
One of the most common questions from Indian makers building interactive projects is: capacitive vs resistive touchscreen DIY — which is the better choice? Modern smartphones use capacitive touch, but many affordable Arduino and ESP32 display modules still use resistive touchscreens. Understanding the real-world differences — sensitivity, wiring complexity, cost, stylus support, and compatibility with bare hands — will help you pick exactly the right display for your next project.
How Capacitive and Resistive Touch Work
Resistive Touchscreen Technology
A resistive touchscreen consists of two flexible conductive layers (usually ITO — Indium Tin Oxide) separated by a tiny air gap. When you press the screen, the top layer deflects and makes contact with the bottom layer. The controller measures the resistance at the point of contact and calculates the X and Y coordinates from voltage dividers across the layers.
Because resistive touch responds to physical pressure, it works with any object: finger, stylus, gloved hand, even a pencil eraser. The touch panel sits on top of the display, slightly reducing visual clarity (you can see a faint double-layer effect under certain lighting). Resistive panels are vulnerable to scratches on the top flexible layer.
Capacitive Touchscreen Technology
Capacitive touchscreens use a rigid glass layer coated with a conductive material and a grid of electrodes below it. The human body is electrically conductive — when your finger touches the glass, it disturbs the capacitive field at that point. The controller IC (like the FT6336 or GT911) scans the electrode grid to find where the field was disturbed and calculates touch coordinates.
Because capacitive touch requires electrical conductivity from the touching object, it does not respond to regular gloves, styluses, or non-conductive tools. However, it offers multi-touch (simultaneous detection of multiple fingers), higher sensitivity (no pressure required), and better optical clarity since the sensing layer is bonded directly to the glass without an air gap.
Sensitivity and Touch Accuracy
Touch sensitivity is often the deciding factor for maker projects with small buttons or fine-grained controls.
Resistive Touch Accuracy
Resistive touch is inherently less sensitive — you must apply enough pressure to deflect the top layer. For thick-fingered or heavy-touch users (common in Indian manufacturing/industrial contexts), this is actually a feature: accidental touches from hovering a finger near the screen never register. Accuracy is moderate; the XPT2046 touch controller used on many Arduino TFT shields is 12-bit, giving 4096 positions across each axis on a 320×240 display — more than adequate for large buttons but marginal for handwriting recognition.
Capacitive Touch Accuracy
Capacitive touch controllers like the FT6336 (2-point multitouch) and GT911 (5-point multitouch) offer sub-millimetre accuracy and respond to the lightest tap. On a 3.5″ 480×320 capacitive display, you can reliably tap targets as small as 4–5 mm — comparable to a smartphone UI. Capacitive displays also support swipe gestures and pinch-to-zoom (if the controller supports multi-touch and your code handles it).
Verdict: Capacitive wins on sensitivity and accuracy. Resistive is adequate for button-based UIs and better for pressure-sensitive or stylus use.
Wiring and Interfacing with Arduino / ESP32
Resistive Touch Controller: XPT2046 / ADS7843
Most resistive TFT shields for Arduino use the XPT2046 or ADS7843 touch controller, which communicates over SPI. On a typical 2.8″ TFT shield, the touch SPI shares the display SPI bus but uses a separate CS (Chip Select) pin. You need 4 SPI pins (shared with display) + 1 additional CS pin + optionally 1 IRQ pin for interrupt-driven touch detection.
Libraries: XPT2046_Touchscreen (by Paul Stoffregen) for the XPT2046. Simple API: ts.touched() and ts.getPoint(). Calibration is required — the raw ADC values from the resistive panel don’t directly map to pixel coordinates. You’ll need to map min/max ADC values to pixel bounds, accounting for the display rotation.
#include <XPT2046_Touchscreen.h>

#define TOUCH_CS  8
XPT2046_Touchscreen ts(TOUCH_CS);

void setup() { ts.begin(); }

void loop() {
  if (ts.touched()) {
    TS_Point p = ts.getPoint();
    // Map raw ADC to screen pixels
    int x = map(p.x, 200, 3900, 0, 320);
    int y = map(p.y, 200, 3900, 0, 240);
  }
}
Capacitive Touch Controller: FT6336 / GT911
Capacitive touch controllers communicate over I2C. The FT6336 used on most 2.8″ and 3.5″ capacitive modules uses address 0x38. The GT911 used on larger 4″+ displays uses 0x14 or 0x5D. Both require an IRQ pin for interrupt-driven detection and an RST pin for hardware reset.
Libraries: FT6236 (for FT6336), TAMC_GT911 (for GT911), or the unified lvgl touch driver if using LVGL for the UI. The I2C interface means only 2 signal lines (SDA + SCL) are shared with other I2C devices — cleaner wiring than resistive touch’s separate SPI CS.
Verdict on wiring: Capacitive touch uses I2C (simpler, fewer wires, shareable bus). Resistive touch uses SPI (requires calibration, separate CS pin, but widely supported on budget Arduino shields).

DHT20 SIP Packaged Temperature and Humidity Sensor
Build a touchscreen thermostat! Pair a capacitive or resistive touch display with the DHT20 temperature sensor for a stylish interactive temperature controller.
Cost and Availability in India
Cost is often the deciding factor for Indian hobbyists and students working with limited budgets. Here’s a realistic market overview:
| Module | Touch Type | India Price | Best For |
|---|---|---|---|
| 2.4″ ILI9341 TFT + XPT2046 | Resistive | ₹250–₹400 | Budget builds, stylus use |
| 2.8″ ILI9341 TFT + XPT2046 | Resistive | ₹350–₹500 | Arduino Shield (plug-in) |
| 3.5″ ILI9488 + FT6336 Cap. | Capacitive | ₹800–₹1,200 | ESP32 UI projects |
| 4.3″ ILI9488 + GT911 Cap. | Capacitive | ₹1,500–₹2,500 | Smart home panels |
| 7″ HDMI + GT911 Cap. | Capacitive | ₹2,500–₹4,000 | Raspberry Pi, large UI |
Resistive touch modules are consistently 2–4x cheaper than equivalent capacitive modules. For student projects and prototypes where cost is paramount, resistive is the practical choice. For commercial-quality interactive devices, capacitive is worth the investment.
Gloves, Stylus and Wet Hands
This is one of the most practically important differences for Indian DIY applications:
When Resistive Touch Wins
- Industrial and workshop environments: Workers wearing gloves can operate resistive touchscreens without removing them. Capacitive requires bare fingers or special conductive gloves.
- Medical devices and lab equipment: Latex gloves block capacitive touch. Resistive responds to any pressure.
- Stylus-based applications: Signature capture, drawing, precise point selection — resistive excels with a thin stylus. Capacitive needs special active styluses (expensive).
- Outdoor/dusty environments: Resistive screens are less affected by dust particles and light moisture on the surface than capacitive screens, which can register false touches from water droplets.
When Capacitive Touch Wins
- Consumer products and kiosks: The light-touch response feels premium and intuitive. Users expect smartphone-like responsiveness.
- Multi-finger gestures: Pinch to zoom, two-finger scroll — only capacitive with multi-touch support can handle these.
- High-use applications: Resistive top layers wear out and lose calibration over time from repeated pressing. Capacitive glass is far more durable.
- Water ingress: In a properly sealed (IP67) device, capacitive touch can work through the sealed glass without any physical moving parts — ideal for fully waterproof devices.

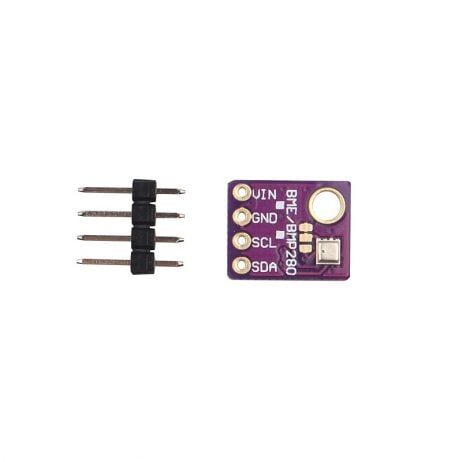
BMP280 Barometric Pressure and Altitude Sensor I2C/SPI Module
Create an interactive touchscreen weather station: tap to cycle between temperature, pressure, and altitude readings on a touchscreen display.
Popular DIY Touch Modules Compared
Best Resistive Touch Module for Arduino: 2.8″ ILI9341 Shield
The 2.8″ Arduino shield (plug-in format, no wiring needed for Uno/Mega) with ILI9341 display and XPT2046 resistive touch is the most beginner-friendly combination. Libraries: MCUFRIEND_kbv (display) + XPT2046_Touchscreen (touch). Nearly every Arduino touchscreen tutorial uses this exact setup. The shield format means zero wiring mistakes — just plug it in and upload.
Best Capacitive Touch Module for ESP32: 3.5″ ILI9488 + FT6336
The 3.5″ IPS display with FT6336 capacitive touch and ILI9488 driver gives 480×320 colour at a comfortable size with proper finger-touch responsiveness. Use TFT_eSPI for the display and the FT6236 library for touch. LVGL (the free embedded GUI library) runs well on this combination with ESP32, enabling smartphone-quality UI with animations, widgets, and gestures.
Best Value for a Smart Home Panel: 4.3″ Nextion or 4″ Capacitive ESP32 Module
Nextion displays have their own processor and handle the UI independently, offloading the Arduino/ESP32 to just send data. This is expensive but simplifies the code significantly. Alternatively, 4″ capacitive IPS displays from Waveshare designed for ESP32-S3 offer excellent performance at a reasonable price point for a fixed home installation.
Which Should You Choose?
Here’s a final decision matrix for Indian DIY makers:
- First touchscreen project, limited budget: Resistive 2.8″ Arduino shield. Cheapest entry point, most tutorials available, foolproof setup.
- ESP32 smart home display, consumer quality: Capacitive 3.5″ IPS + FT6336. Smartphone feel, multi-touch, LVGL support.
- Industrial or workshop interface: Resistive (glove compatible) in a rugged enclosure. Consider 4.3″+ for larger buttons.
- Portable battery device: Capacitive glass is more durable for devices handled frequently. Consider 2.8″–3.5″ for balance of size and power.
- Drawing/writing input: Resistive with a stylus — there’s no affordable capacitive alternative for fine-tipped stylus use at maker budgets.

DHT11 Digital Relative Humidity and Temperature Sensor Module
The classic beginner sensor — pair with a resistive or capacitive touchscreen display to build an interactive climate controller for home or workshop use.
GY-BME280-5V Temperature and Humidity Sensor
5V compatible BME280 for temperature, humidity, and pressure — build a touchscreen dashboard that lets users switch views with a tap, powered by a capacitive display.
Frequently Asked Questions
Can I add touch to a non-touch TFT display?
Yes — you can overlay a resistive touch panel on any flat display. Standalone XPT2046-based resistive touch overlays are available in 2.4″, 2.8″, and 3.5″ sizes. However, alignment and bonding them to an existing display is tricky; it’s generally easier to buy a display module that already includes the touch panel integrated.
Does capacitive touch work with gloves?
Standard vinyl, latex, or leather gloves block capacitive touch. However, capacitive-compatible gloves (with conductive fingertips) do work — the same gloves used with smartphones. Some industrial capacitive touchscreens are designed with higher sensitivity to work even through thicker gloves.
How do I calibrate a resistive touchscreen in Arduino?
Run a calibration sketch that shows crosshair targets at known pixel positions and records the raw ADC values when you tap each one. Then use map(rawValue, rawMin, rawMax, 0, screenWidth) to convert future readings. The MCUFRIEND_kbv library includes a calibration example. Store calibration values in EEPROM so you don’t need to redo it on every power cycle.
Which touchscreen technology does the popular Nextion display use?
Nextion displays use resistive touch technology on their standard models. Nextion Intelligent models (NX series) have capacitive touch. The resistive Nextion modules are significantly cheaper and suitable for most maker projects where you control the UI design to use large, easy-to-press buttons.
Can I use a touchscreen with MicroPython on ESP32?
Yes. The ili9341 and xpt2046 MicroPython libraries support resistive touch on ILI9341 displays. For capacitive touch, the ft6x36 library supports FT6336 on MicroPython/CircuitPython. LVGL has official MicroPython bindings too, enabling full GUI development in Python on ESP32.


Add comment