
The ESP32 CAM setup streaming face detection journey begins the moment you unbox this tiny but incredibly powerful board. For under ₹500, the ESP32-CAM gives you Wi-Fi, Bluetooth, a built-in camera, and even onboard face recognition — all on a chip the size of a matchbox. Whether you’re building a home security camera, a smart doorbell, or experimenting with AI vision on embedded hardware, this guide covers everything you need to know.
What Is the ESP32-CAM?
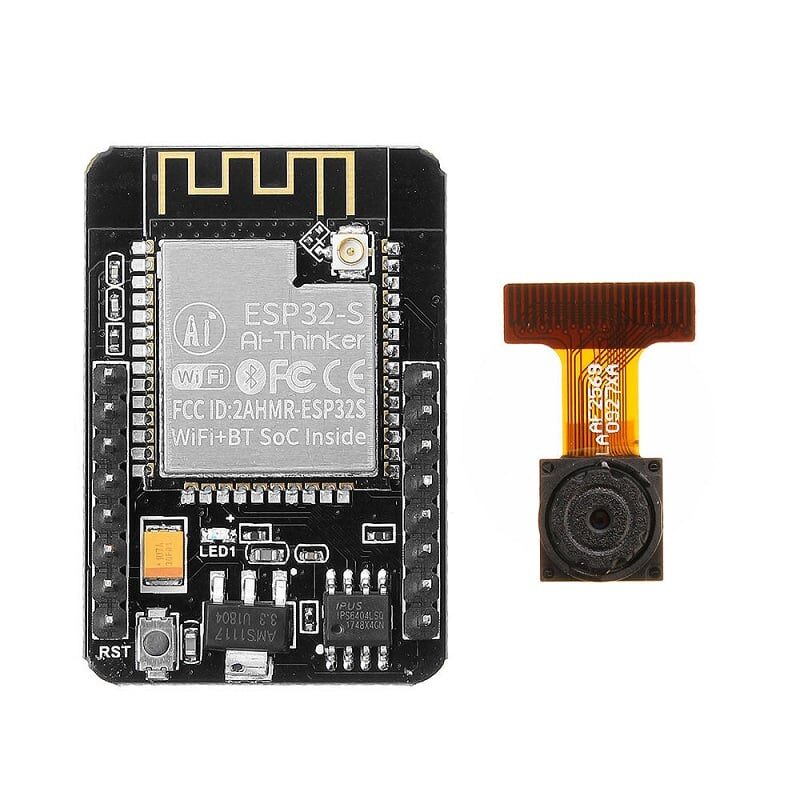
The ESP32-CAM is a small camera module developed by Ai-Thinker, built around Espressif’s ESP32 SoC. It pairs the dual-core Xtensa LX6 processor (running at up to 240 MHz) with 4 MB of PSRAM and an OV2640 2MP camera. What makes this board truly remarkable is that it includes everything needed for a wireless camera project on a single PCB:
- Wi-Fi 802.11 b/g/n and Bluetooth 4.2 / BLE
- OV2640 2MP camera (supports JPEG compression in hardware)
- MicroSD card slot (up to 4 GB)
- GPIO pins for sensors, relays, and more
- Built-in flash LED
- Sleep current as low as 6 mA
The ESP32-CAM does NOT have a built-in USB-to-serial converter, which is why you need an external programmer or the popular ESP32-CAM-MB breakout board to flash firmware.

ESP32 CAM WiFi Module with OV2640 Camera – 2MP Face Recognition
The classic ESP32-CAM with OV2640 2MP sensor. Supports face detection, video streaming, and MicroSD recording. Perfect for DIY security and IoT vision projects.
Components and Tools You’ll Need
Before you start, gather these items:
- ESP32-CAM board (Ai-Thinker variant recommended)
- ESP32-CAM-MB programmer or FTDI USB-to-serial adapter
- Micro-USB cable
- Arduino IDE (version 1.8.x or 2.x)
- Stable 5V power supply (at least 2A — weak supplies cause random resets)
- MicroSD card (optional, for recording)
- Jumper wires and breadboard (if using FTDI instead of CAM-MB)
In India, the easiest setup is to use the ESP32-CAM-MB board which adds a Micro-USB port and handles the IO0/GND boot pin automatically. It saves you from the common mistake of forgetting to pull IO0 LOW before flashing.
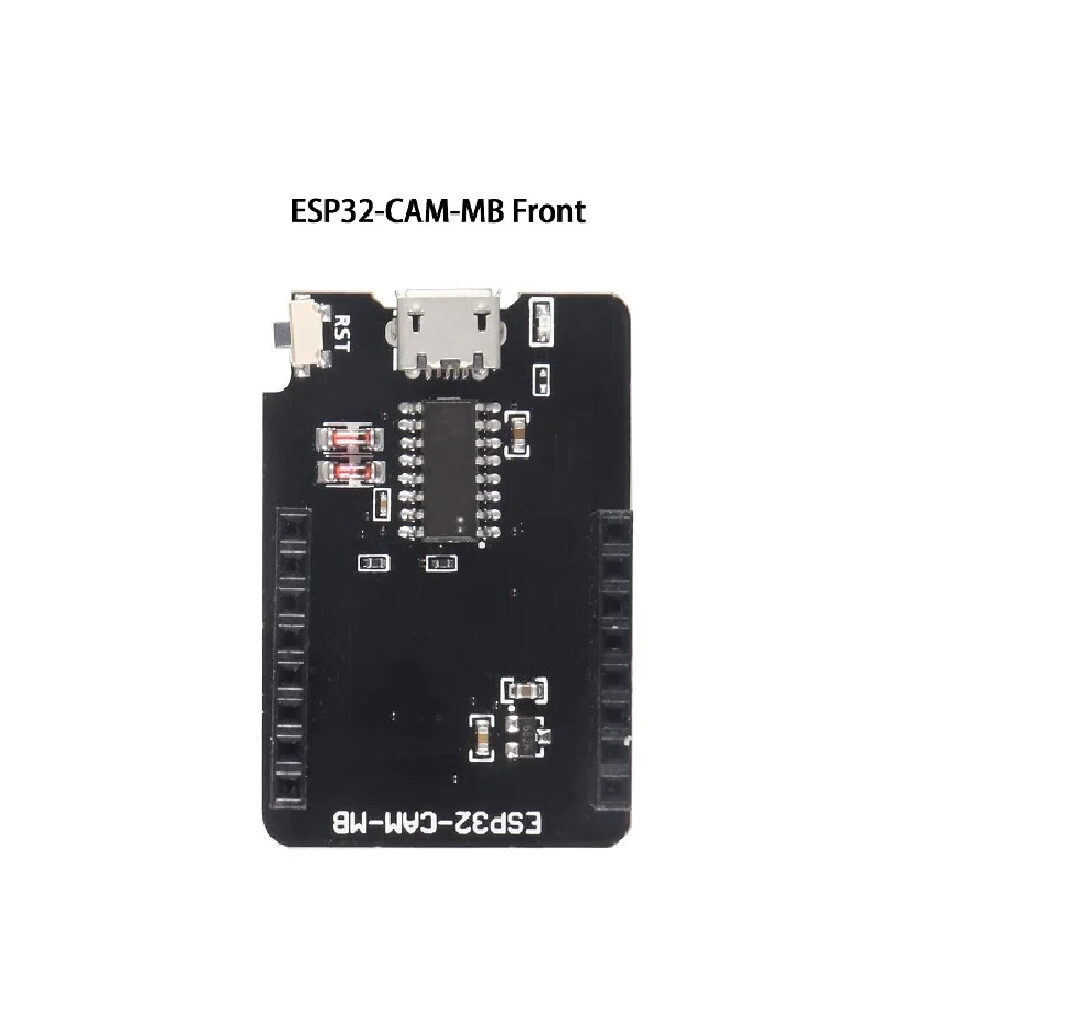
ESP32-CAM-MB Micro USB Download Module
Plug-and-play programmer for ESP32-CAM. Adds Micro-USB connectivity and handles boot mode automatically — no jumper wires needed for flashing.
Wiring and Programming Setup
If you’re using the ESP32-CAM-MB board, simply plug the ESP32-CAM into the MB board (matching the pins), connect via Micro-USB, and you’re ready to flash.
If using an FTDI adapter, connect as follows:
| ESP32-CAM Pin | FTDI Pin |
|---|---|
| 5V | VCC (5V) |
| GND | GND |
| U0R (RX) | TX |
| U0T (TX) | RX |
| IO0 | GND (for flashing only) |
Setting Up Arduino IDE
- Open Arduino IDE → File → Preferences
- Add this URL to “Additional Boards Manager URLs”:
https://raw.githubusercontent.com/espressif/arduino-esp32/gh-pages/package_esp32_index.json - Go to Tools → Board → Boards Manager → search “esp32” → Install (by Espressif Systems)
- Select Board: AI Thinker ESP32-CAM
- Set Upload Speed: 115200, Port: your COM port
Streaming Video Over Wi-Fi
The easiest way to get started is with the built-in CameraWebServer example:
- In Arduino IDE: File → Examples → ESP32 → Camera → CameraWebServer
- Edit the sketch — find the camera model section and select:
#define CAMERA_MODEL_AI_THINKER - Enter your Wi-Fi SSID and password:
const char* ssid = "YourWiFi";const char* password = "YourPassword"; - Upload the sketch
- Open Serial Monitor at 115200 baud — the IP address will be printed
- Open that IP in your browser — you’ll see the live stream control panel
From the web interface you can adjust resolution (up to UXGA 1600×1200), brightness, contrast, saturation, and enable special effects. The stream uses MJPEG format which works in most browsers without plugins.
RTSP Streaming Alternative
For integration with VLC, CCTV NVR software, or Home Assistant, you can use community firmware that enables RTSP streaming. The ESP32-CAM-RTSP project on GitHub is popular and gives you a standard rtsp://[IP]:554/mjpeg/1 stream URL that any RTSP-compatible player can consume.
Ai Thinker ESP32 CAM Development Board WiFi+Bluetooth with AF2569 Camera
Premium Ai Thinker ESP32-CAM with AF2569 camera module. Ideal for streaming, face recognition, and compact IoT camera applications.
Face Detection and Recognition
The ESP32-CAM’s built-in face detection and recognition features are powered by the ESP-WHO library from Espressif. Here’s how they differ:
- Face Detection: Identifies that a face is present in the frame using a lightweight neural network (MTMN model). Runs at ~5-10 fps at lower resolutions.
- Face Recognition: Matches a detected face against a stored database of known faces. Requires enrollment of faces beforehand.
Enabling Face Detection in CameraWebServer
- In the browser stream interface, scroll down to the “Face Detection” section
- Toggle Face Detection ON — you’ll see bounding boxes drawn around detected faces
- For recognition, toggle Face Recognition ON and use the “Enroll Face” button to save faces
Important note: Face detection works best at QVGA (320×240) or VGA (640×480) resolution. Higher resolutions will cause the ESP32 to run out of memory for the neural network processing. Keep the resolution at VGA or below when using face detection features.
Performance Tips
- Set XCLK frequency to 20 MHz in the camera config for better frame rates
- Disable the JPEG quality for streaming (set to 10-12 for lower file size)
- Point the board toward good, even lighting — the OV2640 struggles in backlit conditions
- Use a 5V/2A power supply; face detection draws more current than simple streaming
Common Issues and Fixes
Camera Init Failed
This is the most common error. Causes and fixes:
- Power supply: USB power from a computer may not provide enough current. Use a USB charger rated 2A or more.
- Wrong board model: Ensure you’ve selected the correct camera model define in the sketch.
- Loose ribbon cable: The FFC cable between camera and board can come loose. Reseat it carefully.
- Defective camera: Try another OV2640 module if nothing else works.
Cannot Connect to Wi-Fi / No IP Address
- Check your SSID/password are correct (case-sensitive)
- Ensure your router broadcasts 2.4 GHz — ESP32-CAM does NOT support 5 GHz
- Reduce distance between router and board during initial setup
Upload Failed / Port Not Found
- If using FTDI: ensure IO0 is connected to GND before powering on for flash mode
- Press and hold the RESET button on the CAM-MB board during upload
- Try a different USB cable (some are charge-only)
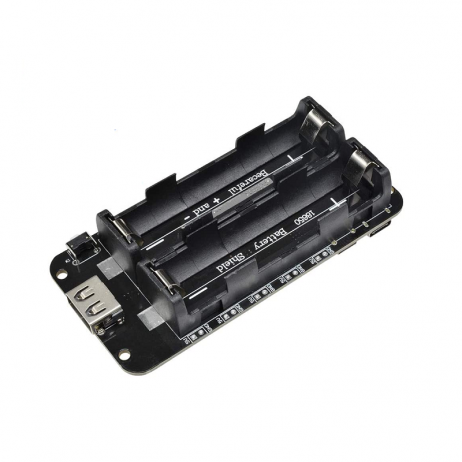
2×18650 Lithium Battery Shield for Arduino/ESP32/ESP8266
Power your ESP32-CAM projects portably with this dual 18650 battery shield. Provides regulated 5V output — ideal for field-deployed cameras and IoT nodes.
Project Ideas for Indian Makers
The ESP32-CAM’s combination of low cost and powerful features makes it perfect for several practical projects in the Indian context:
1. Smart Doorbell Camera
Mount the ESP32-CAM at your door, connect a PIR sensor to GPIO pin, and trigger a push notification (via Telegram or WhatsApp using Twilio) whenever motion is detected. Store snapshots to MicroSD card. Total cost under ₹1,000.
2. Factory / Workshop Monitoring
Set up multiple ESP32-CAM units in a workshop or small factory. Stream to a local NVR using RTSP for cheap multi-camera surveillance without cloud fees.
3. Crop / Greenhouse Monitoring
Solar-powered (with 18650 battery + small panel) ESP32-CAM deployed in a greenhouse or farm field. Deep sleep between snapshots saves power — battery can last weeks.
4. Attendance System
Use the onboard face recognition to build a simple employee attendance system. Enroll faces and log recognized individuals to SD card with timestamp.
5. QR Code / Barcode Scanner
The OV2640 camera combined with ESP32’s processing power can scan QR codes at close range using the ZXing or Quirc libraries ported to ESP32.
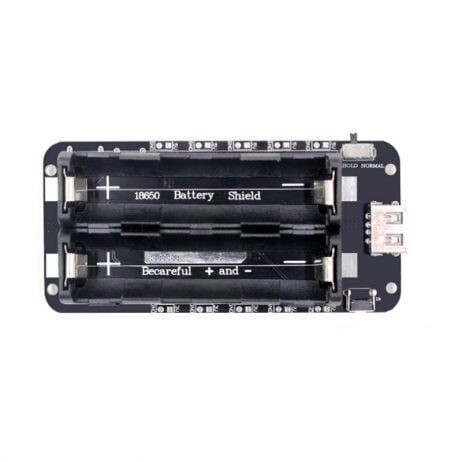
2×18650 Battery Shield V8 – 5V/3A for Arduino/ESP32/ESP8266
High-current 5V/3A output battery shield with Micro-USB passthrough charging. Perfect for power-hungry ESP32-CAM builds with the flash LED active.
Frequently Asked Questions
Can the ESP32-CAM stream to YouTube or Facebook Live?
Not directly — the ESP32-CAM uses MJPEG streaming which isn’t compatible with RTMP-based live streaming platforms. You’d need a Pi or PC as an intermediate relay to transcode the stream.
How many faces can the ESP32-CAM recognize?
The built-in face recognition can store up to 7 enrolled faces in its database. For more faces, you’d need an external storage and a custom implementation.
Is the ESP32-CAM waterproof?
No, it is not waterproof. For outdoor deployments, house it in a weatherproof enclosure. Several 3D-printable enclosure designs are available online.
What is the maximum streaming resolution?
The OV2640 supports up to UXGA (1600×1200), but for stable streaming over Wi-Fi, VGA (640×480) or SVGA (800×600) is recommended. Higher resolutions can cause lag and dropped frames.
Can I use the ESP32-CAM without Wi-Fi?
Yes — you can use it in station-less mode for local processing (e.g., capturing images to SD card on motion) without any Wi-Fi connection. Bluetooth can also be used for local data transfer.
Does it work with Home Assistant?
Yes — via RTSP firmware or using the ESPHome integration which adds native camera streaming support to Home Assistant.
Browse our full range of ESP32-CAM boards, programmer modules, and power accessories at Zbotic. We ship pan-India with fast delivery, and all boards are tested before dispatch. Shop Camera & Vision Modules →


Add comment