
One of the most common questions among Indian Arduino hobbyists is: should I use a 16×2 LCD or OLED display for my project? Both are popular, affordable, and widely available — but they serve very different needs. This 16×2 LCD vs OLED display comparison covers cost, power consumption, visibility, ease of use, wiring complexity, and the best use cases for each — so you can make the right choice for your next project without wasting money on the wrong module.
Quick Overview: LCD vs OLED
Before diving into the details, here is a quick comparison table:
| Feature | 16×2 LCD (HD44780) | 0.96″ OLED (SSD1306) |
|---|---|---|
| Price (India) | ₹40–80 | ₹100–200 |
| Resolution | 16 chars × 2 rows | 128 × 64 pixels |
| Colour | Backlight colour (blue/green/yellow) | White/Blue/Yellow (monochrome) |
| Interface | Parallel (8-pin) or I2C (with PCF8574) | I2C (4-pin) or SPI (7-pin) |
| Power | ~15–25 mA (backlight) | ~5–20 mA (depends on pixels lit) |
| Viewing angle | Limited (~80°) | Excellent (~160°) |
| Graphics | Characters only (custom chars possible) | Full graphics, bitmaps, fonts |
| Arduino GPIO used | 6+ (parallel) or 2 (I2C) | 2 (I2C) |
| Sunlight readability | Poor (backlight washes out) | Good |
| Beginner-friendly | Very easy | Easy (with I2C) |
| Lifespan | Very long (no burn-in) | 10,000–50,000 hours (burn-in possible) |
Cost Comparison in India
For budget-conscious Indian makers, cost is often the deciding factor:
- 16×2 LCD (basic, parallel): ₹40–60 — the most affordable display available
- 16×2 LCD + I2C module (PCF8574 backpack): ₹80–130 — reduces wiring to just 4 wires
- 20×4 LCD + I2C: ₹120–180 — more rows, same technology
- 0.96-inch OLED (SSD1306, I2C): ₹100–200 — slightly more expensive but much more capable
- 1.3-inch OLED (SH1106, I2C): ₹150–250 — larger OLED alternative
If cost is the primary concern and you only need to display text (temperature readings, status messages, menu options), the 16×2 LCD with I2C adapter wins hands down. For anything requiring graphics, custom fonts, or compact size, the OLED is worth the extra ₹50–100.
Power Consumption
This is where the comparison gets interesting:
16×2 LCD: The liquid crystal panel itself uses almost no power, but the LED backlight draws 15–25 mA constantly. Even when showing nothing useful, the backlight stays on (unless you turn it off via the contrast pin).
OLED: Power consumption varies with content. Displaying a white screen (all pixels lit) draws ~20 mA. A mostly black screen with small white text draws as little as 3–5 mA. This makes OLED much more efficient for battery projects where you display minimal information.
Winner for battery projects: OLED, especially when displaying dark backgrounds with minimal lit pixels.
Display Quality and Visibility
16×2 LCD quality points:
- Fixed character grid — you display characters, not pixels. Custom characters (up to 8) can be defined as 5×8 pixel bitmaps
- Yellow-green backlight is very visible indoors; blue backlight looks great in dark environments
- Can be difficult to read in bright sunlight or at extreme angles
- Contrast is adjustable via a potentiometer on the V0 pin
OLED quality points:
- 128×64 pixel matrix — full freedom to draw anything: custom fonts, icons, bar graphs, waveforms
- True black background (pixels physically off) vs lit background of LCD
- Extremely crisp text even at very small sizes
- High contrast ratio (2000:1 vs ~100:1 for LCD) — stunning in dark environments
- 160° viewing angle — readable from almost any direction
Winner for display quality: OLED, clearly. The 16×2 LCD is functional but visually limited.
Interface and Wiring
16×2 LCD (parallel mode): Requires up to 8 GPIO pins (RS, EN, D4-D7 minimum = 6 pins). On an Arduino Uno with only 20 GPIO pins, this is a significant commitment. Easy to wire but takes up space.
16×2 LCD with I2C backpack (PCF8574): Reduces to 4 wires (VCC, GND, SDA, SCL). This is the recommended way to use LCD in 2024 — virtually the same simplicity as OLED.
0.96-inch OLED (I2C): 4 wires only (VCC, GND, SCL, SDA). Same address range (0x3C or 0x3D). Multiple I2C devices can share the same bus.
Winner for wiring simplicity: Tie (both easy with I2C). Without I2C, 16×2 LCD is more complex.
Programming and Libraries
16×2 LCD programming:
- Uses the built-in
LiquidCrystallibrary (parallel) orLiquidCrystal_I2C(I2C) - Extremely simple API:
lcd.begin(16, 2),lcd.setCursor(0,0),lcd.print("Hello") - Included in Arduino IDE — no installation needed
- Custom characters via
lcd.createChar()using a 5×8 byte array
OLED programming:
- Adafruit SSD1306 + Adafruit GFX, or U8g2 library
- Slightly more code required but very well documented
- Buffer-based: all drawing happens in RAM, then pushed to display with
display.display() - Requires more RAM — can be tight on Arduino Nano (2KB RAM)
Winner for beginners: 16×2 LCD. The LiquidCrystal library is simpler. However, OLED is not much harder with Adafruit SSD1306.
RAM note: The OLED uses 1KB of RAM for the frame buffer on a 128×64 display. On an Arduino Nano (2KB total RAM), this leaves only 1KB for your sketch — enough for simple projects but tight for complex ones. Use U8g2 in page mode to avoid the full buffer requirement.
When to Use Which Display
Choose 16×2 LCD when:
- You need the cheapest possible display option (₹40–60)
- Your project only needs text output (temperature, status, menu)
- You are teaching absolute beginners — the LiquidCrystal library is the simplest
- Long-term operation is needed — LCDs don’t burn in
- The display must be readable by a non-technical person without ambiguity
- You are building a standalone device where the display is a secondary feature
Choose OLED display when:
- You need graphics, icons, bar charts, waveforms, or custom fonts
- The display is a primary feature of your project
- You are building a battery-powered device and need low power consumption
- Space is limited — OLED modules are smaller and thinner
- You want a professional-looking finish for a demonstration or competition
- You need a wide viewing angle for displays mounted at odd angles

LM35 Temperature Sensors
Perfect beginner sensor for a 16×2 LCD project — simple analog output, linear 10mV/°C, read with analogRead() and display in one line.

DHT11 Digital Relative Humidity and Temperature Sensor Module
Show temperature and humidity on a 16×2 LCD or OLED — classic beginner project that works beautifully with both displays.

BMP280 Barometric Pressure and Altitude Sensor I2C/SPI Module
Three readings (temp, pressure, altitude) — better displayed on an OLED for a full-featured weather station with graphics.
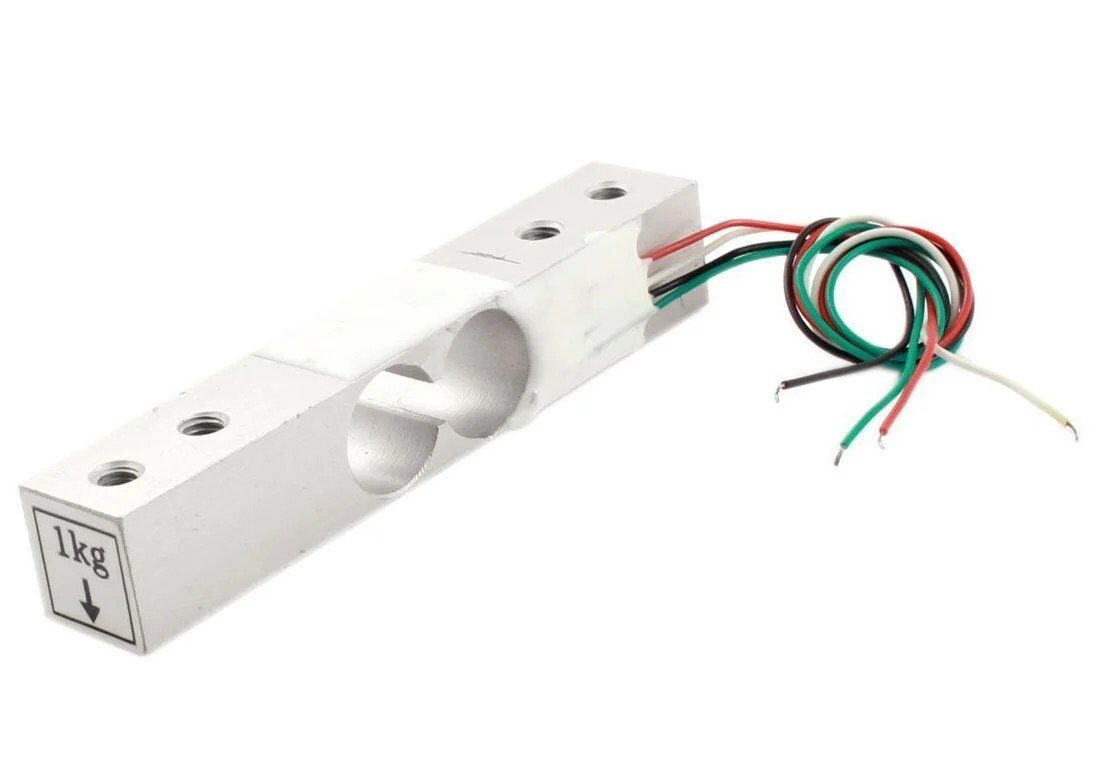
1Kg Load Cell – Electronic Weighing Scale Sensor
Build a digital weighing scale — display the weight on a 16×2 LCD (simple) or OLED (with graphical bar indicator).
Final Verdict
There is no single right answer — both displays serve different needs:
- For beginners building their first project (temperature display, meter, clock): Start with a 16×2 LCD with I2C backpack. The LiquidCrystal_I2C library is plug-and-play simple.
- For projects needing graphics or compact size: OLED (SSD1306) is the clear winner. The slight cost difference is justified by the massive improvement in what you can display.
- For battery-powered projects: OLED wins due to lower average power (especially with dark backgrounds).
- For classroom teaching / Atl labs in India: 16×2 LCD is the standard for introductory sessions because of cost and simplicity. Move to OLED for intermediate projects.
Many experienced makers buy both — use the LCD for quick prototyping and the OLED for final builds. At the price points available in India, owning both is a reasonable investment for any serious hobbyist.
Frequently Asked Questions
Q1: Can I use a 16×2 LCD and OLED together in the same project?
Yes. With I2C versions of both, they share the same SDA/SCL lines — just ensure different I2C addresses. LCD typically uses 0x27 (PCF8574 backpack) and OLED uses 0x3C, so they do not conflict.
Q2: Why does my 16×2 LCD show black boxes or nothing?
Contrast adjustment. Turn the potentiometer on the I2C backpack (or V0 pin pot if direct wiring) until characters appear. On some modules the default contrast is too high or too low.
Q3: Does the OLED burn in like old plasma TVs?
Yes, OLED can exhibit image retention (burn-in) if the same static image is shown for thousands of hours. For projects that run 24/7 with a static display, either use an LCD or implement a screensaver using display.dim(true) after idle time.
Q4: Which display works better with Arduino Nano?
Both work. However, the OLED SSD1306 with Adafruit library uses ~1KB RAM for the frame buffer, leaving ~1KB for your code. For complex sketches on Nano, use U8g2 library in page mode (uses only 256 bytes for the buffer) or stick with the 16×2 LCD.
Q5: What is a 20×4 LCD and is it better than 16×2?
A 20×4 LCD has 4 rows of 20 characters each — more text space. It uses the same HD44780 controller and LiquidCrystal library. Good choice when you need to display more text parameters simultaneously without upgrading to a graphical display.
Whether you choose a 16×2 LCD or OLED, find the best prices and fast delivery at Zbotic.in — India’s favourite electronics store for makers.


Add comment