
Table of Contents
- What Is Drone Telemetry?
- Why Use Mission Planner?
- Components You Need
- Wiring the Telemetry Module
- Installing Mission Planner on Windows
- Connecting Your Drone to Mission Planner
- Configuring Telemetry Parameters
- Reading Live Flight Data
- Troubleshooting Common Issues
- Advanced Mission Planner Features
- Frequently Asked Questions
What Is Drone Telemetry?
Drone telemetry is the real-time, two-way data link between your drone and your ground control station (GCS). When you fly a drone equipped with a telemetry system, you are not flying blind — you can see your drone’s altitude, battery voltage, GPS coordinates, flight mode, heading, airspeed, and dozens of other parameters live on your laptop or tablet screen, even when the drone is hundreds of metres away.
In India, where open spaces for autonomous drone flights are becoming increasingly popular among researchers, agricultural operators, and hobbyists, telemetry is not just a luxury — it is almost a necessity. Without it, you cannot run autonomous waypoint missions safely, you cannot monitor battery levels in real time, and you cannot intervene if something goes wrong mid-flight. Mission Planner, the open-source ground control software built for the ArduPilot ecosystem, makes this entire process straightforward and feature-rich.
This guide will walk you through every step of setting up drone telemetry with Mission Planner — from choosing the right telemetry radio to reading live data at the field. Whether you are using an APM 2.8, a Pixhawk 4, or any other ArduPilot-compatible flight controller, this tutorial applies to you.
Why Use Mission Planner?
Mission Planner is the most widely used ground control station for ArduPilot-powered drones worldwide. Developed and maintained by the open-source community, it offers:
- Real-time HUD (Heads-Up Display): See attitude, altitude, airspeed, and more at a glance.
- Parameter editor: Tweak hundreds of flight controller parameters without reflashing firmware.
- Autonomous mission planning: Plot GPS waypoints on a map and let your drone fly itself.
- Dataflash log analysis: Review every flight in detail after landing.
- Firmware updates: Flash the latest ArduCopter/ArduPlane directly from the software.
- Live map view: Watch your drone move across a satellite map in real time.
Mission Planner runs on Windows (it also works under Wine on Linux). It is free and regularly updated, making it the go-to choice for Indian drone builders and researchers alike.
Components You Need
Before you begin, gather the following hardware:
- ArduPilot-compatible flight controller: APM 2.8, Pixhawk 2.4.8, Pixhawk 4, CubeOrange, etc.
- Telemetry radio module pair: One module goes on the drone (air module), one connects to your laptop (ground module via USB). The 3DR-style 433 MHz or 915 MHz radios are the most popular choices.
- USB cable: To connect the ground module to your laptop.
- Windows laptop or PC: Running Mission Planner.
- Fully assembled drone: With flight controller, GPS, ESCs, and motors ready.
- LiPo battery: To power the drone during ground testing.

3DR 100mW Radio Telemetry 915MHZ For APM PX4 Pixhawk
A reliable 915 MHz telemetry radio pair with 100mW output, compatible with APM, PX4, and Pixhawk flight controllers. Ideal for medium-range telemetry links up to 300–500 metres in open areas.
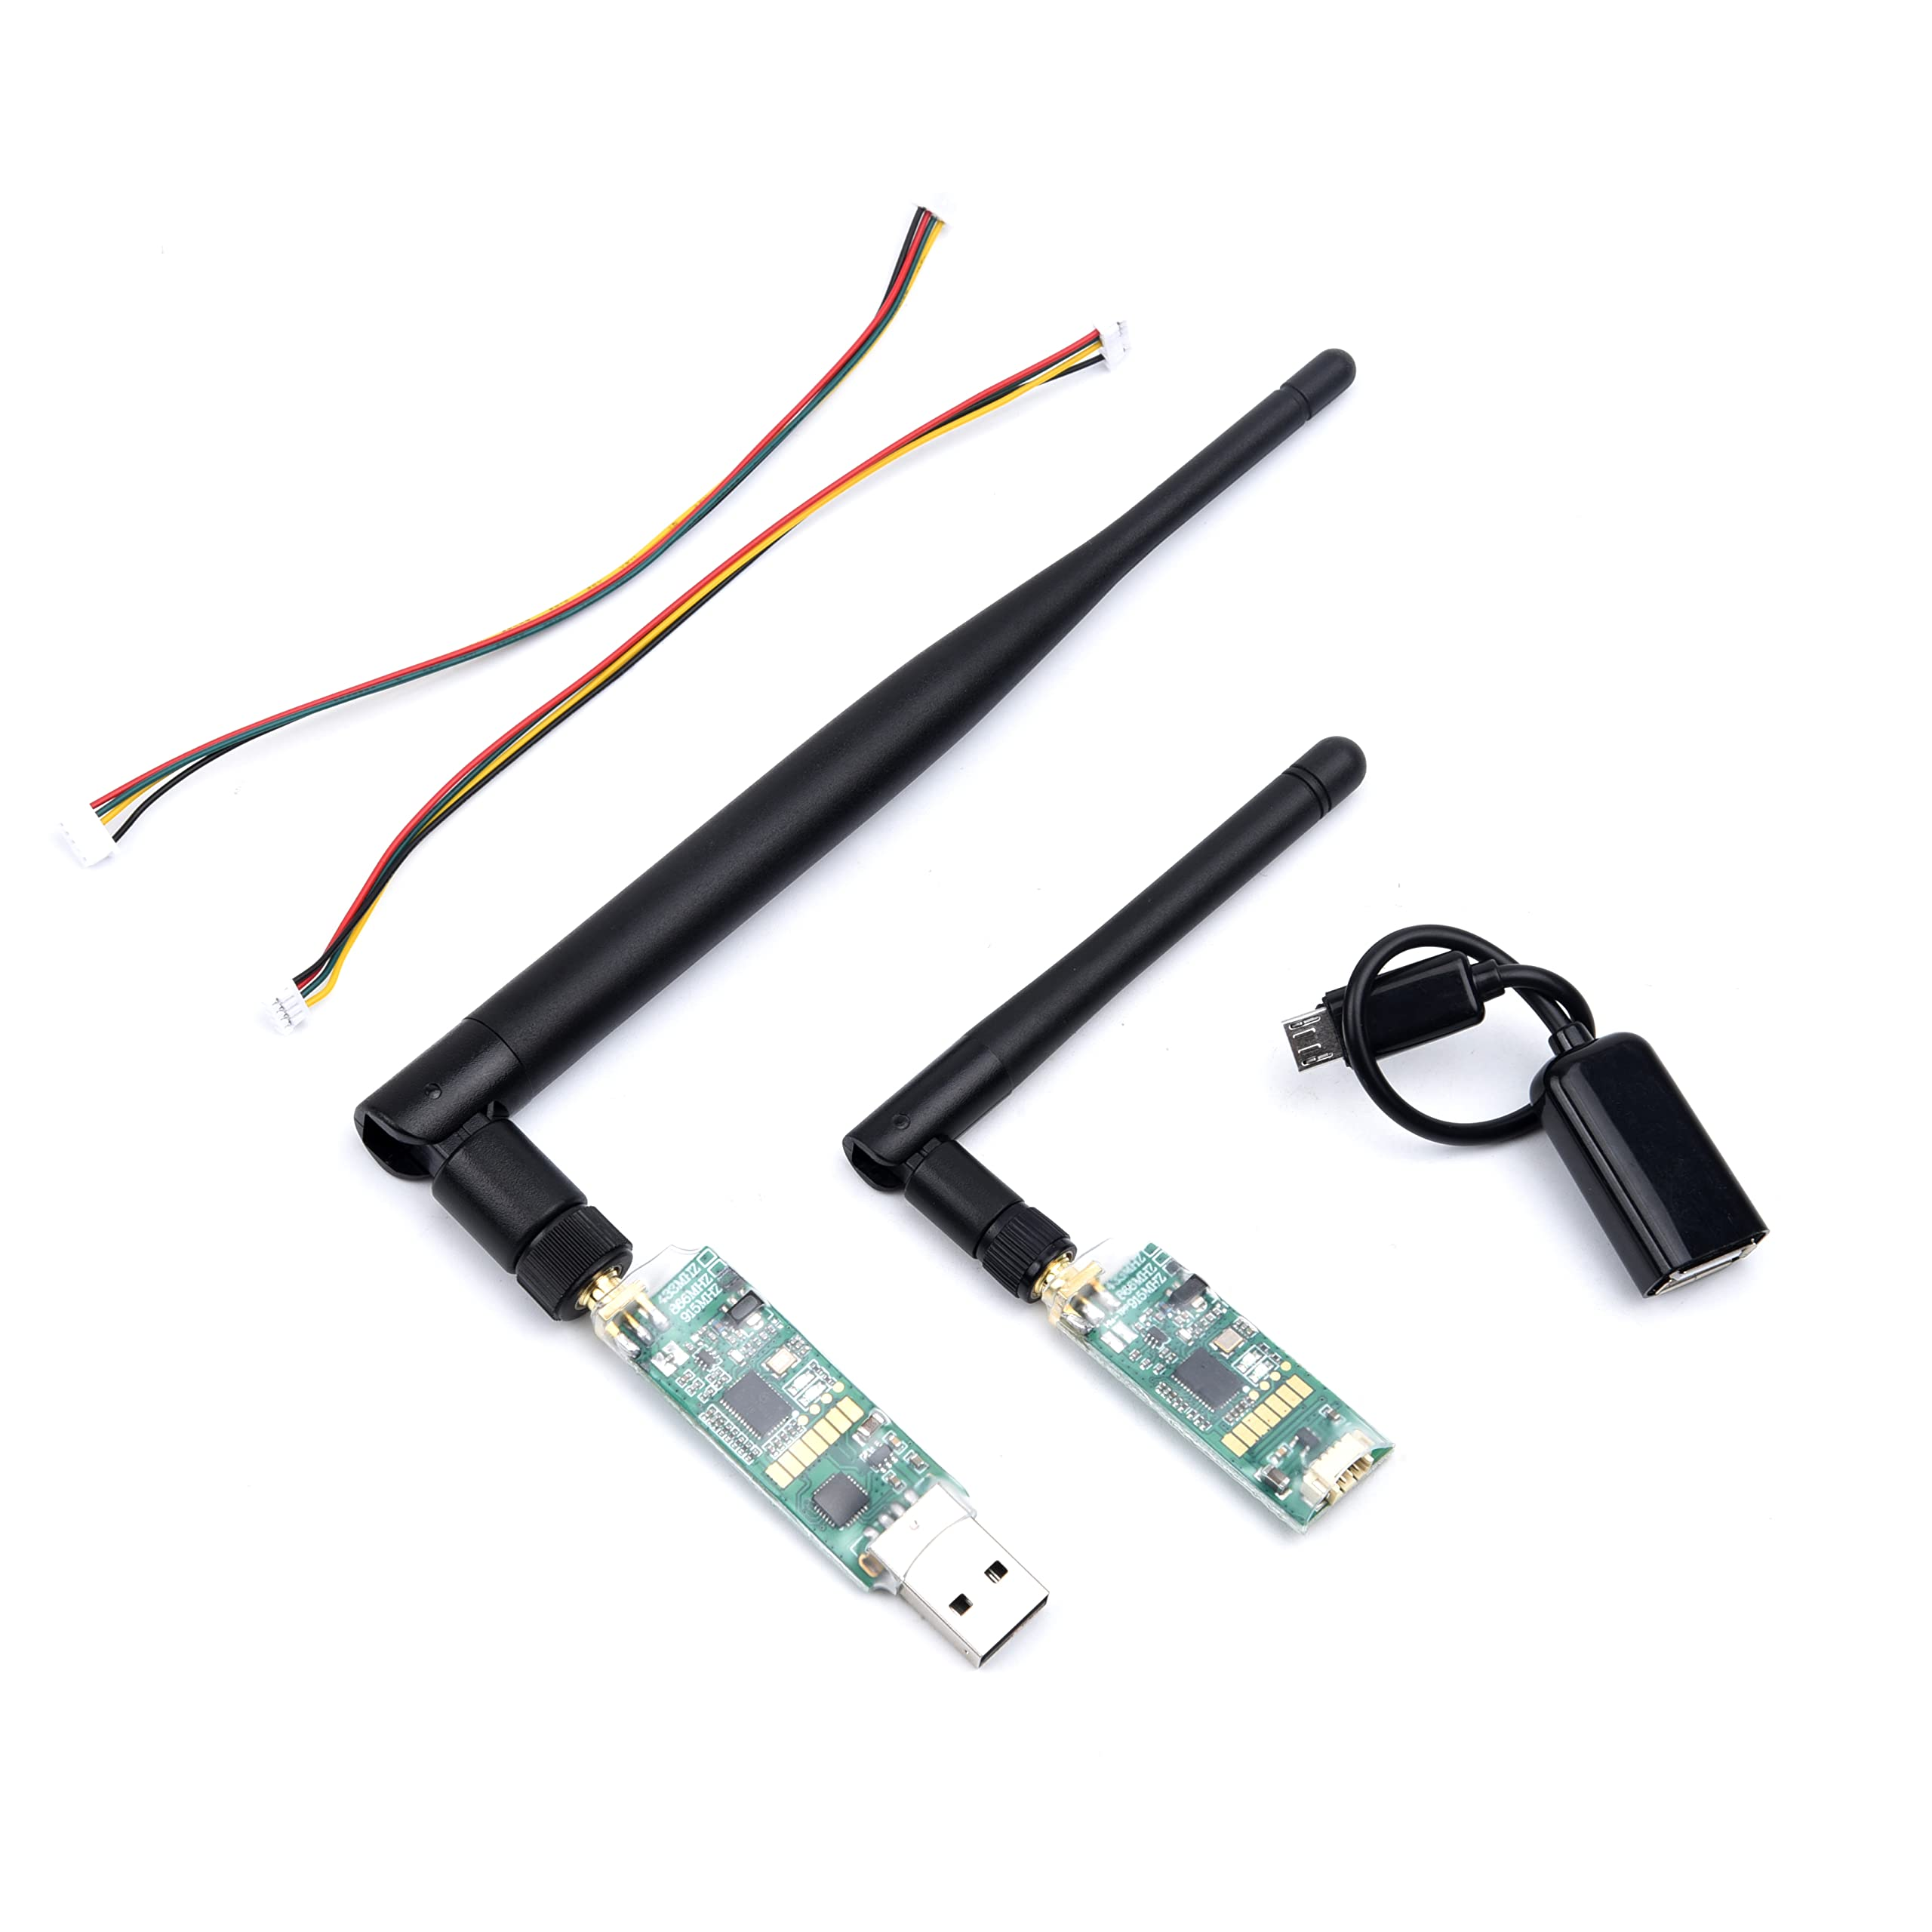
3DR Single TTL MINI Radio Telemetry 433MHz 500mW
Compact 433 MHz TTL telemetry module with 500mW power output. Great for Indian hobbyists needing a lightweight air-side module. Works with both Pixhawk and APM flight controllers.
Wiring the Telemetry Module
Most 3DR-style telemetry radios use a 6-pin JST-GH or DF13 connector that plugs directly into the TELEM1 or TELEM2 port on your flight controller. Here is the standard pinout for Pixhawk-family controllers:
| Pin | Signal | Description |
|---|---|---|
| 1 | VCC | 5V power supply |
| 2 | TX | Transmit (goes to RX of module) |
| 3 | RX | Receive (goes to TX of module) |
| 4 | CTS | Clear to send (optional) |
| 5 | RTS | Ready to send (optional) |
| 6 | GND | Ground |
Simply plug the included cable into the TELEM1 port on your Pixhawk and the other end into the air-side telemetry module. If you are using an APM 2.8, use the TELEM port. Always double-check your specific module’s documentation, but most 3DR-compatible modules are plug-and-play.
Tip: Mount the telemetry module away from your ESCs and power distribution board to minimise RF interference. Use the anti-vibration mount on the flight controller side to keep the wiring tidy.
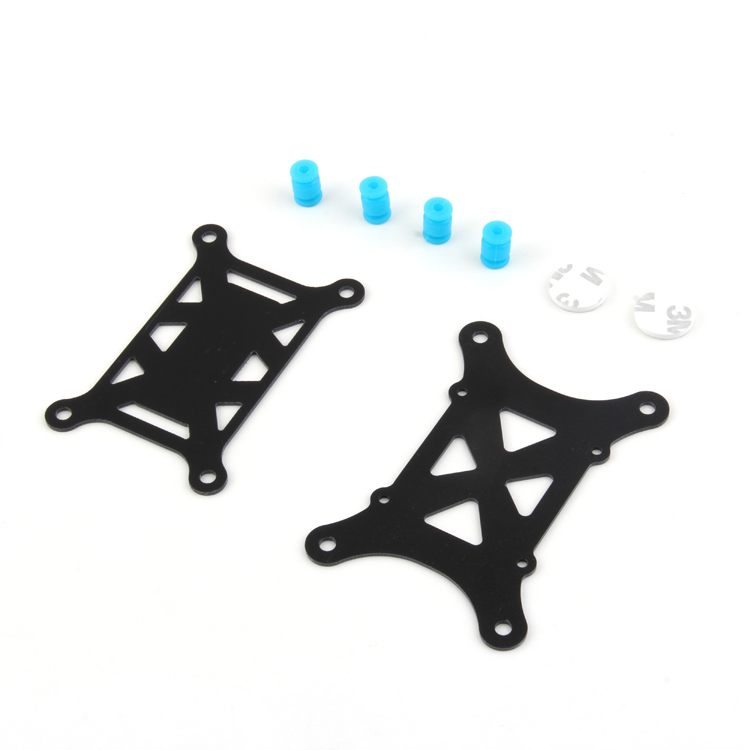
Anti-Vibration Shock Absorber for APM/KK/MWC/PixHawk
Damps vibrations from motors and props to protect your flight controller’s IMU sensors. Essential for clean accelerometer readings and stable telemetry data.
Installing Mission Planner on Windows
- Visit the official ArduPilot Mission Planner page at ardupilot.org and download the latest installer (
MissionPlanner-latest.msi). - Run the installer as Administrator. Mission Planner will also install the necessary Silicon Labs CP210x USB-to-UART driver automatically — this is what lets Windows recognise your ground telemetry module.
- Once installed, plug in your ground-side telemetry radio via USB. Windows will assign it a COM port (e.g., COM5 or COM7). Check this in Device Manager under Ports (COM & LPT).
- Launch Mission Planner. You will see the main HUD screen with an artificial horizon graphic.
India-specific tip: If you are on Windows 11 and the COM port is not recognised, download the CP210x driver separately from Silicon Labs’ website and install it manually. This is a common issue on newer Windows 11 builds.
Connecting Your Drone to Mission Planner
- Power on your drone (connect the LiPo battery). The air-side telemetry module’s LED should blink rapidly, then settle into a slow blink once it pairs with the ground module.
- In Mission Planner, look at the top-right corner. You will see a dropdown showing COM ports and a baud rate selector.
- Select the correct COM port (the one assigned to your ground telemetry radio).
- Set the baud rate to 57600 (this is the ArduPilot default for telemetry links; do not change it unless you know what you are doing).
- Click the Connect button (the green button in the top-right).
- Mission Planner will begin downloading parameters from your flight controller. This takes about 10–30 seconds depending on the link quality.
- Once connected, the HUD will come alive, showing real-time attitude, altitude, GPS lock, and battery voltage.
If the LEDs on both modules are solid green, you have a good link. A red or rapidly blinking LED indicates no pairing — check that both modules are the same frequency (both 433 MHz or both 915 MHz) and that the baud rates match.
Configuring Telemetry Parameters
Once connected, navigate to Config > Full Parameter List in Mission Planner. Here are the key parameters for your telemetry port:
SERIAL1_BAUD: Set to 57 (which means 57600 baud). UseSERIAL2_BAUDif you are using TELEM2.SERIAL1_PROTOCOL: Set to 1 (MAVLink 1) or 2 (MAVLink 2). MAVLink 2 is recommended for newer setups as it supports message signing and compression.SR1_ADSB,SR1_EXT_STAT,SR1_EXTRA1,SR1_EXTRA2: These control how frequently different data packets are sent over the telemetry link. Default values work well at 57600 baud. If you notice lag, reduce these stream rates.
After changing any parameter, click Write Params to save to the flight controller. Then reboot the FC by cycling power.
Reading Live Flight Data
With Mission Planner connected via telemetry, you have access to a wealth of live data:
Flight Data Screen
The main Flight Data tab shows the HUD with pitch, roll, yaw, altitude (both relative and absolute), groundspeed, and airspeed. The status panel on the left shows battery voltage, current draw, GPS HDOP (horizontal dilution of precision), satellite count, and flight mode.
Map View
Click on the map in the Flight Data tab to expand it. Your drone’s position (shown as a small aircraft icon) will update live as it moves. This is invaluable for long-range or autonomous missions. You can right-click on the map to fly to a GPS point instantly.
Quick Tab / Gauges
The Quick tab displays customisable gauge widgets. Add gauges for parameters like wind speed, vertical speed, or any MAVLink message value. Very useful for monitoring agricultural drones over crops.
Status Tab
Shows raw MAVLink message values for all sensor data — IMU, barometer, GPS, compass, etc. Useful for diagnosing sensor issues.
Troubleshooting Common Issues
Mission Planner Cannot Connect
- Verify the correct COM port is selected. Unplug and replug the USB ground module.
- Try baud rate 115200 if 57600 fails — some modules ship with a different factory default.
- Ensure the drone is powered on before clicking Connect.
Telemetry Link Drops Frequently
- Reduce stream rates in the SR1_* parameters to lower bandwidth usage.
- Move the ground antenna further from the laptop to reduce USB noise interference.
- Check for physical damage to the antenna or connector on the air module.
Parameters Take Too Long to Download
- This is normal over a weak RF link. Move closer to the drone during the initial connection.
- Ensure both module antennas are upright and not obstructed by the drone frame or battery.
GPS Shows No Fix
- GPS fix is independent of telemetry — check your GPS module’s connection to the flight controller.
- In India, GPS acquisition can take 2–5 minutes on a cold start. Wait for HDOP below 1.5 and at least 8 satellites before flying.
Advanced Mission Planner Features
Autonomous Waypoint Missions
Go to the Plan tab. Click on the satellite map to place waypoints. Set altitude for each point. Then click Write WPs to upload the mission to the drone via telemetry. Switch the drone to AUTO mode from your RC transmitter and it will fly the entire mission autonomously, returning home when complete.
Geofence
Set a circular or polygon geofence in Mission Planner. If the drone breaches the fence, it will automatically return to home — a critical safety feature for flying near populated areas or sensitive zones in India.
Failsafe Configuration
Configure telemetry failsafe: if the telemetry link drops for more than N seconds, the drone can automatically RTL (Return to Launch) or Land. Set this in Config > Failsafe.
Live Tuning with MAVLink Inspector
Use Ctrl+F > MAVLink Inspector to watch every MAVLink message in real time. This is used for advanced PID tuning and diagnosing oscillations without landing the drone.
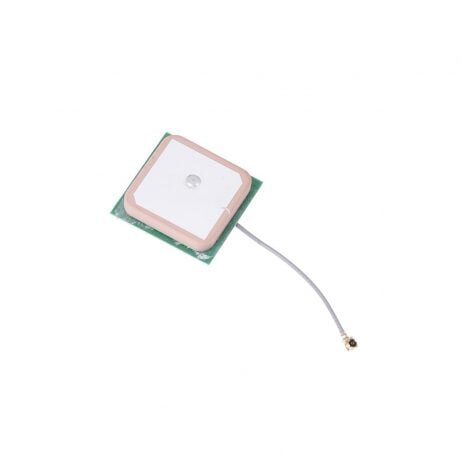
28dB High Gain Active GPS Antenna for NEO-6M/7M/8M
High-gain ceramic patch GPS antenna compatible with u-blox NEO-6M, NEO-7M, and NEO-8M modules. Improves GPS lock time and satellite count significantly — essential for reliable autonomous missions.
Frequently Asked Questions
Q: Which frequency should I use in India — 433 MHz or 915 MHz?
A: In India, the 433 MHz ISM band (430–440 MHz) and 915 MHz are both used, but regulations vary. The 433 MHz band is more commonly used by hobbyists in India and typically gives better range in cluttered environments due to its longer wavelength. Always check DGCA and WPC regulations before operating long-range equipment.
Q: How far can a 3DR telemetry radio reach?
A: In open-field conditions with clear line of sight, a 100mW 3DR-style radio can reach 300–500 metres reliably. Higher-power modules or directional antennas can extend this to 1–2 km. Obstacles, interference, and antenna orientation all reduce range.
Q: Can I use Mission Planner on Android?
A: Mission Planner is Windows-only, but the Android equivalent is QGroundControl (QGC) or Tower (DroidPlanner). Both support the same 3DR telemetry radios via OTG USB adapters.
Q: Can I connect via telemetry and USB at the same time?
A: No — Mission Planner can only maintain one connection at a time. Disconnect telemetry before connecting via USB for firmware updates.
Q: My drone shows “No GPS” in Mission Planner — what should I do?
A: Give the GPS module 3–5 minutes to acquire a fix outdoors. Ensure the GPS module is mounted on top of the drone with a clear sky view, away from ESC noise. Check that GPS_TYPE parameter is set correctly (usually 1 for u-blox).
Q: Is Mission Planner free to use?
A: Yes, Mission Planner is completely free and open-source. It is maintained by the ArduPilot community and regularly updated with new features.
Conclusion
Setting up drone telemetry with Mission Planner transforms your drone from a simple RC aircraft into a fully monitored, autonomous-capable system. With live flight data streaming to your laptop, you can fly with confidence, catch problems early, and run complex autonomous missions — all from the ground.
The hardware investment is minimal — a quality 3DR-style telemetry radio pair is affordable and the software is free. Whether you are a student building your first Pixhawk quad, an agricultural drone operator managing field surveys, or an FPV enthusiast exploring long-range flying, Mission Planner’s telemetry features will elevate your entire operation.
Ready to get started? Shop for telemetry modules, GPS antennas, and flight controller accessories at Zbotic — India’s trusted store for drone components.
Find 3DR telemetry radios (433 MHz & 915 MHz), GPS modules, anti-vibration mounts, and more at zbotic.in. Fast shipping across India.


Add comment