
If you’ve been building IoT projects with ESP32, you’ve probably heard about Blynk 2.0 ESP32 cloud dashboard — the most popular platform for visualising sensor data and controlling hardware remotely. Whether you want to monitor your home environment, track a vehicle, or control appliances from your phone, Blynk 2.0 makes it incredibly simple. In this tutorial, we’ll walk through everything you need to know to set up a fully working cloud dashboard using an ESP32 board.
What is Blynk 2.0 and How is it Different?
Blynk was originally launched as a simple drag-and-drop IoT platform, but Blynk 2.0 (now simply called “Blynk”) is a complete rewrite that offers far more power, stability, and scalability. The old Blynk (legacy) used virtual pins and a token-based approach which was great for beginners, but lacked enterprise features.
Blynk 2.0 introduces:
- Templates: Reusable device blueprints so you can deploy the same firmware to hundreds of devices.
- Datastreams: Structured channels for each sensor value or control signal, with data type enforcement.
- Web Dashboard: A browser-based interface alongside the mobile app — perfect for desktop monitoring.
- Automations: Rule-based triggers (e.g., send a notification if temperature exceeds 35°C).
- Events and Logs: Track when specific conditions occurred over time.
- Over-The-Air (OTA) Updates: Push firmware updates remotely without physical access.
For Indian makers and students, Blynk 2.0’s free tier is generous enough for personal and college projects. You get up to 2 free devices with full feature access, which is more than enough to get started.
Hardware You Need
To follow this tutorial, you’ll need the following components:
- ESP32 development board (any variant works — DevKit, NodeMCU-32S, etc.)
- DHT11 or BME280 temperature/humidity sensor
- Jumper wires
- USB cable for programming
- A smartphone with the Blynk app installed (Android/iOS)
- A Wi-Fi network (2.4GHz)

Ai Thinker NodeMCU-32S ESP32 Development Board
A reliable dual-core ESP32 board with onboard Wi-Fi and Bluetooth — perfect for Blynk 2.0 cloud projects with plenty of GPIO pins.

DHT11 Digital Temperature and Humidity Sensor Module
An affordable and easy-to-use sensor ideal for reading ambient temperature and humidity to stream live data to your Blynk dashboard.
Setting Up Blynk 2.0 Account and Template
Getting started with Blynk 2.0 is straightforward. Follow these steps:
Step 1: Create a Free Account
Go to blynk.io and register for a free account. Verify your email and log in to the Blynk console.
Step 2: Create a New Template
In the Blynk console, click on Developer Zone → Templates → + New Template. Name it something like “ESP32 Sensor Monitor”, choose ESP32 as the hardware, and select Wi-Fi as the connection type. Click Done.
Step 3: Create Datastreams
Under your template, navigate to Datastreams and add the following:
- Virtual Pin V0 — Name: Temperature, Data Type: Double, Min: -40, Max: 80
- Virtual Pin V1 — Name: Humidity, Data Type: Double, Min: 0, Max: 100
- Virtual Pin V2 — Name: LED Control, Data Type: Integer, Min: 0, Max: 1
Step 4: Build the Web Dashboard
Go to the Web Dashboard tab and drag widgets onto the canvas. Add a Gauge widget for Temperature (assign to V0), a Gauge for Humidity (V1), and a Switch widget for LED Control (V2). Arrange them neatly and save.
Step 5: Create a Device
In the Blynk console, go to Devices → + New Device → From Template, select your template, and name the device. You’ll get an BLYNK_AUTH_TOKEN — copy it, you’ll need it in the firmware.
Also install the Blynk IoT app on your phone, log in, and you’ll see the mobile dashboard auto-created from your template.
Writing ESP32 Code for Blynk 2.0
Open Arduino IDE and install the Blynk library (version 1.3.0 or newer) via Library Manager. Also install the DHT sensor library by Adafruit and the Adafruit Unified Sensor library.
Here’s the complete firmware:
#define BLYNK_TEMPLATE_ID   "TMPLxxxxxxxx"
#define BLYNK_TEMPLATE_NAME "ESP32 Sensor Monitor"
#define BLYNK_AUTH_TOKEN    "YourAuthTokenHere"

#include <WiFi.h>
#include <BlynkSimpleEsp32.h>
#include <DHT.h>

#define DHTPIN 4
#define DHTTYPE DHT11
#define LED_PIN 2

DHT dht(DHTPIN, DHTTYPE);
BlynkTimer timer;

char ssid[] = "YourWiFiSSID";
char pass[] = "YourWiFiPassword";

void sendSensorData() {
  float humidity = dht.readHumidity();
  float temperature = dht.readTemperature();

  if (isnan(humidity) || isnan(temperature)) {
    Serial.println("Failed to read from DHT sensor!");
    return;
  }

  Blynk.virtualWrite(V0, temperature);
  Blynk.virtualWrite(V1, humidity);

  Serial.print("Temp: "); Serial.print(temperature);
  Serial.print(" C, Humidity: "); Serial.println(humidity);
}

BLYNK_WRITE(V2) {
  int value = param.asInt();
  digitalWrite(LED_PIN, value);
}

void setup() {
  Serial.begin(115200);
  pinMode(LED_PIN, OUTPUT);
  dht.begin();
  Blynk.begin(BLYNK_AUTH_TOKEN, ssid, pass);
  timer.setInterval(2000L, sendSensorData);
}

void loop() {
  Blynk.run();
  timer.run();
}
Replace BLYNK_TEMPLATE_ID, BLYNK_TEMPLATE_NAME, BLYNK_AUTH_TOKEN, and your Wi-Fi credentials. Upload the code to your ESP32.
Open the Serial Monitor at 115200 baud. You should see the ESP32 connecting to Wi-Fi and then printing sensor readings every 2 seconds. Open the Blynk app or web console — you’ll see the gauges updating in real time!
Adding DHT11/BME280 Sensor to the Dashboard
While the DHT11 is great for beginners, the BME280 offers higher accuracy and also measures barometric pressure — useful for weather stations and altitude tracking. Here’s how to upgrade your setup:
Wiring the BME280 to ESP32
The BME280 communicates over I2C. Connect:
- VCC → 3.3V on ESP32
- GND → GND
- SDA → GPIO 21
- SCL → GPIO 22
Install the Adafruit BME280 Library in Arduino IDE.

GY-BME280-3.3 Precision Altimeter Atmospheric Pressure Sensor Module
Upgrade your Blynk dashboard with pressure and altitude readings using this high-accuracy I2C sensor — 3.3V compatible and breadboard-friendly.
Add a third datastream V3 (Pressure, Double, Min: 900, Max: 1100) to your Blynk template, and update the firmware to use the BME280 library. Your dashboard now shows temperature, humidity, and pressure in real time.
Advanced Dashboard Features: Automations and Events
Blynk 2.0’s automation engine lets you set rules that trigger actions without any code changes. Here are some powerful use cases:
Temperature Alert Notification
Go to Automations → + New Automation. Set the condition: “When Temperature (V0) is above 35” → Action: “Send Notification: Warning! Temperature is too high.” Save and enable it. You’ll now receive a push notification on your phone whenever the temperature threshold is crossed.
Scheduled Control
Create a time-based automation: “Every day at 7:00 PM → Set V2 to 1” and another: “Every day at 11:00 PM → Set V2 to 0”. This turns your LED (or relay) on and off on schedule — perfect for automating lights or fans.
Events and Logging
In your template, create a custom Event (e.g., “high_temp”) with a notification message. In your firmware, call Blynk.logEvent("high_temp"); when the condition is met. Events appear in the Event Log on the web dashboard, giving you a timestamped history of anomalies.
Over-The-Air Firmware Updates
Blynk 2.0 supports OTA updates via the Blynk.Air feature (available on paid plans). For free-tier users, you can still use the Blynk Edgent library which provides a self-provisioning Wi-Fi setup (no hardcoded credentials) and basic OTA support.
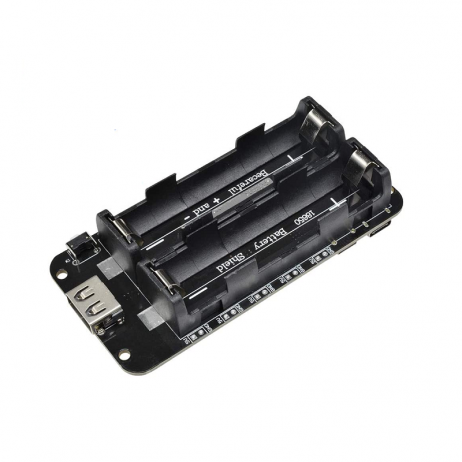
2 x 18650 Lithium Battery Shield for ESP32
Make your Blynk IoT project portable with this dual 18650 battery shield — provides clean 5V output and onboard USB charging for field deployments.
Frequently Asked Questions
Is Blynk 2.0 free to use with ESP32?
Yes. Blynk 2.0 offers a free tier that supports up to 2 active devices, unlimited datastreams, and access to automations and events. This is sufficient for most personal and college projects. Paid plans are needed for more devices or commercial deployments.
Can I use Blynk 2.0 with the old ESP32 Blynk code?
No. Blynk 2.0 is completely different from the legacy Blynk. You need to update your library to the latest Blynk version (1.3.x), create a new template on blynk.io, and rewrite your firmware using the new macros (BLYNK_TEMPLATE_ID, BLYNK_TEMPLATE_NAME). The old tokens and legacy server are no longer active.
Why is my ESP32 not connecting to Blynk 2.0?
Common reasons include: wrong or expired auth token, Wi-Fi credentials mismatch, the Blynk library version is outdated (must be 1.3.0+), or the Template ID/Name don’t match what’s defined in your Blynk console. Double-check all three #define macros at the top of your sketch.
How do I add more sensors to my Blynk dashboard?
Simply add more datastreams (Virtual Pins) in your template on the Blynk console, add the corresponding widgets to the dashboard, and write the sensor values to those pins in your ESP32 firmware using Blynk.virtualWrite(Vx, value);. You can monitor up to many sensors simultaneously.
Does Blynk 2.0 work without internet?
Blynk 2.0 requires internet connectivity as it routes through Blynk’s cloud servers. For local-only setups, consider running a local Blynk server (Blynk Local Server — open source) or look at alternatives like Home Assistant MQTT. However, for most Indian home and lab projects, cloud connectivity is not an issue.
Ready to Build Your IoT Dashboard?
Get all the ESP32 boards, sensors, and accessories you need for your Blynk 2.0 project at Zbotic.in — India’s trusted electronics components store. Fast delivery across India with genuine components.


Add comment