
Building a WebSocket server ESP32 real-time browser client project is one of the most exciting ways to bring live sensor data directly into your web browser without constantly refreshing the page. Whether you are monitoring temperature in a factory, tracking soil moisture in your greenhouse, or controlling a relay from your phone, WebSockets make the experience seamless and instantaneous. In this comprehensive tutorial, we will walk through everything you need to know to set up a WebSocket server on the ESP32 and stream real-time data to a browser client.
What is WebSocket and Why Use It with ESP32?
WebSocket is a communication protocol that provides a full-duplex communication channel over a single TCP connection. Unlike traditional HTTP requests where the browser has to repeatedly ask the server for new data (polling), WebSocket establishes a persistent connection. Once the handshake is complete, both the server (ESP32) and the client (browser) can send messages to each other at any time without the overhead of repeated HTTP headers.
For IoT projects in India, where bandwidth can sometimes be limited and latency matters, WebSocket is an ideal choice. Imagine you have a temperature sensor installed on a factory floor in Pune or an air quality monitor on a rooftop in Delhi — with WebSocket, readings appear on your dashboard the moment the sensor detects a change. HTTP polling would waste bandwidth and add noticeable delay.
The ESP32 is the perfect microcontroller for WebSocket servers. It has a dual-core 240 MHz processor, 520 KB of SRAM, built-in Wi-Fi and Bluetooth, and an impressive set of peripherals — all at a price point affordable for hobbyists and startups alike. The AsyncWebServer library combined with the ESPAsyncWebSocket library makes implementing WebSocket on the ESP32 straightforward and efficient.
Key advantages of WebSocket over HTTP polling for ESP32 projects:
- Low latency: Data is pushed immediately when available
- Reduced overhead: No repeated HTTP headers after initial handshake
- Bi-directional: Browser can send commands to ESP32 and receive data simultaneously
- Efficient battery use: Fewer packets mean lower Wi-Fi radio activity
Hardware Requirements
Before writing any code, gather the following components. All of these are readily available at Zbotic.in with fast shipping across India.
- ESP32 development board (any variant — NodeMCU-32S, ESP32-CAM, ESP32-C3, or ESP32-S3)
- DHT11 or DHT20 temperature and humidity sensor
- BMP280 barometric pressure sensor (optional, for richer data)
- USB cable (Micro USB or Type-C depending on your board)
- Breadboard and jumper wires
- 18650 battery shield (optional, for portable deployments)

Ai Thinker NodeMCU-32S-ESP32 Development Board – IPEX Version
A feature-rich ESP32 development board ideal for WebSocket server projects, with dual-core processor, onboard Wi-Fi, and breadboard-friendly pinout.

DHT11 Digital Relative Humidity and Temperature Sensor Module
Perfect for streaming live temperature and humidity readings through your ESP32 WebSocket server to the browser dashboard.
Setting Up Arduino IDE for ESP32 WebSocket
If you have not already set up your Arduino IDE for ESP32, follow these steps:
- Open Arduino IDE and go to File > Preferences
- In “Additional boards manager URLs” add:
https://raw.githubusercontent.com/espressif/arduino-esp32/gh-pages/package_esp32_index.json - Go to Tools > Board > Boards Manager and search for “esp32” — install the Espressif Systems package
- Select your board: Tools > Board > ESP32 Arduino > NodeMCU-32S (or your specific board)
Now install the required libraries via the Library Manager (Sketch > Include Library > Manage Libraries):
- ESPAsyncWebServer by lacamera
- AsyncTCP by dvarrel (required by ESPAsyncWebServer)
- DHT sensor library by Adafruit
- ArduinoJson by Benoit Blanchon (for structured data payloads)
Note: ESPAsyncWebServer and AsyncTCP are often downloaded directly from their GitHub repositories since they may not always appear in the Arduino Library Manager. Download the ZIP files and use Sketch > Include Library > Add .ZIP Library.
Writing the ESP32 WebSocket Server Code
The core of our project is the ESP32 acting as both a Wi-Fi access point (or station) and a WebSocket server. Here is the complete sketch that reads DHT11 sensor data and broadcasts it to all connected browser clients every 2 seconds:
#include <WiFi.h>
#include <ESPAsyncWebServer.h>
#include <DHT.h>
#include <ArduinoJson.h>

const char* ssid = "YOUR_WIFI_SSID";
const char* password = "YOUR_WIFI_PASSWORD";

#define DHTPIN 4
#define DHTTYPE DHT11
DHT dht(DHTPIN, DHTTYPE);

AsyncWebServer server(80);
AsyncWebSocket ws("/ws");

unsigned long lastSendTime = 0;
const unsigned long sendInterval = 2000;

void onWsEvent(AsyncWebSocket *server, AsyncWebSocketClient *client,
               AwsEventType type, void *arg, uint8_t *data, size_t len) {
  if (type == WS_EVT_CONNECT) {
    Serial.printf("Client #%u connectedn", client->id());
  } else if (type == WS_EVT_DISCONNECT) {
    Serial.printf("Client #%u disconnectedn", client->id());
  }
}

String getSensorJSON() {
  float temp = dht.readTemperature();
  float hum = dht.readHumidity();
  StaticJsonDocument<128> doc;
  doc["temperature"] = isnan(temp) ? 0 : temp;
  doc["humidity"] = isnan(hum) ? 0 : hum;
  doc["timestamp"] = millis();
  String output;
  serializeJson(doc, output);
  return output;
}

void setup() {
  Serial.begin(115200);
  dht.begin();
  WiFi.begin(ssid, password);
  while (WiFi.status() != WL_CONNECTED) {
    delay(500);
    Serial.print(".");
  }
  Serial.println("nConnected! IP: " + WiFi.localIP().toString());
  ws.onEvent(onWsEvent);
  server.addHandler(&ws);
  server.on("/", HTTP_GET, [](AsyncWebServerRequest *request) {
    request->send(200, "text/html", "<!-- HTML goes here -->");
  });
  server.begin();
}

void loop() {
  ws.cleanupClients();
  unsigned long now = millis();
  if (now - lastSendTime > sendInterval) {
    lastSendTime = now;
    String json = getSensorJSON();
    ws.textAll(json);
  }
}
Key points about this code:
AsyncWebSockethandles WebSocket connections asynchronously, meaning the main loop is never blockedws.textAll(json)broadcasts to every connected client simultaneouslyws.cleanupClients()should be called regularly to free memory from stale connections- The server handles both HTTP (for serving the HTML page) and WebSocket on the same port 80
Building the Browser Client with HTML and JavaScript
The browser client uses the native JavaScript WebSocket API — no additional libraries needed. The ESP32 serves this HTML page from PROGMEM (flash memory) to save RAM. Here is the client-side code that displays live temperature and humidity:
<!DOCTYPE html>
<html lang="en">
<head>
<meta charset="UTF-8">
<meta name="viewport" content="width=device-width, initial-scale=1">
<title>ESP32 Live Dashboard</title>
<style>
body { font-family: Arial; text-align: center; background: #1a1a2e; color: #eee; }
.card { background: #16213e; border-radius: 12px; padding: 30px;
margin: 20px auto; max-width: 300px; }
.value { font-size: 48px; font-weight: bold; color: #ff6b00; }
#status { color: #4ade80; margin-top: 20px; }
</style>
</head>
<body>
<h1>ESP32 WebSocket Dashboard</h1>
<div class="card">
<p>Temperature</p>
<div class="value" id="temp">--</div>
<p>°C</p>
</div>
<div class="card">
<p>Humidity</p>
<div class="value" id="hum">--</div>
<p>%</p>
</div>
<div id="status">Connecting...</div>
<script>
var ws = new WebSocket('ws://' + location.hostname + '/ws');
ws.onopen = () => document.getElementById('status').textContent = 'Connected';
ws.onclose = () => document.getElementById('status').textContent = 'Disconnected';
ws.onmessage = (event) => {
var data = JSON.parse(event.data);
document.getElementById('temp').textContent = data.temperature.toFixed(1);
document.getElementById('hum').textContent = data.humidity.toFixed(1);
};
</script>
</body>
</html>To serve this HTML from ESP32 flash memory, store it as a raw string literal in a separate header file index_html.h and reference it in your main sketch. Use the PROGMEM keyword to keep it in flash and free up precious RAM for sensor operations.
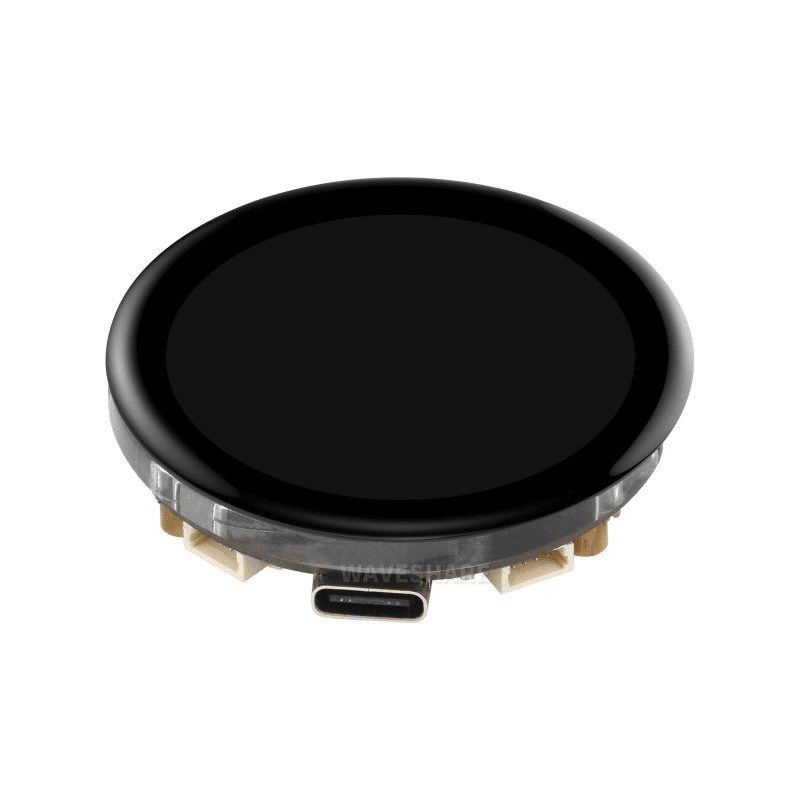
Waveshare ESP32-S3 1.43inch AMOLED Display Development Board
Combine WebSocket data streaming with a stunning onboard AMOLED display for a dual-output dashboard — browser and local screen simultaneously.
Streaming Real-Time Sensor Data
Once the basic connection is working, you can expand the data payload to include more sensors. A typical JSON payload for a multi-sensor node might look like:
{
  "temperature": 28.5,
  "humidity": 65.2,
  "pressure": 1013.25,
  "timestamp": 45823,
  "uptime": 3600
}
For production deployments, consider these enhancements:
- Authentication: Add a query parameter token to the WebSocket URL and validate it in the
WS_EVT_CONNECThandler - Reconnection logic: In the browser JavaScript, implement exponential backoff reconnection when the connection drops
- Data buffering: Store the last N readings in a circular buffer on the ESP32 and send them on reconnect so the browser chart does not start empty
- Multiple clients: ESPAsyncWebSocket supports up to 8 simultaneous connections by default — adjust with
ws.setMaxClients()
For chart visualization in the browser, you can use lightweight libraries like Chart.js or uPlot to plot the incoming data in real time. Chart.js is particularly popular and easy to integrate with WebSocket data streams.

BMP280 Barometric Pressure and Altitude Sensor I2C/SPI Module
Add barometric pressure and altitude data to your WebSocket stream for a more comprehensive environmental monitoring dashboard.
Troubleshooting Tips and Best Practices
Building WebSocket projects on ESP32 can sometimes hit snags. Here are the most common issues and their solutions:
1. WebSocket connection refused
Make sure your browser and ESP32 are on the same Wi-Fi network. If using a router with client isolation, the browser cannot reach the ESP32. Check the ESP32’s IP address in the Serial Monitor and type it directly into the browser’s address bar.
2. Memory heap exhaustion
The AsyncWebServer + WebSocket stack uses significant RAM. If your ESP32 crashes with heap errors, reduce the JSON payload size, call ws.cleanupClients() more frequently, and avoid allocating large String objects in the main loop. Use StaticJsonDocument with a fixed size instead of DynamicJsonDocument.
3. Sensor reads failing
DHT11/DHT22 sensors need at least 2 seconds between reads. If you read faster, you get NaN values. Always check isnan(temp) before using the value and add a minimum interval guard in your code.
4. Browser shows stale data after reconnect
Implement server-side state caching. Send the last known sensor reading immediately when a new client connects in the WS_EVT_CONNECT handler using client->text(lastJson).
5. CORS issues when serving HTML from different origin
If you serve your HTML from a separate web server (not the ESP32), add CORS headers in the AsyncWebServerResponse. The simplest approach is to serve the HTML directly from the ESP32 to avoid cross-origin restrictions entirely.
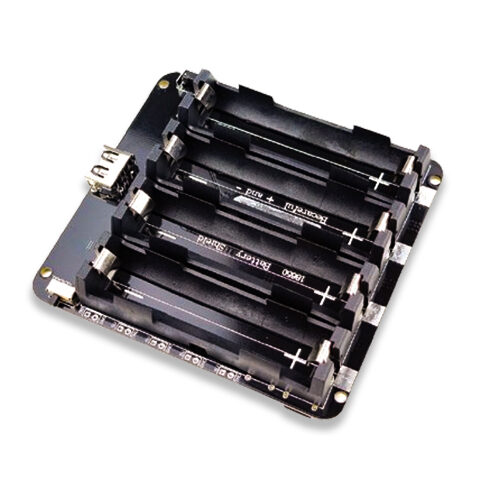
4 x 18650 Lithium Battery Shield V8/V9 for ESP32
Power your ESP32 WebSocket node portably with this 4-cell lithium battery shield, perfect for remote sensor deployments without wall power.
Frequently Asked Questions
Can I use WebSocket with ESP32 in Access Point mode?
Yes! Instead of WiFi.begin(ssid, password), use WiFi.softAP("ESP32-AP", "password"). The ESP32 creates its own Wi-Fi network. Connect your phone or laptop to that network and navigate to 192.168.4.1 to access the dashboard. This is ideal for portable projects with no existing Wi-Fi infrastructure.
How many WebSocket clients can ESP32 handle simultaneously?
The ESPAsyncWebSocket library supports up to 8 clients by default. In practice, 3-4 concurrent clients is comfortable for an ESP32 running sensor reads at the same time. Beyond that, the heap usage climbs and you risk crashes. For higher client counts, consider an MQTT broker-based architecture instead.
Is WSS (WebSocket Secure) supported on ESP32?
Yes, but it requires significantly more resources. The ESP-IDF and the ESPAsyncWebServer library support TLS via the AsyncTCP_SSL extension. However, handling SSL on the ESP32 consumes ~50 KB of heap and adds latency. For internal LAN use, plain WS is typically sufficient. Use WSS only when the data travels over the public internet.
What is the maximum data rate I can achieve with ESP32 WebSocket?
In ideal Wi-Fi conditions, the ESP32 can push WebSocket messages at rates up to 100 Hz (100 messages per second) for small payloads. For sensor data (temperature, humidity, etc.) a 1-10 Hz update rate is more than sufficient and keeps the heap usage manageable.
Can I control relays or GPIO pins from the browser via WebSocket?
Absolutely — this is one of the most powerful features of bi-directional WebSocket. Add a handler in the WS_EVT_DATA event to parse incoming commands (e.g., {"pin":2,"state":1}) and call digitalWrite() accordingly. This lets you build browser-based GPIO control panels without any cloud dependency.
Ready to Build Your ESP32 WebSocket Project?
Shop the complete range of ESP32 boards, sensors, and accessories at Zbotic.in — India’s trusted electronics components store with fast delivery pan-India.


Add comment