
An ESP32 smart mirror display clock weather project is one of the most satisfying builds for any Indian hobbyist. Imagine looking into a mirror that simultaneously shows you the current time, today’s weather forecast, and your upcoming calendar events — all powered by a tiny ESP32 microcontroller. This guide walks you through every step, from hardware selection to final code, so you can build your own smart mirror at home.
What Is an ESP32 Smart Mirror?
A smart mirror is a two-way mirror (also called a spy mirror or half-silvered mirror) with a display placed behind it. When the display is off, the mirror looks like a regular reflective surface. When the display lights up, the bright content shines through the mirror’s semi-transparent coating, giving the illusion that the information is floating inside the glass.
The ESP32 is the perfect brain for this project. It has built-in Wi-Fi, enough processing power to render graphics, and a rich ecosystem of libraries. Unlike an Arduino Uno, the ESP32 can connect to the internet to fetch live weather data, sync NTP time, and even pull your Google Calendar events — making it far more capable for IoT builds.
Indian makers have been building smart mirrors for under ₹2,000–₹3,000 using local components, making this one of the best-value IoT projects available today.
Components You Need
Before you start, gather these components. Most are available on Zbotic.in with fast delivery across India:
- ESP32 development board (30-pin or 38-pin variant)
- ILI9341 or ST7789 SPI LCD (2.8″ or 3.5″ recommended)
- Two-way acrylic mirror sheet (available on Amazon India or local glass shops)
- DHT20 or BME280 sensor for local temperature/humidity readings
- 5V USB power supply (minimum 2A)
- Jumper wires, breadboard or custom PCB, 3D-printed or wooden enclosure
For weather data, the project uses the free OpenWeatherMap API (1,000 calls/day free tier is more than enough). For time sync, it uses NTP (Network Time Protocol) servers — no RTC module required since the ESP32 reconnects to Wi-Fi on boot.

DHT11 Digital Relative Humidity and Temperature Sensor Module
A reliable and affordable sensor for reading local temperature and humidity — ideal for displaying indoor conditions on your smart mirror.

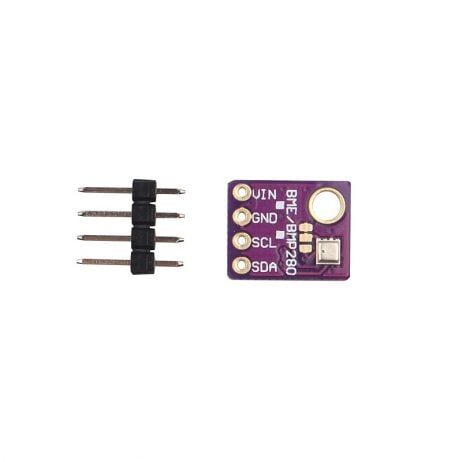
BMP280 Barometric Pressure and Altitude Sensor I2C/SPI Module
Measure local barometric pressure and altitude alongside temperature. Great for adding a weather-station widget to your smart mirror display.

DHT20 SIP Packaged Temperature and Humidity Sensor
The DHT20 is the upgraded successor to the DHT11 with I2C interface and improved accuracy — a cleaner wiring solution for your mirror build.
Choosing the Right Display
The display is the heart of any smart mirror. Here are the three best options for an ESP32 smart mirror project:
1. ILI9341 2.8″ TFT SPI LCD (320×240)
This is the most popular choice for beginner smart mirrors. The 320×240 resolution provides enough space for a clock, temperature widget, and a 3-day weather forecast. SPI communication is fast and well-supported by the TFT_eSPI library. Cost: around ₹300–₹400.
2. ST7789 1.9″ or 2.4″ IPS LCD
IPS panels offer wider viewing angles, which matters for a mirror you glance at from the side. The ST7789 is also supported by TFT_eSPI and offers better colour accuracy than TFT panels.
3. Large 7″ HDMI Display
For a full-length bathroom mirror project, a 7″ display connected to an ESP32-S3 or Raspberry Pi gives you much more screen real estate. However, this is a significantly more advanced and expensive build.
For most Indian hobbyists starting out, the 2.8″ ILI9341 SPI LCD offers the best balance of cost, ease of use, and visual impact.
Wiring the ESP32 to Your LCD
For an SPI LCD such as the ILI9341, connect the pins as follows:
| LCD Pin | ESP32 GPIO | Notes |
|---|---|---|
| VCC | 3.3V | Most LCDs are 3.3V logic |
| GND | GND | Common ground |
| CS | GPIO 5 | Chip select |
| RESET | GPIO 4 | Hardware reset |
| DC/RS | GPIO 2 | Data/Command select |
| MOSI | GPIO 23 | SPI data out |
| SCK | GPIO 18 | SPI clock |
| LED | 3.3V or GPIO (PWM) | Backlight control |
If you are adding a DHT20 or BME280 for local readings, connect them via I2C on GPIO 21 (SDA) and GPIO 22 (SCL). The I2C and SPI buses run independently on the ESP32, so there is no conflict.
Software Setup: Libraries and APIs
Install the following libraries in the Arduino IDE (or PlatformIO):
- TFT_eSPI — fastest graphics library for ESP32 + SPI LCD. Configure
User_Setup.hwith your exact pin mapping. - ArduinoJson (version 6.x) — parse JSON responses from OpenWeatherMap.
- HTTPClient — built into ESP32 Arduino core; no separate install needed.
- WiFi.h — also built-in.
- time.h — NTP time sync. Call
configTime(19800, 0, "pool.ntp.org")to set IST (UTC+5:30 = 19800 seconds offset).
OpenWeatherMap API Setup
Register for a free account at openweathermap.org and copy your API key. The current weather endpoint is:
https://api.openweathermap.org/data/2.5/weather?q=Mumbai,IN&appid=YOUR_API_KEY&units=metric
Parse the JSON response to extract main.temp, weather[0].description, and main.humidity. Update weather data every 10 minutes to stay within the free tier’s call limits.
NTP Time Sync for IST
configTime(5*3600 + 30*60, 0, "pool.ntp.org", "time.nist.gov");
After the ESP32 connects to Wi-Fi and calls configTime(), use getLocalTime(&timeinfo) to retrieve hours, minutes, and seconds in IST without any manual offset calculation.
Displaying Clock, Weather and Calendar
Organise your screen real estate into logical zones. A popular layout for a 320×240 display:
- Top zone (y=0–80): Large digital clock with date below it. Use the built-in fonts in TFT_eSPI (Font 7 is particularly large and clean).
- Middle zone (y=80–160): Current weather icon (drawn with simple TFT shapes or bitmap), temperature, humidity, and city name.
- Bottom zone (y=160–240): Scrolling text for upcoming calendar events (fetched from a simple JSON endpoint you host, since Google Calendar API requires OAuth2 which is complex on ESP32).
Refresh Strategy
Only redraw the portions of the screen that have changed. Redrawing the entire display every second causes visible flicker. Instead:
- Redraw the clock seconds digit every second (small region).
- Redraw the minutes digit once per minute.
- Refresh weather data every 10 minutes by making a new API call in a separate non-blocking timer.
Use millis()-based timers (not delay()) to keep the display responsive. This is the same principle used in professional embedded UI development.
Building the Mirror Enclosure
The two-way mirror effect is achieved with a semi-transparent acrylic mirror sheet, available in sizes from A4 to A0 at most hardware stores or on Amazon India for ₹300–₹1,500 depending on size. The key requirement is that the room in front of the mirror should be brighter than the display behind it — just like a one-way interrogation room mirror.
For a tabletop clock build, a simple wooden or 3D-printed frame works well. Cut a hole in the back of the frame for the display, secure the ESP32 board with standoffs inside, and attach the acrylic mirror sheet to the front of the frame. For wall mounting, use a shadow box picture frame from a craft store (IKEA Ribba frames are a popular choice globally; in India, similar frames are available at Home Centre).
Ensure good ventilation — the ESP32 runs warm under continuous Wi-Fi operation. Adding a small cutout at the bottom of the enclosure is sufficient for passive airflow.

GY-BME280-3.3 Precision Altimeter Atmospheric Pressure Sensor Module
Combines temperature, humidity, and barometric pressure in one I2C module. Perfect for a complete indoor weather station widget on your smart mirror.
GY-BME280-5V Temperature and Humidity Sensor
5V-compatible BME280 module — no level shifter required when powering the entire project from a 5V USB supply. Plug and play with ESP32 5V pin.
Frequently Asked Questions
Can I use a regular mirror glass instead of two-way acrylic?
Regular mirrors are fully reflective and will block the display completely. You must use a two-way (semi-transparent) mirror or spy mirror sheet. Acrylic sheets are cheaper and lighter than glass and are the recommended choice for DIY builds.
Does the ESP32 need to stay connected to Wi-Fi the whole time?
The ESP32 needs Wi-Fi to fetch weather data and sync NTP time. However, you can configure it to reconnect only every 10 minutes for weather updates, putting the Wi-Fi radio to sleep in between to save power and reduce heat. The clock will still tick accurately between syncs using the internal RTC.
How do I show my Google Calendar on the ESP32?
Google Calendar’s API requires OAuth2, which is complex for ESP32. The easiest approach is to write a simple Python Flask or Node.js script on a Raspberry Pi or home server that queries the Calendar API and exposes a simple JSON endpoint. Your ESP32 then fetches this simplified JSON instead.
What if the display is too dim to shine through the mirror?
Use the backlight PWM control to run the display at maximum brightness. Also, use a darker room or ensure the display faces a wall rather than a window. A display with at least 400 nits brightness works well. Avoid placing the mirror in direct sunlight.
Can I add voice assistant support?
Yes — you can add a MAX4466 microphone module and use the ESP32’s I2S interface to capture audio, then send it to a home assistant server (like Home Assistant with Assist). However, this significantly increases project complexity and is best tackled after the basic display is working.


Add comment