
Table of Contents
- What Is a Drone Antenna Tracker?
- Why You Need One for Long Range FPV
- How an Antenna Tracker Works
- Hardware You Need to Build One
- Choosing the Right Antenna
- Mechanical Build: Pan and Tilt Assembly
- Electronics and Wiring
- Software Setup: OpenAVRc and INAV Tracker
- Calibration and Field Testing
- Recommended Products from Zbotic
- Frequently Asked Questions
Flying long range FPV in India — over open farmland in Maharashtra, along the coastline of Kerala, or across the hills of Uttarakhand — is one of the most rewarding experiences in the hobby. But the moment your drone passes a kilometre or two, a fixed omnidirectional antenna starts losing the battle against free-space path loss. A drone antenna tracker solves this problem elegantly: it keeps a high-gain directional antenna pointed directly at your aircraft at all times, giving you a reliable, clean video signal and telemetry link at distances that would otherwise be impossible.
In this guide we cover everything from the theory behind antenna trackers to a complete DIY build guide with hardware recommendations, software configuration, and field calibration tips.
What Is a Drone Antenna Tracker?
A drone antenna tracker is a motorised pan-and-tilt mechanism that holds a directional antenna and continuously rotates it to point at the GPS coordinates of your flying drone. It uses real-time telemetry from the aircraft — typically the GPS latitude, longitude, and altitude — to calculate the azimuth (horizontal direction) and elevation angle to the drone, then drives two servo motors to physically aim the antenna at those angles.
The result is that instead of your video receiver or RC link antenna spraying signal in all directions (and wasting most of it), all the transmitted and received power is concentrated in a tight beam aimed precisely where your drone actually is. A typical 13 dBi Yagi antenna provides roughly 20 times the effective gain compared to a standard omnidirectional dipole in the direction it is pointed.
Why You Need One for Long Range FPV
Signal strength follows the inverse square law: double the distance and signal power drops to one quarter. At 2 km, you have only 1/4 the signal you had at 1 km. At 5 km, you have 1/25. A 13 dBi directional antenna provides about 20x the effective receive gain over a stock rubber duck antenna. Combined, these two effects mean a well-aimed 13 dBi Yagi lets you fly as far at 5 km as you could without it at barely 1 km.
Long-range RC links like ELRS or Crossfire already have excellent sensitivity, but even they benefit from directional antennas on the ground side when pushing the limits. And for 5.8 GHz video transmission — where free-space path loss is even more severe — a tracker is practically mandatory beyond 3 km.
How an Antenna Tracker Works
The tracker controller reads the following inputs:
- Aircraft GPS position — latitude, longitude, altitude — received via MAVLink, MSP, or a dedicated GPS telemetry stream from the drone.
- Tracker GPS position — the position of the tracker itself, either from a local GPS module or manually entered before flight.
- Compass heading of the tracker — so the controller knows which direction it is facing before it starts calculating pan angles.
From these three data points, simple trigonometry gives the azimuth (pan angle) and elevation (tilt angle) needed to point the antenna at the aircraft. The controller outputs servo PWM signals to the pan servo (horizontal rotation) and tilt servo (vertical elevation), which physically move the antenna mount.
The calculation loop runs many times per second, so the tracker follows even a fast-moving aircraft smoothly. When telemetry is lost, most tracker firmware holds last-known position and slowly scans to re-acquire the signal.
Hardware You Need to Build One
Here is a complete hardware list for a DIY antenna tracker suitable for Indian builders:
- Tracker controller: Arduino Mega or dedicated tracker boards like the RSSI Tracker or Deviationtx AAT module.
- Pan servo: A 180° or continuous-rotation servo with metal gears. 20 kg·cm torque or higher recommended to handle a heavy Yagi antenna.
- Tilt servo: Standard 180° metal-gear servo. 10–15 kg·cm is adequate for elevation.
- GPS module: NEO-7M or NEO-8M for the tracker’s own position fix.
- Compass/magnetometer: HMC5883L or QMC5883L, used for accurate north-seeking before flight.
- Telemetry receiver: Matches what your aircraft transmits — a 433 MHz or 915 MHz radio module if using ArduPilot/INAV, or an FrSky S.Port module if using Betaflight.
- Power supply: A 2S–3S LiPo or a DC bench supply. Metal-gear servos under load need 1–2 A at 5–6V.
- Structural frame: Aluminium extrusion or 3D-printed brackets to mount everything rigidly.
- Tripod: A standard camera tripod works perfectly for field deployment.
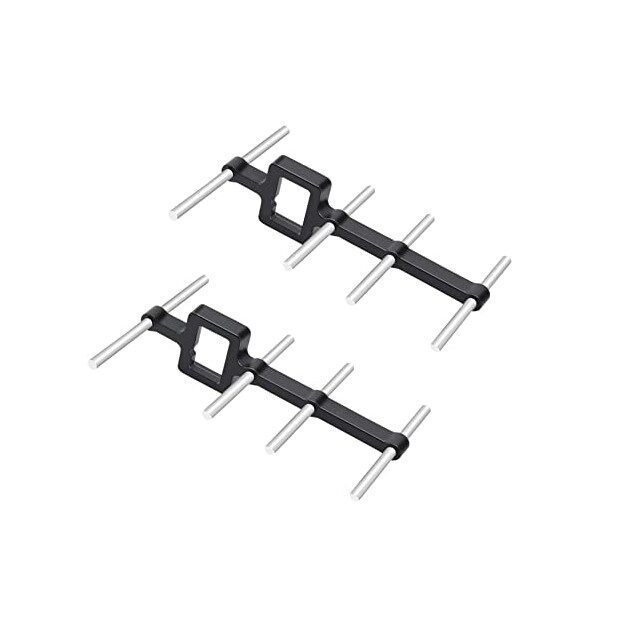
2.4GHz Yagi-UDA Drone Signal Booster
A directional Yagi-UDA antenna designed for 2.4 GHz drone RC links. Ideal for mounting on an antenna tracker to dramatically extend RC and video range.
Choosing the Right Antenna
The antenna is the most important part of the tracker. Get this right and everything else follows.
For 5.8 GHz Video (FPV)
A 5-element or 9-element Yagi for 5.8 GHz provides 10–14 dBi gain with a 40–60° beamwidth. Narrower beamwidth means more gain but less tolerance for tracker pointing error. For a first build, a 7-element Yagi with 12 dBi and 50° beamwidth is a good balance. Pair it with a patch antenna on the other port of your FPV receiver for omni coverage at short range.
For 2.4 GHz RC Link (ELRS / Crossfire)
A 2.4 GHz Yagi-UDA or a high-gain flat patch antenna gives excellent results for ELRS or TBS Crossfire on the tracker. Some long-range pilots put both their 5.8 GHz video Yagi and their 2.4 GHz RC Yagi on the same tracker for a dual-band system that auto-aims both links simultaneously.
For 433 MHz Telemetry
433 MHz Yagis are physically large — a 5-element 433 MHz Yagi is about 70 cm long. For telemetry-only tracking (ArduPilot/INAV), use a helical or turnstile antenna instead of a Yagi at this frequency. The longer wavelength already provides better range per watt than 5.8 GHz, so a modest antenna gain boost goes far.

3DR 100mW Radio Telemetry 915MHz for APM / Pixhawk
The ground-side telemetry radio that feeds MAVLink GPS data to your antenna tracker controller, enabling precise real-time pointing of your directional antenna.
Mechanical Build: Pan and Tilt Assembly
Pan Axis (Azimuth)
The pan axis must rotate a full 360° (or close to it) to follow the aircraft as it circles around the pilot. Use a continuous-rotation servo or a standard 270° servo with mechanical endstop management in software. Mount this servo on a heavy tripod-mounted base. The key is a smooth, low-friction bearing at the centre of rotation so the servo does not have to fight mechanical resistance while tracking.
Tilt Axis (Elevation)
The tilt axis only needs 0° to 90° of movement (horizon to directly overhead). A standard 180° metal-gear servo with the range limited in software to 0–90° is ideal. Balance the antenna assembly around the tilt pivot point to minimise the torque the servo must produce — an imbalanced heavy Yagi will drain your servo fast and produce jittery movement.
3D Printed Parts
Numerous free designs are available on Thingiverse and Printables for antenna tracker pan-tilt mounts. Search for “antenna tracker bracket” and print in PETG or ABS for outdoor use in Indian summer heat. PLA will soften and warp at temperatures above 60°C, which is easily reached inside a car or on a sun-baked field.
Electronics and Wiring
The wiring for a DIY tracker is straightforward:
- Telemetry radio module → Arduino Mega Serial1 (pins 18/19 for RX/TX).
- GPS module (for tracker position) → Arduino Mega Serial2 (pins 16/17).
- Compass (I2C) → SDA/SCL pins on the Arduino.
- Pan servo signal wire → Arduino pin 9.
- Tilt servo signal wire → Arduino pin 10.
- Servo power (5V) → separate 5V BEC or regulated supply. Do not power servos from Arduino’s 5V pin.
Use shielded cable for the telemetry and GPS connections to avoid RF interference from the servo PWM signals. Keep servo wires away from the receiving antenna feedline — servo PWM can introduce noise into sensitive RF circuits.
Software Setup: OpenAVRc and INAV Tracker
INAV Antenna Tracker Firmware
INAV includes dedicated Antenna Tracker firmware that runs on the same STM32-based boards as INAV flight firmware. This is the easiest path for INAV-based builds: flash INAV antenna tracker firmware to a spare flight controller board, connect it to your telemetry radio and servos, and configure it through the INAV Configurator. It reads MSP or MAVLink telemetry and drives the servos automatically.
OpenAVRc / Deviationtx AAT
For FrSky / OpenTX-based setups, the AAT (Auto Antenna Tracker) module integrates with your transmitter’s telemetry display. The tracker module sits between your transmitter and antenna and physically aims the antenna based on GPS data coming through the SPort telemetry channel.
Mission Planner Tracker (ArduPilot)
ArduPilot’s Mission Planner includes an antenna tracker plugin that can drive servos connected to a companion Arduino via serial, reading MAVLink GPS data from the main telemetry stream. This is the simplest software setup for ArduPilot users — no additional firmware is needed.
Calibration and Field Testing
Compass Calibration
The tracker’s compass must be calibrated and the declination offset for your location entered. In India, magnetic declination varies from approximately 0° in the northeast to -2° in the southwest. Enter this value in your tracker software to get accurate north-seeking.
Servo Centre and Range
Before attaching the antenna, manually verify that 0° pan commands result in the tracker pointing true north (or whatever reference direction you set). Verify that 0° tilt is level with the horizon and 90° tilt points straight up. Adjust servo endpoints in software until these are correct.
Field Calibration Walk
For your first field test, walk 50 metres away from the tracker with your GPS transmitter (or a phone GPS spoofed to your drone’s GPS output). The tracker should follow you continuously. Walk in a circle around the tracker at 50 metres distance and confirm it tracks smoothly throughout 360°.
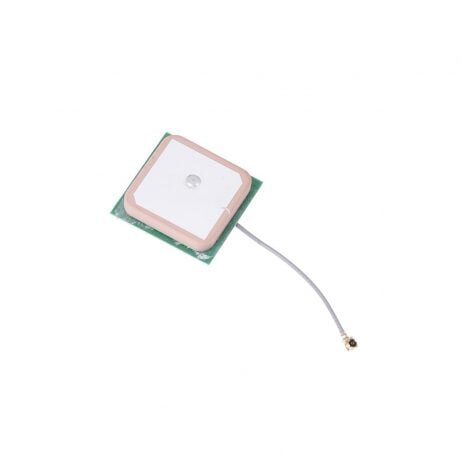
28dB High Gain Ceramic GPS Antenna for NEO-6M/7M/8M
A high-gain active GPS patch antenna to power the tracker’s own position fix module, ensuring accurate tracker location data even in open field conditions.
Recommended Products from Zbotic
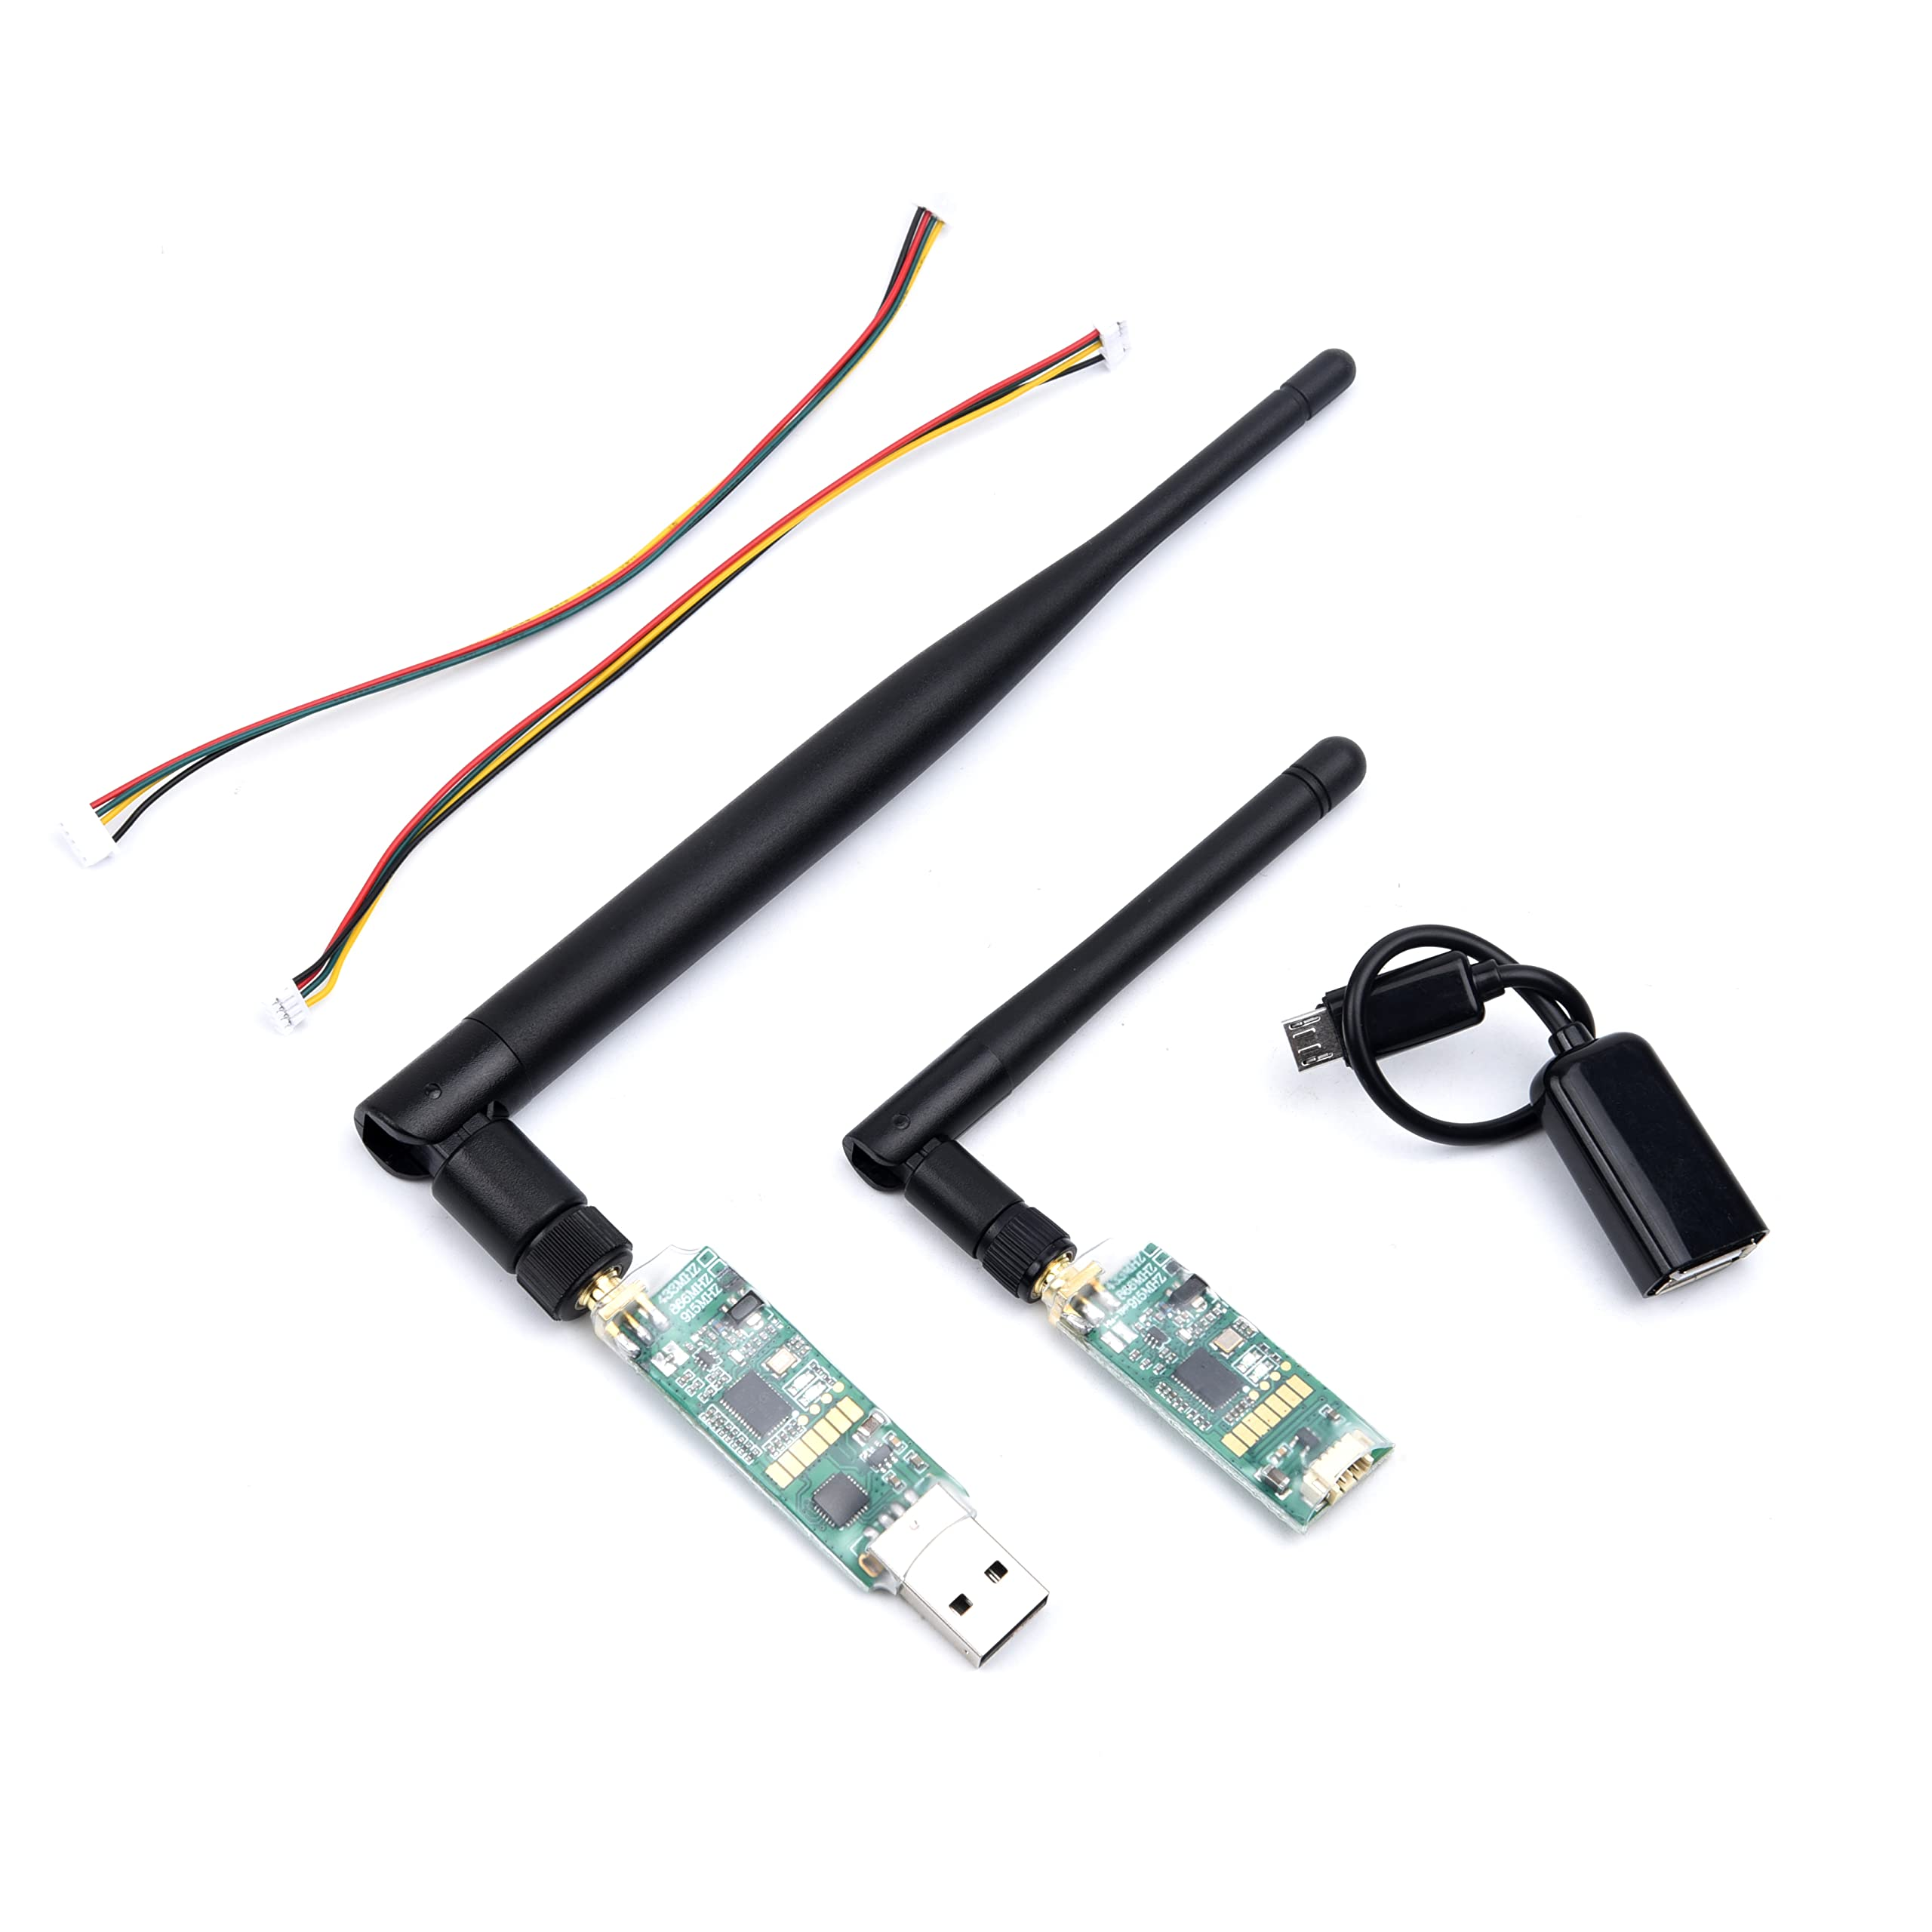
3DR Mini Telemetry 433MHz 500mW for Pixhawk and APM
Compact 433 MHz telemetry pair for long-range MAVLink streams. Use this as the ground-side radio feeding GPS data to your antenna tracker controller.
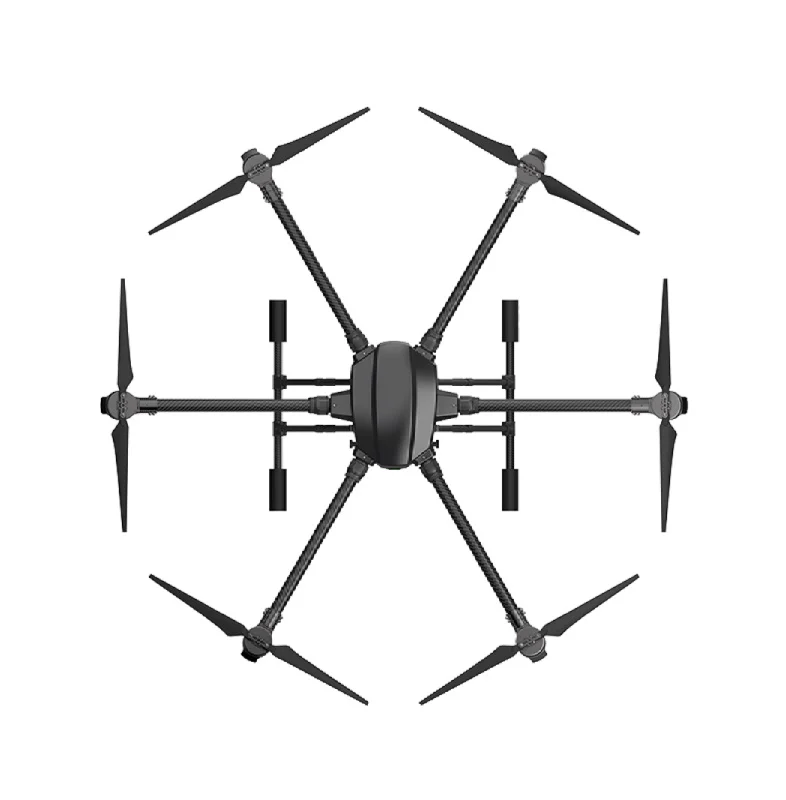
EFT 6120 Multifunction Surveillance Drone Frame
A long-endurance hexacopter frame built for surveillance missions — the type of aircraft that benefits most from a ground-based antenna tracker for extended-range operations.
Frequently Asked Questions
How much range can an antenna tracker realistically give?
With a 13 dBi Yagi antenna on the tracker, a 200 mW 5.8 GHz video transmitter, and clear line of sight, ranges of 5–8 km are achievable. With a 500 mW 5.8 GHz transmitter and similar antenna, 10–12 km has been demonstrated. RC control range with ELRS and a 2.4 GHz Yagi tracker can exceed 30 km in ideal conditions.
Do I need a tracker for ELRS?
ELRS (ExpressLRS) with a standard patch antenna can often reach 20+ km without a tracker due to its excellent sensitivity. An antenna tracker is more beneficial for the video downlink at 5.8 GHz, which has much higher path loss than 2.4 GHz RC links.
Can I use an antenna tracker in India legally?
Flying beyond visual line of sight (BVLOS) in India requires DGCA approval regardless of your antenna setup. An antenna tracker enables BVLOS-capable range, but flying BVLOS without approval is illegal. Use your tracker for extended VLOS operations or ensure you have the appropriate permissions before flying beyond 450 metres altitude or beyond visual range.
What happens if the telemetry link breaks?
Most tracker firmware enters a hold-and-scan mode when telemetry is lost: it holds the last known pointing angle and performs a slow scan pattern to re-acquire the telemetry signal. Some advanced trackers use RSSI (signal strength) as a backup tracking signal when GPS telemetry is unavailable.
Is an antenna tracker worth building for a beginner?
An antenna tracker is a rewarding intermediate-level project. You need competent soldering skills and basic familiarity with Arduino programming or embedded firmware flashing. A beginner who can already fly FPV comfortably and has done some DIY electronics builds will find it very achievable over a weekend.
Extend Your FPV Range with Zbotic
Zbotic stocks telemetry radios, high-gain antennas, GPS modules, and heavy-duty drone frames perfect for long-range antenna tracker builds. All delivered to your door anywhere in India.


Add comment