
When you need a simple analog temperature sensor for an Arduino project, two names always come up: the LM35 and the TMP36. Both are inexpensive, 3-pin analog sensors that output a voltage proportional to temperature. But they differ in their output formulas, supply voltage requirements, and temperature range — and choosing the wrong one for your circuit can produce completely incorrect readings.
This guide provides a thorough TMP36 vs LM35 comparison with exact formulas, wiring diagrams, and Arduino code for both sensors so you can make the right choice and measure temperature correctly from day one.
What Are TMP36 and LM35?
Both sensors are analog integrated circuit temperature sensors — meaning they produce a DC voltage output that varies linearly with temperature, with no digital conversion needed. Connect power and ground, read the voltage with an ADC (like Arduino’s built-in 10-bit ADC), apply a formula, and you have a temperature reading.
- The LM35 is made by Texas Instruments (originally National Semiconductor). It has been in production since the 1970s and remains popular in educational and industrial settings.
- The TMP36 is made by Analog Devices. It has a wider supply voltage range (2.7–5.5 V vs LM35’s 4–30 V) and can measure negative temperatures with a single supply.
Both come in standard TO-92 (plastic transistor) packages with three pins, making them look almost identical. Read the markings carefully — they are not pin-compatible and produce different output voltages for the same temperature.
LM35 Specifications and Output Formula
LM35 Output Equation
Vout = 10 mV/°C × Temperature (°C)

Examples:
  At 0°C:   Vout = 0.000 V
  At 25°C:  Vout = 0.250 V
  At 100°C: Vout = 1.000 V
The LM35 outputs exactly 0 V at 0°C, which seems intuitive, but it creates a problem: you cannot measure negative temperatures with a standard single-supply circuit. To measure below 0°C, the output would need to go negative, which a standard ADC cannot read.
LM35 Key Specifications
| Parameter | Value |
|---|---|
| Output scale | 10 mV/°C |
| Output at 0°C | 0.000 V |
| Supply voltage | 4 V – 30 V |
| Temperature range | −55°C to +150°C (LM35DZ: 0°C to +100°C) |
| Accuracy | ±0.5°C at 25°C (typical) |
| Output impedance | 0.1 Ω (loaded), very low |
| Quiescent current | 60 µA typical |
| Package | TO-92, TO-46, SOIC |
LM35 Variants
- LM35A: ±1°C accuracy over full −55°C to +150°C range
- LM35C/CA: Rated for −40°C to +110°C range
- LM35D/DZ: 0°C to +100°C range only, lower cost
For Arduino projects, the common LM35DZ (0–100°C range) is the most affordable and readily available variant.

LM35 Temperature Sensors
Classic 10 mV/°C analog output temperature sensor. Ideal for Arduino temperature monitoring, HVAC, and learning projects. Easy to use.
TMP36 Specifications and Output Formula
TMP36 Output Equation
Vout = 500 mV + (10 mV/°C × Temperature)

Or rearranged to find temperature:
Temperature (°C) = (Vout_mV − 500) / 10

Examples:
  At −40°C: Vout = 0.100 V
  At 0°C:   Vout = 0.500 V
  At 25°C:  Vout = 0.750 V
  At 100°C: Vout = 1.500 V
The TMP36 includes a 500 mV offset at 0°C. This is the key difference from the LM35. The offset means the output at room temperature is around 0.75 V — well within the ADC measurement range — and even at −40°C, the output is still 0.1 V (positive), so negative temperatures can be measured with a standard single-supply circuit.
TMP36 Key Specifications
| Parameter | Value |
|---|---|
| Output scale | 10 mV/°C |
| Output at 0°C | 0.500 V |
| Supply voltage | 2.7 V – 5.5 V |
| Temperature range | −40°C to +125°C |
| Accuracy | ±2°C at 25°C (typical), ±1°C with calibration |
| Output impedance | 1 Ω |
| Quiescent current | 50 µA typical |
| Package | TO-92, SOT-23 |
Side-by-Side Comparison Table
| Feature | LM35 | TMP36 |
|---|---|---|
| Output at 0°C | 0 V | 0.5 V |
| Sensitivity | 10 mV/°C | 10 mV/°C |
| Min supply voltage | 4 V | 2.7 V |
| Max supply voltage | 30 V | 5.5 V |
| Below-zero (single supply) | No (output goes negative) | Yes (output stays positive) |
| Temperature range | 0–100°C (LM35DZ) | −40°C to +125°C |
| Accuracy (typical) | ±0.5°C | ±2°C (±1°C with calibration) |
| 3.3V Arduino friendly | Partial (requires 4V VCC) | Yes (2.7V minimum) |
| Formula complexity | Simpler (no offset) | Slight offset subtraction |
| Availability in India | Excellent | Good |
Wiring Both Sensors to Arduino
LM35 Pinout (TO-92 package, flat face toward you)
    LM35 TO-92 (flat face)
    ┌───────────────┐
    │  VCC  OUT  GND│
    │  (1)  (2)  (3)│
    └───────────────┘

VCC (Pin 1) → 5V (must be ≥4V)
OUT (Pin 2) → Arduino A0
GND (Pin 3) → GND

Add 100nF bypass cap between VCC and GND (close to the sensor)
TMP36 Pinout (TO-92 package, flat face toward you)
    TMP36 TO-92 (flat face)
    ┌───────────────┐
    │  VCC  OUT  GND│
    │  (1)  (2)  (3)│
    └───────────────┘

VCC (Pin 1) → 3.3V or 5V
OUT (Pin 2) → Arduino A0
GND (Pin 3) → GND

Note: LM35 and TMP36 look IDENTICAL but have different output formulas!
Important: The LM35 and TMP36 have the same physical pin arrangement — but their output voltages for a given temperature are completely different. Always double-check the IC marking on the package before connecting.
Arduino Code: LM35
// LM35 Temperature Sensor - Arduino Code
// Power sensor from 5V. Connect output to A0.

const int LM35_PIN = A0;
const float VREF = 5.0;           // Arduino reference voltage
const int ADC_RESOLUTION = 1023;  // 10-bit ADC

void setup() {
  Serial.begin(9600);
  Serial.println("LM35 Temperature Sensor");
}

void loop() {
  // Average 10 readings to reduce noise
  long sum = 0;
  for (int i = 0; i < 10; i++) {
    sum += analogRead(LM35_PIN);
    delay(10);
  }
  int rawValue = sum / 10;

  // Convert ADC reading to voltage
  float voltage = rawValue * (VREF / ADC_RESOLUTION);

  // LM35 formula: Temp (°C) = Voltage (mV) / 10
  float temperature_C = (voltage * 1000.0) / 10.0;
  float temperature_F = (temperature_C * 9.0 / 5.0) + 32.0;

  Serial.print("Raw ADC: "); Serial.print(rawValue);
  Serial.print(" | Voltage: "); Serial.print(voltage, 3); Serial.print(" V");
  Serial.print(" | Temp: "); Serial.print(temperature_C, 1); Serial.print(" C");
  Serial.print(" / "); Serial.print(temperature_F, 1); Serial.println(" F");

  delay(1000);
}
Arduino Code: TMP36
// TMP36 Temperature Sensor - Arduino Code
// Works with 3.3V or 5V supply. Connect output to A0.

const int TMP36_PIN = A0;
const float VREF = 5.0;  // Change to 3.3 if using 3.3V supply

void setup() {
  Serial.begin(9600);
  Serial.println("TMP36 Temperature Sensor");
}

void loop() {
  // Average 10 readings
  long sum = 0;
  for (int i = 0; i < 10; i++) {
    sum += analogRead(TMP36_PIN);
    delay(10);
  }
  float rawValue = sum / 10.0;

  // Convert to voltage
  float voltage = rawValue * (VREF / 1023.0);

  // TMP36 formula: Temp (°C) = (Voltage_mV - 500) / 10
  float temperature_C = (voltage * 1000.0 - 500.0) / 10.0;
  float temperature_F = (temperature_C * 9.0 / 5.0) + 32.0;

  Serial.print("Voltage: "); Serial.print(voltage, 3); Serial.print(" V");
  Serial.print(" | Temp: "); Serial.print(temperature_C, 1); Serial.print(" C");
  Serial.print(" / "); Serial.print(temperature_F, 1); Serial.println(" F");

  delay(1000);
}
Improving Accuracy with AREF
The biggest source of error for both sensors on Arduino is ADC reference voltage instability. The Arduino’s 5V rail varies with USB voltage and current draw — often ranging from 4.9 V to 5.1 V. Since the temperature formula divides by VREF, a 2% variation in VREF causes a 2% error in temperature (about 0.5°C at 25°C).
Two ways to improve this:
Method 1: Use Internal 1.1V Reference
Arduino has a built-in 1.1 V precision reference. For LM35 measuring 0–100°C (output 0–1.0 V), this is a perfect match:
void setup() {
  analogReference(INTERNAL); // 1.1V internal reference
  // ... rest of setup
}

// In loop, use VREF = 1.1:
float voltage = rawValue * (1.1 / 1023.0);
float temp_C  = (voltage * 1000.0) / 10.0; // LM35
Caution: Do NOT connect the sensor output to the AREF pin when using INTERNAL reference.
Method 2: Use External Precision Reference
For the highest accuracy, connect a precision 3.3 V or 2.5 V voltage reference (e.g., LM4040, REF3033) to the AREF pin and call analogReference(EXTERNAL). This eliminates VREF instability entirely.
Measuring Negative Temperatures with LM35
The standard LM35 circuit cannot measure below 0°C with a single supply because the output goes to 0 V at 0°C and cannot go negative. Two solutions:
Solution 1: Use a small pull-down resistor
Connect a 18 kΩ resistor between the sensor output pin and −5 V (or −15 V if available). This shifts the output so that 0°C corresponds to a positive voltage. Requires a dual-supply (±5V) power source — not practical for most Arduino projects.
Solution 2: Switch to TMP36
If you need to measure below 0°C with a single supply, simply use the TMP36 instead. Its 500 mV offset at 0°C means the output stays positive down to −40°C (output = 0.1 V at −40°C), readable by any standard ADC.
Which Sensor Should You Choose?
Choose LM35 when:
- You only need to measure temperatures from 0°C to 100°C (indoor environments, body temperature, electronics monitoring)
- You want the simplest possible formula (Voltage in mV ÷ 10 = °C with no offset subtraction)
- You need better specified accuracy out of the box (±0.5°C vs TMP36’s ±2°C typical)
- You have an existing 5V-powered Arduino project
- Availability is a priority — LM35 is extremely common in India
Choose TMP36 when:
- You need to measure below 0°C (cold storage, outdoor winter monitoring, refrigeration)
- You are using a 3.3V microcontroller (ESP32, ESP8266, STM32, Raspberry Pi) — the TMP36 works from 2.7V
- You are designing a low-power battery device (TMP36 draws slightly less quiescent current)
- You need the extended range up to 125°C
Digital Alternatives to Consider
While LM35 and TMP36 are easy to use, digital temperature sensors offer several advantages: they are immune to ADC noise, can be placed far from the microcontroller without signal degradation, and often have better specified accuracy.

DS18B20 Programmable Resolution Digital Temperature Sensor
1-Wire digital sensor with ±0.5°C accuracy, 9–12 bit resolution, and −55°C to +125°C range. Multiple sensors share one Arduino pin.

DHT11 Digital Temperature and Humidity Sensor Module
Measures both temperature and relative humidity digitally. ±2°C accuracy. Perfect for weather stations and home automation projects.
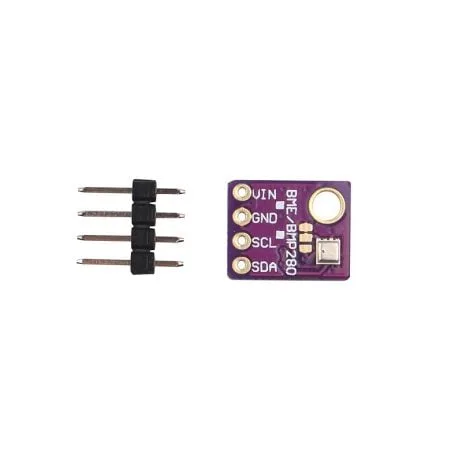
GY-BME280-5V Temperature and Humidity Sensor
Advanced I2C/SPI sensor for temperature, humidity, and pressure. ±1°C accuracy. Ideal for professional weather stations and IoT projects.
Quick Digital Sensor Comparison
| Sensor | Interface | Accuracy | Also measures |
|---|---|---|---|
| DS18B20 | 1-Wire | ±0.5°C | Temperature only |
| DHT11 | Single-wire | ±2°C | Temperature + Humidity |
| DHT22 | Single-wire | ±0.5°C | Temperature + Humidity |
| BME280 | I2C/SPI | ±1°C | Temp + Humidity + Pressure |
Frequently Asked Questions
Q: Why does my LM35 read 0°C even at room temperature?
This usually means the sensor is connected with the wrong orientation (GND and VCC swapped) or that you are using an incorrect formula. Verify the flat face of the TO-92 LM35 faces you: left pin = VCC, middle pin = Vout, right pin = GND. Also ensure VREF in the formula matches the actual supply voltage (not 3.3 V if using 5 V). If the reading is consistently zero, check that the output pin is not shorted to GND.
Q: Can I use LM35 with a 3.3V Arduino/ESP32?
The LM35 requires a minimum supply voltage of 4 V. Running it from 3.3 V will not damage it, but the output may be inaccurate because the internal circuit needs approximately 1 V headroom above the output, and at room temperature (25°C) the output is 0.25 V — giving only 3.05 V headroom on a 3.3 V supply. This is technically within spec, but the accuracy will degrade. For 3.3 V systems, use the TMP36 (works from 2.7 V) or a DS18B20.
Q: My TMP36 reads about 20°C too high. What is wrong?
This is the most common TMP36 mistake. If you are using the formula for LM35 (Voltage / 10 mV) instead of the TMP36 formula ((Voltage_mV − 500) / 10), you will always read 50°C too high. Also check if you accidentally swapped LM35 and TMP36 sensors — they look identical. At 25°C, the TMP36 outputs 0.75 V while the LM35 outputs 0.25 V. Measure the output with a multimeter to identify which sensor you have.
Q: Is LM35 or TMP36 suitable for measuring body temperature?
Both sensors can measure body temperature (36–37°C range), but neither is accurate enough for medical use out of the box. At 37°C, LM35 outputs 370 mV and TMP36 outputs 870 mV — both well within ADC range. However, accuracy of ±0.5°C (LM35) or ±2°C (TMP36) does not meet the ±0.1°C requirement for clinical thermometers. For body temperature projects (fitness or wellbeing, not medical), the LM35 with internal AREF calibration gives better results.
Q: Can I waterproof an LM35 or TMP36 sensor?
The bare TO-92 package is not waterproof. You can waterproof it by coating it with clear epoxy resin or heat-shrink tubing with glue liner, leaving only the pins exposed. However, for truly waterproof temperature measurement (liquid level, aquarium, outdoor pipe), the DS18B20 in stainless steel probe housing is a much better choice — it is rated for direct water immersion and comes factory-sealed.
Conclusion
Both the LM35 and TMP36 are excellent introductory temperature sensors that work reliably with Arduino when the correct formula and supply voltage are used. The LM35 wins on accuracy and simplicity for 0–100°C indoor applications with a 5 V supply. The TMP36 wins for battery-powered 3.3 V designs and applications requiring sub-zero temperature measurement.
For most hobbyist and educational projects measuring room temperature, either sensor will work well with basic averaging and the correct formula. When you need better accuracy, longer cable runs, or humidity measurement alongside temperature, step up to a digital sensor like the DS18B20, DHT22, or BME280.
Get Your Temperature Sensors from Zbotic
Zbotic stocks LM35, DS18B20, DHT11, DHT20, BME280, and more temperature sensors for every project. Free shipping on orders above ₹999.


Add comment