
Building a Raspberry Pi robot car with Python GPIO and camera vision is one of the most rewarding projects for electronics hobbyists in India. You combine real-time motor control, sensor integration, and live computer vision into a single mobile platform — all programmed in Python. Whether you’re a student exploring robotics or a maker wanting a capable autonomous bot, this guide walks you through every step: hardware selection, wiring, Python code, and OpenCV-based obstacle avoidance.
Hardware Requirements
Before writing a single line of Python, gather all the hardware components. For a Raspberry Pi robot car with camera vision you will need:
- Raspberry Pi 4B or 3B+ — the main compute board running Python
- 2WD or 4WD robot chassis — acrylic or aluminium frame with DC gear motors
- L298N or L293D motor driver module — bridges the Pi’s 3.3 V GPIO to 6–12 V motors
- Raspberry Pi Camera Module v2 or a compatible USB webcam
- HC-SR04 ultrasonic sensor — for distance measurement and obstacle detection
- 18650 Li-Ion battery pack or 4× AA battery holder — 7.4 V for motors, 5 V USB power bank for the Pi
- Jumper wires, breadboard, and M3 standoffs
- MicroSD card (16 GB minimum) with Raspberry Pi OS (Bullseye or Bookworm)
The total cost for a beginner build in India lands between ₹2,500 and ₹5,000 depending on chassis quality and whether you use a Camera Module or a USB webcam.
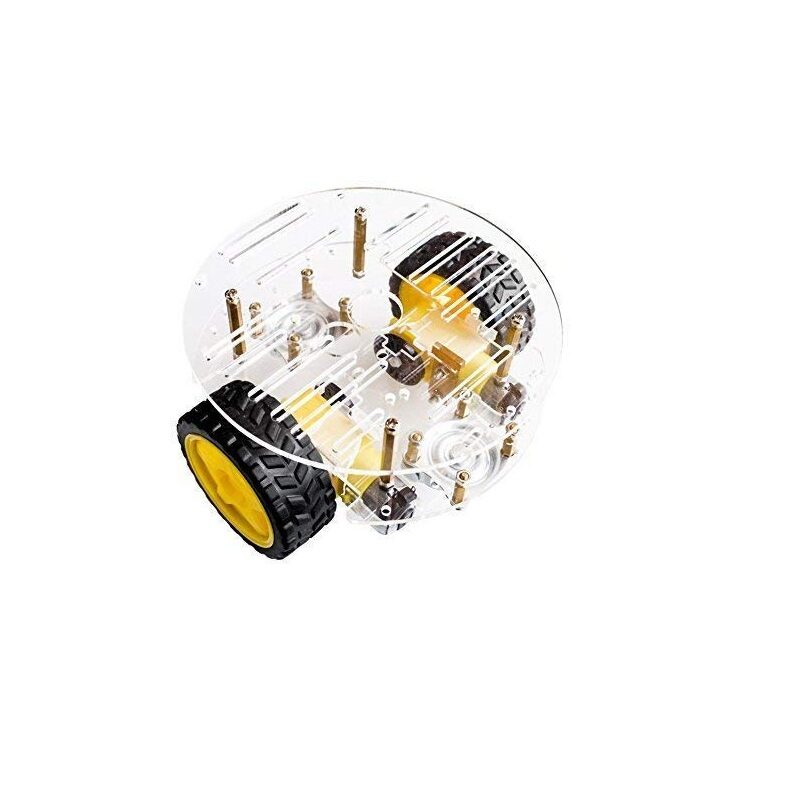
2WD Mini Round Double-Deck Smart Robot Car Chassis DIY Kit
Compact two-wheel-drive chassis with dual DC gear motors, encoder wheels, and a double-deck acrylic frame — perfect for mounting a Raspberry Pi and camera module on top.
Chassis Assembly & Motor Wiring
Most Indian robot car kits come with all screws and standoffs included. Follow these assembly steps:
- Attach the two DC gear motors to the bottom plate using M3 screws.
- Press-fit the rubber wheels onto the motor shafts or use the included hex couplings.
- Mount the caster wheel at the rear for three-point stability.
- Secure the L298N motor driver on the second deck with M3 nylon standoffs.
- Place the Raspberry Pi on the top deck, ensuring the camera slot faces forward.
- Run motor cables from the chassis to the L298N OUT1–OUT4 terminals.
L298N Wiring to Raspberry Pi GPIO:
| L298N Pin | Raspberry Pi GPIO (BCM) |
|---|---|
| IN1 | GPIO 17 |
| IN2 | GPIO 27 |
| IN3 | GPIO 22 |
| IN4 | GPIO 23 |
| ENA (PWM) | GPIO 18 |
| ENB (PWM) | GPIO 25 |
| GND | GND (Pin 6) |
Important: use a separate power supply for the motors. Never power the L298N from the Pi’s 5 V rail — high motor current will brown-out the Pi and corrupt the SD card.
Raspberry Pi GPIO Motor Control with Python
Install the RPi.GPIO library (pre-installed on Raspberry Pi OS) and create a motor driver class:
import RPi.GPIO as GPIO
import time

# BCM numbering
IN1, IN2, IN3, IN4 = 17, 27, 22, 23
ENA, ENB = 18, 25

GPIO.setmode(GPIO.BCM)
GPIO.setwarnings(False)
GPIO.setup([IN1, IN2, IN3, IN4, ENA, ENB], GPIO.OUT)

pwm_a = GPIO.PWM(ENA, 1000)  # 1kHz PWM
pwm_b = GPIO.PWM(ENB, 1000)
pwm_a.start(0)
pwm_b.start(0)

def set_motors(left_speed, right_speed):
    """speed: -100 to 100 (negative = reverse)"""
    # Left motor
    GPIO.output(IN1, left_speed > 0)
    GPIO.output(IN2, left_speed  0)
    GPIO.output(IN4, right_speed < 0)
    pwm_b.ChangeDutyCycle(abs(right_speed))

def forward(speed=70):  set_motors(speed, speed)
def backward(speed=70): set_motors(-speed, -speed)
def turn_left(speed=60):  set_motors(-speed, speed)
def turn_right(speed=60): set_motors(speed, -speed)
def stop():              set_motors(0, 0)
PWM speed control lets you fine-tune torque — vital for smooth turning and line following. Duty cycle 70 works well for most 200 RPM gear motors at 7.4 V.
Camera Module Setup
Enable the camera interface in raspi-config → Interface Options → Camera (for legacy camera support) or use the new libcamera stack on Bookworm.
Install OpenCV:
pip3 install opencv-python-headless picamera2
# Or for legacy picamera:
pip3 install picamera opencv-python-headless
Capture a frame with picamera2:
from picamera2 import Picamera2
import cv2

cam = Picamera2()
cam.configure(cam.create_preview_configuration(
    main={"size": (320, 240), "format": "RGB888"}
))
cam.start()

while True:
    frame = cam.capture_array()
    # frame is a NumPy array — ready for OpenCV
    cv2.imshow("Robot View", frame)
    if cv2.waitKey(1) & 0xFF == ord('q'):
        break
Use 320×240 resolution for real-time processing at 30+ fps on a Pi 4. Higher resolutions drop frame rate and increase latency.
OpenCV Line Following & Obstacle Avoidance
Line following with OpenCV uses HSV colour thresholding to detect a black line on a white surface:
import cv2
import numpy as np

def get_line_error(frame):
    # Crop bottom third for near-ground view
    h, w = frame.shape[:2]
    roi = frame[int(h*0.6):h, :]

    gray = cv2.cvtColor(roi, cv2.COLOR_RGB2GRAY)
    _, thresh = cv2.threshold(gray, 60, 255, cv2.THRESH_BINARY_INV)

    M = cv2.moments(thresh)
    if M["m00"] > 500:
        cx = int(M["m10"] / M["m00"])
        error = cx - w // 2   # positive = line is to the right
        return error
    return None

Kp = 0.3  # proportional gain
base_speed = 60

while True:
    frame = cam.capture_array()
    error = get_line_error(frame)

    if error is not None:
        correction = int(Kp * error)
        set_motors(base_speed - correction, base_speed + correction)
    else:
        stop()  # line lost — halt
This proportional controller steers the robot to keep the line centred in the camera view. Tune Kp — too high causes oscillation, too low causes slow correction.
Ultrasonic Sensor Integration
The HC-SR04 provides distance data for obstacle stopping:
TRIG, ECHO = 24, 25
GPIO.setup(TRIG, GPIO.OUT)
GPIO.setup(ECHO, GPIO.IN)

def get_distance_cm():
    GPIO.output(TRIG, False)
    time.sleep(0.01)
    GPIO.output(TRIG, True)
    time.sleep(0.00001)
    GPIO.output(TRIG, False)

    t1 = time.time()
    while GPIO.input(ECHO) == 0:
        t1 = time.time()
    t2 = time.time()
    while GPIO.input(ECHO) == 1:
        t2 = time.time()

    return (t2 - t1) * 17150  # distance in cm
In your main loop, call get_distance_cm() and stop the motors if the reading falls below 20 cm.
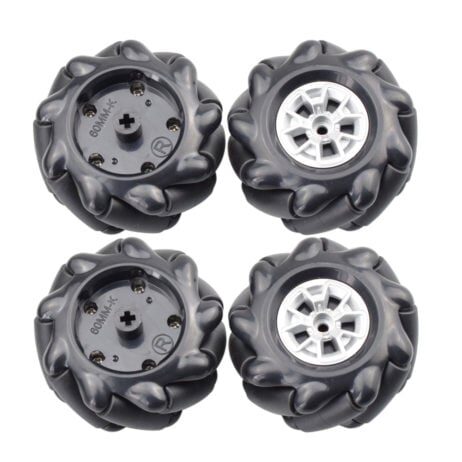
60MM-K Mecanum Wheel (Pack of 4) – Black
Upgrade your robot car to omnidirectional movement. These 60mm mecanum wheels let the Pi robot strafe sideways — ideal for advanced maze-solving projects.
Complete Python Code — Autonomous Robot Car
Combining all modules into a single script:
#!/usr/bin/env python3
import RPi.GPIO as GPIO, cv2, time
from picamera2 import Picamera2

# --- GPIO setup (as above) ---
# ... (motor and ultrasonic setup)

cam = Picamera2()
cam.configure(cam.create_preview_configuration(
    main={"size": (320, 240), "format": "RGB888"}
))
cam.start()
time.sleep(1)

Kp, base_speed = 0.3, 60

try:
    while True:
        dist = get_distance_cm()
        if dist < 20:
            stop()
            time.sleep(0.5)
            backward(50)
            time.sleep(0.4)
            turn_right(60)
            time.sleep(0.35)
            continue

        frame = cam.capture_array()
        error = get_line_error(frame)
        if error is not None:
            correction = int(Kp * error)
            set_motors(base_speed - correction,
                       base_speed + correction)
        else:
            stop()
except KeyboardInterrupt:
    stop()
    GPIO.cleanup()
    cam.stop()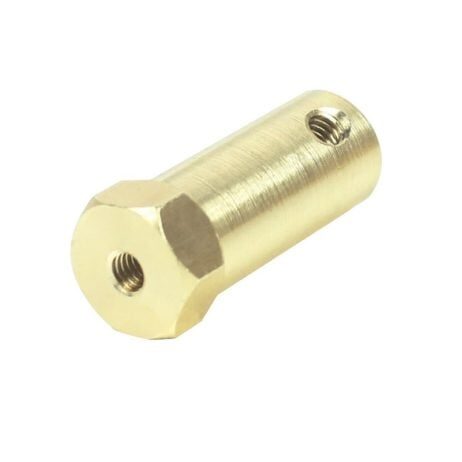
4mm Hex Coupling for Robot Smart Car Wheel (30mm)
Securely couple DC motor shafts to robot wheels. These 4mm hex couplings fit most standard 2WD/4WD chassis motors and ensure zero slippage at full speed.
Troubleshooting Tips
- Motors not spinning: Check ENA/ENB jumpers on L298N — they must be removed if you are using PWM, or shorted for full-speed mode.
- Pi keeps rebooting: Motor power draw is causing USB power supply brownout. Always power Pi and motors separately.
- Camera not detected: Run
vcgencmd get_camera(legacy) orlibcamera-hello. Ensure flat-flex ribbon is seated firmly. - OpenCV slow on Pi 3: Drop resolution to 160×120 and convert to grayscale before processing. Use
THRESH_BINARYinstead of Canny edge detection. - HC-SR04 giving erratic readings: Use a 1kΩ + 2kΩ voltage divider on the ECHO pin — 5 V logic can damage Pi GPIO.
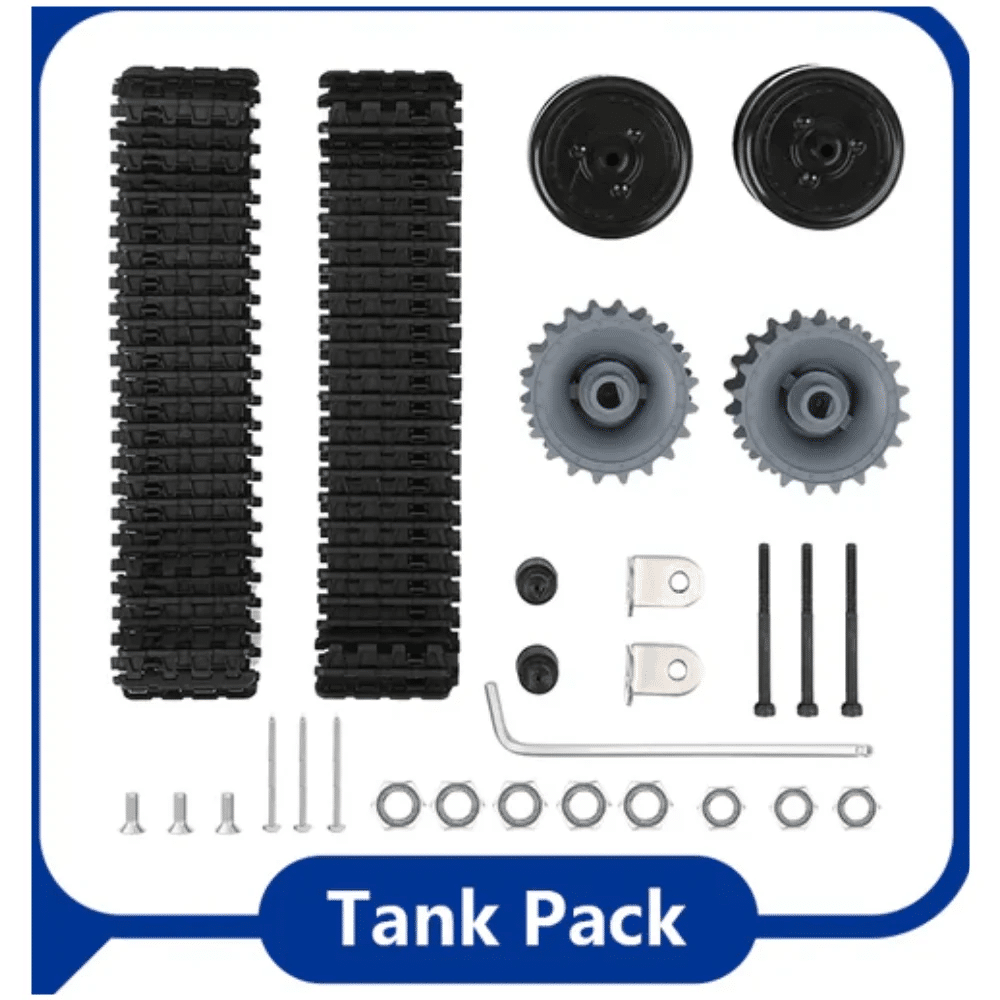
ACEBOTT ESP32 Tank Robot Car Expansion Pack (QD001–QD004)
Take your robot to the next level with this ESP32-powered tank chassis expansion. Add camera vision, IR sensors, and WiFi remote control right out of the box.
Frequently Asked Questions
Can I use Arduino instead of Raspberry Pi for a camera robot car?
Arduino lacks the RAM and processing power for real-time OpenCV camera vision. Use the Raspberry Pi for vision tasks and an Arduino as a motor co-processor if needed, communicating over UART or I2C.
Which Raspberry Pi model is best for a robot car?
The Raspberry Pi 4B (2 GB or 4 GB) is ideal — it handles 1080p camera capture and OpenCV frame processing simultaneously without throttling. Pi 3B+ is acceptable for 320×240 vision at 30fps.
How do I stream the camera feed live to a browser?
Use Flask with MJPEG streaming: encode each frame as JPEG with cv2.imencode and yield it in a multipart HTTP response. Access the stream at http://[Pi-IP]:5000/video_feed on any browser on the same network.
What is the best battery for a Raspberry Pi robot car?
Use two separate power sources: a 5V/3A USB power bank for the Raspberry Pi, and a 2S 18650 Li-Ion pack (7.4V) for the motors via the L298N. This prevents motor surge from interfering with the Pi’s power rail.
How accurate is line following with a Pi camera and OpenCV?
With a 320×240 crop and proportional controller at 30fps, a Pi camera robot can follow a 20mm black tape line at speeds up to 0.5 m/s. Accuracy improves significantly by adding a derivative (PD) controller term.
Ready to Build Your Raspberry Pi Robot Car?
All the components for this project — robot chassis, wheels, hex couplings, and motor drivers — are available at Zbotic.in with fast shipping across India. Start your build today and bring your autonomous robot to life.


Add comment