
Knowing how to desolder components cleanly and efficiently is just as important as knowing how to solder them in the first place. Whether you need to salvage an expensive IC from a scrap board, fix a mistake in your PCB assembly, or replace a faulty capacitor in a power supply, desoldering is an unavoidable part of every electronics hobbyist’s life. The good news is that with the right technique and tools, desoldering can be fast, clean, and non-destructive — even on multi-layer PCBs. This guide covers all three major desoldering methods with step-by-step instructions.
Before You Start: Tools and Safety
Successful desoldering starts with the right setup. Rushing into desoldering with a cold iron, the wrong tip, or no flux is the fastest way to destroy pads, overheat components, and ruin your board. Here is what you need before you start:
Essential Tools
- Soldering iron: A temperature-controlled iron is mandatory. Set it to 300–350°C for lead-free solder (SAC305), or 280–320°C for leaded solder. Never use a fixed-temperature “25W iron” for desoldering — the temperature will swing wildly and you will either not melt the solder or overheat the pad.
- Solder wick (desoldering braid): A copper braid impregnated with flux. Comes in widths from 1.5mm to 3.5mm. Wider braid for larger pads, narrower for fine pitch SMD work.
- Desoldering pump: A spring-loaded suction device. Cheap and effective for through-hole components. Get one with a silicone tip, not a plastic one — silicone handles the heat much better.
- Flux: Liquid or gel flux is the single most important consumable in desoldering. Adding flux to old, oxidised solder joints dramatically improves wetting and makes the solder flow and wick properly. Never desolder without adding fresh flux.
- Tweezers: Bent-tip anti-static tweezers for holding SMD components during removal. Regular steel tweezers risk shorting adjacent pads.
- PCB holder / helping hands: A third hand is critical — you need both hands free when operating an iron and pump simultaneously.
Safety First
Desoldering generates solder fumes and flux vapour. Always work in a well-ventilated area, ideally with a fume extractor pointing at the work surface. Lead-based solder (common in older Indian electronics and PCBs from budget suppliers) produces toxic lead fumes — wash hands thoroughly after every session. Never rub your eyes when desoldering. Keep the soldering iron in its stand when not actively soldering; a second of inattention with a 350°C tip causes serious burns.
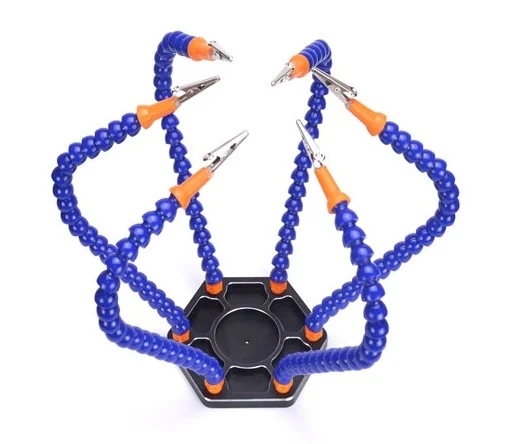
6 Flexible Arms Soldering Station With Swiveling Alligator Clip
A six-arm helping hands station holds your PCB securely at any angle while you work, leaving both hands free to operate the iron and desoldering pump simultaneously.
Method 1: Solder Wick (Desoldering Braid)
Solder wick is the most universally applicable desoldering tool. It works through capillary action — the flux-impregnated copper mesh draws molten solder up into its strands like a sponge draws water. Once the braid is saturated, you simply snip off the used section and continue with fresh braid.
Step-by-Step: Using Solder Wick
- Choose the right braid width. For standard through-hole pads, use 2.5–3.0mm braid. For SMD 0402/0603 components, use 1.5mm braid to avoid bridging adjacent pads.
- Apply fresh flux. This is the most important step that beginners skip. Apply liquid flux directly to the solder joint and to the braid itself. Old solder is often oxidised and will not wick cleanly without fresh flux. A single drop of liquid flux or a smear of flux gel transforms a frustrating desoldering job into an easy one.
- Place the wick on the joint. Lay the braid flat on top of the solder joint, then press your iron tip onto the top of the braid. Do not press too hard — a light touch is enough. The braid conducts heat down to the solder joint.
- Wait for wicking. Within 2–4 seconds, you will see the solder melt and wick up into the braid. The braid will change colour from shiny copper to silver/grey as it fills with solder.
- Lift wick and iron together. As soon as the solder is wicked up, lift the wick AND the iron simultaneously. If you lift the iron first and leave the wick, it will cool and stick to the pad, potentially ripping up the pad when you pull it off.
- Inspect and repeat. Check if all the solder is removed. If the hole is clear or the SMD pad is clean, you are done. If residual solder remains, snip the used section of braid and repeat with a fresh section.
- Clean up. Wipe the area with isopropyl alcohol (IPA) on a cotton swab to remove flux residue. Flux residue left on the board can cause corrosion and tracking issues over time.
Pro tip: If you are struggling to get the solder to wick, tin the iron tip freshly before placing the braid. A well-tinned tip makes thermal contact much faster. Also, if the braid seems dry or ineffective, soak it in liquid flux before use.
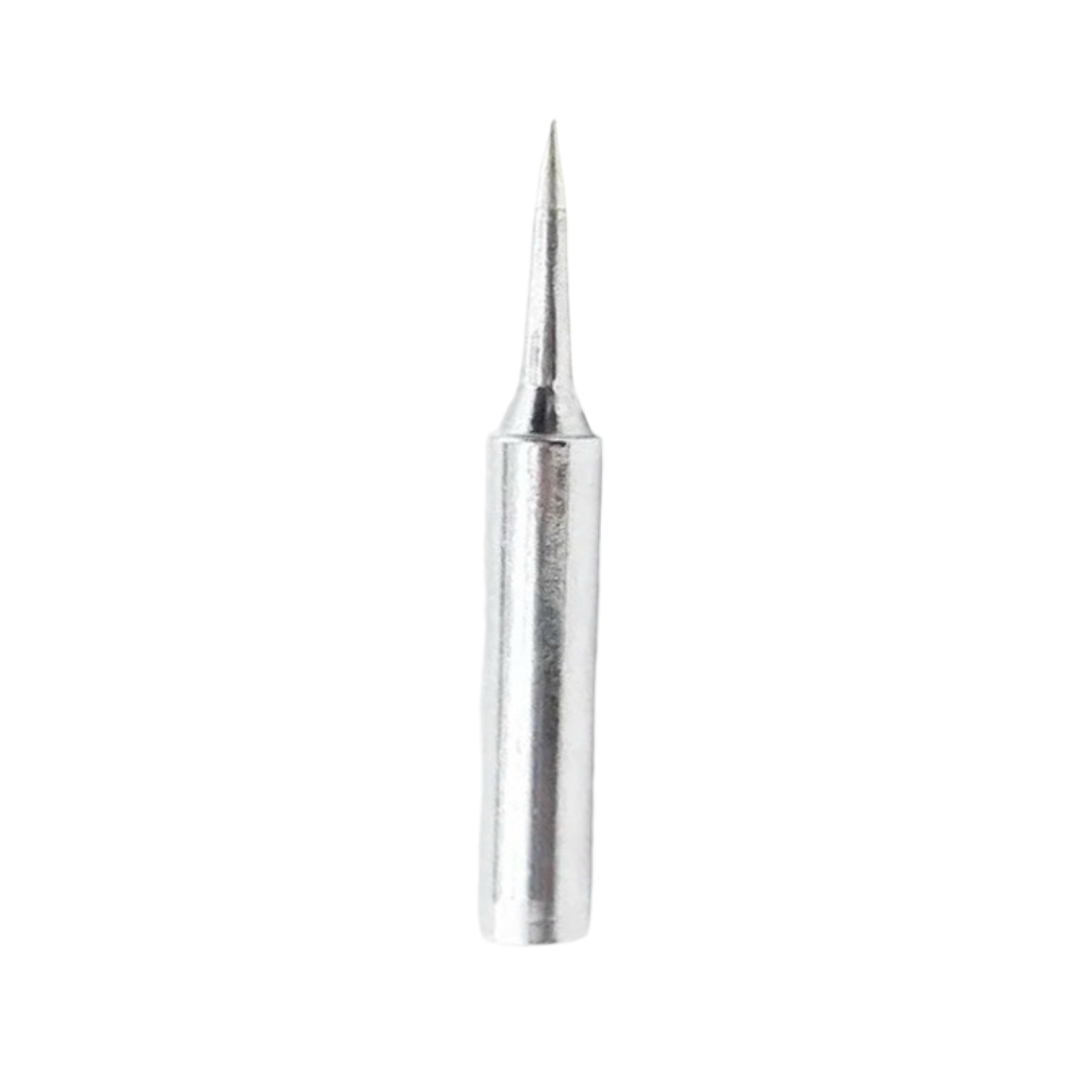
BAKON Soldering Iron Tip 900M-T-I
A quality replacement soldering iron tip for 900M series irons. A clean, freshly-tinned tip is essential for efficient heat transfer when using solder wick.
Method 2: Desoldering Pump (Solder Sucker)
The desoldering pump is the fastest method for clearing solder from through-hole component leads and vias. It works by creating a vacuum that sucks up the molten solder in a fraction of a second. The best pumps have a teflon or silicone tip, a wide-bore barrel for maximum vacuum, and an easy-clean design.
Step-by-Step: Using a Desoldering Pump
- Prime the pump. Press the plunger down until it locks in the cocked position. The spring mechanism is now loaded and ready to release on demand.
- Heat the joint. Apply your soldering iron tip directly to the solder joint. Wait until the solder is fully molten — you will see it go shiny and start to flow. This typically takes 2–5 seconds.
- Position the pump tip. While keeping the iron on the joint, place the pump tip (the nozzle) directly on the molten solder, right next to the iron tip. The pump tip and iron tip should both be touching the molten solder at the same time.
- Trigger the pump. Press the release button on the desoldering pump. The spring-loaded plunger releases, creating a sudden vacuum that sucks the molten solder up into the barrel. This happens in milliseconds — it should be immediate.
- Remove iron and pump. Lift both the iron and pump simultaneously. Check the hole — it should be completely clear of solder, with a clean round hole visible through the PCB.
- Clean the pump. Extend the plunger to eject the solidified solder pellet from the barrel. Pump nozzles block easily — clear the barrel after every 2–3 uses. Most pumps have a removable nozzle for cleaning.
- Repeat if necessary. If the hole is not fully clear, add a small amount of fresh solder to the joint (this sounds counterintuitive but improves the thermal contact), then repeat the pumping operation.
Common mistake: Not having the iron on the joint long enough before triggering the pump. If the solder is not fully molten when you trigger, the pump will only capture a tiny amount. The joint needs to be fully liquid — if it looks dull or doesn’t flow freely, it’s not ready.
Method 3: Hot Air Rework Station
A hot air rework station (also called a heat gun station or SMD rework station) directs a focused stream of hot air at the solder joint. Unlike an iron that makes contact at one point, hot air heats all pads of a component simultaneously, making it the only practical method for removing multi-pad SMD ICs, QFP packages, and fine-pitch components.
Hot Air Temperature and Flow Settings
Start with these settings and adjust based on your results:
- SOIC-8 to SOIC-28: 320–360°C, airflow 3–4 (medium-low)
- QFP (0.5mm pitch and above): 340–380°C, airflow 2–3 (low to prevent component movement)
- BGA (Ball Grid Array): 380–420°C, airflow 2–3, with preheating the board from below
- SMD resistors and capacitors (0402/0603/0805): 300–330°C, airflow 3–4
Step-by-Step: Hot Air Component Removal
- Apply flux around all pads and leads of the target component. Use gel flux for easy application around IC leads.
- Protect neighbouring components. For SMD work, place small pieces of aluminium foil or Kapton tape over adjacent components to shield them from the hot air. SMD capacitors and resistors can easily fly off the board from the airflow if they are not shielded.
- Heat the component. Hold the hot air nozzle 1–2cm above the component and move it in a small circular motion over the component. Do not concentrate heat in one spot.
- Watch for reflow. After 20–60 seconds (depending on component size and board thickness), the solder will reflow. You will see the component slightly shift or settle as the solder becomes liquid. At this point, the pads are all molten simultaneously.
- Remove the component. Using tweezers or a vacuum pickup tool, gently lift the component straight up. Do not drag it sideways — you will take the pads with it. If it doesn’t lift easily, the solder is not fully molten — keep heating.
- Clean the pads. After component removal, use solder wick and flux to clean up any remaining solder blobs on the pads, leaving them flat and ready for a new component.
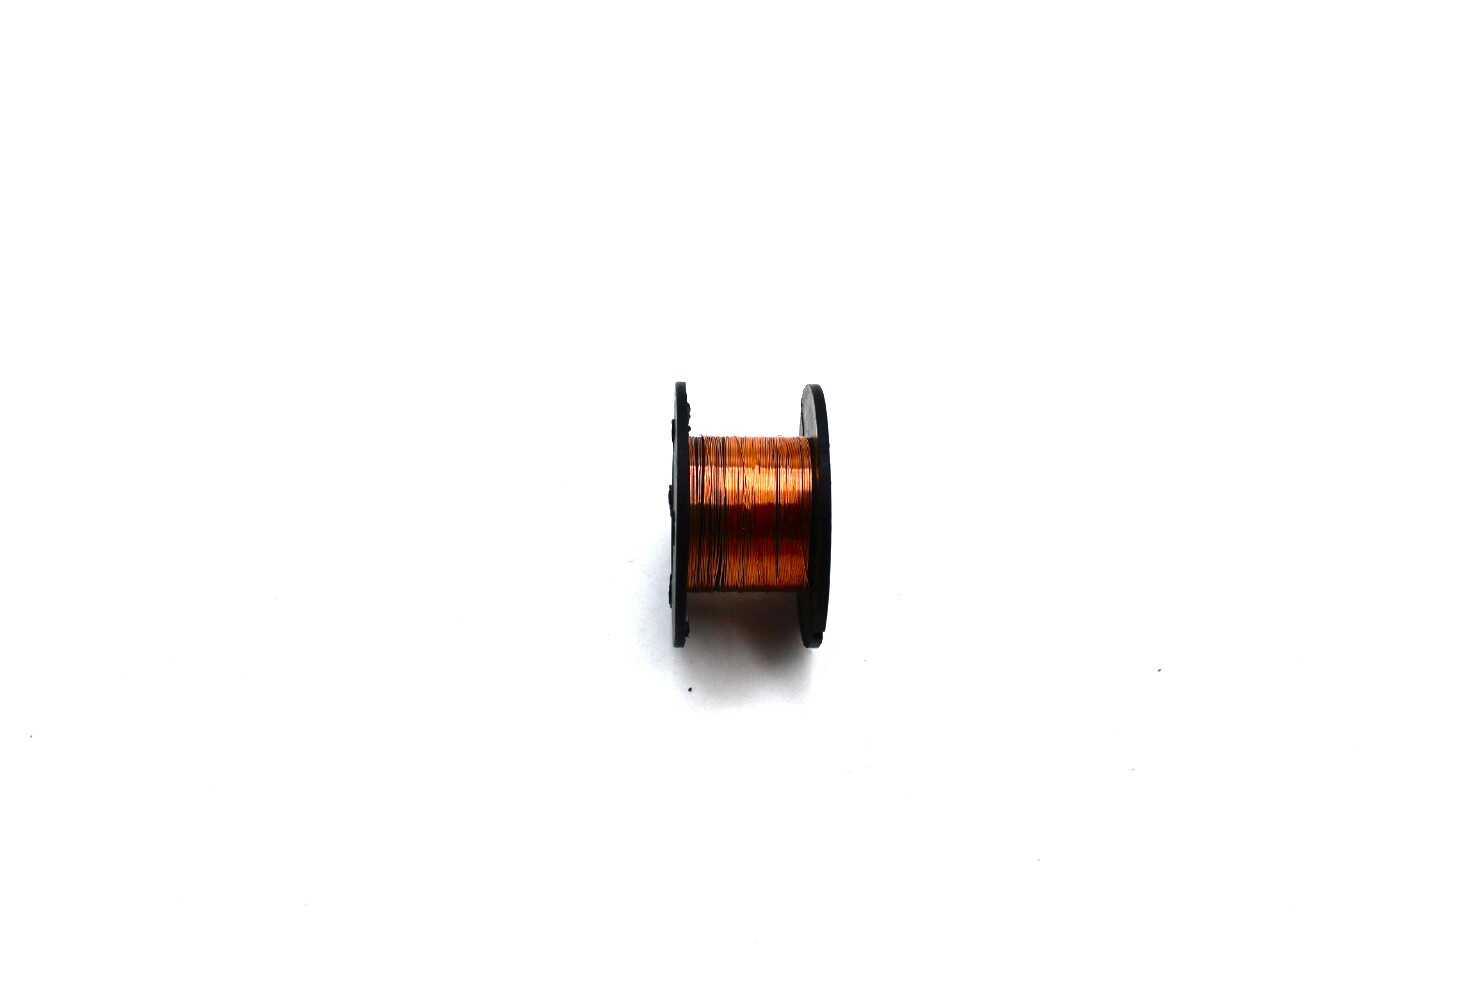
0.1mm Copper Soldering Solder PPA Enamelled Repair Wire
Ultra-fine 0.1mm enamelled copper repair wire for jumper repairs and trace reconstruction after pad damage during desoldering. Essential for PCB rework.
Desoldering Through-Hole Components
Through-hole components (resistors, capacitors, transistors, connectors) are the easiest to desolder because the leads are accessible from both sides of the board. The standard approach is to use the desoldering pump first, then finish with solder wick to clean any remaining residue.
For components with multiple pins in a row (DIP ICs, terminal blocks), add a generous amount of flux to all pins and work along the row with the iron and pump, clearing one pin at a time before attempting to extract the component. Only try to pull the component out when every single pin is free — forcing it out with even one pin still soldered will rip the pad right off the board.
For components with very large pads or thick copper pours (common in power supply boards), you may need to increase your iron temperature to 370–400°C temporarily to overcome the heat sink effect of the large copper area. Return to normal temperature after desoldering.
Desoldering SMD Components
SMD desoldering is where beginners often struggle. The key insight is that for two-pad SMD components (resistors, capacitors, diodes), you can often use a single soldering iron tip to bridge both pads simultaneously, melting both solder joints at once and sliding the component off with tweezers. This technique, called the “drag and slide” method, works well for 0805 and larger components but becomes unreliable for 0603 and 0402.
For 0603 and smaller, use hot air. For anything with three or more pads (transistors, power modules), always use hot air. Never try to desolder a 3-pin SOT-23 transistor with an iron — you will almost always bridge pads or damage the component.
Desoldering ICs and Multi-Pin Chips
Multi-pin DIP ICs (Arduino’s ATmega328P, 555 timer, op-amps in DIP-8 packages) are the most common candidates for desoldering in hobbyist repairs. The safest approach with a pump is:
- Add fresh flux to all pins
- Clear each pin individually with pump (14 pins for DIP-14, 8 pins for DIP-8)
- After all pins appear clear, gently try to wiggle the IC body slightly — it should have almost no resistance
- Use a flat tool (like a spudger or a flat-blade screwdriver protected with tape) to gently lever the IC out evenly from both sides, a little at a time
If the IC pins are not worth salvaging (they are damaged, or it’s a faulty chip), cut the IC body away from the leads first with flush cutters. Then desolder each individual pin stub from the board one at a time — this is far easier and eliminates the risk of pad damage from trying to pull out a partially-desoldered IC.

10×10 cm Universal PCB Prototype Board
Practice your desoldering technique on this affordable perfboard before tackling real repairs. Build mock circuits and practise wick and pump techniques risk-free.
Frequently Asked Questions
My solder wick is not wicking up the solder. What am I doing wrong?
The three most common causes are: (1) Not enough flux — add fresh liquid flux to both the braid and the joint. (2) Iron temperature is too low — increase to at least 320°C for lead-free solder. (3) Old braid — the flux impregnation in solder wick has a shelf life. Braid exposed to air for more than a year may have degraded flux. Soak it in fresh flux before use. If the braid turns brown without lifting any solder, it’s the flux that’s the issue.
I’ve lifted a pad while desoldering. Can I repair it?
Yes. Lifted pads are common on cheap PCBs and old boards. For SMD pads, use UV-cure PCB repair epoxy to re-anchor the pad, then use fine magnet wire (28–32 AWG) to bridge the lifted pad to the nearest via or trace. For through-hole pads, solder a pin-to-pin jumper wire on the component side. The fine 0.1mm repair wire available from Zbotic is perfect for this type of trace repair work.
How do I know when the solder is fully melted before using the pump?
Watch the solder joint carefully — molten solder has a bright, liquid mirror finish. Solid or partially-molten solder appears dull or matte. When the joint goes fully shiny and you can see the solder flowing around the lead, it’s ready. On a new board with shiny solder, it can be harder to see; in that case, give it 1 second longer than you think you need.
Can I use a regular hair dryer instead of a hot air station?
No. A hair dryer’s maximum temperature is about 80–120°C, far below the 183°C melting point of eutectic solder (or 217°C for lead-free solder). You need a proper hot air rework station that reaches 300–400°C. Budget hot air stations are available from ₹1,500 upwards and are a worthwhile investment if you do regular SMD rework.
Is there a way to desolder a multi-pin IC without a hot air station?
Yes — Chip Quick is a low-melting-point alloy that you apply to all pins of the IC simultaneously. It lowers the effective melting point of the solder, allowing you to keep all pins molten at once with a regular iron and sweep the chip off with a brush. It is the professional technique for DIP IC removal without a pump station. However, it is expensive and not easy to find in India. The pump method, done carefully pin by pin, is the practical Indian hobbyist alternative.
Upgrade Your Soldering Toolkit
From soldering tips and helping-hand stations to jumper wires and prototype boards — Zbotic has everything the Indian electronics hobbyist needs to get the job done right. Explore our full range of soldering and prototyping accessories.


Add comment