
If you are building an IoT project and want to send data securely to a cloud server, mastering the ESP32 HTTPS REST API POST method is essential. The ESP32 microcontroller is one of the most popular choices among Indian electronics enthusiasts and professionals for building connected devices. Its built-in Wi-Fi, powerful dual-core processor, and rich library support make it ideal for securely communicating with cloud platforms using HTTPS.
In this tutorial, we will walk you through everything you need to know to make secure HTTPS POST requests from an ESP32 to a REST API endpoint — from setting up SSL certificates to structuring your JSON payload and parsing responses. Whether you are sending temperature readings, GPS coordinates, or custom sensor data, this guide has you covered.
Why Use HTTPS for ESP32 REST API Communication?
HTTP (plain text) communication is convenient for local development but completely unsafe for sending data over the internet. Any attacker who can intercept your Wi-Fi traffic can read your API keys, sensor data, or authentication tokens. HTTPS solves this by encrypting the entire connection using TLS (Transport Layer Security).
When you use the ESP32 HTTPS REST API approach, every byte of data between your device and the cloud server is encrypted. This is especially important for projects involving:
- Industrial sensor data with commercial value
- Home automation systems with security implications
- Medical IoT devices tracking patient vitals
- Agricultural monitoring systems storing proprietary farm data
- Any project connecting to commercial APIs that require authentication headers
The ESP32’s hardware accelerated cryptographic engine makes TLS handshakes much faster than on older 8-bit microcontrollers. It supports AES, SHA, RSA, and ECC — the core building blocks of modern HTTPS.
Prerequisites and Hardware Required
Before you begin, make sure you have the following:
- An ESP32 development board (any variant works)
- Arduino IDE 2.x or PlatformIO
- ESP32 board package installed in Arduino IDE
- A Wi-Fi network with internet access
- A cloud REST API endpoint (we will use a test server)
- ArduinoJson library v6+ (install via Library Manager)

Ai Thinker NodeMCU-32S-ESP32 Development Board – IPEX Version
This NodeMCU-32S board is perfect for HTTPS REST API projects — it has dual-core 240MHz processor, 520KB SRAM, and robust Wi-Fi/Bluetooth for stable cloud communication.
Understanding SSL/TLS Certificates on ESP32
The most critical concept for HTTPS on ESP32 is certificate verification. There are three approaches:
1. Using Root CA Certificate (Recommended)
You supply the root CA certificate of the server you are connecting to. The ESP32 uses it to verify the server’s identity. This is the most secure method and prevents man-in-the-middle attacks.
2. Skipping Certificate Verification (Insecure)
You call client.setInsecure() which disables certificate checking. This still encrypts the connection but does NOT verify the server’s identity. Fine for local testing, never for production.
3. Using a Certificate Bundle (ESP-IDF)
The esp_crt_bundle approach bundles Mozilla’s trusted CA store into your firmware. Great for connecting to many different cloud providers without updating certificates manually.
To get a server’s root CA certificate, you can use OpenSSL from your Linux/Mac terminal:
openssl s_client -connect your-api-server.com:443 -showcertsCopy the last certificate in the chain (the root CA), save it as a string in your Arduino sketch, and pass it to the WiFiClientSecure object.
Setting Up Arduino IDE for HTTPS Requests
Install the following libraries before proceeding:
- WiFiClientSecure — built into the ESP32 Arduino core, no separate install needed
- HTTPClient — also built-in, provides high-level HTTP/HTTPS methods
- ArduinoJson — install from Library Manager (search for “ArduinoJson” by Benoit Blanchon)
In Arduino IDE, go to Tools > Board > ESP32 Arduino and select your board. Set the upload speed to 115200 baud. Make sure your ESP32 board package is version 2.0.x or higher for best TLS support.

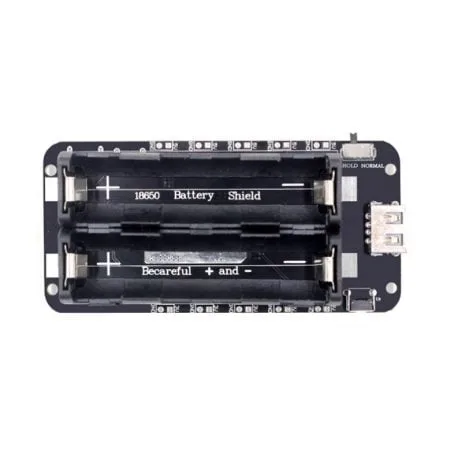
2 x 18650 Lithium Battery Shield for Arduino/ESP32/ESP8266
Power your ESP32 REST API node remotely with this dual 18650 battery shield — ideal for field deployments where mains power is unavailable.
Complete Code: ESP32 HTTPS POST to REST API
Below is a complete, production-ready Arduino sketch for posting JSON data via HTTPS to a REST API. We use httpbin.org as a test server — it echoes back whatever you POST to it, making it perfect for development.
#include <WiFi.h>
#include <WiFiClientSecure.h>
#include <HTTPClient.h>
#include <ArduinoJson.h>

const char* ssid = "YOUR_WIFI_SSID";
const char* password = "YOUR_WIFI_PASSWORD";

// Root CA for httpbin.org (DigiCert Global Root CA)
const char* rootCACert =
"-----BEGIN CERTIFICATE-----n"
"MIIDrzCCApegAwIBAgIQCDvgVpBCRrGhdWrJWZHHSjANBgkqhkiG9w0BAQUFADBhn"
"... (truncated — paste full certificate here) ...n"
"-----END CERTIFICATE-----n";

void setup() {
  Serial.begin(115200);
  WiFi.begin(ssid, password);
  while (WiFi.status() != WL_CONNECTED) {
    delay(500);
    Serial.print(".");
  }
  Serial.println("nWiFi connected!");
  postDataToAPI();
}

void postDataToAPI() {
  WiFiClientSecure client;
  client.setCACert(rootCACert);
  // For testing only — remove in production:
  // client.setInsecure();

  HTTPClient https;
  String url = "https://httpbin.org/post";

  if (https.begin(client, url)) {
    https.addHeader("Content-Type", "application/json");
    https.addHeader("Authorization", "Bearer YOUR_API_TOKEN");

    // Build JSON payload
    StaticJsonDocument<256> doc;
    doc["device_id"] = "esp32_node_001";
    doc["temperature"] = 28.5;
    doc["humidity"] = 65.2;
    doc["timestamp"] = millis();

    String jsonPayload;
    serializeJson(doc, jsonPayload);

    int httpCode = https.POST(jsonPayload);

    if (httpCode == HTTP_CODE_OK || httpCode == HTTP_CODE_CREATED) {
      String response = https.getString();
      Serial.println("Response: " + response);
    } else {
      Serial.printf("POST failed, code: %dn", httpCode);
    }
    https.end();
  }
}

void loop() {
  delay(60000); // Post every 60 seconds
  if (WiFi.status() == WL_CONNECTED) {
    postDataToAPI();
  }
}
Key points about this code:
WiFiClientSecurehandles the TLS layer automaticallysetCACert()validates the server’s identity against the provided root certificateHTTPClientwraps the secure client and provides convenientPOST(),GET()methodsaddHeader()lets you attach Authorization tokens, Content-Type, and custom headers- Always call
https.end()to free up memory — ESP32 has limited RAM
Structuring JSON Payloads and Parsing Responses
Most modern REST APIs communicate using JSON. The ArduinoJson library makes creating and parsing JSON straightforward on ESP32. Here is how to handle a more complex API response:
// Parse API response
DynamicJsonDocument responseDoc(1024);
DeserializationError error = deserializeJson(responseDoc, response);

if (!error) {
  const char* status = responseDoc["status"];
  int recordId = responseDoc["data"]["id"];
  Serial.printf("Status: %s, Record ID: %dn", status, recordId);
} else {
  Serial.println("JSON parse error: " + String(error.c_str()));
}
Best practices for JSON payloads in IoT:
- Use
StaticJsonDocumentfor payloads under 256 bytes — it allocates on the stack - Use
DynamicJsonDocumentfor larger or variable-size documents — allocates on heap - Always size your document slightly larger than needed (add 20% buffer)
- Use
serializeJsonPretty()during development for readable output, switch toserializeJson()for production

Ai Thinker ESP32-C3-01M Wi-Fi + BLE Module
The compact ESP32-C3 module with RISC-V core supports HTTPS natively and is ideal for space-constrained cloud-connected IoT products.
Popular Cloud Platforms for Indian IoT Projects
India has seen rapid growth in IoT deployments across agriculture, manufacturing, and smart cities. Here are the most popular cloud platforms that Indian developers use with ESP32 HTTPS REST APIs:
ThingsBoard (Open Source)
ThingsBoard is extremely popular in India for industrial IoT. It has a self-hosted option (ideal for MSME budgets), supports HTTPS REST telemetry APIs, and has an excellent dashboard builder. The API endpoint for posting telemetry is POST /api/v1/{ACCESS_TOKEN}/telemetry.
AWS IoT Core
Amazon Web Services is widely used for enterprise IoT in India. AWS IoT Core uses X.509 client certificates for authentication — you will need to embed the device certificate, private key, and Amazon Root CA in your firmware. The MQTT protocol is preferred, but HTTPS is supported via the POST /topics/{topic} endpoint.
Google Firebase Realtime Database
For hobbyists and startups, Firebase offers a simple REST API with HTTPS. You can PUT or PATCH data directly to your database URL: https://your-project.firebaseio.com/sensors/node1.json. Google’s root CA is widely trusted.
Adafruit IO
Adafruit IO is beginner-friendly and has a clear REST API. Post sensor data with a simple HTTPS POST and your AIO key in the header. Free tier supports 30 data points per minute — sufficient for most student projects.
Custom Node.js/Python Backend
Many Indian companies deploy their own REST API servers using Express.js or FastAPI on AWS EC2 or DigitalOcean. If you own a domain with a Let’s Encrypt certificate, you can extract the root CA (ISRG Root X1) and use it in your ESP32 sketch.
2 x 18650 Lithium Battery Shield V8 – 5V/3A for ESP32
Deploy your ESP32 HTTPS API node anywhere with this V8 battery shield — provides stable 5V/3A output from two 18650 cells with USB charging.
Frequently Asked Questions
Q1: Why does my ESP32 HTTPS request fail with “certificate verify failed”?
This usually means the root CA certificate in your sketch does not match the server’s certificate chain, or the certificate has expired. Re-extract the root CA using OpenSSL and update your sketch. Also check that your ESP32’s time is synchronized via NTP — TLS validation requires accurate system time.
Q2: How do I add NTP time sync before HTTPS requests?
Add these lines before your first HTTPS call: configTime(19800, 0, "pool.ntp.org"); (19800 seconds = IST UTC+5:30). Then wait in a loop until time(nullptr) returns a value greater than 1000000000.
Q3: Can I use ESP32 HTTPS POST with authentication headers?
Yes. Use https.addHeader("Authorization", "Bearer your_token_here"); before calling https.POST(). For Basic Auth: https.setAuthorization("username", "password");.
Q4: What is the maximum payload size for ESP32 HTTPS POST?
ESP32 has 520KB of SRAM (with more available via PSRAM on some models). Practically, keep JSON payloads under 4KB for smooth operation. For larger data, use multipart upload or chunk your data across multiple POST requests.
Q5: Is HTTPS on ESP32 slower than plain HTTP?
The initial TLS handshake takes 1-3 seconds on first connection. However, you can reuse the same WiFiClientSecure connection for multiple requests using HTTP Keep-Alive. After the handshake, subsequent requests are nearly as fast as plain HTTP.
Ready to Build Your ESP32 HTTPS IoT Node?
Get all the ESP32 modules, sensors, and power solutions you need from Zbotic — India’s trusted electronics components store with fast delivery across India.


Add comment