
Choosing the right power supply for Arduino options is one of the most fundamental decisions you will make when starting any electronics project. Whether you are a student building your first circuit in Pune, a hobbyist prototyping a home automation system in Bengaluru, or a professional maker preparing a product demo in Delhi, getting power delivery right determines whether your Arduino runs reliably or frustratingly restarts at the worst moments. This guide breaks down every mainstream power supply approach, compares the trade-offs honestly, and helps you pick the correct solution for your specific use case.
Why Power Supply Quality Matters for Arduino
The Arduino Uno, Nano, Mega, and their variants all have an on-board voltage regulator (typically the AMS1117 or LM7805 family) that converts an incoming voltage (7–12 V recommended) to a stable 5 V rail for the microcontroller. This regulator is a linear type — it burns off excess voltage as heat. When the input voltage is too high, the chip gets hot and throttles. When the input is too low (below roughly 6.6 V for a Uno), the 5 V rail sags and the MCU resets.
Beyond voltage level, current capacity matters enormously. An Arduino Uno itself draws only 40–50 mA at 5 V, but the moment you attach an SG90 servo (up to 500 mA stall), an HC-SR04 ultrasonic sensor, an OLED display, and an SIM800L GSM module, total current can easily exceed 1 A. Undersized supplies cause brownouts, mysterious resets, and corrupted data.
In the Indian context, mains voltage fluctuations (especially in tier-2 and tier-3 cities) add another variable. A cheap unbranded adapter may nominally say 12 V but output anywhere from 9 V to 14 V depending on load and grid voltage. Always check with a multimeter before trusting a no-brand adapter.
USB Power: Convenient but Limited
Powering via the USB port is the default for most beginners. The USB spec guarantees 5 V at 500 mA from a standard port (USB 2.0) or up to 900 mA from USB 3.0. Modern phone chargers and fast-charge adapters can supply 2–3 A at 5 V, making them adequate for most Arduino setups.
Pros
- Zero additional hardware — plug the included cable into any laptop, power bank, or phone charger.
- Simultaneously programs and powers the board (no need to disconnect for uploads).
- Phone chargers with 2 A output handle Arduino + moderate peripherals without issue.
- Power banks give you a portable, rechargeable option for field demonstrations.
Cons
- USB delivers 5 V directly to the 5 V pin, bypassing the on-board regulator entirely. The USB port’s poly-fuse protects the host computer but provides minimal protection to your circuit.
- If you attach high-current peripherals (motors, high-brightness LEDs, GSM modules), the 5 V rail can sag.
- Some laptop USB ports limit to 100 mA until USB enumeration completes — an issue when the Arduino draws current before being recognized.
- Cheap USB cables with thin conductors (26 AWG) can drop 0.3–0.5 V, reducing the 5 V supply to below 4.7 V.
Best for: Desktop prototyping, serial debugging, low-current sensor projects, classroom setups.
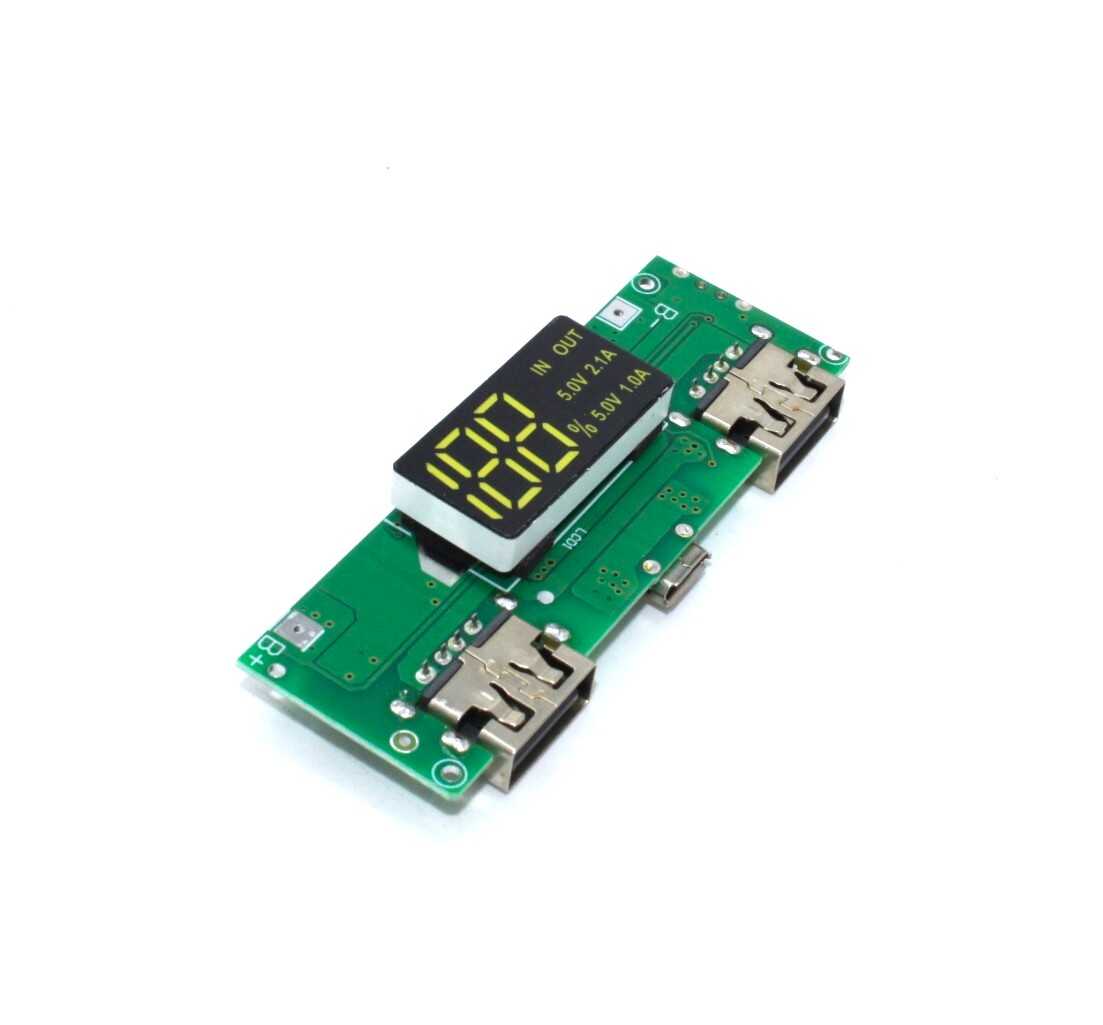
18650 5V 1A/2A Lithium Battery Charging Module with Dual USB Output
A compact boost module that takes a single 18650 cell and outputs 5 V at up to 2 A via dual USB ports — perfect for powering an Arduino Uno or Nano from a rechargeable lithium cell with a built-in voltage display.
9V Battery: Portable but Short-Lived
The humble 9V PP3 battery (also called 6F22 in India) is arguably the most popular beginner power source for portable Arduino projects. Connect it to the barrel jack via a 9 V snap connector and the on-board regulator handles the rest.
Pros
- Widely available at every electronics market, Reliance Digital, or local kirana-style hardware shop across India.
- Clean, regulated voltage profile — output stays near 9 V until almost fully depleted.
- No charging circuit required; just swap when depleted.
- Safe for beginners — no risk of high-current shorts.
Cons
- Capacity is shockingly low: a typical alkaline 9 V battery holds only 550–600 mAh. At 100 mA total draw (Arduino + a few sensors), you get roughly 5–6 hours. Add a servo or GSM module and runtime drops under 30 minutes.
- The on-board linear regulator dissipates (9 V − 5 V) × current as heat. At 200 mA, that is 800 mW — the small SOT-223 package will get uncomfortably hot.
- Cost per mAh is extremely poor compared to rechargeable lithium cells.
- Carbon-zinc 9 V batteries (common in budget packs) have even lower capacity and poor discharge curves.
Best for: Quick demos, science fair projects, short-term field use where swapping batteries is acceptable.
DC Barrel Jack Adapter: The Workshop Workhorse
A mains-powered DC adapter (wall wart) feeding 7–12 V into the Arduino’s barrel jack is the most reliable option for stationary workshop or home automation projects. The Arduino Uno accepts a 2.1 mm centre-positive barrel connector.
What Voltage Should You Use?
- 7–9 V: Ideal. The regulator dissipates less heat, runs cooler, and can supply more current to the 5 V rail before thermal limiting. A 9 V / 1 A adapter is the sweet spot for most projects.
- 12 V: Works fine for low-current projects. But at 300 mA load, the regulator dissipates 2.1 W — you may need a heatsink or active cooling in an enclosure.
- Do not exceed 12 V for extended use. The Arduino Mega can accept up to 12 V, but sustained use shortens regulator life.
Pros
- Virtually unlimited runtime — as long as mains power is available.
- High-quality adapters from brands like Syska, Anchor, or Molex deliver clean, stable voltage.
- Widely available in Indian electronics markets (Lamington Road Mumbai, SP Road Bengaluru, Nehru Place Delhi).
Cons
- Not portable — tethered to a wall socket.
- Cheap unbranded adapters can have high ripple voltage, causing ADC reading errors on sensitive sensor projects.
Best for: Home automation, workshop benches, long-running data loggers, any project that stays at a fixed location.
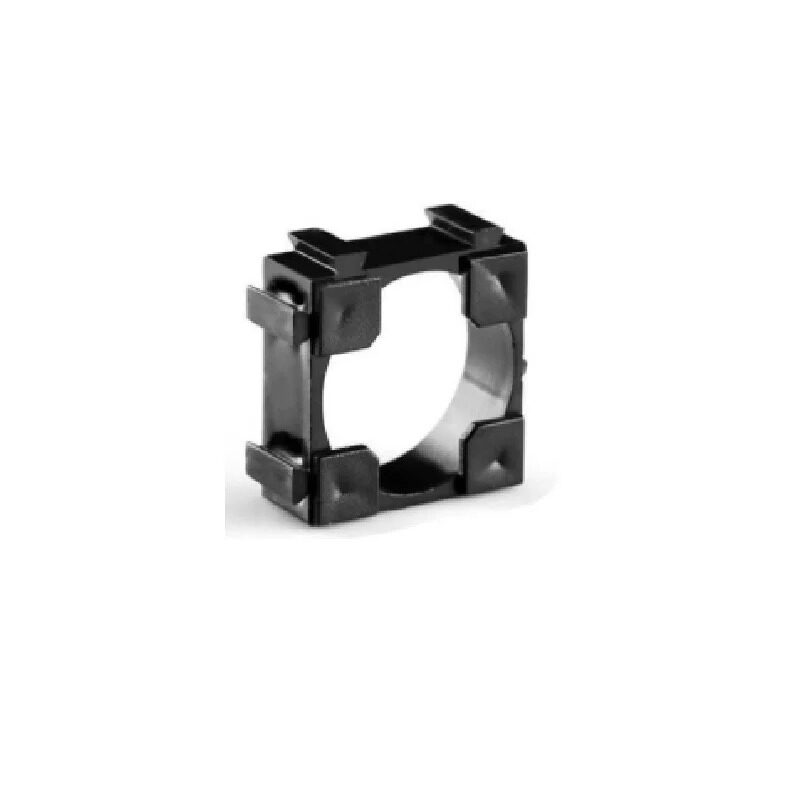
1 x 18650 Battery Holder with 18.4MM Bore Diameter (Pack of 4)
A sturdy single-cell 18650 holder that pairs perfectly with boost modules to build compact portable power supplies for Arduino, ESP32, or Raspberry Pi Pico projects.
LiPo and 18650 Li-ion: Best for Portable Projects
For any project that needs to be genuinely portable — wearables, robots, weather stations, agricultural sensor nodes in fields — rechargeable lithium cells are the correct answer.
18650 Li-ion Cells
An 18650 cell outputs 3.6–4.2 V at capacities of 2000–3500 mAh. To power a 5 V Arduino, you need a boost converter module. A single high-quality 3000 mAh 18650 cell will run an Arduino Uno with moderate peripherals for 20–40 hours. Multiple cells in parallel multiply this further.
LiPo Packs
Flat LiPo packs are available in 3.7 V (1S) to 11.1 V (3S) configurations. A 2S LiPo (7.4 V nominal) can feed the barrel jack directly and runs the on-board regulator at a very comfortable voltage, minimising heat. Capacities of 1000–5000 mAh are common in the Indian market.
Charging Solutions
Both cell types require a dedicated charger. The TP4056 module is the most popular single-cell Li-ion charger in the Indian maker community, available for under ₹30 from Zbotic.
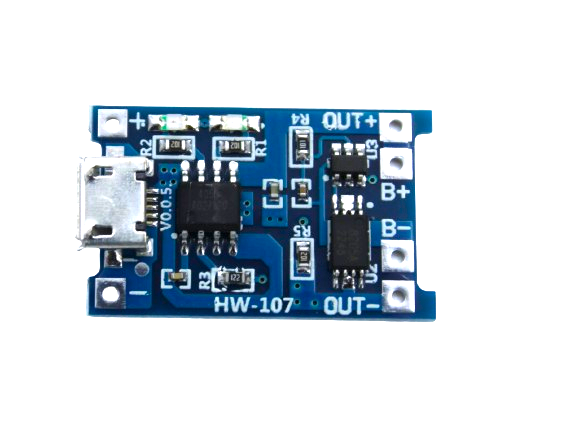
TP4056 1A Li-Ion Battery Charging Board Micro USB with Current Protection
The go-to single-cell Li-ion charger module for Indian makers. Built-in DW01A protection chip handles overcharge, over-discharge, and short-circuit protection automatically.
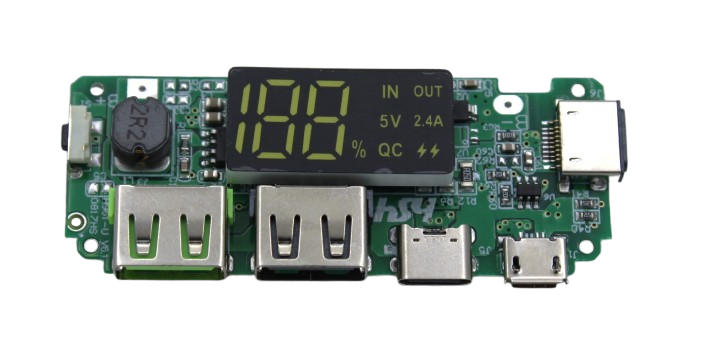
18650 5V 2.4A Lithium Battery Charging Module with Dual USB Output
Supports multiple 18650 cells in parallel, outputs 5 V at 2.4 A via dual USB ports, and includes a digital battery level display — ideal for high-current Arduino and ESP32 projects.
Voltage Regulators and External Power Shields
When your project grows beyond what the on-board regulator can handle, an external power module is the professional solution. The most common options in the Indian market are:
- MB102 Breadboard Power Supply Module: Accepts 6.5–12 V input, outputs selectable 3.3 V or 5 V at up to 700 mA. Plugs directly onto a standard 830-point breadboard. Excellent for sensor-heavy projects.
- LM2596 Buck Converter: Adjustable step-down module, accepts up to 40 V input, output adjustable 1.5–35 V at up to 3 A. Highly efficient (up to 92%) compared to linear regulators. For powering Arduino from 12 V car batteries or solar panels, this is the correct tool.
- XL6009 Boost Converter: Accepts 3–32 V input and boosts to 5–35 V at up to 4 A. Use this when your supply voltage is lower than 5 V (e.g., a single 3.7 V lithium cell).
Using an external regulated supply and feeding 5 V directly to the Arduino’s 5 V pin bypasses the on-board regulator entirely, maximising efficiency and current availability for peripherals.
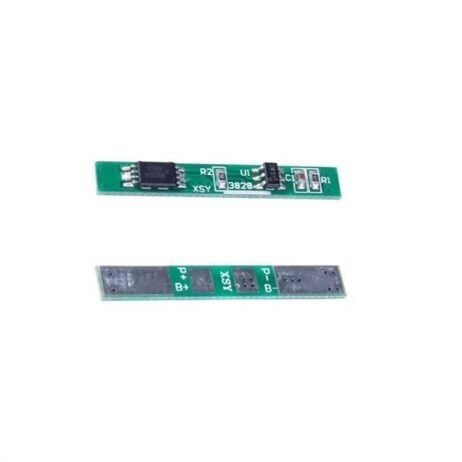
1S 3.7V 2A BMS Li-ion 18650 Battery Protection Board
Essential BMS protection circuit for DIY Arduino power packs. Prevents overcharge, over-discharge, and short-circuit faults on single 18650 Li-ion cells with up to 2 A continuous discharge.
Quick Comparison Table
| Supply Type | Voltage | Current | Portable? | Cost (India) | Best For |
|---|---|---|---|---|---|
| USB (Phone Charger) | 5 V | Up to 2 A | Semi | ₹100–300 | Desk prototyping |
| 9 V Alkaline Battery | 9 V | ~500 mA | Yes | ₹40–80 | Short demos |
| DC Barrel Adapter | 9–12 V | 1–2 A | No | ₹150–400 | Fixed installations |
| 18650 + Boost Module | 5 V out | Up to 2 A | Yes | ₹200–600 | Portable builds |
| LiPo Pack (2S) | 7.4 V | 3–20 A | Yes | ₹400–1500 | Robots, drones |
| Buck Converter + 12 V | Adj. | Up to 3 A | Semi | ₹80–200 | Solar/car projects |
Frequently Asked Questions
Can I power an Arduino Uno with a phone charger?
Yes. A 5 V phone charger with at least 1 A output connected via a USB cable works perfectly for most desk projects. Use a quality cable with thick conductors (24 AWG) to minimise voltage drop. Avoid cheap cables rated 26 AWG or thinner for any current above 500 mA.
What happens if I supply more than 12 V to an Arduino?
Voltages above 12 V cause the on-board linear voltage regulator to dissipate excessive heat. Above approximately 20 V, the regulator (LM7805 or AMS1117 variant) will enter thermal shutdown or fail permanently. Always stay within 7–12 V for reliable, safe operation.
Can I power an Arduino from a Li-ion 18650 cell directly?
A fully charged 18650 outputs 4.2 V — just below the minimum needed by the on-board regulator (which needs at least 6.6 V for the 5 V rail). However, you can connect 4.2 V directly to the Arduino’s 5 V pin (bypassing the regulator) if you add a boost converter between the cell and the pin. Alternatively, use two cells in series (8.4 V) and feed via the barrel jack.
How do I know if my power supply is causing resets?
Measure the voltage on the 5 V pin with a multimeter while the Arduino is running under load. If it drops below 4.7 V, your supply is insufficient. Also look for the on-board power LED dimming under load — a classic symptom of a marginal supply.
Is a power bank safe for powering Arduino in the field?
Yes, with a caveat. Many power banks enter sleep mode and cut output when current draw is very low (below ~100 mA). An Arduino in deep sleep mode may trigger this cutoff. Keep a small dummy load (a resistor drawing ~50 mA) on the USB output, or choose a power bank advertised as suitable for low-current devices. Brands like Mi and Ambrane (common in India) handle low-current devices better than generic brands.
Ready to Power Your Next Arduino Project?
Browse Zbotic’s complete range of battery holders, charging modules, BMS protection boards, and power management components — all stocked in India with fast shipping across Bengaluru, Mumbai, Delhi, and 500+ pin codes.


Add comment