
If you’re new to IoT and find traditional coding intimidating, the Node-RED flow IoT beginners combination is your perfect entry point. Node-RED is a visual, browser-based programming tool developed by IBM that lets you connect devices, APIs, and services by dragging and dropping “nodes” and linking them together with wires. There’s no complex syntax to memorize — you build logic visually, making it ideal for students, hobbyists, and engineers transitioning into IoT from non-software backgrounds. In this comprehensive guide, we’ll set up Node-RED, connect an ESP32, and build real dashboard projects step by step.
What Is Node-RED and Why Use It?
Node-RED is a flow-based programming tool built on Node.js. It provides a visual editor in your web browser where you can create programs (called “flows”) by connecting nodes together. Each node does something specific — read from a sensor, send an HTTP request, trigger on a time schedule, send an email, control an output, or display data on a dashboard. By connecting these nodes, you create IoT logic without writing a single line of traditional code.
Originally created by IBM for internal tooling, Node-RED became open source in 2013 and is now one of the most popular IoT middleware platforms worldwide. It runs on Raspberry Pi, Linux servers, Windows, macOS, and even low-power computers like Orange Pi. In India, it’s widely used in college IoT labs, industry 4.0 demonstrations, and home automation projects.
Key advantages of Node-RED for Indian IoT developers:
- Zero cost: Completely free and open source
- Huge library: Over 4,000 community nodes — for WhatsApp, Google Sheets, Telegram, MySQL, MQTT, HTTP, WebSockets, and more
- Visual debugging: See messages flowing through your pipeline in real time
- Dashboard: The node-red-dashboard package creates professional-looking web dashboards with gauges, charts, buttons, and switches
- Works offline: Runs entirely on your local network, no cloud dependency required
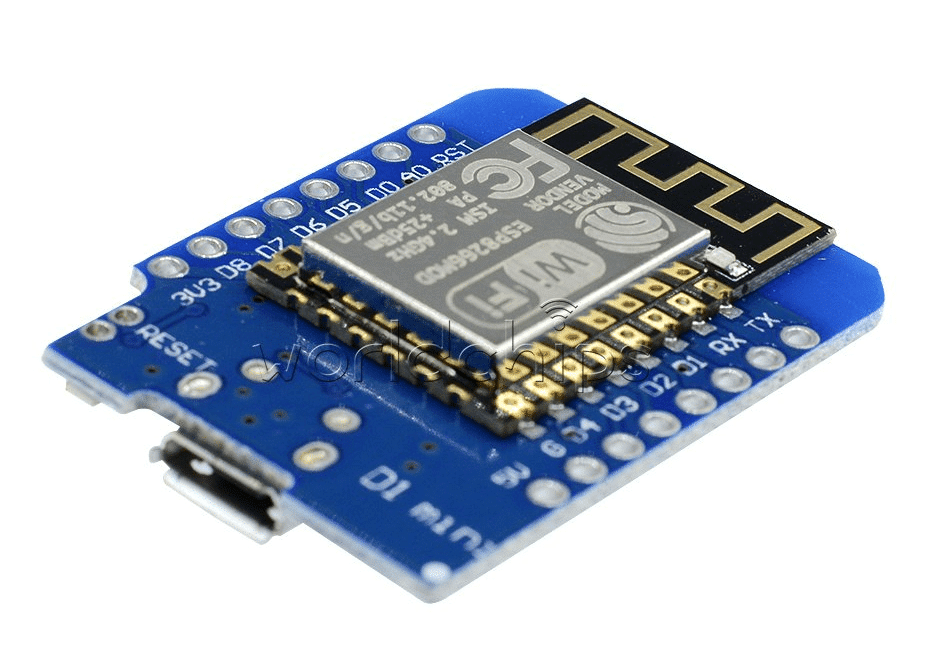
D1 Mini V2 NodeMCU 4M Bytes Lua Wi-Fi IoT Development Board – ESP8266
A compact and affordable Wi-Fi board perfect for beginners to publish sensor data to Node-RED via MQTT — ideal for first Node-RED projects.
Installing Node-RED
On Raspberry Pi (Recommended for Always-On IoT Server)
Raspberry Pi is the most popular platform for running Node-RED as a permanent IoT server in India. The official installation script makes it one command:
bash <(curl -sL https://raw.githubusercontent.com/node-red/linux-installers/master/deb/update-nodejs-and-nodered)After installation, enable it to start on boot:
sudo systemctl enable nodered.service
sudo systemctl start nodered.service
Access the editor at http://[raspberry-pi-ip]:1880 from any device on your network.
On Windows
Install Node.js from nodejs.org (LTS version), then open Command Prompt and run:
npm install -g --unsafe-perm node-red
node-red
Access at http://localhost:1880.
Install Dashboard and MQTT Nodes
In Node-RED, click the hamburger menu → Manage Palette → Install tab. Search for and install:
node-red-dashboard— Web UI with gauges, charts, buttonsnode-red-contrib-mqtt-broker— Embedded MQTT broker (or use Mosquitto separately)
Core Concepts: Nodes, Flows, and Messages
Understanding these three concepts is all you need to start building:
Nodes
Nodes are the building blocks. They appear as rectangles in the editor. Each node has an input port (left side) and/or output port (right side). There are three categories:
- Input nodes: Generate messages — MQTT subscriber, HTTP request, Inject (timer/manual trigger), sensor data
- Processing nodes: Transform messages — Function (JavaScript), Switch (conditional routing), Change (modify payload), JSON parser
- Output nodes: Do something with messages — MQTT publisher, HTTP response, Dashboard widgets, Email, Debug
Messages (msg object)
Everything in Node-RED flows as a JavaScript object called msg. The most important property is msg.payload, which carries the data. For example, when an MQTT message arrives from your ESP32 temperature sensor, msg.payload will contain the temperature value (e.g., "28.5"). You can add your own properties too (e.g., msg.topic, msg.timestamp).
Flows
A flow is a connected network of nodes on a single tab. You can have multiple flows on multiple tabs. Think of each tab as a different aspect of your IoT system — one tab for temperature monitoring, another for security alerts, another for device control.
Connecting ESP32 to Node-RED via MQTT
MQTT is the standard IoT messaging protocol, and it’s the bridge between your ESP32 hardware and Node-RED. You need an MQTT broker — a server that routes messages between publishers (ESP32) and subscribers (Node-RED). We’ll use Mosquitto, a lightweight open-source MQTT broker.
Install Mosquitto Broker
sudo apt install mosquitto mosquitto-clients
sudo systemctl enable mosquitto
sudo systemctl start mosquitto
Mosquitto runs on port 1883 by default. For local testing, no authentication is needed — for production, always add a password file.
ESP32 MQTT Publisher Code
#include <WiFi.h>
#include <PubSubClient.h>
#include <DHT.h>

const char* ssid     = "YOUR_WIFI";
const char* password = "YOUR_PASSWORD";
const char* mqtt_server = "192.168.1.100"; // Your Node-RED server IP

#define DHTPIN 4
#define DHTTYPE DHT11
DHT dht(DHTPIN, DHTTYPE);
WiFiClient espClient;
PubSubClient client(espClient);

void setup() {
  Serial.begin(115200);
  WiFi.begin(ssid, password);
  while (WiFi.status() != WL_CONNECTED) delay(500);
  client.setServer(mqtt_server, 1883);
  dht.begin();
}

void loop() {
  if (!client.connected()) {
    client.connect("ESP32Client");
  }
  float temp = dht.readTemperature();
  float hum  = dht.readHumidity();
  String payload = "{"temperature":" + String(temp) + ","humidity":" + String(hum) + "}";
  client.publish("home/livingroom/sensor", payload.c_str());
  delay(10000);
}
DHT11 Temperature And Humidity Sensor Module with LED
Perfect beginner sensor for your first Node-RED dashboard — provides both temperature and humidity readings, readable directly by ESP32 with a single wire.
Building Your First IoT Dashboard
With the ESP32 publishing data, let’s build a dashboard in Node-RED to display it.
- Drag an mqtt in node onto the canvas. Double-click it, set Server to your Mosquitto IP:1883, and Topic to
home/livingroom/sensor. - Drag a JSON node and connect it after the mqtt in node (this parses the JSON string into a JavaScript object).
- Drag a change node, set it to Set
msg.payloadtomsg.payload.temperature. Connect it after the JSON node. - Drag a gauge node (from Dashboard section). Set Label to “Temperature”, Unit to “°C”, Range 0-50. Connect it after the change node.
- Repeat steps 3-4 for humidity using a separate change node and gauge.
- Click Deploy (top right red button).
- Access your dashboard at
http://[node-red-ip]:1880/ui.
You should now see live temperature and humidity gauges updating every 10 seconds from your ESP32. This is your first working Node-RED IoT flow!
Creating Automation Flows
Node-RED’s power comes from chaining logic. Let’s add a simple automation: send a WhatsApp message (via Telegram or email) when temperature exceeds 35°C.
- After the JSON node, add a switch node. Set it to check
msg.payload.temperature> 35. Connect only the “true” output to the next step. - Add a template node with message:
⚠️ Alert! Living room temperature is {{payload.temperature}}°C - Add an email node (install node-red-node-email) with your Gmail details. Or add the Telegram node for phone notifications.
- Add a delay node before the alert node set to “Rate Limit: 1 message per 15 minutes” — this prevents alert flooding.
In five nodes, you’ve built a real alert system that would have required dozens of lines of code in traditional programming. This is why Node-RED is so powerful for IoT beginners.

Ai Thinker NodeMCU-32S ESP32 Development Board – IPEX Version
The go-to ESP32 board for Node-RED projects — dual-core processor, Wi-Fi, Bluetooth, and enough GPIO to connect sensors, relays, and actuators simultaneously.

BMP280 Barometric Pressure and Altitude Sensor I2C/SPI Module
Expand your Node-RED dashboard with atmospheric pressure and altitude data — this I2C sensor connects directly to ESP32 and publishes environmental data over MQTT.
Frequently Asked Questions
Do I need programming knowledge to use Node-RED?
No prior programming knowledge is required for basic flows. You can build dashboards, alerts, and device control entirely using visual nodes. However, basic JavaScript knowledge becomes useful when you use the Function node for custom logic that can’t be achieved with built-in nodes alone.
Can Node-RED connect to cloud platforms like AWS or Google Cloud?
Yes. There are community nodes for AWS IoT Core, Google Cloud IoT, Azure IoT Hub, ThingsBoard, Ubidots, and most major IoT cloud platforms. Node-RED can act as a local edge processing layer that aggregates sensor data before sending processed results to the cloud.
Is Node-RED secure for production use?
By default, Node-RED has no authentication. Before using it in production, enable the admin password in settings.js, add HTTPS with a self-signed or Let’s Encrypt certificate, and restrict access to your local network only using firewall rules.
What devices can connect to Node-RED?
Any device that supports MQTT, HTTP, WebSocket, or serial communication can connect to Node-RED. This includes ESP32, ESP8266, Arduino with Ethernet/Wi-Fi shields, Raspberry Pi, Python scripts, Node.js apps, and even commercial IoT devices that support standard protocols.
How many sensors can Node-RED handle simultaneously?
Node-RED runs on Node.js’s asynchronous event loop, making it surprisingly efficient. A Raspberry Pi 4 running Node-RED can comfortably handle hundreds of simultaneous MQTT connections and thousands of messages per minute without any performance issues.
Get the ESP32 boards, sensors, and components you need to build your first Node-RED IoT project. Available at Zbotic.in with fast pan-India delivery.


Add comment