
7-Segment Clock with MAX7219: Build a Digital Clock Project
Building a 7-segment digital clock with MAX7219 and Arduino is one of the most satisfying beginner-to-intermediate electronics projects in India. The MAX7219 is a compact, serial LED display driver IC that can control up to 8 seven-segment displays (or a 64-LED dot matrix) using only 3 wires from your Arduino. Add an RTC module like the DS3231 for accurate timekeeping, and you have a beautiful, accurate digital clock that can run standalone — no PC required. This guide covers everything from the basics to a complete, working clock code.
What is the MAX7219 and Why Use It?
The MAX7219 is a serial-input, common-cathode display driver from Maxim Integrated. It controls up to 8 seven-segment LED displays (or an 8×8 LED matrix) using only three microcontroller pins via SPI: Data (DIN), Clock (CLK), and Load (CS/LOAD). This is a massive advantage over directly driving seven-segment displays, which would require 8 pins per digit plus multiplexing code.
Key features that make MAX7219 ideal for Indian maker projects:
- Only 3 MCU pins for up to 8 digits — simple wiring, leaves more GPIOs free.
- Built-in BCD decoder — just send the digit number (0–9) and it handles segment mapping automatically.
- Adjustable brightness — 16 brightness levels via software. Dim the display at night or adjust for ambient light.
- Daisy-chaining: Multiple MAX7219 modules can be chained to drive 16, 24, 32 digits with the same 3 wires.
- Scan limit register: Drive only as many digits as you need, saving power.
- Low cost: MAX7219 modules with 8-digit displays cost under ₹100 at Zbotic.
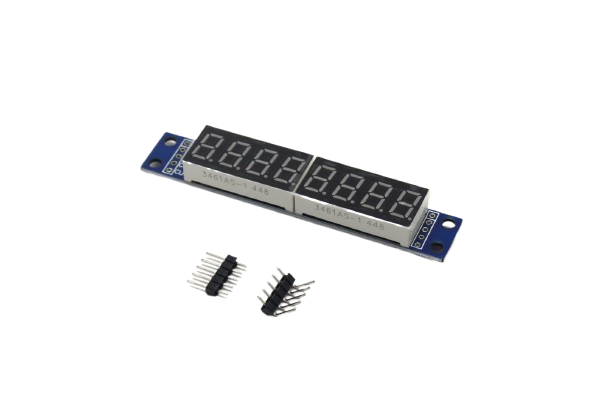
MAX7219 8-Digit LED Tube Display Control Module
The perfect all-in-one module for a 7-segment clock. 8 digits (HH:MM:SS + 2 extra), MAX7219 driver onboard, SPI interface, and bright red 7-segment display.
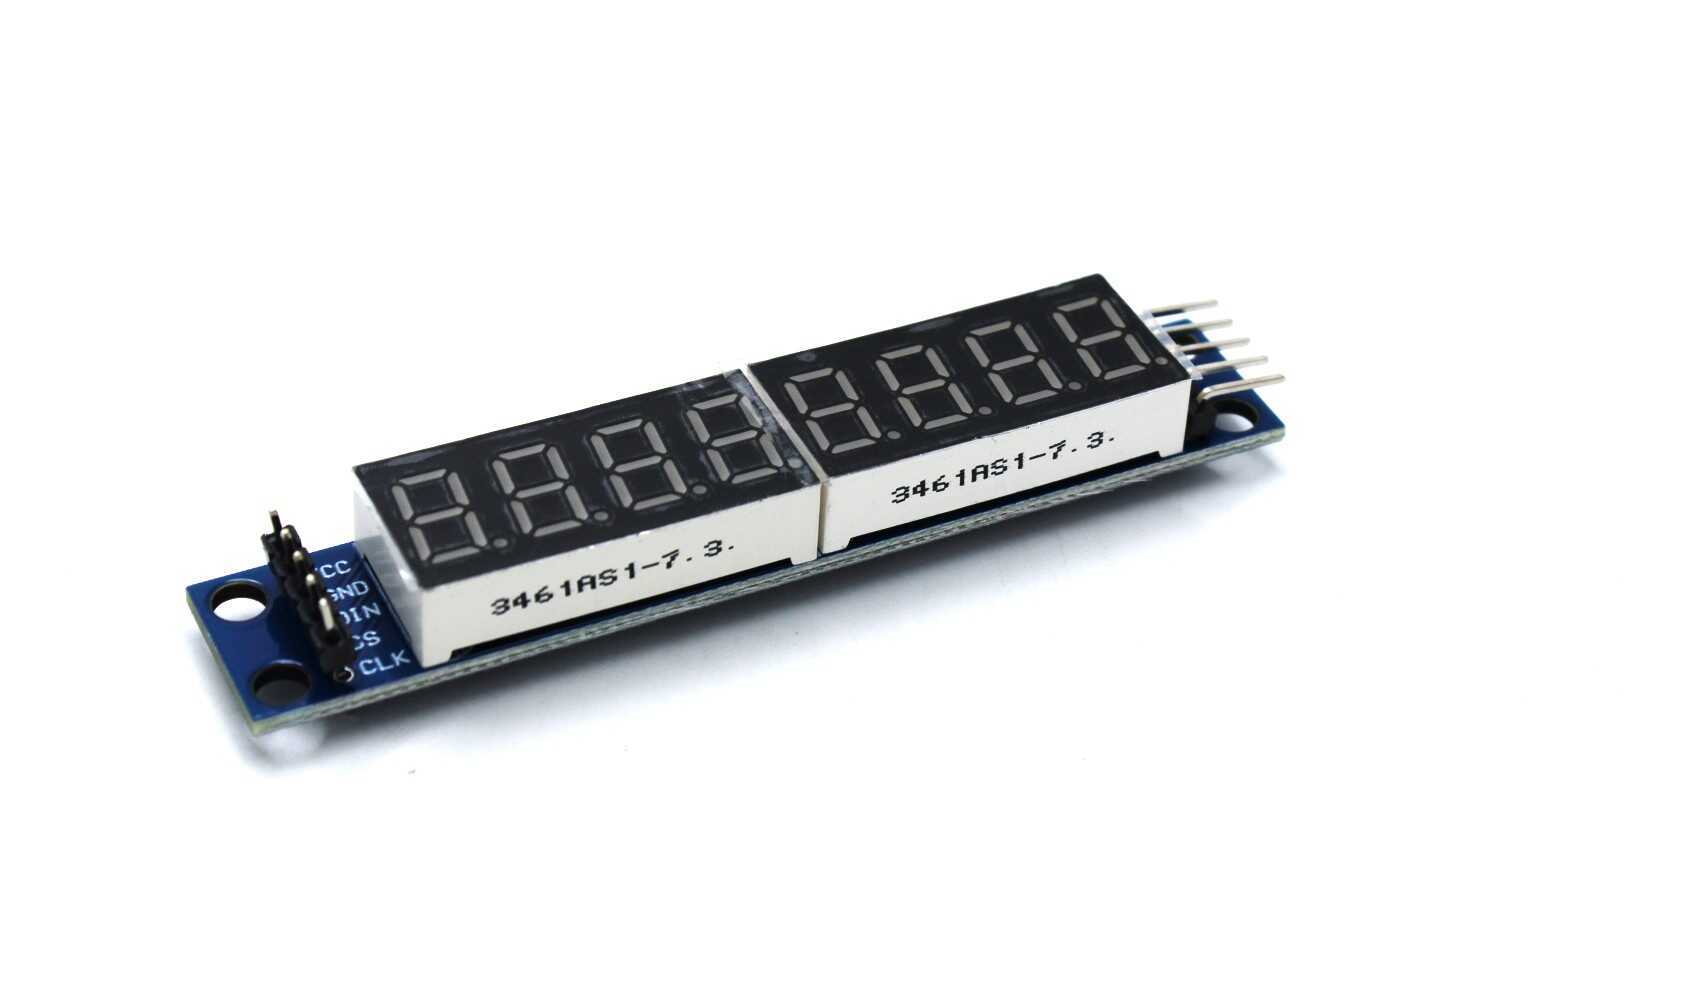
MAX7219 Digital Tube Display Module Control Module
A compact MAX7219-based 8-digit 7-segment tube display module. Chainable for more digits. Widely used in clocks, counters, and scoreboards across India.
Components You Need
- Arduino Uno R3 (or Nano/Mega)
- MAX7219 8-digit 7-segment LED display module
- DS3231 or DS1307 RTC (Real-Time Clock) module with battery backup
- CR2032 coin cell battery (for RTC backup)
- Jumper wires
- USB cable + laptop for programming
- Optional: 12V DC adapter or USB power bank for standalone operation
The DS3231 is strongly preferred over the DS1307 for Indian projects because it has a temperature-compensated crystal oscillator — it stays accurate to within ±2 minutes/year even in India’s hot and humid conditions. The DS1307 can drift significantly in high temperatures.
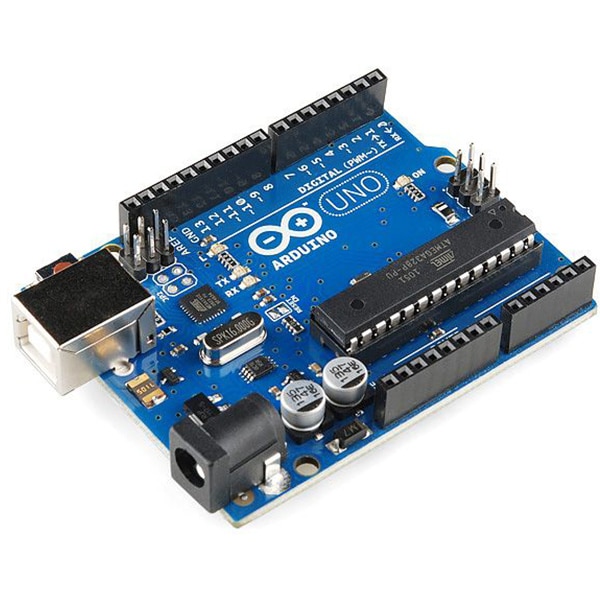
Arduino UNO R3 Development Board ATMEGA16U2
The standard Arduino Uno R3 — the most popular microcontroller board in India for beginner projects including MAX7219 clocks.
Wiring the MAX7219 Display to Arduino
The MAX7219 module uses SPI. Connect it to Arduino Uno as follows:
| MAX7219 Pin | Arduino Uno Pin | Notes |
|---|---|---|
| VCC | 5V | MAX7219 runs on 5V |
| GND | GND | Ground |
| DIN | Pin 11 (MOSI) | SPI Data |
| CLK | Pin 13 (SCK) | SPI Clock |
| CS (LOAD) | Pin 10 | Chip Select |
Adding the DS3231 RTC Module
The DS3231 uses I2C. Connect it to Arduino alongside the MAX7219 (they use different buses, so no conflict):
| DS3231 Pin | Arduino Uno Pin |
|---|---|
| VCC | 3.3V or 5V |
| GND | GND |
| SDA | A4 |
| SCL | A5 |
The DS3231 module has a CR2032 battery holder for backup. With a fresh battery installed, the clock will keep accurate time even when Arduino power is removed for months.
Libraries to Install
Install these libraries via Arduino IDE Library Manager:
- MD_Parola by MajicDesigns — the most versatile MAX7219 library with scrolling, animation, and effects support.
- MD_MAX72XX by MajicDesigns — required by MD_Parola, handles low-level MAX7219 communication.
- RTClib by Adafruit — supports DS3231, DS1307, and other common RTC chips.
Alternative: LedControl library (simpler, less features but easier for beginners) works well for basic digit display without scrolling effects.
Complete Digital Clock Code
This code displays time in HH:MM:SS format on a MAX7219 8-digit display, reading from the DS3231 RTC:
#include <MD_Parola.h>
#include <MD_MAX72XX.h>
#include <SPI.h>
#include <RTClib.h>
#include <Wire.h>

// MAX7219 wiring
#define MAX_DEVICES 1   // Number of MAX7219 modules chained
#define CS_PIN      10  // CS/LOAD pin
#define CLK_PIN     13
#define DATA_PIN    11

MD_Parola myDisplay = MD_Parola(MD_MAX72XX::FC16_HW,
                                DATA_PIN, CLK_PIN, CS_PIN,
                                MAX_DEVICES);
RTC_DS3231 rtc;

void setup() {
  Serial.begin(9600);
  myDisplay.begin();
  myDisplay.setIntensity(5); // 0-15 brightness level
  myDisplay.displayClear();

  Wire.begin();
  if (!rtc.begin()) {
    Serial.println("RTC not found!");
    while (1);
  }

  // Uncomment to SET time (run once, then comment out)
  // rtc.adjust(DateTime(2026, 3, 11, 12, 0, 0));

  if (rtc.lostPower()) {
    Serial.println("RTC lost power, setting time!");
    rtc.adjust(DateTime(F(__DATE__), F(__TIME__)));
  }
}

void loop() {
  DateTime now = rtc.now();

  // Format: HH.MM.SS
  char timeStr[9];
  sprintf(timeStr, "%02d.%02d.%02d",
          now.hour(), now.minute(), now.second());

  myDisplay.setTextAlignment(PA_CENTER);
  myDisplay.print(timeStr);

  // Blink the dots every second for a "tick" effect
  static bool dotState = true;
  static unsigned long lastBlink = 0;
  if (millis() - lastBlink > 500) {
    lastBlink = millis();
    dotState = !dotState;
    // Adjust brightness slightly for visual pulse
    myDisplay.setIntensity(dotState ? 8 : 4);
  }

  delay(50); // Update ~20 times/sec
}
The sprintf(timeStr, "%02d.%02d.%02d", ...) formats the time string with leading zeros and dots as separators. The MD_Parola library on the FC16_HW hardware type supports the 8-digit tube display modules available at Zbotic.
Setting the hardware type: MD_MAX72XX::FC16_HW works for most 8-digit tube modules. If your display shows scrambled digits, try MD_MAX72XX::GENERIC_HW instead.
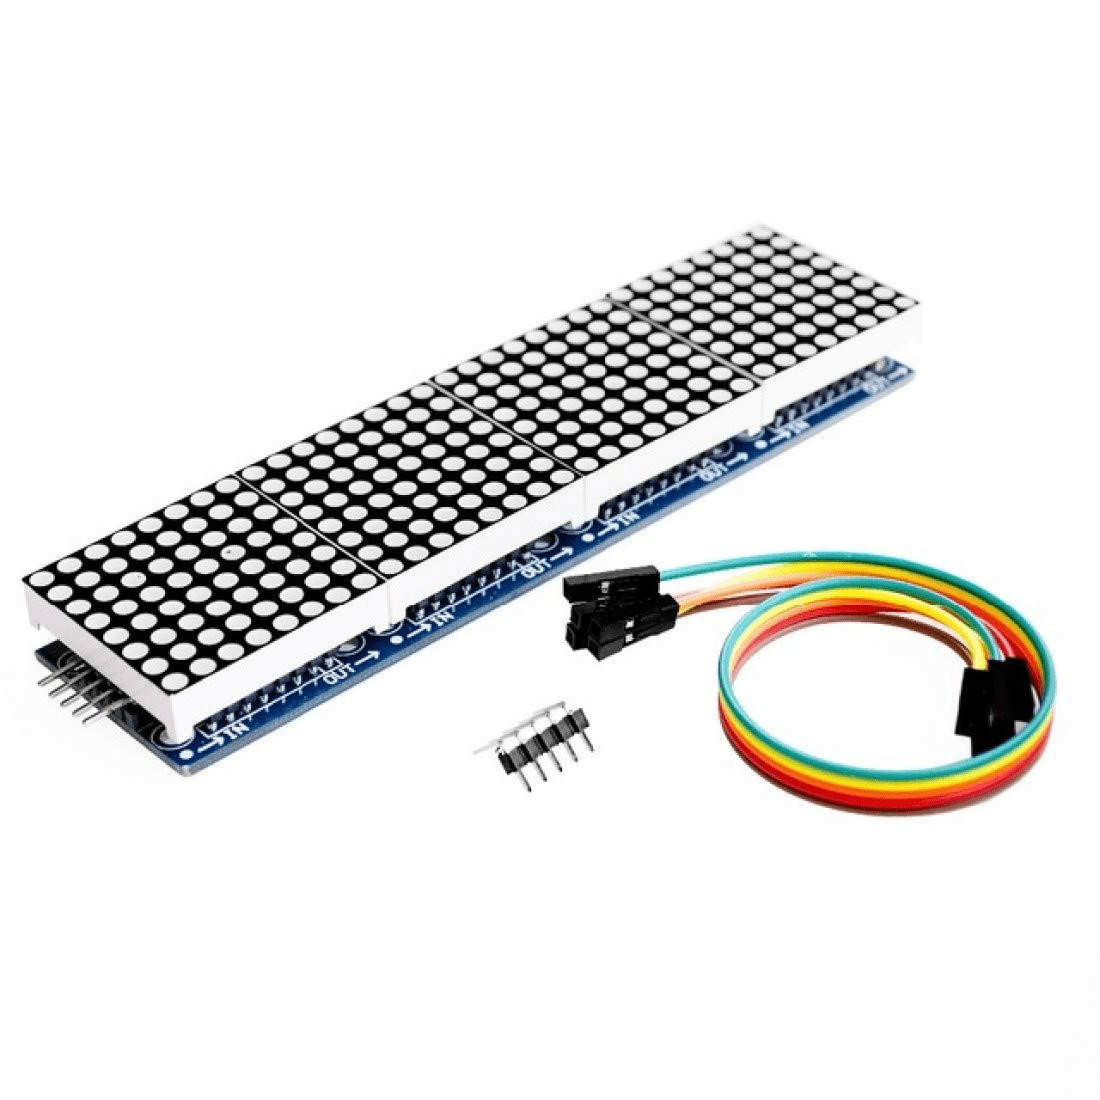
MAX7219 LED Dot Matrix 4-in-1 Display with 5P Line Module
Four 8×8 LED matrices chained on one board with MAX7219. Supports scrolling text and custom character display. Excellent for a scrolling clock or news ticker.
Enhancements and Upgrades
Once your basic MAX7219 clock is working, here are popular upgrades that Indian makers build next:
12-Hour Format with AM/PM
Modify the format: int hr12 = now.hour() % 12; if (hr12 == 0) hr12 = 12; bool isPM = now.hour() >= 12; Then display hr12 with a dedicated 8th digit showing A (am) or P (pm) using the MAX7219 BCD decode mode off and custom segment patterns.
Date Display
Add a second mode that alternates between time and date. Use a button on Arduino digital pin to toggle, or auto-alternate every 5 seconds: show DD-MM-YY for 3 seconds, then time for 5 seconds.
Brightness Auto-Adjust
Add an LDR (Light Dependent Resistor) on Arduino A0. Read the ambient light and use myDisplay.setIntensity(map(analogRead(A0), 0, 1023, 0, 15)); to automatically dim the display in dark rooms — great for bedroom clocks.
Temperature Display
The DS3231 has a built-in temperature sensor. Read it with rtc.getTemperature() and display it between time updates. No extra sensor needed!
Alarm Function
Add a buzzer on digital pin 9. Compare current time with a preset alarm time. When matched, sound the buzzer for 30 seconds. The DS3231 has hardware alarm outputs (SQW pin) for reliable alarm triggering even if your code gets busy.
More Project Ideas with MAX7219
- Countdown Timer: Perfect for exam halls, cricket match overs, or cooking timers. Start/stop/reset with push buttons.
- Scoreboard: Use two chained MAX7219 modules for a two-team cricket or carrom score display.
- Cryptocurrency Price Ticker: ESP32 + MAX7219 + WiFi — fetch Bitcoin/Ethereum price from an API and scroll it across the display.
- Digital Tachometer: Count pulses from a hall-effect sensor attached to a motor or wheel and display RPM in real time.
- Production Counter: Industrial count of parts produced per shift — increment on a limit switch or IR sensor signal.
- Vintage Nixie-Style Clock: Use larger 1-inch 7-segment displays with MAX7219 and a 3D-printed wooden frame for an aesthetic desk clock popular in maker communities.

0.56-Inch Red 4-Digit 7-Segment LED Display
A standalone 4-digit 7-segment LED display — use two of these with a MAX7219 for a full HH:MM clock display. Bright red, highly visible in all lighting conditions.
Frequently Asked Questions
Does the MAX7219 module work with Arduino Nano?
Yes. Arduino Nano has the same SPI pins as Uno in a smaller form factor: MOSI on D11, SCK on D13, and you can use D10 as CS. The Nano is popular for making compact clock builds that fit inside small enclosures.
Can I chain multiple MAX7219 modules for more digits?
Yes, that is one of MAX7219’s best features. Connect the DOUT of the first module to the DIN of the second, share CLK and CS lines. In your code, set MAX_DEVICES 2 (or more). MD_MAX72XX and MD_Parola natively support chaining.
What is the difference between MAX7219 7-segment module and MAX7219 dot matrix module?
Both use the same MAX7219 chip. The 7-segment version drives 8 numerical 7-segment digits — ideal for clocks, counters, and numeric data. The dot matrix version (8×8 LEDs per module) displays custom characters, letters, and graphics but is more complex to program for clocks.
Which RTC is better for an Indian clock project — DS3231 or DS1307?
DS3231 is strongly recommended for India. It uses a temperature-compensated internal oscillator and maintains ±2 minutes per year accuracy even in Indian heat and humidity. DS1307 uses an external crystal and can drift significantly in high temperatures common in Indian summers.
How do I power a MAX7219 clock without a computer?
The simplest option is a USB phone charger (5V, 1A) connected to Arduino’s USB port. For a wall-mounted clock, a 5V DC adapter plugged into the Arduino’s barrel jack (7–12V for Vin, or 5V directly to 5V pin) works perfectly. The DS3231’s CR2032 backup battery keeps time even when main power is off.
Build Your MAX7219 Clock Today
Get all the components you need — MAX7219 display modules, Arduino boards, 7-segment displays, and RTC modules — at Zbotic with fast shipping across India.


Add comment