
The Waveshare 4-inch DSI display Raspberry Pi CM4 combination is one of the most popular choices for compact industrial panels, HMI interfaces, and portable media devices built in India. The MIPI DSI (Display Serial Interface) standard delivers high-bandwidth, low-latency video directly from the CM4’s GPU, avoiding the SPI bottleneck that limits refresh rates on most small hobby displays. This guide walks through every step — from unboxing to a fully calibrated touchscreen display running on your Compute Module 4.
Why Choose DSI Over SPI/HDMI for CM4 Projects?
Before diving into the setup, it is worth understanding why the DSI interface is the right choice for a 4-inch embedded display on the CM4:
| Feature | DSI | SPI | HDMI |
|---|---|---|---|
| Max refresh rate (4″) | 60 fps | ~10–20 fps | 60 fps |
| CPU overhead | Very low (GPU driven) | High (CPU DMA) | Low (GPU driven) |
| Cable / connector | FPC ribbon (compact) | Multiple dupont wires | Full-size HDMI |
| GPIO pins used | 0 (dedicated DSI port) | 4–6 | 0 (dedicated port) |
| Ideal for | Compact embedded panels | Simple status displays | Desktop / media center |
For IoT dashboards, industrial control panels, kiosk displays, and handheld devices — DSI wins on all practical metrics. The CM4 has a single DSI port (22-pin FPC connector), which the Waveshare 4-inch display uses directly.
Hardware Requirements and What’s in the Box
What you need:
- Waveshare 4-inch DSI LCD (800×480 resolution, capacitive touch, part: DSI-LCD-4B or similar)
- Raspberry Pi Compute Module 4 (CM4001000 or any variant with RAM)
- CM4 IO Board (official Raspberry Pi IO board recommended) or a custom CM4 carrier board with DSI port
- 22-pin to 15-pin FPC cable (usually included with Waveshare display) OR 22-pin to 22-pin depending on your IO board
- 5V 3A USB-C power supply (CM4 IO board draws up to 2.5A under load with display)
- MicroSD card (16GB+) with Raspberry Pi OS or eMMC flash
Waveshare 4″ DSI display specifications:
- Resolution: 800 × 480 pixels
- Interface: MIPI DSI (4-lane)
- Touch: Capacitive (I2C), GT911 controller
- Viewing angle: IPS, 160°
- Backlight: LED, software-controllable via PWM
- Power consumption: ~0.5W typical
Physical Connection: CM4 IO Board to Waveshare Display
The CM4 IO Board has a 22-pin FPC DSI connector (marked DISP0 or DSI0). The Waveshare 4-inch display typically has a 15-pin FPC connector. You will need a 22-to-15-pin FPC adapter cable (Waveshare usually includes this).
Step-by-step connection:
- Power off everything before connecting DSI cables. DSI connectors are fragile and hot-plugging is not supported.
- Locate the DISP0 FPC connector on the CM4 IO board (near the center of the board, labeled DSI0).
- Lift the FPC locking tab gently using a fingernail or flat plastic spudger — do not use metal tools.
- Insert the FPC cable with the blue/metallic contacts facing down (toward the PCB) into the CM4 IO board connector.
- Press the locking tab down firmly until it clicks.
- Connect the other end to the Waveshare display’s DSI connector similarly — the contact orientation may be reversed (contacts facing up). Refer to Waveshare’s specific diagram for your model.
- For touch: The GT911 touch controller communicates over I2C. Connect the display’s touch I2C cable to the CM4 IO board’s 40-pin GPIO header: SDA to GPIO2 (pin 3), SCL to GPIO3 (pin 5), GND to pin 6, 3.3V to pin 1.
Warning: FPC connectors on Waveshare DSI displays are delicate. Applying torque while the cable is not fully seated is the single most common cause of display failure. Take your time and verify the cable seats flat before locking.
OS Configuration: config.txt Settings
After physical connection, boot your CM4 and edit /boot/config.txt (or /boot/firmware/config.txt on newer Raspberry Pi OS releases).
For Waveshare 4-inch DSI display on CM4:
# Enable DSI display (disable HDMI if not needed)
dtoverlay=vc4-kms-v3d
# For older kernel (non-KMS):
# dtoverlay=vc4-fkms-v3d

# Waveshare 4inch DSI LCD overlay
dtoverlay=waveshare-4dpid

# OR use generic DSI settings for some models:
# display_auto_detect=1

# Set GPU memory (important for display operation)
gpu_mem=128

# Disable display auto-detect for forced resolution
# hdmi_force_hotplug=0

# DSI display brightness (optional - 0-255)
# dtparam=tp_brightness=100
Installing the Waveshare overlay: Newer Waveshare DSI displays include a setup script. Download and run:
sudo apt update
sudo apt install -y raspberrypi-kernel-headers

# Download Waveshare CM4 DSI driver
wget https://files.waveshare.com/upload/1/18/CM4-DSI-TOUCH-LCD-4B.zip
unzip CM4-DSI-TOUCH-LCD-4B.zip
cd CM4-DSI-TOUCH-LCD-4B
sudo chmod +x CM4_install.sh
sudo ./CM4_install.sh
The install script handles adding the DTB overlay file to /boot/overlays/ and updating /boot/config.txt automatically. Reboot after installation.
After reboot, verify the display is detected:
# Check display detection
tvservice -s
# Should show: state 0xa [HDMI CEA (4) RGB lim 16:9], ... or DSI output

# Check kernel messages for DSI
dmesg | grep -i dsi

# List framebuffer devices
ls /dev/fb*
Touch Screen Calibration
The GT911 capacitive touch controller on most Waveshare DSI displays typically works out of the box without calibration on Raspberry Pi OS. However, if touch input is off-center or inverted:
# Install xinput-calibrator
sudo apt install -y xinput-calibrator

# Run calibration (with display connected and X running)
XINPUTCALIBRATOR_DEVICE="Goodix Capacitive TouchScreen"
xinput_calibrator

# Follow on-screen prompts to touch 4 calibration points
# Copy the output calibration matrix to:
sudo nano /etc/X11/xorg.conf.d/99-calibration.conf
For Wayfire/Wayland (Raspberry Pi OS Bookworm default), touch calibration uses libinput configuration instead of xinput. Create a file at /etc/libinput/local-overrides.quirks with your device’s calibration matrix.
Screen Rotation and Orientation
Many CM4 project enclosures mount the display in portrait or inverted landscape orientation. Rotation is handled at two levels:
1. Hardware rotation (DRM/KMS — recommended for CM4):
# Add to /boot/config.txt
# Rotate 90 degrees (portrait)
display_rotate=1

# Rotate 180 degrees (inverted landscape)
display_rotate=2

# Rotate 270 degrees (portrait, other way)
display_rotate=3

# For KMS driver (vc4-kms-v3d), use instead:
# dtparam=display_rotate=90
2. Software rotation (Xorg):
# Create /etc/X11/xorg.conf.d/10-monitor.conf
Section "Monitor"
    Identifier "DSI-1"
    Option "Rotate" "left"    # or right / inverted
EndSection
Touch rotation must match display rotation. Add the transformation matrix to your libinput or xinput configuration to rotate touch coordinates accordingly.
Troubleshooting: No Display, Wrong Resolution, Touch Issues
| Problem | Cause | Solution |
|---|---|---|
| No image on display | Wrong DTB overlay or FPC not seated | Re-seat FPC cable; verify correct overlay in config.txt |
| White/blank screen | Display powered but no video signal | Check dmesg | grep dsi; ensure gpu_mem=128 |
| Wrong resolution | KMS driver using EDID default | Add explicit resolution: hdmi_cvt=800 480 60 6 0 0 0 |
| Touch not working | GT911 I2C not connected | Run i2cdetect -y 1 — should see device at 0x5D or 0x14 |
| Touch inverted/offset | Calibration matrix not matching rotation | Re-run xinput_calibrator after applying display rotation |
| Display works but backlight off | Backlight GPIO not enabled | Add dtparam=i2c_arm=on and check Waveshare backlight GPIO |
| CM4 hangs on boot with display | Kernel/overlay version mismatch | Update Pi OS (sudo apt full-upgrade) then re-run install script |
Popular Use Cases for CM4 + DSI Display in India
The CM4 + 4-inch DSI display combination is particularly well-suited for products being developed and deployed across India:
- Smart energy meters: Compact HMI running custom Python UI (PyQt5 or Kivy) on a 4-inch panel to display power consumption, billing, and tariff information.
- Agricultural IoT display nodes: Waterproof enclosures housing CM4 + DSI display for field-mounted soil, weather, and crop monitoring dashboards.
- ATM/kiosk secondary screen: The CM4’s compact form factor fits into custom kiosk builds where a 4-inch status or PIN confirmation display is needed alongside the main screen.
- Industrial PLC HMI: DIN-rail mounted CM4 with 4-inch DSI panel replacing proprietary HMI units in factory control applications.
- Inventory scanner terminal: Handheld barcode scanner with 4-inch DSI display for warehouse management, replacing costly commercial handheld terminals.

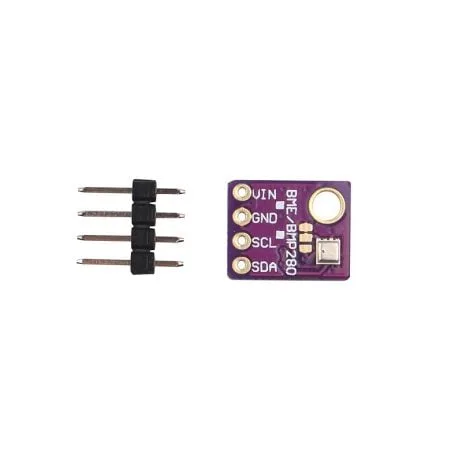
BMP280 Barometric Pressure and Altitude Sensor (I2C/SPI)
Perfect environmental sensor for CM4 weather station builds. Reads on the same I2C bus as the DSI touch controller, displaying live pressure, temperature, and altitude data on the 4-inch panel.

DHT20 SIP Packaged Temperature and Humidity Sensor
I2C temperature and humidity sensor that pairs seamlessly with CM4 projects. Display live readings on your Waveshare DSI panel for a complete environmental monitoring unit.

CJMCU-219 INA219 I2C Bi-directional Current/Power Monitor
Monitor your CM4 system’s power consumption in real time and display it on the 4-inch DSI panel. Ideal for battery-powered CM4 projects where power management matters.
Recommended Accessories from Zbotic
GY-BME280-5V Temperature, Humidity and Pressure Sensor
A full-featured environmental sensor covering temperature, humidity, and barometric pressure. Use with CM4 to feed a comprehensive weather dashboard on your Waveshare DSI display.

MQ-135 Air Quality/Gas Detector Sensor Module
Add air quality monitoring to your CM4 display project. Read MQ-135 analog output via an ADC (MCP3008 over SPI) and display air quality indices on the Waveshare DSI panel in real time.
Frequently Asked Questions
Can I use this display with a standard Raspberry Pi 4 or 5, not just the CM4?
Yes. The Raspberry Pi 4B has a DSI connector (marked DISPLAY). The same Waveshare 4-inch DSI display works on the Pi 4B, though the ribbon cable length and connector orientation may differ. The Pi 5 also has a DSI connector but uses a different FPC pin-out — verify cable compatibility before purchase.
Do I need a separate power supply for the display?
No. The Waveshare 4-inch DSI display is powered entirely through the DSI ribbon cable from the CM4’s DSI port. You only need one 5V power supply for the CM4 IO board, which feeds the display. Make sure to use a good quality 5V 3A supply — insufficient current causes display flicker or CM4 undervoltage warnings.
Can I run both HDMI and DSI displays simultaneously on CM4?
Yes, the CM4 supports dual display output — HDMI0 (or HDMI1) and DSI0 simultaneously. Configure both in config.txt with appropriate overlays. Each display can run an independent display (extended desktop) or clone the main display. This requires adequate gpu_mem (256MB recommended for dual display).
Is the GT911 touch controller plug-and-play on Raspberry Pi OS?
On recent versions of Raspberry Pi OS (Bullseye and Bookworm), the GT911 driver is included in the kernel and is detected automatically over I2C when the display overlay is loaded. For older OS versions, you may need to compile the GT911 module from source or use Waveshare’s pre-patched kernel image.
What is the maximum distance I can run the DSI ribbon cable?
The standard FPC cable supplied by Waveshare is 150–200mm. DSI is a short-range interface; cables beyond 300mm significantly increase signal integrity issues. For display installations further from the CM4, use an external HDMI display instead of extending the DSI cable. Some third-party DSI extension cables (up to 500mm) exist but signal quality is not guaranteed.
Build Your CM4 Project with Zbotic
Zbotic stocks sensors, modules, and electronic components perfect for your Raspberry Pi CM4 display projects. Fast shipping across India — Mumbai, Pune, Delhi, Bengaluru, Hyderabad, Chennai, and all major cities.


Add comment