
LoRa Node Activation: OTAA vs ABP for TTN Configuration
When configuring a LoRa node on The Things Network (TTN), the first major decision you’ll face is choosing between LoRa OTAA vs ABP for TTN configuration. OTAA (Over-the-Air Activation) and ABP (Activation By Personalization) are the two methods defined by the LoRaWAN specification for authenticating a device on a LoRaWAN network. Getting this choice right determines your device’s security, battery life, roaming capability, and ease of deployment — especially important for the growing number of Indian IoT developers using TTN’s free community network.
LoRaWAN Activation: How Devices Join a Network
LoRaWAN is a media access control (MAC) protocol built on top of LoRa’s physical layer. Every LoRaWAN device must be activated on the network before it can send or receive data. Activation establishes the security keys used to encrypt payloads and authenticate the device. These keys are essential — without them, the network server won’t accept your device’s transmissions.
LoRaWAN activation involves three key identifiers:
- DevEUI: A globally unique 64-bit device identifier (like a MAC address). Assigned by the manufacturer or generated for DIY modules.
- AppEUI / JoinEUI: A 64-bit application identifier that identifies which application server should receive data from this device.
- AppKey: A 128-bit AES root key used to derive session keys during OTAA. Keep this secret.
- DevAddr: A 32-bit network address assigned to the device (either during join for OTAA, or manually for ABP).
- NwkSKey / AppSKey: Session keys derived from AppKey during OTAA (or manually set for ABP) used for encryption and authentication.
OTAA — Over-the-Air Activation Explained
OTAA is the recommended activation method for production LoRaWAN deployments and is preferred by TTN. Here’s what happens during OTAA activation:
- Join Request: The device transmits a Join Request frame containing DevEUI, AppEUI (JoinEUI), and a DevNonce (random number). This is sent unencrypted but signed with the AppKey.
- Network Server Verification: TTN’s network server uses the AppKey to verify the MIC (Message Integrity Code) in the Join Request. If valid, it assigns a DevAddr and derives new session keys (NwkSKey and AppSKey) from the AppKey + server nonce.
- Join Accept: The network sends back a Join Accept frame (encrypted with AppKey) containing the DevAddr, network settings, and a JoinNonce.
- Device Derives Keys: The device decrypts the Join Accept and derives the same NwkSKey and AppSKey using the AppKey. Now both sides share the session keys without ever transmitting them over the air.
- Data Transmission: All subsequent data frames are encrypted with AppSKey and authenticated with NwkSKey.
Key benefit: Fresh session keys are generated on every join. If session keys are ever compromised, a device re-join generates new ones. The AppKey itself never travels over the air.
ABP — Activation By Personalization Explained
ABP skips the join procedure entirely. The DevAddr, NwkSKey, and AppSKey are hardcoded into the device firmware and also registered in the TTN console. The device starts transmitting immediately without any join handshake.
ABP activation flow:
- Generate or obtain DevAddr, NwkSKey, and AppSKey from TTN console
- Hardcode these values into your device firmware
- Power on the device — it immediately starts sending data with no join procedure
Critical ABP issue — Frame Counter: LoRaWAN uses a frame counter (FCnt) to prevent replay attacks. With ABP, this counter is stored in RAM. If the device resets or loses power, the counter resets to 0. By default, TTN rejects frames with a counter lower than the last received counter. This means after every reset, your device will stop working until you either disable frame counter checking in TTN (a security risk) or implement EEPROM-based counter persistence in your firmware.
OTAA vs ABP: Side-by-Side Comparison
| Feature | OTAA | ABP |
|---|---|---|
| Join Procedure | Dynamic (over-the-air join request) | None (hardcoded keys) |
| Security | Higher — fresh session keys per join | Lower — static session keys |
| Network Coverage Needed | Yes — gateway needed to join | No — can send immediately |
| After Device Reset | Re-joins automatically | Frame counter issue unless EEPROM-saved |
| Roaming | Excellent — joins nearest network | Limited — DevAddr tied to one network |
| First Transmission | Delayed (join must succeed first) | Immediate |
| Battery Impact | Slight overhead for join (one-time) | Minimal (no join overhead) |
| TTN Recommendation | Strongly recommended | For testing / specific use cases only |
| Complexity | Slightly more complex setup | Simpler to start |
Configuring OTAA on TTN: Step-by-Step
Step 1: Create an Application on TTN Console
- Go to TTN Console and log in (create a free account if needed)
- Navigate to Applications → Create Application
- Set Application ID (e.g., “zbotic-sensor-network”) and Application name
- Save
Step 2: Register a Device (OTAA)
- Inside your Application → End Devices → Register End Device
- Select “Enter end device specifics manually”
- LoRaWAN version: LoRaWAN Specification 1.0.3 (for MCCI LMIC library)
- Regional parameters: RP001 Regional Parameters 1.0.3 revision A
- Frequency plan: Asia 920-923 MHz (for India — IN865 or AU915 depending on module support)
- JoinEUI: Generate or enter your value
- DevEUI: Generate (TTN will assign one) or enter the one printed on your module
- AppKey: Generate (click the refresh icon)
- Register the device
Step 3: Arduino Code for OTAA (using MCCI LMIC library)
#include <lmic.h>
#include <hal/hal.h>
#include <SPI.h>

// Copy from TTN Console (LSB format for APPEUI and DEVEUI, MSB for APPKEY)
static const u1_t PROGMEM APPEUI[8] = { 0x00, 0x00, 0x00, 0x00, 0x00, 0x00, 0x00, 0x00 };
static const u1_t PROGMEM DEVEUI[8] = { 0x70, 0xB3, 0xD5, 0x7E, 0xD0, 0x05, 0xAB, 0xCD };
static const u1_t PROGMEM APPKEY[16] = { 0x88, 0x88, 0x88, 0x88, 0x88, 0x88, 0x88, 0x88,
                                          0x88, 0x88, 0x88, 0x88, 0x88, 0x88, 0x88, 0x88 };

void os_getArtEui(u1_t* buf) { memcpy_P(buf, APPEUI, 8); }
void os_getDevEui(u1_t* buf) { memcpy_P(buf, DEVEUI, 8); }
void os_getDevKey(u1_t* buf) { memcpy_P(buf, APPKEY, 16); }
Configuring ABP on TTN: Step-by-Step
Step 1: Register a device in TTN console as described above, but select “Activation mode: ABP” on the device registration page.
Step 2: TTN will show you DevAddr, NwkSKey (Network Session Key), and AppSKey (App Session Key). Copy all three.
// ABP credentials from TTN Console
static const u4_t DEVADDR = 0x260B1234; // Device Address
static const u1_t PROGMEM NWKSKEY[16] = { 0xA1, 0xB2, ... }; // Network Session Key
static const u1_t PROGMEM APPSKEY[16] = { 0xC3, 0xD4, ... }; // App Session Key

void setup() {
  // ... LMIC init ...
  LMIC_setSession(0x13, DEVADDR, NWKSKEY, APPSKEY);
  // IMPORTANT: Disable frame counter check for testing (not for production!)
  LMIC.dn2Dr = DR_SF9;
  LMIC_setLinkCheckMode(0);
}
ABP EEPROM frame counter persistence (recommended for production):
#include <EEPROM.h>

void saveFrameCounter() {
  uint32_t fcnt = LMIC.seqnoUp;
  EEPROM.put(0, fcnt);
  EEPROM.commit(); // ESP32 requires commit()
}

void loadFrameCounter() {
  uint32_t fcnt;
  EEPROM.get(0, fcnt);
  LMIC.seqnoUp = fcnt + 10; // Add margin for safety
}
LoRaWAN in India: TTN Gateway Coverage and Tips
LoRaWAN and TTN are relatively new in India compared to Europe and the US, but the community is growing fast. Here’s what Indian makers need to know:
TTN Gateway Coverage in India: Major cities like Bengaluru, Mumbai, Pune, Hyderabad, Chennai, and Delhi have some TTN community gateways. Use the TTN coverage map to check your area. Coverage is still sparse in tier-2 and tier-3 cities.
If there’s no gateway near you: Set up your own TTN gateway! The RAK Wireless WisGate and similar gateway boards can connect to TTN and expand coverage in your area. Many university labs and maker spaces in India are deploying gateways to build local LoRaWAN networks.
Frequency plan for India: India officially uses the IN865 frequency plan (865–867 MHz) for LoRa. Some modules like the Ai Thinker Ra-01H support 868MHz which is close enough for testing, but for regulatory compliance in India, use IN865-compatible modules. The AU915 plan is sometimes used as an alternative. Always check your module’s supported frequency range.
Duty cycle and fair use: TTN Community Network has a fair use policy: max 30 seconds airtime per day per device, and max 10 downlink messages per day. For SF7 at 125kHz (fast spreading factor), a 20-byte payload takes about 60ms — you can send roughly 500 messages per day. Plan your payload size accordingly.
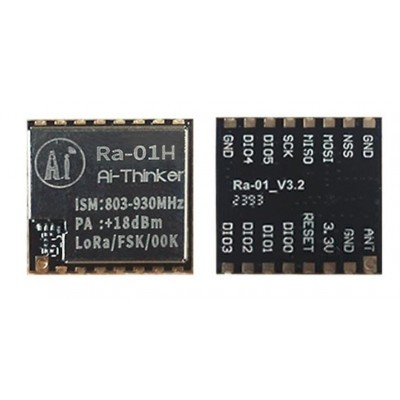
Ai Thinker LoRa Ra-01H Module
SX1276-based LoRa module operating at 868MHz. Long range up to 10km in open areas, ideal for TTN OTAA/ABP experiments and rural IoT deployments. SPI interface, works with Arduino and ESP32.
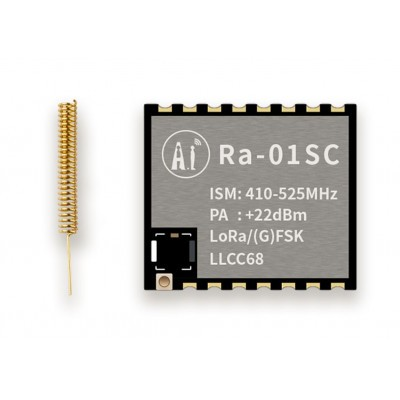
Ai Thinker LoRa Ra-01SC Module
Compact SX1262-based LoRa module with better sensitivity and lower power than SX1276. Supports OTAA and ABP. Ideal for Class A devices requiring low sleep current for battery-powered sensors.
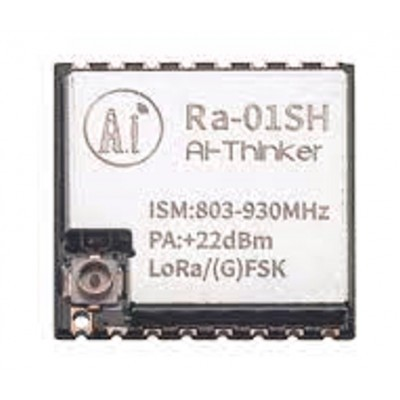
Ai Thinker LoRa Ra-01SH Spread Spectrum Wireless Module
High-power SX1262-based module for maximum range LoRaWAN applications. Perfect for remote agricultural sensors, environmental monitoring, and wide-area IoT deployments in India.

0.96 Inch I2C OLED LCD Module SSD1306
Add a display to your LoRa node to show join status, RSSI, SNR, and frame counter. Very helpful for debugging OTAA join issues in the field.
Frequently Asked Questions
Why is my OTAA join failing on TTN?
Common causes: (1) No gateway within range — check TTN coverage map; (2) Wrong frequency plan — ensure module and TTN application use the same plan (IN865 for India); (3) Byte order error — DevEUI and AppEUI must be in LSB (Least Significant Byte first) format in LMIC, while AppKey is MSB; (4) Gateway not configured to forward join requests; (5) DevEUI already registered elsewhere with different AppKey. Check TTN console live data tab to see if the join request arrives at all.
Should I use OTAA or ABP for a production LoRa deployment?
Always use OTAA for production deployments. ABP’s static session keys are a security liability, and the frame counter issue after device resets is a maintenance nightmare at scale. OTAA handles re-joins automatically, supports roaming between networks, and generates fresh session keys. The only valid case for ABP is devices that need to transmit immediately without any network dependency (e.g., simple offline data loggers where network join time is unacceptable).
How long does OTAA join take?
A successful OTAA join typically completes in 5–15 seconds, depending on the gateway’s response time and network conditions. The LMIC library will retry the join at exponentially increasing intervals if the first attempt fails. At SF10 (slower, longer range), a join can take up to 30 seconds for the initial request/response cycle.
What happens if an OTAA device goes out of gateway range?
The device will keep trying to transmit, but frames won’t reach the network. When it comes back into range, it doesn’t need to re-join (unless there was a reset). The existing session remains valid and transmission resumes automatically. If the device resets while out of range, it will attempt a new join when it comes back into gateway coverage.
What LoRa frequency should I use in India?
India’s WPC (Wireless Planning & Coordination) wing has approved 865–867 MHz for LoRa use without a license under the Short Range Device (SRD) category. The TTN IN865 frequency plan uses channels at 865.0625, 865.4025, 865.985 MHz. Use modules that support this range. Note: 433MHz LoRa modules also exist and can be used for private (non-LoRaWAN) point-to-point links without a license.
Build Your LoRaWAN Node with Zbotic
Get Ra-01H, Ra-01SC, Ra-01SH LoRa modules and all the components you need to build OTAA/ABP nodes for TTN — shipped across India with fast delivery from Zbotic.


Add comment