
Table of Contents
- Why Build an Autonomous Delivery Drone?
- How ArduPilot Enables Autonomy
- Complete Parts List for Your Build
- Choosing the Right Frame
- Setting Up the Flight Controller
- GPS and Telemetry Setup
- ESC and Motor Wiring
- Configuring Mission Planner
- Payload Delivery Mechanism
- Testing and Safety Checks
- Legal Considerations in India
- Frequently Asked Questions
Why Build an Autonomous Delivery Drone?
The drone delivery revolution is no longer just a concept from Silicon Valley boardrooms — it is actively happening across Indian cities and rural areas. From medicine delivery in remote Himalayan villages to last-mile e-commerce logistics in tier-2 cities, autonomous delivery drones are solving real problems. Companies like Skye Air, Throttle Aerospace, and TechEagle are already flying commercial delivery routes in India.
But here is the exciting part: you do not need a multi-crore budget to build one. With an open-source autopilot system called ArduPilot and readily available components from Zbotic, you can assemble a functional autonomous delivery drone for under ₹50,000. Whether you are a final-year engineering student, a drone hobbyist looking to level up, or an entrepreneur testing a delivery concept, this guide walks you through every step.
ArduPilot is the most widely used open-source autopilot in the world, powering everything from military UAVs to student competition drones. It supports GPS-guided waypoint navigation, Return-to-Launch (RTL), geofencing, and advanced payload control — all the features you need for a delivery application.
How ArduPilot Enables Autonomy
Before diving into the build, it helps to understand what makes a drone “autonomous.” A traditional RC drone requires a human pilot to control every movement. An autonomous drone, by contrast, uses onboard sensors and software to navigate, stabilize, and complete missions without continuous human input.
ArduPilot achieves this through a layered architecture:
- Sensor fusion: IMU (accelerometer + gyroscope), barometer, compass, and GPS data are fused together to give the drone a precise understanding of its position and orientation in 3D space.
- Extended Kalman Filter (EKF): ArduPilot uses an EKF algorithm to estimate the drone’s state even when individual sensors have noise or drift.
- Flight modes: Modes like AUTO, GUIDED, and LOITER allow the drone to follow pre-programmed waypoints, receive real-time target coordinates, or hold position mid-flight.
- Mission Planner GCS: A ground control station (GCS) app like Mission Planner lets you upload flight plans, monitor telemetry, and trigger payload release — all from a laptop or tablet.
For delivery applications, the typical workflow is: upload a mission with GPS waypoints → drone takes off autonomously → navigates to delivery point → triggers servo/gripper to release payload → returns home. This can be further enhanced with obstacle avoidance sensors, though that is beyond the scope of this basic build.
Complete Parts List for Your Build
Here is a realistic component list for a mid-size autonomous delivery quadcopter capable of carrying a 500g–1kg payload over distances of 3–5 km:
| Component | Recommended Spec | Approx. Cost |
|---|---|---|
| Frame | 500–600mm wheelbase, foldable | ₹4,000–8,000 |
| Flight Controller | Pixhawk 2.4.8 / Pixhawk 4 | ₹3,500–7,000 |
| GPS Module | NEO-M8N or better | ₹1,500–3,000 |
| Telemetry Radio | 915 MHz 3DR pair | ₹2,000–3,500 |
| Motors (×4) | 920–1000KV brushless | ₹3,000–6,000 |
| ESCs (×4) | 30–40A BLHeli32 | ₹2,500–5,000 |
| Propellers | 1045 or 1155 CF | ₹800–2,000 |
| Battery | 4S 5000–6000mAh LiPo | ₹4,000–7,000 |
| Power Module | 3DR or HV PM | ₹800–1,500 |
| RC Transmitter/Receiver | FlySky FS-i6 or similar | ₹3,500–6,000 |
| Servo (payload release) | MG90S or SG5010 | ₹300–600 |
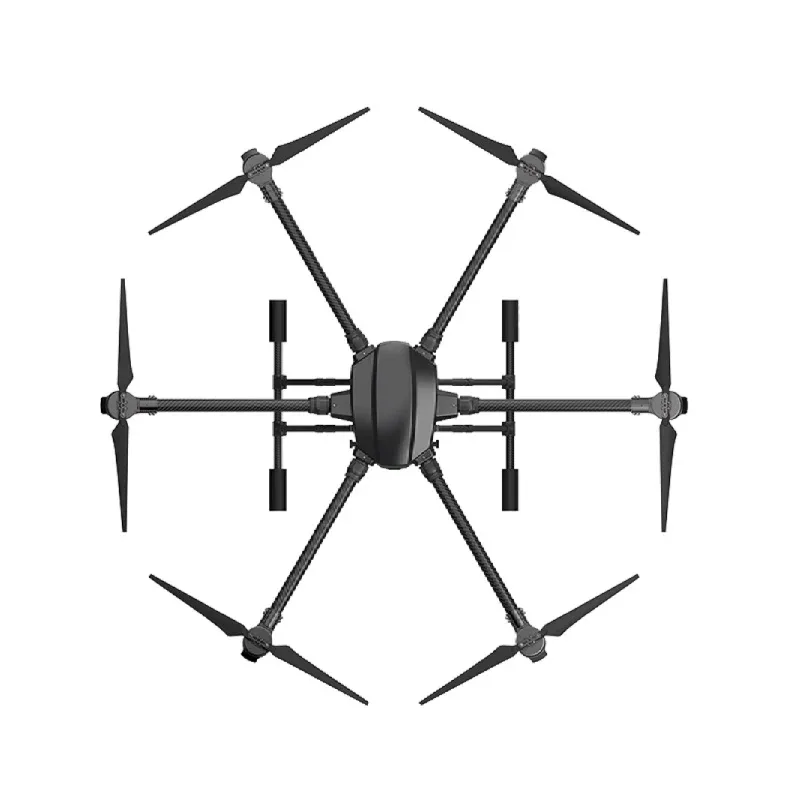
EFT 6120 Multifunction Surveillance Drone Frame
A professional-grade 6-rotor frame designed for heavy-lift and surveillance applications. Ideal base for an autonomous delivery build requiring higher payload capacity.

3DR 100mW Radio Telemetry 915MHz for APM/PX4/Pixhawk
Essential for real-time ground station communication. The 915MHz band offers excellent range in Indian conditions with minimal interference from Wi-Fi or 2.4GHz RC links.
Choosing the Right Frame
Frame selection is perhaps the most consequential decision in a delivery drone build. You need to balance payload capacity, portability, and structural rigidity. Here are the key factors to consider:
Wheelbase (Motor-to-Motor Distance)
Larger frames spin bigger, slower propellers that are more efficient. For a delivery drone carrying 500g–1kg of payload on top of its own weight (~800g–1.2kg), a 500–600mm wheelbase quadcopter with 1045–1155 propellers is the sweet spot. If you need to carry 2kg+, consider a hexacopter like the EFT E410P or E416P agricultural frames, which offer redundancy (drone can still fly on 5 motors if one fails) — critical for delivery reliability.
Material
- Carbon fiber: Best strength-to-weight ratio, but expensive. Ideal for arms and top/bottom plates.
- Glass fiber (G10): Heavier but cheaper and more durable under crash impacts. Good for beginners.
- Aluminum alloy: Used in folding mechanisms and central plates of agricultural/delivery frames.
Foldability
For delivery applications, especially in urban environments, the ability to fold the drone for transport in a backpack or car trunk is highly desirable. Most professional delivery frames have folding arms.

EFT E410P 10L 4-Axis Agricultural Drone Frame
A heavy-duty foldable quadcopter frame capable of carrying substantial payloads. Originally designed for agricultural spraying, it doubles as an excellent delivery drone platform with its robust aluminium and carbon construction.
Setting Up the Flight Controller
The Pixhawk series (2.4.8, 4, or 6C) running ArduCopter firmware is the standard choice for autonomous builds. Here is the setup process:
Step 1: Install ArduCopter Firmware
- Download Mission Planner from
ardupilot.org/plannerand install on your Windows laptop. - Connect Pixhawk to PC via USB.
- In Mission Planner → Setup → Install Firmware → select Quad (or Hexa if applicable).
- Select the latest stable ArduCopter release. Do NOT use beta firmware for a delivery build.
Step 2: Accelerometer Calibration
Follow Mission Planner’s guided calibration: hold the drone in 6 orientations (level, nose down, nose up, left side, right side, back). This is critical for stable autonomous flight — a poorly calibrated accelerometer will cause drift and oscillations.
Step 3: Compass Calibration
Use the onboard compass AND an external GPS/compass module (mounted on a mast away from power wires). External compass should be set as primary. Run the compass calibration in an open area away from metal structures and electronics interference.
Step 4: Radio Calibration
Bind your RC transmitter, then calibrate channels in Mission Planner. Set up at minimum: throttle, roll, pitch, yaw, and a 3-position switch for flight modes (Stabilize / Loiter / Auto).
Step 5: Motor Test
Remove props. Use Mission Planner’s motor test to verify correct motor order (ArduCopter uses a specific numbering: Motor 1 = front-right, Motor 2 = rear-left, etc.) and rotation direction.

Anti-Vibration Shock Absorber for APM/KK/MWC/PixHawk
Motor vibrations are the number one killer of autonomous flight quality. These silicone dampeners mount between the flight controller and frame to isolate vibrations, ensuring clean IMU readings and stable ArduPilot performance.
GPS and Telemetry Setup
A reliable GPS lock is non-negotiable for autonomous flight. Here is what you need to know:
GPS Module Placement
Mount the GPS/compass module on a 10–15cm riser mast above the frame, positioned as far as possible from the ESCs, battery, and power distribution board. These are major sources of electromagnetic interference (EMI) that can corrupt compass readings and cause the drone to circle uncontrollably (“toilet bowling”).
Pre-Arm GPS Requirements
ArduCopter will not arm in AUTO mode unless it has a 3D GPS fix with at least 6 satellites and HDOP below 1.5. In Indian cities, GPS lock typically takes 30–60 seconds outdoors. Do not fly in deep urban canyons where satellite count drops.
Telemetry Link
The 915MHz 3DR telemetry pair connects Pixhawk to your laptop running Mission Planner. This gives you real-time telemetry (battery voltage, GPS position, altitude, flight mode) and allows you to upload/modify missions mid-flight. The 433MHz version is also available if you find 915MHz congested in your area.

3DR Single TTL MINI Radio Telemetry 433MHz 500mW for Pixhawk/APM
Compact telemetry module with 500mW output power for extended range ground station communication. Essential for monitoring your autonomous delivery mission in real time.
ESC and Motor Wiring
Power system wiring is where most beginners make mistakes. Follow this sequence:
- Solder motors to ESCs: Connect the 3 motor phase wires. To reverse direction, swap any two of the three wires.
- Connect ESCs to PDB: The 100A Power Distribution Board handles battery power routing to all 4 ESCs plus a 5V/12V BEC for the flight controller and peripherals.
- Connect ESC signal wires to Pixhawk: ESC PWM signal goes to Pixhawk’s Main Out ports (1–4 for quadcopter).
- Power module: The 3DR power module sits between the battery and PDB, providing current and voltage sensing data to Pixhawk’s power port.

100A Multirotor ESC Power Distribution Battery Board for Quadcopter
Clean, centralised power distribution for all 4 ESCs with integrated current rating of 100A. Includes solder pads for ESC and battery connections, keeping your build tidy and reducing the risk of loose connections mid-flight.

1045 Carbon Fiber Propeller CW & CCW Pair
10-inch, 4.5-pitch carbon fiber propellers for efficient thrust generation. Lightweight yet rigid, ideal for delivery drone builds where efficiency directly translates to longer flight time and heavier payload capacity.
Configuring Mission Planner for Autonomous Flight
This is where your drone becomes truly autonomous. Mission Planner’s Flight Plan tab lets you lay out GPS waypoints on a map and define actions at each point.
Creating a Delivery Mission
- Open Mission Planner → Flight Plan tab.
- Right-click on the map to add waypoints. Set altitude (recommended: 30–50m for obstacle clearance in India).
- At the delivery point, add a DO_SET_SERVO command: Channel 9, PWM 2000 (to trigger payload servo).
- Add a loiter command (5–10 seconds) after the servo trigger to allow payload to be collected.
- Add a Return to Launch (RTL) command as the final waypoint.
- Click “Write WPs” to upload the mission to Pixhawk.
Key Parameters to Set
WPNAV_SPEED: 500–1000 cm/s (5–10 m/s) for delivery — not too fast, not too slow.RTL_ALT: Set to at least 3000cm (30m) so the drone climbs before returning, clearing obstacles.FS_THR_ENABLE: Enable throttle failsafe — if RC link is lost, drone will RTL automatically.BATT_FS_LOW_VOLT: Set low battery failsafe voltage for your battery chemistry. For 4S LiPo, set around 14.0V (3.5V per cell).GCS_FAILSAFE_ENABLE: Enable GCS failsafe — if telemetry is lost for 5+ seconds, drone RTLs.
Payload Delivery Mechanism
The simplest delivery mechanism uses a servo-actuated gripper or hook:
- Mount a servo on the drone’s belly using a 3D-printed bracket.
- Attach a monofilament line to the servo arm. The payload hangs from this line via a hook.
- When the servo rotates, the hook opens and the payload is released.
- Connect the servo signal wire to Pixhawk AUX Out port (e.g., AUX1 = Channel 9).
- Use Mission Planner’s DO_SET_SERVO command to trigger release at the delivery waypoint.
For more advanced builds, you can use a winch mechanism to lower the payload to the ground (avoiding the need for the drone to actually land), which is how many commercial delivery drones operate.
Testing and Safety Checks
Never skip the testing phase, especially for an autonomous build. Follow this order:
- Bench test: With props OFF, test all systems — motors spin in correct direction, GPS locks, RC input works, telemetry connects.
- Tethered hover test: Tie the drone to stakes with 1-meter ropes. Arm and throttle up slowly. Check for oscillations and hover stability.
- Manual hover test: Fly in Stabilize mode first, then Loiter (GPS hold). Verify the drone holds position accurately.
- Short autonomous mission: Program a simple 3-waypoint mission within visual line of sight (VLOS). Keep altitude low (15–20m). Have a spotter watch the drone while you monitor telemetry.
- Payload test: Carry an inert payload (no servo release) on the same mission. Check flight time reduction and stability.
- Full delivery test: Only after passing all above tests, test the full mission including payload release.
Legal Considerations in India
Drone laws in India are governed by DGCA (Directorate General of Civil Aviation) under the Drone Rules 2021. Key points for delivery drone builders:
- Drones above 250g require UIN (Unique Identification Number) registration on the Digital Sky portal.
- Flying above 400 feet AGL or beyond VLOS requires a Remote Pilot Certificate (RPC).
- Commercial delivery operations require a Drone Operator Permit (DOP) and prior approval from state authorities.
- No-fly zones include airports (within 5km), military areas, and many urban districts without prior LAANC-equivalent permission.
- The Indian government has announced a drone corridor policy — dedicated low-altitude airspace for drone delivery in select cities.
For a DIY build used for testing and research purposes, follow the VLOS requirement, stay below 120m AGL (400ft), and register your drone on the Digital Sky portal. Do not attempt commercial delivery without proper permits.
Frequently Asked Questions
How far can an ArduPilot delivery drone fly?
A well-optimised 4S quadcopter with a 6000mAh battery can fly 15–25 minutes. At 10 m/s cruise speed that translates to roughly 4–6 km range. A hexacopter with dual batteries can extend this to 8–10 km one way. For longer ranges, switch to a fixed-wing ArduPlane build.
What is the maximum payload for a DIY delivery drone?
A mid-size quadcopter (550mm, 1000KV motors, 1045 props, 4S) can typically carry 500g–800g of payload while maintaining 15+ minutes flight time. Larger hexacopter frames like the EFT E416P can carry 2–3kg payloads. Total weight (drone + battery + payload) must not exceed the thrust-to-weight ratio of 2:1 minimum.
Do I need a drone licence to build an autonomous delivery drone in India?
For personal testing on your own private property below 50m altitude with a drone under 2kg, registration is the main requirement (UIN on Digital Sky portal). For any commercial operation or flights in public airspace, you need a Remote Pilot Certificate (RPC) from DGCA.
Is ArduPilot better than DJI for autonomous delivery?
ArduPilot gives you full control over the flight stack — you can customise failsafes, integrate custom sensors, and connect to your own backend systems. DJI’s SDK is easier to start with but has limitations on payload integration, geofencing override, and commercial licensing. For serious delivery product development, ArduPilot is the professional choice.
What happens if GPS signal is lost mid-mission?
ArduPilot’s EKF can continue using accelerometers and barometer for short periods (called “EKF dead reckoning”). However, position drift increases rapidly. The recommended practice is to set GPS_HDOP_GOOD to a strict value and configure the drone to RTL immediately if GPS accuracy degrades below threshold. Never fly autonomous missions in areas with GPS jamming or poor sky view.
Conclusion
Building an autonomous delivery drone with ArduPilot is one of the most rewarding drone projects you can take on in India today. You are not just building a flying machine — you are developing skills in embedded systems, control theory, RF communications, and systems integration that are directly applicable to the booming Indian drone industry.
Start with a proven frame, use genuine Pixhawk hardware, and take the testing phase seriously. The ArduPilot community forums (discuss.ardupilot.org) have an incredibly active Indian user base and are an excellent resource for troubleshooting. Zbotic stocks all the components you need to get started — from frames and flight controllers to GPS modules and telemetry radios — so you can source everything from a single trusted supplier.


Add comment