
One of the most impressive features of the DS18B20 temperature sensor is its ability to share a single data wire with dozens of other DS18B20 sensors — all connected in parallel on a single Arduino pin. This 1-Wire bus protocol developed by Dallas Semiconductor (now Maxim Integrated) gives each sensor a unique 64-bit ROM address, allowing your Arduino to individually address and read each one independently. This tutorial covers everything you need to know to build a multi-point temperature monitoring system with multiple DS18B20 sensors on a single 1-Wire bus.
DS18B20 Overview: Why It Supports Multiple Sensors
The DS18B20 is a digital thermometer with a measurement range of -55°C to +125°C and factory-calibrated accuracy of ±0.5°C across the -10°C to +85°C range — impressive for a sensor that costs less than ₹50. What makes it uniquely suited for multi-sensor systems is its 1-Wire communication protocol.
Every DS18B20 chip is programmed at the factory with a globally unique 64-bit address (also called ROM code or serial number). This 64-bit code consists of an 8-bit family code (0x28 for DS18B20), 48 bits of unique ID, and an 8-bit CRC for error detection. When you connect ten DS18B20 sensors to one Arduino pin, the 1-Wire library can enumerate all of them, get their unique IDs, and then selectively read each one — all over the same single wire.
This is in stark contrast to analog sensors like the LM35 or thermistors, where each sensor needs its own ADC pin. With DS18B20 on a 1-Wire bus, you could theoretically connect 100 sensors to a single digital pin (practical limits are around 10–20 due to bus capacitance). This makes DS18B20 the top choice for:
- Multi-zone HVAC temperature monitoring
- Aquarium and greenhouse multi-point sensing
- Battery pack cell temperature monitoring
- Industrial pipeline temperature profiling
- Soil temperature at multiple depths for agricultural IoT

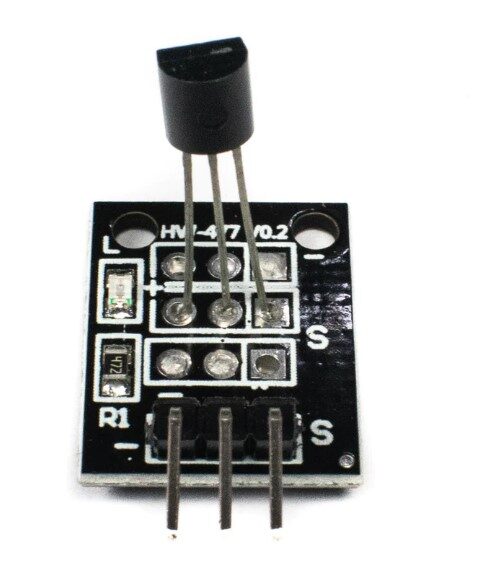
DS18B20 Programmable Resolution Temperature Sensor IC
The classic TO-92 DS18B20 IC — connect multiple on a single Arduino pin for multi-zone temperature monitoring with unique 64-bit addressing.
Hardware Wiring: Connecting Multiple DS18B20s to Arduino
The DS18B20 in TO-92 package has three pins. Identify them by looking at the flat face of the package with the text facing you:
- Left pin (GND): Ground
- Middle pin (DQ): Data (1-Wire bus) — this is the single shared data line
- Right pin (VDD): Power supply (3.0V to 5.5V)
Normal (Externally Powered) Mode — Recommended
For most applications, power each DS18B20 from Arduino’s 5V (or 3.3V) supply. Connect all sensors in parallel:
| All DS18B20 Pins | Connect To |
|---|---|
| VDD (all sensors) | 5V (Arduino) |
| GND (all sensors) | GND (Arduino) |
| DQ (all sensors) | Arduino Pin 2 (shared bus) |
| Pull-up resistor | 4.7kΩ between DQ bus and 5V |
The 4.7kΩ pull-up resistor is mandatory. The 1-Wire bus is an open-drain bus — sensors pull it LOW to communicate, and the pull-up resistor pulls it HIGH when idle. Without this resistor, communication fails completely. Use a single pull-up for the entire bus (one resistor for all sensors).
Wiring Topology Tips
Star vs. Linear (daisy-chain) topology: Always use linear (daisy-chain) topology — run the bus wire from sensor to sensor in a line. Avoid star topology where multiple branches radiate out from a central point. Stars create signal reflections that corrupt 1-Wire communication, especially at longer distances. Each sensor shares the same 3-wire bus (VDD, GND, DQ) running serially from sensor to sensor.
Maximum bus length: With 4.7kΩ pull-up and normal wiring, reliable operation up to 100 meters is achievable. For very long cables or many sensors, reduce the pull-up resistor to 2.2kΩ to reduce rise time — but do not go below 1kΩ as it may damage sensors.
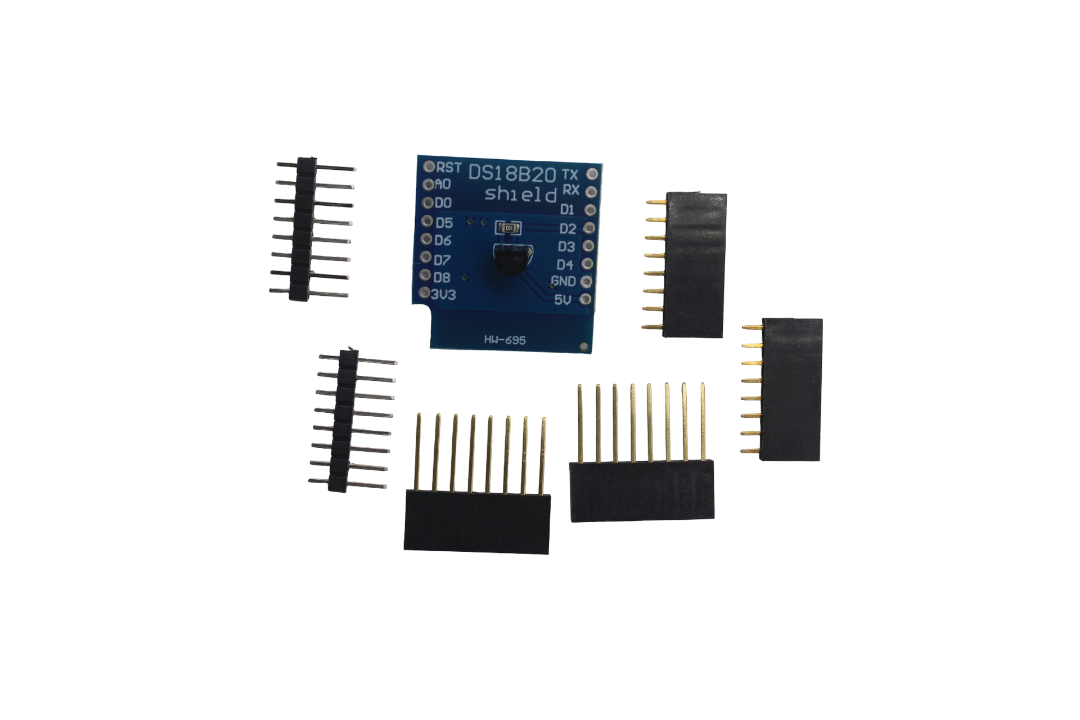
DS18B20 Module for D1 Mini Temperature Measurement Sensor Module
Pre-mounted DS18B20 with pull-up resistor built in — plug directly into your Wemos D1 Mini for 1-Wire temperature sensing without extra components.
Library Setup: OneWire and DallasTemperature
You need two libraries. Open Arduino IDE → Sketch → Include Library → Manage Libraries:
- Search “OneWire” by Paul Stoffregen — install the latest version
- Search “DallasTemperature” by Miles Burton — install the latest version
The OneWire library handles the low-level 1-Wire protocol timing (reset, presence detection, ROM commands, data read/write). The DallasTemperature library sits on top of OneWire and provides a high-level API specifically for DS18B20 and other Dallas temperature sensors — handling conversion commands, scratchpad reads, CRC verification, and unit conversion automatically.
Scanning and Identifying Sensor Addresses
Before you can address individual sensors, you need to discover their 64-bit addresses. Run this sketch to enumerate all sensors on the bus:
#include <OneWire.h>
#include <DallasTemperature.h>

#define ONE_WIRE_BUS 2  // Arduino pin for the 1-Wire bus

OneWire          oneWire(ONE_WIRE_BUS);
DallasTemperature sensors(&oneWire);

void setup() {
  Serial.begin(115200);
  sensors.begin();

  int deviceCount = sensors.getDeviceCount();
  Serial.print("Found ");
  Serial.print(deviceCount);
  Serial.println(" DS18B20 sensor(s) on bus:");
  Serial.println();

  DeviceAddress addr;
  for (int i = 0; i < deviceCount; i++) {
    if (sensors.getAddress(addr, i)) {
      Serial.print("Sensor ");
      Serial.print(i);
      Serial.print("  Address: ");
      printAddress(addr);
      Serial.println();
    }
  }
}

void printAddress(DeviceAddress addr) {
  for (uint8_t i = 0; i < 8; i++) {
    if (addr[i] < 16) Serial.print("0");  // Leading zero
    Serial.print(addr[i], HEX);
    if (i < 7) Serial.print("-");
  }
}

void loop() {}
Connect your sensors one at a time and record each address printed in the Serial Monitor. Label your sensors physically (use a marker on the cable) with the address index or the last 4 hex digits of their address. This is essential for identifying which sensor is reading which physical location.
Sample output with 3 sensors:
Found 3 DS18B20 sensor(s) on bus:

Sensor 0  Address: 28-FF-3A-4C-A0-17-05-C1
Sensor 1  Address: 28-01-9D-5E-A0-17-05-88
Sensor 2  Address: 28-BB-12-1F-A0-17-05-3F
Reading Specific Sensors by Address
Once you have your sensor addresses, hardcode them into your project. This ensures consistent sensor identification even if the bus is power-cycled or a sensor is temporarily disconnected and reconnected:
#include <OneWire.h>
#include <DallasTemperature.h>

#define ONE_WIRE_BUS 2

OneWire          oneWire(ONE_WIRE_BUS);
DallasTemperature sensors(&oneWire);

// === Hardcoded sensor addresses (from scan sketch above) ===
DeviceAddress sensor_room    = { 0x28, 0xFF, 0x3A, 0x4C, 0xA0, 0x17, 0x05, 0xC1 };
DeviceAddress sensor_outside = { 0x28, 0x01, 0x9D, 0x5E, 0xA0, 0x17, 0x05, 0x88 };
DeviceAddress sensor_water   = { 0x28, 0xBB, 0x12, 0x1F, 0xA0, 0x17, 0x05, 0x3F };

void setup() {
  Serial.begin(115200);
  sensors.begin();

  // Set 12-bit resolution for all sensors
  sensors.setResolution(sensor_room,    12);
  sensors.setResolution(sensor_outside, 12);
  sensors.setResolution(sensor_water,   12);

  Serial.println("DS18B20 multi-sensor system ready.");
}

void loop() {
  // Request temperature conversion from ALL sensors simultaneously
  sensors.requestTemperatures();

  // Read each sensor by its address
  float temp_room    = sensors.getTempC(sensor_room);
  float temp_outside = sensors.getTempC(sensor_outside);
  float temp_water   = sensors.getTempC(sensor_water);

  Serial.print("Room: ");    Serial.print(temp_room, 2);    Serial.print("°C  ");
  Serial.print("Outside: "); Serial.print(temp_outside, 2); Serial.print("°C  ");
  Serial.print("Water: ");   Serial.print(temp_water, 2);   Serial.println("°C");

  delay(2000);
}
Notice the key pattern: sensors.requestTemperatures() is called once — it sends a single CONVERT T command on the bus that triggers all sensors to simultaneously start their analog-to-digital conversion. Then you read each sensor individually with getTempC(address). This is far more efficient than requesting and reading each sensor individually.
Simultaneous Temperature Conversion for Speed
By default, the DallasTemperature library uses blocking mode: requestTemperatures() waits for the conversion to complete before returning. At 12-bit resolution, this means a blocking wait of up to 750ms per call — and since all sensors convert simultaneously, it is still only 750ms total regardless of sensor count. This is already very efficient for most applications.
For time-critical applications, use non-blocking (async) mode:
void setup() {
  sensors.begin();
  sensors.setWaitForConversion(false);  // Non-blocking mode
}

unsigned long lastRequest = 0;
bool conversionRequested  = false;

void loop() {
  if (!conversionRequested) {
    sensors.requestTemperatures();
    lastRequest          = millis();
    conversionRequested  = true;
  }

  // 750ms conversion time for 12-bit resolution
  if (conversionRequested && (millis() - lastRequest >= 750)) {
    float temp1 = sensors.getTempC(sensor_room);
    float temp2 = sensors.getTempC(sensor_outside);
    float temp3 = sensors.getTempC(sensor_water);

    // ... use temp1, temp2, temp3 ...
    Serial.print(temp1); Serial.print(" "); Serial.println(temp2);

    conversionRequested = false;  // Ready for next cycle
  }

  // Do other work here while conversion happens in background...
  doOtherWork();
}

void doOtherWork() {
  // Read other sensors, update display, etc.
}
DS18B20 Temperature Sensor Module
Board-mounted DS18B20 with pull-up resistor and indicator LED — easiest way to add a calibrated digital temperature probe to any Arduino project.
Parasitic Power Mode for Long-Distance Sensing
In parasitic power mode, the DS18B20 eliminates the VDD wire entirely — the sensor draws its power directly from the DQ data line (it stores charge in an internal capacitor during high periods). This means you only need TWO wires for very long sensor runs: GND and DQ. This is ideal for embedded probes in walls or underground pipelines.
To enable parasitic mode:
- Connect DS18B20 VDD pin to GND (not left floating)
- Connect DQ to your Arduino pin with 4.7kΩ pull-up to 5V
- During temperature conversion, the 1-Wire master must actively hold the bus HIGH (strong pull-up)
// For parasitic power — use requestTemperatures with parasite power flag
sensors.requestTemperatures();  // Library auto-detects parasitic mode
// Library will drive bus HIGH for 750ms during conversion automatically
Limitation: In parasitic mode, you cannot run multiple 1-Wire operations during conversion, and bus length is more restricted (lower current means more voltage drop over long cables). For most parasitic applications, keep total cable length under 20 meters.
Setting Measurement Resolution (9–12 bit)
The DS18B20 offers four resolution settings that trade off between conversion time and temperature precision:
| Resolution | Precision | Conversion Time | Best For |
|---|---|---|---|
| 9-bit | ±0.5°C (0.5°C steps) | 93.75 ms | Fast polling, HVAC triggers |
| 10-bit | 0.25°C steps | 187.5 ms | General use |
| 11-bit | 0.125°C steps | 375 ms | Lab measurements |
| 12-bit | 0.0625°C steps | 750 ms | Maximum precision |
The resolution setting is stored in the sensor’s EEPROM — it persists across power cycles. Set it once in your setup() and it stays until you change it:
sensors.setResolution(9);   // All sensors, 9-bit (fastest)
sensors.setResolution(12);  // All sensors, 12-bit (most precise)
sensors.setResolution(sensorAddress, 11);  // Specific sensor only
Frequently Asked Questions

LM35 Temperature Sensors
Simple analog alternative when you need just one or two temperature readings without the 1-Wire protocol complexity — direct mV/°C output.
Conclusion
The ability to run multiple DS18B20 sensors on a single 1-Wire bus with Arduino is one of the most practical and elegant features in the maker world. With just one data pin, a single pull-up resistor, and two well-established libraries, you can build a professional multi-zone temperature monitoring system that rivals commercial solutions at a fraction of the cost.
The key takeaways: always use linear daisy-chain topology, include the mandatory 4.7kΩ pull-up, scan and record each sensor’s unique 64-bit address, and use requestTemperatures() once for simultaneous conversion across all sensors. Whether you are monitoring room temperatures, tank levels, battery packs, or industrial pipelines, DS18B20 on a 1-Wire bus is the most wire-efficient way to add distributed temperature sensing to your Arduino project.


Add comment