
Table of Contents
- Introduction
- How ESP32 + Alexa Works
- Hardware & Software Requirements
- Wiring Diagram
- Method 1: Using SinricPro (Easiest)
- Method 2: Using FauxmoESP (Local, No Cloud)
- Complete Arduino Code
- Controlling Multiple Devices
- Troubleshooting Common Issues
- Recommended Products from Zbotic
- FAQs
- Conclusion
Introduction
Imagine walking into your home after a long day and saying “Alexa, turn on the living room lights” — and it just works. With an ESP32, a relay module, and a free Alexa skill, you can build this exact experience for under ₹800, without buying expensive commercial smart switches or subscribing to any paid service.
This guide covers everything you need to set up ESP32 Alexa home automation from scratch. Whether you want to control a single LED for learning or automate every light and fan in your house, the techniques here scale to any size. We cover two methods — one cloud-based (SinricPro) and one fully local (FauxmoESP) — so you can choose based on your privacy preferences and network setup.
How ESP32 + Alexa Works
There are two main architectures for connecting an ESP32 to Alexa:
1. Cloud-Based (via SinricPro or Sinric)
Your ESP32 connects to a cloud service (SinricPro, Sinric, or IFTTT). Alexa’s skill connects to the same cloud service. When you say “Alexa, turn on the fan”, Alexa sends a command to the cloud, which relays it to your ESP32 over MQTT. The ESP32 triggers the relay.
Pros: Works from anywhere (remote control via internet). Cons: Requires internet, latency ~500ms–1s, third-party cloud involved.
2. Local Network (via FauxmoESP)
The ESP32 emulates a Belkin WeMo smart plug on your local network. Alexa’s device discovery finds it directly. No cloud involved — the entire communication stays inside your Wi-Fi network.
Pros: Zero latency, works without internet, fully private. Cons: Only works on local network, no remote access.
Hardware & Software Requirements
Hardware
- ESP32 development board (NodeMCU-32S or similar)
- 5V relay module (1-channel or 4-channel depending on how many devices you want to control)
- Amazon Echo device (Echo Dot, Echo, Echo Show, or Alexa app)
- Jumper wires
- 5V power supply or USB cable
- AC appliance to control (lamp, fan, etc.) — for beginners, start with an LED first
Software
- Arduino IDE 2.x (latest version)
- ESP32 board package installed in Arduino IDE
- SinricPro library (for Method 1) or FauxmoESP library (for Method 2)
- SinricPro account (free at sinricpro.com) — for Method 1
- Alexa app on your phone
Safety Warning
Important: Working with mains AC voltage (230V in India) is dangerous. If you are not trained in electrical work, do NOT connect your relay to the mains. Practice with 5V DC circuits and LEDs first. Always use an enclosure and proper insulation when working with AC.
Wiring Diagram
ESP32 to Relay Module
| ESP32 Pin | Relay Module Pin |
|---|---|
| VIN (5V) | VCC |
| GND | GND |
| GPIO 26 | IN1 (Signal) |
The relay’s COM and NO (Normally Open) terminals go in series with the load. When GPIO 26 goes LOW (active-low relay), the relay closes and the appliance turns on.
Method 1: Using SinricPro (Easiest)
Step 1: Create a SinricPro Account
- Go to sinricpro.com and create a free account.
- Click Devices → Add Device → select Switch.
- Give it a name like “Living Room Light”.
- Copy the App Key, App Secret, and Device ID — you will need these in the code.
Step 2: Enable the Alexa Skill
- Open the Alexa app → Skills & Games → search “SinricPro”.
- Enable the skill and link your SinricPro account.
- Say “Alexa, discover my devices” (or use the Alexa app).
Step 3: Install the Library
In Arduino IDE: Sketch → Include Library → Manage Libraries → search SinricPro → Install. Also install the ArduinoJson and WebSockets libraries.
Method 2: Using FauxmoESP (Local, No Cloud)
Step 1: Install the Library
FauxmoESP is not in the Arduino Library Manager. Download it from GitHub: github.com/vintlabs/fauxmoESP and add it as a ZIP library in Arduino IDE. Also install the ESPAsyncTCP and ESPAsyncWebServer libraries.
Step 2: ESP32 Network Configuration
For FauxmoESP to work reliably, give your ESP32 a static IP address. This prevents device discovery issues after reboots. Configure static IP in your router’s DHCP reservation settings using the ESP32’s MAC address.
Step 3: Alexa Discovery
Once the ESP32 is running with FauxmoESP, say “Alexa, discover my devices”. Alexa will find the ESP32-emulated device on your local network within 30 seconds.
Complete Arduino Code
SinricPro Method (recommended for beginners)
#include <Arduino.h>
#include <WiFi.h>
#include "SinricPro.h"
#include "SinricProSwitch.h"

// WiFi credentials
#define WIFI_SSID     "Your_WiFi_Name"
#define WIFI_PASS     "Your_WiFi_Password"

// SinricPro credentials (from dashboard)
#define APP_KEY       "your-app-key-here"
#define APP_SECRET    "your-app-secret-here"
#define SWITCH_ID     "your-device-id-here"

// Relay pin
#define RELAY_PIN     26
#define RELAY_ON      LOW   // Active LOW relay
#define RELAY_OFF     HIGH

bool onPowerState(const String &deviceId, bool &state) {
  Serial.printf("Device %s turned %srn",
    deviceId.c_str(), state ? "on" : "off");
  digitalWrite(RELAY_PIN, state ? RELAY_ON : RELAY_OFF);
  return true;
}

void setupWiFi() {
  WiFi.begin(WIFI_SSID, WIFI_PASS);
  Serial.print("Connecting to WiFi");
  while (WiFi.status() != WL_CONNECTED) {
    Serial.print(".");
    delay(500);
  }
  Serial.printf("rnConnected! IP: %srn",
    WiFi.localIP().toString().c_str());
}

void setupSinricPro() {
  SinricProSwitch& mySwitch = SinricPro[SWITCH_ID];
  mySwitch.onPowerState(onPowerState);
  SinricPro.begin(APP_KEY, APP_SECRET);
}

void setup() {
  Serial.begin(115200);
  pinMode(RELAY_PIN, OUTPUT);
  digitalWrite(RELAY_PIN, RELAY_OFF); // Start OFF
  setupWiFi();
  setupSinricPro();
}

void loop() {
  SinricPro.handle();
}
FauxmoESP Method (local network)
#include <Arduino.h>
#include <WiFi.h>
#include "fauxmoESP.h"

#define WIFI_SSID   "Your_WiFi_Name"
#define WIFI_PASS   "Your_WiFi_Password"
#define RELAY_PIN   26

fauxmoESP fauxmo;

void wifiSetup() {
  WiFi.mode(WIFI_STA);
  WiFi.begin(WIFI_SSID, WIFI_PASS);
  while (WiFi.status() != WL_CONNECTED) delay(100);
  Serial.printf("[WiFi] Connected: %sn",
    WiFi.localIP().toString().c_str());
}

void setup() {
  Serial.begin(115200);
  pinMode(RELAY_PIN, OUTPUT);
  digitalWrite(RELAY_PIN, HIGH); // OFF
  wifiSetup();
  fauxmo.createServer(true);
  fauxmo.setPort(80);
  fauxmo.enable(true);
  // Device name must match what you say to Alexa
  fauxmo.addDevice("Living Room Light");
  fauxmo.onSetState([](unsigned char device_id,
    const char * device_name, bool state, unsigned char value) {
    Serial.printf("[FAUXMO] %s -> %sn",
      device_name, state ? "ON" : "OFF");
    if (strcmp(device_name, "Living Room Light") == 0) {
      digitalWrite(RELAY_PIN, state ? LOW : HIGH);
    }
  });
}

void loop() {
  fauxmo.handle();
}
Controlling Multiple Devices
Scaling to multiple appliances is straightforward. For each additional appliance, you need:
- One additional relay channel (use a 4-channel or 8-channel relay board)
- One additional device in SinricPro (or one more
fauxmo.addDevice()call) - One additional callback or GPIO pin assignment
Example: 4-device setup
// SinricPro multi-device
#define SWITCH_1_ID  "device-id-1"  // Living Room Light
#define SWITCH_2_ID  "device-id-2"  // Bedroom Fan
#define SWITCH_3_ID  "device-id-3"  // Study Lamp
#define SWITCH_4_ID  "device-id-4"  // Plug Socket

int relayPins[] = {26, 27, 14, 12};
String deviceIds[] = {SWITCH_1_ID, SWITCH_2_ID,
                      SWITCH_3_ID, SWITCH_4_ID};

bool onPowerState(const String &deviceId, bool &state) {
  for (int i = 0; i < 4; i++) {
    if (deviceId == deviceIds[i]) {
      digitalWrite(relayPins[i], state ? LOW : HIGH);
      break;
    }
  }
  return true;
}
Troubleshooting Common Issues
Alexa says “That device is not responding”
- Check that your ESP32 is connected to Wi-Fi (Serial monitor shows IP address).
- For SinricPro: verify App Key, App Secret, and Device ID are correct and that your ESP32 can reach the internet.
- For FauxmoESP: ensure Alexa and ESP32 are on the same Wi-Fi network (not guest network).
Alexa can’t discover the device
- FauxmoESP: Disable firewall/AP isolation on your router. Some routers block mDNS discovery.
- Try re-running device discovery from the Alexa app: Devices → + → Add Device → Other.
- Make sure port 80 is not blocked on your network.
Relay clicks but appliance doesn’t turn on
- Verify relay wiring: use COM and NO (Normally Open) terminals, not NC.
- Check that the relay module’s VCC is receiving 5V (ESP32 VIN, not 3.3V pin).
- Some relay modules are active HIGH — change
RELAY_ONtoHIGHandRELAY_OFFtoLOW.
ESP32 keeps rebooting
- Power issue — relay coils draw current on activation and can brown-out the ESP32. Use a separate 5V supply for the relay board, with shared GND.
- Add a 100µF capacitor across the ESP32’s power pins.
Recommended Products from Zbotic

Ai Thinker NodeMCU-32S ESP32 Development Board
The workhorse ESP32 board for home automation. Dual-core 240MHz, Wi-Fi + Bluetooth, 38 GPIO pins — everything you need to control relays and talk to Alexa.

30Pin ESP32 Expansion Board with Type-C and Micro USB
Prototyping board that breaks out all ESP32 pins cleanly. Makes relay wiring neat and reduces breadboard clutter for home automation builds.
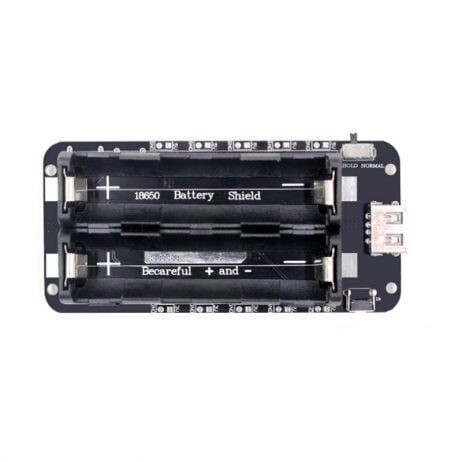
2 × 18650 Battery Shield V8 for ESP32/Arduino
Add 5V/3A portable power to your ESP32 home automation hub. Great for backup power or portable installations — 5V output eliminates relay brown-out issues.
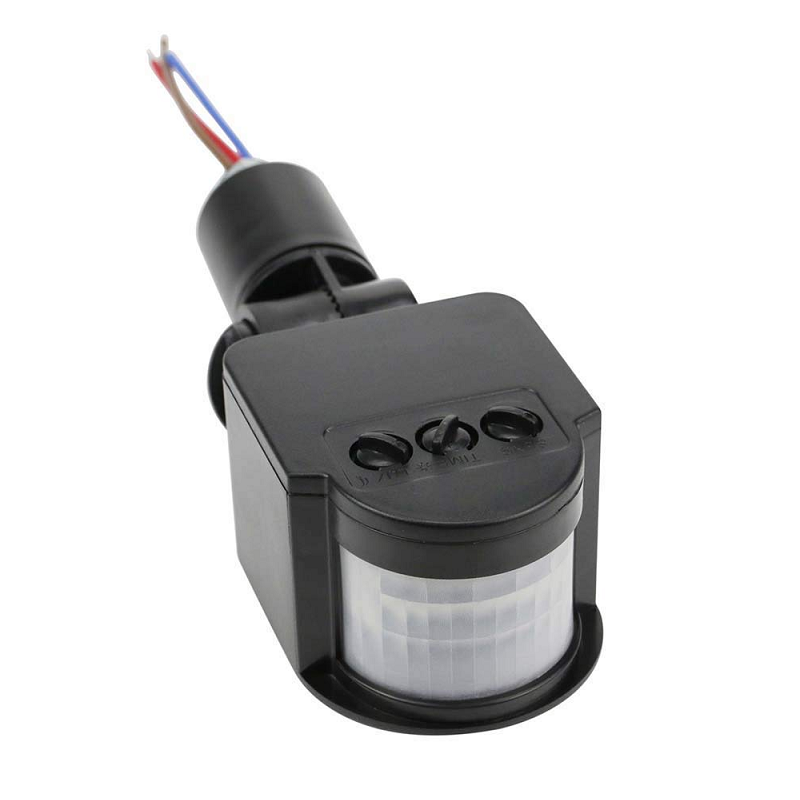
AC 220V PIR Human Body Motion Sensor Switch
Automate lights when motion is detected. Combine with your ESP32 Alexa setup for occupancy-based automation — lights turn on automatically when you enter a room.
Frequently Asked Questions
Do I need an Amazon Echo device to use Alexa with ESP32?
You need some Alexa endpoint. This can be an Echo Dot, Echo, Echo Show, or even the free Alexa app on your Android or iOS phone. The Alexa app works fine for testing and basic use — you do not necessarily need to buy an Echo speaker.
Can I control the ESP32 when I’m away from home?
Yes, but only with the cloud-based method (SinricPro). The FauxmoESP local method only works when your phone and ESP32 are on the same Wi-Fi network. For remote access, SinricPro routes commands through their cloud servers, so you can control your home from anywhere with internet.
Is this safe to use with 230V AC appliances?
The relay module provides electrical isolation between the low-voltage ESP32 circuit and the mains AC side. When wired correctly with proper insulation and an enclosed housing, it is safe. However, if you are not confident with electrical work, we strongly recommend hiring an electrician for the AC wiring portion and testing only the low-voltage ESP32-relay logic yourself.
Can I use this with Google Home instead of Alexa?
Yes! SinricPro also has a Google Home integration. The setup is similar — enable the SinricPro skill in the Google Home app and link your account. For FauxmoESP, there is no direct Google Home equivalent (it only emulates Belkin WeMo which Alexa supports natively).
How many devices can I control with one ESP32?
Practically, you can control 8–16 relay channels from a single ESP32 using an 8-channel or 16-channel relay board. The ESP32 has 34 programmable GPIOs, but some are reserved for boot/programming. A practical limit for relay outputs is 8–10 channels per ESP32 while keeping other GPIO available for inputs (switches, sensors).
What happens if the Wi-Fi goes down?
Voice control stops working, but your appliances stay in whatever state they were. To add resilience, implement auto-reconnect Wi-Fi logic in your code and add physical wall switch inputs so your relays can still be toggled manually. The code example above can be extended with a physical button on another GPIO pin.
Conclusion
Building an ESP32 Alexa home automation system is one of the most satisfying weekend electronics projects you can do. With under ₹1,000 in components and a few hours of setup, you can voice-control your lights, fans, and appliances — something that used to require expensive commercial smart home ecosystems.
Start with a single relay and one device. Get it working, then expand. The SinricPro method is the easiest starting point for most users. Once you have the basics working, explore adding temperature sensors, motion detectors, and schedules to create a truly intelligent home system.
All the components you need are available at Zbotic with fast delivery across India. Build your smart home today.
Genuine components, competitive prices, and fast delivery across India.
Shop IoT Components →


Add comment