
The Z-axis on any CNC machine is arguably the most critical axis to get right. It controls cutting depth on routers and mills, layer height on 3D printers, and focus position on laser cutters. An under-powered or poorly configured Z-axis leadscrew drive causes missed steps, chatter marks, inconsistent layer lines, and in worst cases, a broken tool or damaged workpiece.
This complete guide covers every aspect of selecting and configuring a Z-axis leadscrew motor system — from choosing lead and pitch to anti-backlash nuts and microstepping drivers.
Leadscrew Basics: Pitch, Lead & Starts
A leadscrew (also called a power screw or translation screw) converts rotary motion into linear motion through the screw-nut interface. Three terms are often confused:
- Pitch: The axial distance between adjacent thread crests, measured in mm. A 2mm pitch screw has threads spaced 2mm apart.
- Starts: The number of independent thread helices on the screw. A single-start screw has one helix; a 4-start screw has four helices beginning at 90° intervals around the circumference.
- Lead: The axial distance the nut travels per one full revolution = Pitch × Starts. A 2mm pitch, 4-start screw has 8mm lead — the nut moves 8mm per revolution.
Common Leadscrew Types in CNC
| Type | Thread Profile | Efficiency | Typical Use |
|---|---|---|---|
| Trapezoidal (Tr / ACME) | 30° included angle | 30–50% | Router Z-axis, 3D printers |
| Ball Screw | Gothic arch | 90–95% | Precision mills, VMCs |
| M8 Threaded Rod | 60° (metric V) | 15–25% | Budget 3D printers (avoid) |
| T8 Trapezoidal (8mm dia) | Trapezoidal | 35–45% | Most DIY CNC Z-axes |
The T8 × 8mm lead (2mm pitch, 4-start) is the de facto standard for DIY CNC Z-axes and most 3D printers running NEMA 17 steppers. It gives 8mm linear travel per revolution — a manageable 200 steps/rev stepper at 1/16 microstepping gives 400 microsteps per mm, which is excellent resolution for these applications.
Z-Axis Requirements by Machine Type
3D Printer (FDM)
- Travel speed: 1–10 mm/s (Z moves are slow; print speed is XY)
- Required torque: Very low — typically under 0.1 N·m when using balanced gantry
- Resolution needed: 0.01–0.1mm per step (layer heights of 0.05–0.3mm)
- Best motor: NEMA 17, 40mm body, 400 mA–800 mA
CNC Wood Router
- Z-axis must overcome: router weight (2–5 kg), cutting force component, friction
- Travel speed: 500–2000 mm/min during rapid, 100–500 mm/min during plunge
- Required torque: 0.5–2.0 N·m depending on spindle mass
- Best motor: NEMA 17 (1.7 N·m) or NEMA 23 (2.8–4.2 N·m) for heavier spindles
CNC Milling Machine (Metal)
- Vertical load: 5–20 kg spindle head
- Cutting forces: significant Z-axis component during facing, drilling
- Required torque: 2–8 N·m on the leadscrew
- Best drive: NEMA 23 or NEMA 34 stepper, or closed-loop servo
Laser Cutter
- Z-axis just lifts the bed or focuses the lens — very light
- Required torque: Minimal (<0.3 N·m)
- Best motor: NEMA 17, 28mm body, 0.4 N·m
Stepper Motor Selection for Z-Axis
NEMA 17 (42mm frame, 1.7–2.5 N·m holding torque) covers most DIY CNC Z-axes. The holding torque rating is the torque at zero speed with rated current — the motor cannot “fall” against this force when energised.
NEMA 17 for Z-Axis: What to Look For
- Holding torque: Minimum 4 kg·cm (0.39 N·m) for 3D printers; 8 kg·cm (0.78 N·m) for router Z with balanced counterweight; 12–18 kg·cm (1.2–1.7 N·m) for unbalanced heavy spindles
- Step angle: 1.8° (200 steps/rev) standard; 0.9° (400 steps/rev) for finer resolution without microstepping noise
- Current rating: 1.2–1.7 A/phase is typical for NEMA 17; ensure your driver supports this
- D-type shaft: Flat on the shaft prevents the coupling from spinning — essential for Z-axis where torque transfer is critical

42HS48-1204A NEMA17 5.6 kg-cm Stepper Motor with D-Type Shaft
1.2A per phase, 5.6 kg·cm holding torque, detachable cable for clean routing — the right spec for router Z-axis with counterweight or for any 3D printer. D-shaft prevents coupling slip.
Torque Calculation for Vertical Load
For a Z-axis lifting a vertical load W (in Newtons) via a leadscrew of lead L (in mm):
Trequired = (W × L) / (2π × η)
Where η is leadscrew efficiency (~0.35 for trapezoidal, ~0.90 for ball screw).
Example: Router Z-axis
- Spindle + carriage mass: 2 kg → W = 2 × 9.8 = 19.6 N
- Leadscrew: T8 × 8mm lead → L = 0.008 m
- Efficiency: 0.40 (trapezoidal)
- T = (19.6 × 0.008) / (2π × 0.40) = 0.157 / 2.513 = 0.062 N·m = 6.3 kg·cm
- With 2× safety factor: 12.6 kg·cm → NEMA 17 at 0.78–1.7 N·m is adequate with counterweight
Key insight: A trapezoidal leadscrew is self-locking (efficiency <50% at typical helix angles). This means the motor holds the Z-axis in position even when de-energised — an important safety feature for routers where you don’t want the spindle to drop. Ball screws are NOT self-locking and require active braking or counterweights.
Anti-Backlash Nuts & Nut Types
Backlash is the lost motion when the screw reverses direction — the nut takes up the clearance between thread flanks before force is transmitted. On a Z-axis, backlash causes:
- In 3D printing: Z-wobble, layer shifting, inconsistent layer heights
- In CNC routing: depth inconsistency when reversing Z direction during engraving
- In milling: tool chatter and incorrect depths of cut
Nut Options
- Single brass nut: Simple, cheap, 0.1–0.5mm backlash — acceptable for most 3D printing Z-axes
- Anti-backlash spring-loaded nut: Two halves spring-loaded apart to take up play — reduces backlash to ~0.05mm. Common on 3D printers.
- POM/Delrin nut: Plastic nut with close-tolerance fit — self-lubricating, low backlash, quiet. Good for light CNC routers.
- Split anti-backlash nut (adjustable): Two nuts with preload set by a bolt — adjust as it wears. Best for light CNC router Z-axes.
- Ball nut (for ball screws): Recirculating steel balls — essentially zero backlash, low friction. Required for precision milling.
Flexible Couplings vs Direct Drive
The Z-axis motor connects to the leadscrew either via a flexible jaw coupling or by direct integration (motor threads onto lead screw in anti-gravity orientation).
Flexible Jaw Coupling
- Compensates for minor angular and parallel misalignment between motor shaft and leadscrew
- Absorbs vibration — important for smooth layer deposition
- Allow a small amount of torsional compliance — this causes a tiny Z positioning error during rapid direction reversal
- The elastomer spider (jaw insert) must be snug — a worn spider causes coupling backlash
Direct Drive (Lead Screw Onto Motor Shaft)
- Zero coupling backlash
- Requires perfect alignment of motor mount to leadscrew
- Used in Creality Ender/CR-10 style printers where the leadscrew sits directly in the motor shaft
Stepper Driver Selection
The stepper driver converts step/direction pulses from the CNC controller (GRBL, Marlin, LinuxCNC) into phase currents for the motor windings. For Z-axis drives:
- A4988: Budget driver, up to 2A/phase, 1/16 microstepping. Gets hot. Suitable for 3D printers and very light CNC.
- DRV8825: Up to 2.5A/phase, 1/32 microstepping, better thermal performance than A4988. Recommended over A4988 for CNC routers.
- TMC2208/TMC2209: Silent stepper drivers with stealthChop — near-silent operation. Stallguard on TMC2209 enables sensorless homing. Excellent for 3D printers.
- TB6600: External driver, up to 4A/phase, 1/32 microstepping. Required for NEMA 23 motors drawing >2.5A.

A4988 Stepper Motor Driver Controller Board
Classic A4988 driver for NEMA 17 Z-axis steppers — plug into any RAMPS, CNC shield, or 3D printer board. Add a heatsink and limit current to 1.2–1.5A for reliable operation.
Microstepping & Step Resolution
With a T8 × 8mm lead leadscrew and a NEMA 17 (200 steps/rev):
- Full step: 8mm / 200 = 0.04 mm/step
- 1/8 microstepping: 0.04 / 8 = 0.005 mm/step
- 1/16 microstepping: 0.04 / 16 = 0.0025 mm/step
- 1/32 microstepping: 0.04 / 32 = 0.00125 mm/step
Higher microstepping improves smoothness and reduces resonance, but torque drops roughly proportionally (1/8 microstepping has ~12% of full-step holding torque at the microstep position). For Z-axis, 1/16 is a good balance — smooth enough to avoid resonance, enough torque to not miss steps under load.
Z-Axis Homing Strategies
Mechanical Endstop
A simple microswitch at the top or bottom of travel — motor homes until switch triggers. Repeatability: ±0.05–0.1mm depending on switch quality. Use a Honeywell or Omron switch, not a cheap Chinese clone, for reliable homing on a CNC router.
Optical / Hall Endstop
An IR emitter-receiver pair or Hall effect sensor triggered by a flag on the carriage. Repeatability: ±0.02–0.05mm. No mechanical wear. Preferred for long-running CNC machines.
Probe (BLTouch / Inductive Probe)
On 3D printers, automatic bed levelling uses a probe that touches the build plate and homes the Z to the physical surface. This eliminates the need for a separate Z endstop and compensates for bed warp. Increasingly common on modern 3D printers.
Sensorless Homing (StallGuard)
TMC2209 drivers can detect when the motor stalls (physical stop) and trigger a home position electronically. No endstop switch needed. Works well for Z-axis on lightweight 3D printers.
Common Z-Axis Problems & Fixes
- Z-wobble (wavy surface on 3D print): Eccentricity in the leadscrew or bent screw. Fix: replace screw, use flexible couplings, allow the screw to self-align with floating top bearing.
- Z-axis drops after homing (ball screw): Ball screws are not self-locking. Fix: add counterweight, gas spring, or energise motor after homing.
- Missed Z steps going up: Motor under-torqued. Fix: increase driver current (within limits), reduce acceleration, or change to a higher-torque motor.
- Z-axis vibrates at certain speeds: Stepper resonance. Fix: increase microstepping, change Z speed by ±20%, or use TMC silent driver.
- Backlash causing depth errors: Worn or loose nut. Fix: replace with anti-backlash nut, apply backlash compensation in firmware (GRBL $13 or Marlin BACKLASH_COMPENSATION).
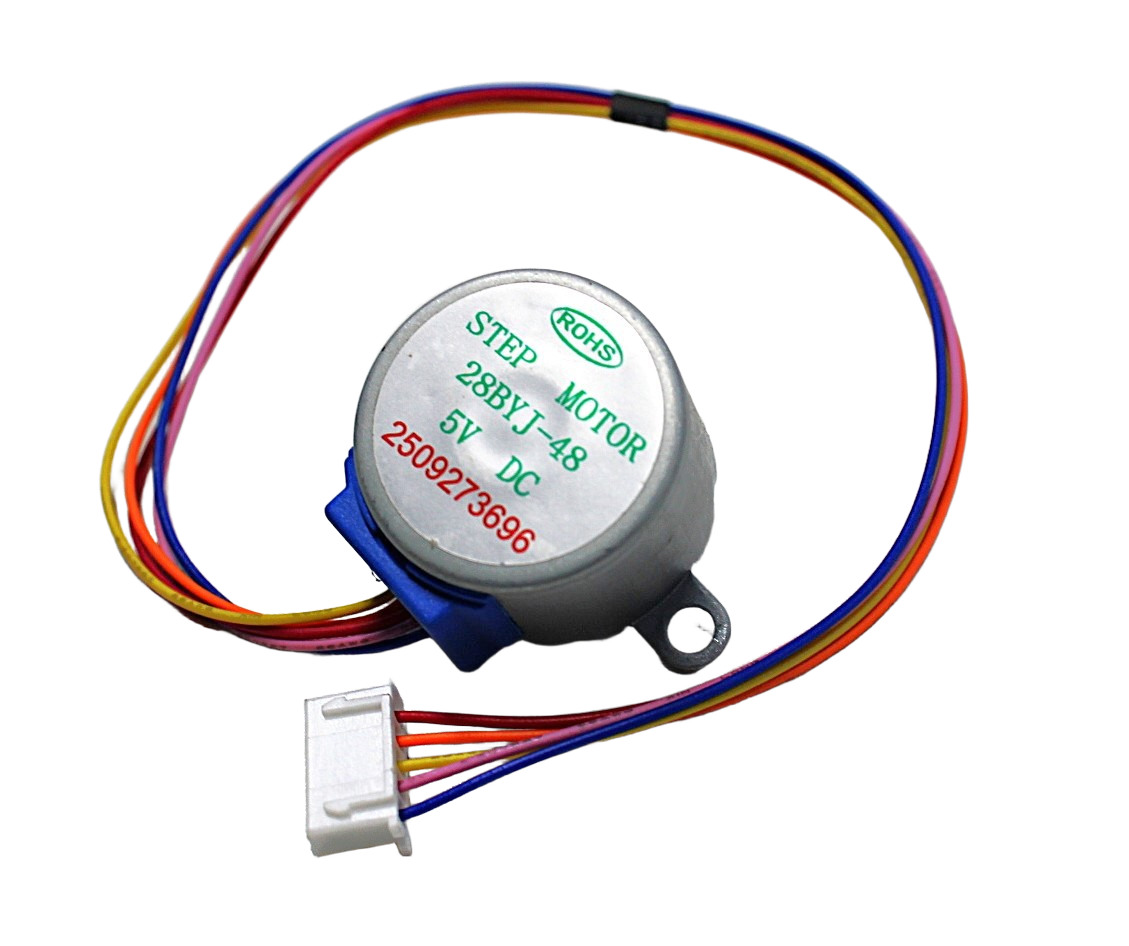
28BYJ-48 5V Stepper Motor
Affordable geared stepper motor for lightweight Z-axis experiments and educational CNC builds. Not suitable for production routers, but excellent for learning leadscrew motion control.
Frequently Asked Questions
What is the best leadscrew pitch for a 3D printer Z-axis?
T8 × 8mm lead (2mm pitch, 4-start) is the industry standard for good reason. At 1/16 microstepping with a 200-step motor, you get 400 microsteps/mm — more than sufficient for 0.05mm layers. A finer pitch (e.g., T8 × 2mm, 1-start) gives more mechanical advantage but much slower Z movement, which slows Z-hop moves and causes layer delays.
Why does my Z-axis drift down when power is off?
This is a self-locking issue. A trapezoidal leadscrew (T8) is self-locking and should hold the carriage. If it drifts, the leadscrew efficiency is too high (worn threads, well-lubricated), or the thread angle is too high (multi-start lead too large). Add a counterweight or switch to a finer pitch leadscrew.
Do I need two Z motors for a dual-Z axis setup?
On large format printers (300mm+ bed width), dual Z motors with independent drivers allow automatic tramming — the firmware can adjust each motor independently to level the X-axis gantry. The TMC2209 with UART control makes this straightforward with Marlin’s MECHANICAL_GANTRY_CALIBRATION.
What is the difference between T8 and TR8 leadscrews?
T8 refers to an 8mm diameter trapezoidal leadscrew following the metric Tr standard — they are the same thing. The “T8” label is informal but universally used in the 3D printing community. The formal designation is Tr8×8 (diameter × lead) or Tr8×2 (diameter × pitch, 1-start).
Can I use a DC gear motor instead of a stepper for Z-axis?
Only if you add an encoder and close the position loop in firmware. Without position feedback, a DC motor has no way to hold a precise Z height. This is why steppers dominate CNC Z-axes — their open-loop positioning is good enough for most applications, and they hold position when energised without any encoder.
Zbotic stocks NEMA 17 stepper motors, A4988 drivers, and a full range of motion control components for CNC builds. All items ship pan-India with same-day dispatch on in-stock items. Browse CNC motors and drivers at Zbotic →


Add comment