
A smart conveyor belt with Arduino for sorting and count automation is one of the most practical and impressive DIY robotics projects you can build. It mirrors real industrial automation systems — object detection, automatic counting, and category-based sorting — all on a desktop scale. In this guide, you will learn how to design and build a complete automated sorting conveyor using an Arduino, a stepper motor, sensors, and a servo-based sorter arm. Whether for a school project, a portfolio piece, or a small production automation task, this project delivers hands-on experience with real automation concepts.
Project Overview and Architecture
The smart conveyor system works as follows: Objects are placed at one end of the belt. As each object travels down the belt, a sensor detects it and increments a counter. A second sensor (color, size, or IR proximity) identifies the object type. Based on the classification, a servo-powered deflector arm pushes the object into one of two or three output bins. An LCD or serial monitor displays the running count and last sort action.
This maps directly to industrial use cases:
- Pharmaceutical pill counting and sorting by size
- Package sorting by weight or barcode scan
- Defect rejection on a manufacturing line
- Coin sorting and counting
Our desktop version is scaled for objects like coins, colored balls, or small boxes (20–50mm). The same principles apply directly to full-scale industrial conveyors.
Components Required
- Arduino Uno or Mega (Mega preferred for more I/O pins)
- Stepper motor: 28BYJ-48 (5V, adequate for a light desktop belt) or NEMA17 for heavier loads
- Stepper motor driver: ULN2003 (for 28BYJ-48) or A4988 (for NEMA17)
- IR proximity sensors × 2 (detection + counting)
- Color sensor (TCS34725) or IR sensor array for sorting classification
- SG90 servo motor × 1–2 (for deflector arms)
- Conveyor belt frame: 3D-printed or acrylic sheet with rubber belt (or silicone tubing)
- Idler roller + drive roller (3D-printed or PVC pipe sections)
- 16×2 LCD with I²C backpack (for count display)
- Jumper wires, breadboard, 5V power supply
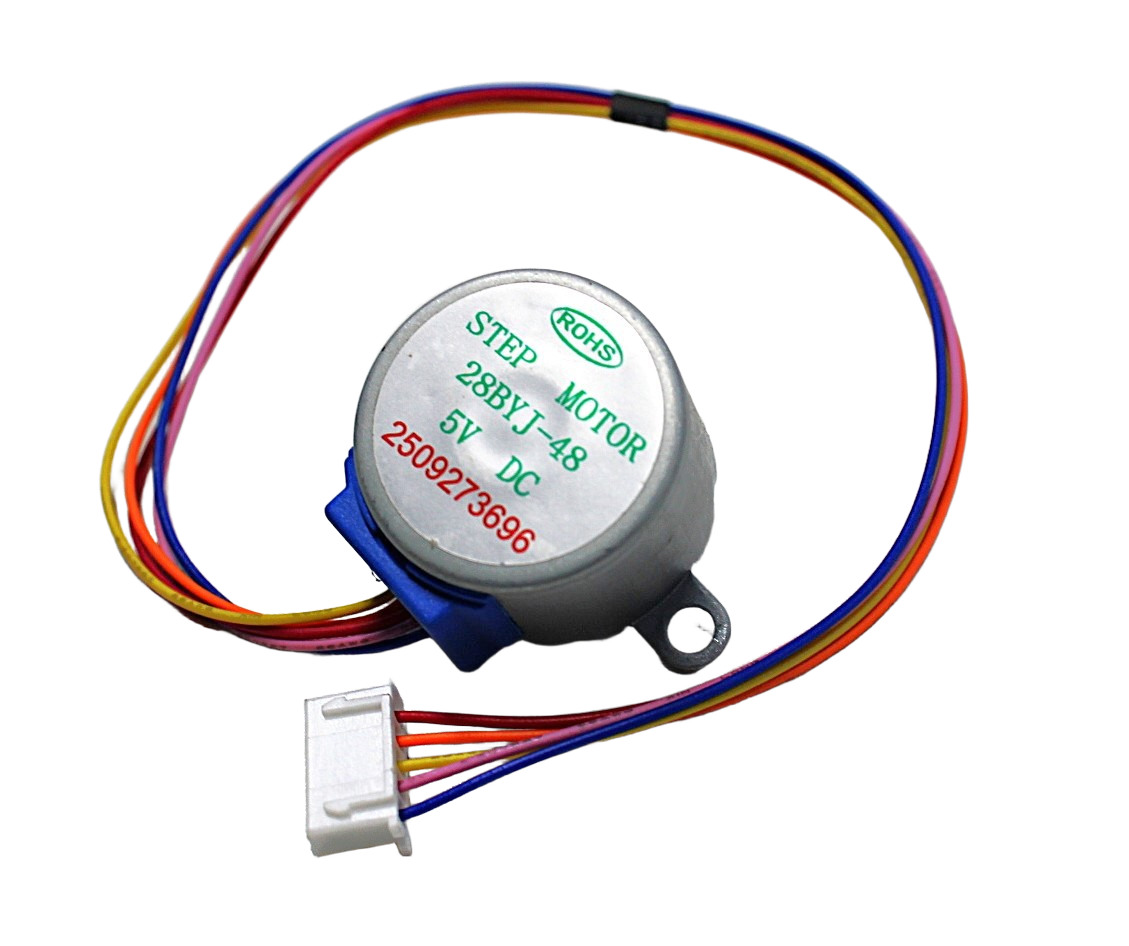
28BYJ-48 5V Stepper Motor
Low-cost 5V stepper motor perfect for driving a desktop conveyor belt. 64-step resolution with gearbox, controlled via ULN2003 driver. Runs on Arduino 5V output.

42HS48-1204A NEMA17 5.6 kg-cm Stepper Motor
High-torque NEMA17 for heavier conveyor builds. 5.6 kg·cm holding torque, detachable cable, D-type shaft for secure coupling. Compatible with A4988 and DRV8825 drivers.
Conveyor Belt Mechanics and Motor Selection
The belt frame consists of two parallel side rails with a drive roller at one end and an idler roller at the other. The belt wraps around both rollers. Tension keeps the belt taut.
DIY belt options:
- Silicone tubing: Loop multiple bands around the rollers side by side. Cheap, grippy, replaceable.
- Rubber band chain: Large elastic bands. Quick to set up but inconsistent tension.
- 3D-printed TPU belt: Durable and customizable width. Requires a 3D printer with TPU capability.
- Fabric belt: Thin canvas or felt glued into a loop. Good for smooth objects like coins.
Motor selection: The 28BYJ-48 stepper motor is ideal for lightweight conveyor projects. It runs on 5V, interfaces directly with the ULN2003 driver board, and provides precise step control. For belts wider than 100mm or carrying objects heavier than 200g, switch to NEMA17 with an A4988 driver and 12V supply.
Drive roller diameter determines belt speed per motor step. A 25mm diameter roller gives ~0.4mm of belt travel per step of the 28BYJ-48 (which has 2048 steps/revolution with the gearbox). So at half-step mode, you can control belt position to sub-millimeter accuracy — useful for precise object positioning under a sensor.

A4988 Stepper Motor Driver Controller Board
Reliable A4988 microstepping driver for NEMA17 motors. Supports full/half/quarter/eighth/sixteenth step modes. Adjustable current limit for smooth, quiet conveyor operation.
Sensor Setup for Detection and Sorting
Two sensors are needed at minimum:
Entry Detection Sensor (Counting)
Place an IR proximity sensor at the input end of the belt. When an object breaks the IR beam (or reflects sufficiently), the sensor output goes LOW. The Arduino increments the object count on this falling edge. Debounce with a 50ms timer to avoid double-counting.
Classification Sensor (Sorting)
Positioned mid-belt, this sensor determines which bin the object goes to. Options:
- IR proximity (simple): Sorts by presence vs. absence — reject vs. accept. Basic but reliable.
- Color sensor (TCS34725): Reads RGB values. Sorts colored objects (red/green/blue balls, colored caps).
- Ultrasonic sensor: Measures object height/size. Sorts by volume.
- Inductive proximity sensor: Detects metallic objects. Perfect for metal vs. plastic sorting.
Sensor placement timing: the classification sensor must fire, the Arduino must decide the sort category, and the servo must be pre-positioned before the object reaches the deflector arm. With a belt running at ~100 mm/s and a 200mm sensor-to-deflector distance, you have 2 seconds — plenty of time for sensor-to-servo response.
Servo Sorter Arm Design
The deflector arm is a lightweight plastic paddle mounted on a servo horn. When triggered, the servo rotates 45–90° to push the object into the correct bin. For two-bin sorting: servo at 0° = bin A, servo at 90° = bin B. For three-bin: use two servos in sequence, or a single servo with three positions (0°, 60°, 120°).
The arm should be tall enough to catch the object but not so tall that it jams under fast-moving objects. A simple arm cut from 2mm thick plastic sheet (30mm tall × 60mm wide) works perfectly for coins and small balls.
Servo timing: after sorting, return the arm to the home position (center of belt) with a 300ms delay to allow the object to fully exit the sorting zone before the next object arrives.
Arduino Control Code
Here is the core logic structure for the Arduino conveyor controller:
#include <Stepper.h>
#include <Servo.h>

#define IR_DETECT 2    // Entry IR sensor
#define IR_SORT   3    // Classification sensor
#define SERVO_PIN 9

Stepper belt(2048, 8,10,9,11);
Servo sorter;
int objectCount = 0;
bool objectInSort = false;

void setup() {
  belt.setSpeed(12); // 12 RPM
  sorter.attach(SERVO_PIN);
  sorter.write(90); // Home position
  pinMode(IR_DETECT, INPUT);
  pinMode(IR_SORT, INPUT);
  Serial.begin(9600);
}

void loop() {
  belt.step(10); // Continuous belt movement

  // Count objects at entry
  if (digitalRead(IR_DETECT) == LOW) {
    objectCount++;
    Serial.print("Count: "); Serial.println(objectCount);
    delay(50); // debounce
  }

  // Sort at mid-belt
  if (digitalRead(IR_SORT) == LOW && !objectInSort) {
    objectInSort = true;
    int sortClass = classifyObject(); // read color or size sensor
    if (sortClass == 1) sorter.write(45);   // Bin A
    else sorter.write(135); // Bin B
    delay(500); // let object pass
    sorter.write(90); // return home
    objectInSort = false;
  }
}
Extend this with an I²C LCD (using LiquidCrystal_I2C library) to display running counts per bin, and a reset button to zero the counters between batches.
Object Counting and Display Logic
For industrial accuracy, counting must be debounced and edge-triggered (not level-triggered). Use attachInterrupt() on the IR sensor pin for faster response:
volatile int count = 0;
void countISR() {
  static unsigned long lastTrigger = 0;
  if (millis() - lastTrigger > 100) { // 100ms debounce
    count++;
    lastTrigger = millis();
  }
}
// In setup():
attachInterrupt(digitalPinToInterrupt(IR_DETECT), countISR, FALLING);
Display per-bin counts on the LCD: Bin A: 12 | Bin B: 7 | Total: 19. Add a buzzer that beeps every 10 objects for batch alerts. Store counts in EEPROM so they survive a power cycle — essential for production counting where data loss is unacceptable.
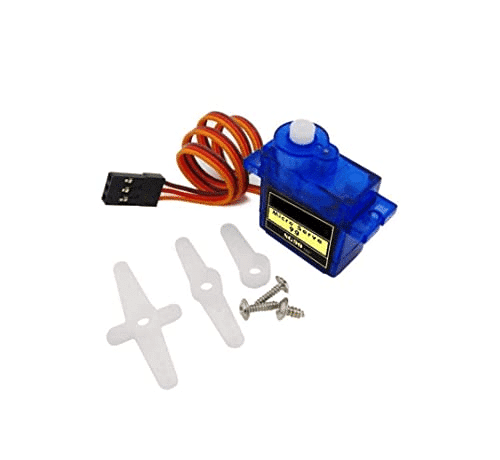
TowerPro SG90 180 Degree Rotation Servo Motor
Lightweight 9g servo perfect for the conveyor sorter deflector arm. Fast response (0.12s/60°), 1.8 kg·cm torque, standard PWM control from Arduino digital pins.
Frequently Asked Questions
Can I build a smart conveyor without a 3D printer?
Yes. Use acrylic sheet for the side rails and PVC pipe sections for the rollers. The belt can be silicone bands or rubber tubing looped over the rollers. No 3D printing required.
How fast can a 28BYJ-48 driven conveyor run?
The 28BYJ-48 runs well up to 15 RPM. With a 25mm drive roller, that gives ~18 mm/s — good for desktop sorting. For faster conveyors, use NEMA17 with A4988.
Can I sort by color using Arduino?
Yes, using a TCS34725 color sensor over I²C. Read the RGB values, compare to calibrated reference values for each color category, and command the appropriate servo position.
How many bins can I sort into?
With two servos you can reliably sort into 3 bins. For more categories, add servo actuators or use a rotating bin platform that steps to the correct position based on classification.
How do I prevent jamming on the conveyor?
Keep object size consistent, ensure adequate spacing between objects (at least 1.5× object length), and add a small guide rail on each side of the belt to prevent objects from falling off.
Start Your Automation Project Today
A smart conveyor with Arduino sorting and counting automation is one of the best projects for learning industrial automation concepts at home or in a classroom. The combination of stepper motors, sensors, servo actuators, and display logic gives you experience with nearly every subsystem found in a real production environment. Zbotic has all the components you need — from stepper motors and drivers to servo kits and Arduino boards — to bring your automated conveyor to life.


Add comment