
Table of Contents
- What Is the SG90 Servo Motor?
- SG90 Specifications & Pinout
- How a Servo Motor Works
- Wiring SG90 to Arduino
- Basic Arduino Code with Servo Library
- Controlling SG90 with a Potentiometer
- Controlling Multiple SG90 Servos
- 10 Beginner Project Ideas
- SG90 vs MG90S vs MG996R
- Frequently Asked Questions
The SG90 servo motor is the most popular microservo in the world. Tiny, affordable, and astonishingly capable for its size, the SG90 appears in thousands of projects — from robotic arms and RC planes to pan-tilt camera mounts and animatronic faces. If you’re an Arduino beginner in India looking to add precise rotational control to your project, the SG90 is the perfect starting component.
In this complete guide, we’ll explain what the SG90 is, how servo motors work, how to wire it to your Arduino, walk through code from basic to advanced, and give you 10 exciting project ideas to build right away.
What Is the SG90 Servo Motor?
The SG90 is a 9-gram micro servo motor made by TowerPro. Unlike DC motors (which spin continuously) or stepper motors (which move in discrete steps), a servo motor moves to a specific angle and holds that position — controlled by a PWM signal from your Arduino. The “9g” refers to its weight: just 9 grams, making it extremely lightweight.
Inside the SG90 is a DC motor, a gearbox (made of plastic in the SG90), a position feedback potentiometer, and a control circuit — all packed into a housing smaller than a matchbox. This combination allows precise position control with minimal code.
Why the SG90 Is Perfect for Beginners
- Ultra-simple control: Just 3 wires and one line of Arduino code to move to any angle.
- Lightweight: At 9 grams, it doesn’t add meaningful weight to robots or flying models.
- Very affordable: Available in India for ₹80–₹150, making it accessible for learning.
- Direct Arduino power: Can run directly from Arduino’s 5V pin for low-load applications.
- Huge community: Thousands of tutorials, projects, and code examples available online.
SG90 Specifications & Pinout
Technical Specifications
| Parameter | Value |
|---|---|
| Weight | 9 grams |
| Dimensions | 22.2mm × 11.8mm × 31mm |
| Operating voltage | 4.8V – 5V (up to 6V max) |
| Stall torque at 4.8V | 1.8 kg·cm (17.7 N·cm) |
| Stall torque at 6V | 2.2 kg·cm (21.6 N·cm) |
| No-load speed at 4.8V | 0.1 sec/60° (100 RPM) |
| Rotation range | 180° (0° to 180°) |
| Gear type | Plastic gears |
| Control signal | PWM (50Hz, 1ms–2ms pulse) |
| Dead bandwidth | 10µs |
| Operating temperature | 0°C to 55°C |
| Connector | JR/Futaba style 3-pin |
SG90 Pinout (Wire Colours)
| Wire Colour | Function | Connect To |
|---|---|---|
| Brown (or Black) | Ground (GND) | Arduino GND |
| Red | Power (VCC) | Arduino 5V (or external 5V) |
| Orange (or Yellow/White) | Signal (PWM) | Arduino digital pin (e.g., Pin 9) |
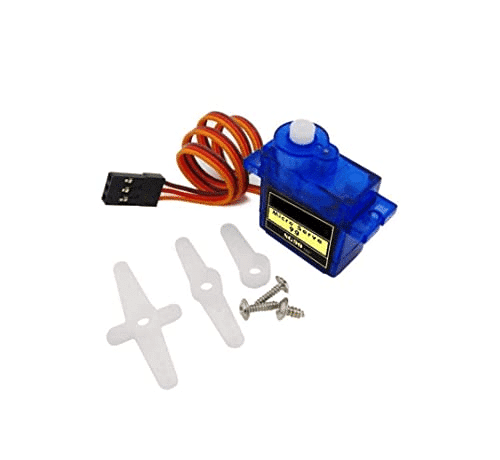
TowerPro SG90 180 Degree Rotation Servo Motor
The genuine TowerPro SG90 — the industry-standard microservo for Arduino projects, robotics, and RC models. Lightweight, reliable, and beginner-friendly with a standard 3-pin JR connector.
How a Servo Motor Works
Understanding the control mechanism of a servo makes programming it much more intuitive.
PWM Control Signal
Servo motors are controlled by a Pulse Width Modulation (PWM) signal at 50Hz (one pulse every 20ms). The width of the pulse determines the servo’s position:
- 1ms (1000µs) pulse: Servo moves to 0°
- 1.5ms (1500µs) pulse: Servo moves to 90° (centre position)
- 2ms (2000µs) pulse: Servo moves to 180°
The servo has a built-in feedback potentiometer connected to the output shaft. The internal circuit compares the commanded position (from the PWM pulse width) to the actual position (from the potentiometer) and drives the motor until they match. This is called a closed-loop position control system.
Why Not Just Use analogWrite()?
Arduino’s analogWrite() generates PWM at 490Hz or 980Hz (not 50Hz) and at 8-bit resolution. Servo motors need 50Hz PWM with specific pulse widths. Arduino’s Servo library handles all this automatically, using hardware timer interrupts to generate the correct signal. This is why you use servo.write(angle) instead of analogWrite().
Wiring SG90 to Arduino
Wiring is beautifully simple — just three connections:
For a Single SG90 (Direct Arduino Power — Low Load Only)
- SG90 Brown/Black wire → Arduino GND
- SG90 Red wire → Arduino 5V
- SG90 Orange/Yellow wire → Arduino Pin 9
Important power note: Arduino’s onboard 5V regulator can only supply about 500mA total. A stalled SG90 can draw 500–700mA alone. For most light-motion applications, direct Arduino power is fine. But for any project with multiple servos, heavy loads, or continuous use, power the servo from an external 5V supply (sharing only GND with Arduino).
For Multiple SG90s (Recommended Setup)
- External 5V, 2A power supply → Common 5V rail for all servo Red wires
- External supply GND → Arduino GND → All servo Brown/Black wires
- Each servo Orange/Yellow wire → Separate Arduino digital pin
This approach prevents voltage drops from impacting Arduino stability when multiple servos move simultaneously.
Basic Arduino Code with Servo Library
Arduino’s built-in Servo library makes controlling the SG90 extremely simple. No external libraries needed.
Sweeping Back and Forth
#include <Servo.h>

Servo myServo;  // Create servo object

void setup() {
  myServo.attach(9);  // Attach servo to pin 9
}

void loop() {
  // Sweep from 0 to 180 degrees
  for (int pos = 0; pos = 0; pos -= 1) {
    myServo.write(pos);
    delay(15);
  }
}
Moving to Specific Angles
#include <Servo.h>

Servo myServo;

void setup() {
  myServo.attach(9);
}

void loop() {
  myServo.write(0);    // Move to 0 degrees
  delay(1000);
  myServo.write(45);   // Move to 45 degrees
  delay(1000);
  myServo.write(90);   // Move to centre (90 degrees)
  delay(1000);
  myServo.write(135);  // Move to 135 degrees
  delay(1000);
  myServo.write(180);  // Move to 180 degrees
  delay(1000);
}
Advanced: Using writeMicroseconds() for Precise Control
#include <Servo.h>

Servo myServo;

void setup() {
  // Specify pulse width range for more precise control
  // SG90: min=500µs (0°), max=2400µs (180°)
  myServo.attach(9, 500, 2400);
}

void loop() {
  myServo.writeMicroseconds(500);   // 0 degrees
  delay(1000);
  myServo.writeMicroseconds(1500);  // 90 degrees (centre)
  delay(1000);
  myServo.writeMicroseconds(2400);  // 180 degrees
  delay(1000);
}
Why use writeMicroseconds? The SG90’s actual pulse range is typically 500–2400µs, but servo.write(0) maps to 544µs and servo.write(180) maps to 2400µs by default. Using writeMicroseconds() with the actual range from your servo’s datasheet gives you true 0°–180° control without the soft limits the library imposes.
Controlling SG90 with a Potentiometer
One of the most intuitive interfaces for a servo: turn a knob, servo follows. This is how many robotic joysticks work.
#include <Servo.h>

Servo myServo;
const int potPin = A0;  // Potentiometer on analog pin 0

void setup() {
  myServo.attach(9);
}

void loop() {
  int potValue = analogRead(potPin);           // Read 0-1023
  int angle = map(potValue, 0, 1023, 0, 180); // Map to 0-180
  myServo.write(angle);                        // Set servo angle
  delay(15);                                   // Small delay for stability
}
This sketch reads a 10kΩ potentiometer on analog pin A0 and maps its 0–1023 value to 0°–180° servo position. Wire the potentiometer: left pin to GND, right pin to 5V, middle (wiper) to A0.
Controlling Multiple SG90 Servos
Arduino can control up to 12 servos simultaneously on most boards (using hardware timer pins). Each servo needs its own digital pin but shares power and ground.
#include <Servo.h>

Servo servo1;  // Base rotation
Servo servo2;  // Shoulder
Servo servo3;  // Elbow
Servo servo4;  // Wrist

void setup() {
  servo1.attach(5);
  servo2.attach(6);
  servo3.attach(9);
  servo4.attach(10);

  // Move all to home position
  servo1.write(90);
  servo2.write(90);
  servo3.write(90);
  servo4.write(90);
  delay(1000);
}

void moveToPosition(int s1, int s2, int s3, int s4) {
  servo1.write(s1);
  servo2.write(s2);
  servo3.write(s3);
  servo4.write(s4);
  delay(500);  // Wait for servos to reach position
}

void loop() {
  moveToPosition(45, 120, 60, 90);   // Position 1
  moveToPosition(135, 60, 120, 45);  // Position 2
  moveToPosition(90, 90, 90, 90);    // Home
}
Power caution: Never power multiple servos from Arduino’s 5V pin. Use an external 5V, 2A+ power supply connected to the servo power rails, with GND shared with Arduino.
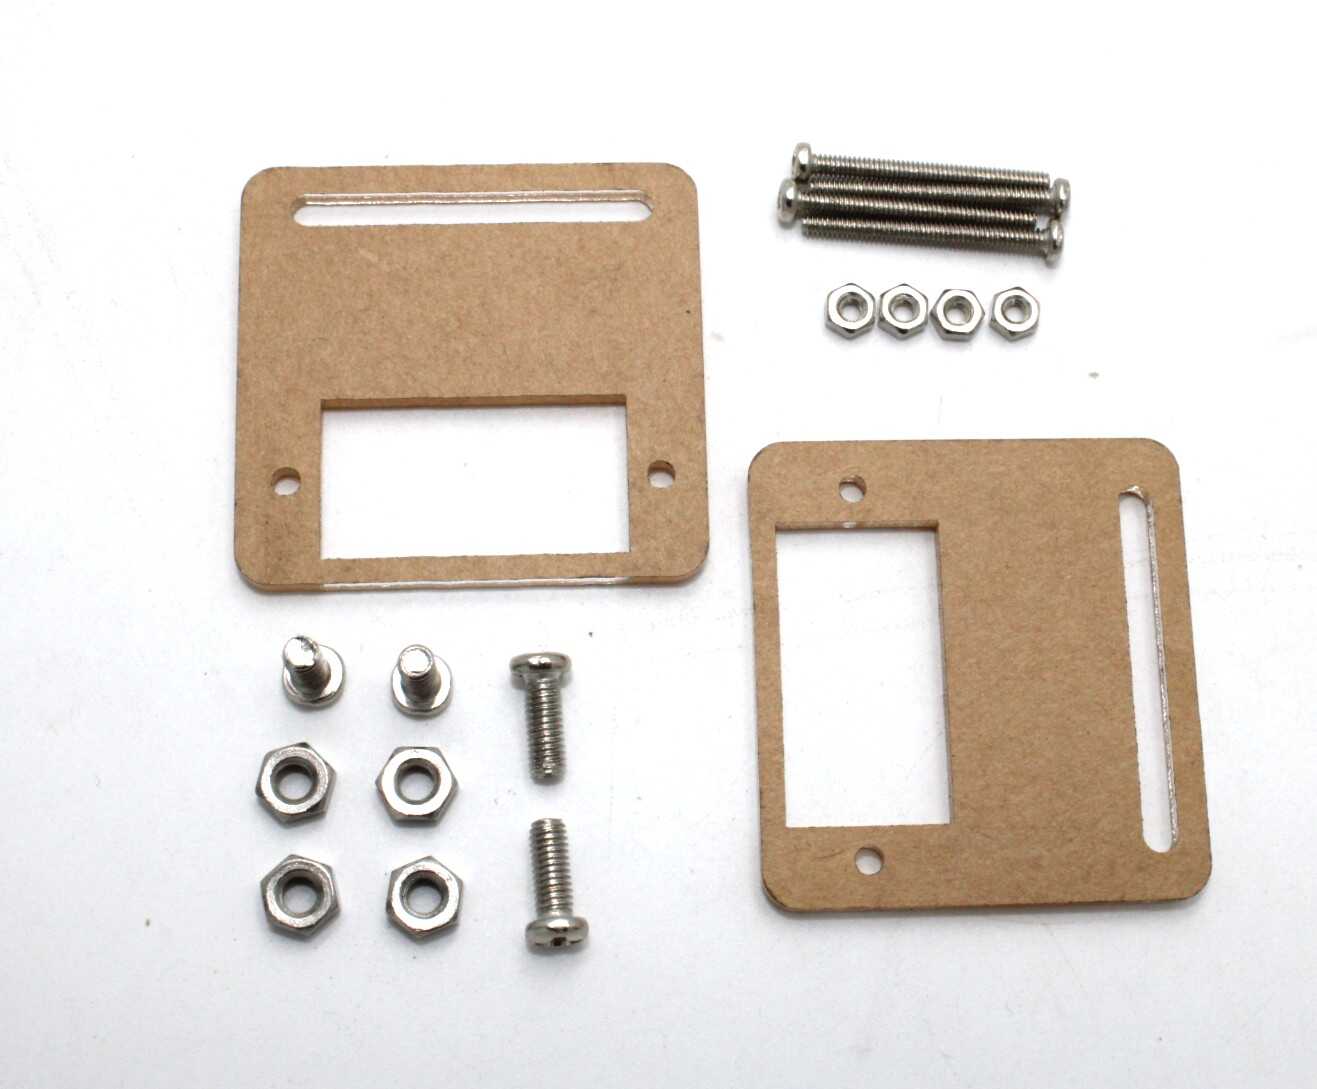
Servo Mount Holder Bracket for SG90/MG90 (Pack of 2)
Securely mount your SG90 servos in any orientation with these precision-fit servo brackets — essential for building pan-tilt mounts, robot joints, and camera rigs.
10 Beginner Project Ideas with SG90
1. Pan-Tilt Camera Mount
Mount two SG90 servos at 90° to each other using a servo bracket kit. One controls horizontal pan, one controls vertical tilt. Add a joystick or two potentiometers for manual control. This is the foundation of PTZ (pan-tilt-zoom) camera systems and is used in surveillance, photography, and drone gimbals.
2. 4-DOF Robotic Arm
Use 4 SG90s for a miniature robotic arm with base rotation, shoulder, elbow, and wrist joints. Program pre-set positions and use a joystick to record and replay movements. A great introduction to inverse kinematics and robot programming.
3. Smart Door Lock / Latch
A single SG90 can drive a door latch or bolt. Combine with an RFID-RC522 reader and Arduino to build a keycard-activated door lock. When the correct card is detected, the servo rotates to unlock; after a timeout, it rotates back to lock.
4. Radar System with HC-SR04
Mount an HC-SR04 ultrasonic sensor on an SG90 servo horn. Sweep the servo 0°–180° in steps, take distance readings at each angle, and display the result on a Processing sketch (PC software) as a radar-like map. A visually impressive and educational project.
5. Automatic Plant Watering System
Connect the SG90 to a water valve or use it to press a pump button. A soil moisture sensor triggers the servo to open the valve when the soil is dry. Simple, practical, and a great combination of sensors and actuators.
6. RC Servo Tester / Signal Generator
Build a standalone servo tester using an Arduino, SG90, and LCD display. Push buttons to move the servo to specific positions and display the pulse width in microseconds — useful for calibrating RC models.
7. Walking Robot (Quadruped)
A quadruped (4-legged) robot uses 8 SG90s — two per leg (hip and knee). Programming gait sequences (raising legs, moving forward, setting down) gives you a walking robot. This is a challenging but rewarding project that teaches servo sequencing and timing.
8. Animatronic Eyes
Use two SG90s to control a set of 3D-printed or craft store eyeballs — one for left-right movement, one for up-down. Add a sound reactive module to make the eyes react to noise, or use IR proximity sensors to follow movement.
9. Automatic Sunblind / Curtain Controller
A single SG90 can drive a string-and-pulley mechanism to open or close a small sunblind or curtain. Add a light sensor (LDR) and program it to automatically close when sunlight exceeds a threshold — set-and-forget home automation.
10. Haptic Feedback Wearable
Mount a micro SG90 on a wristband or glove. Use Bluetooth (HC-05) to receive commands from a smartphone and vibrate or press against the wrist for notifications. A creative wearable project that explores alternative human-computer interfaces.
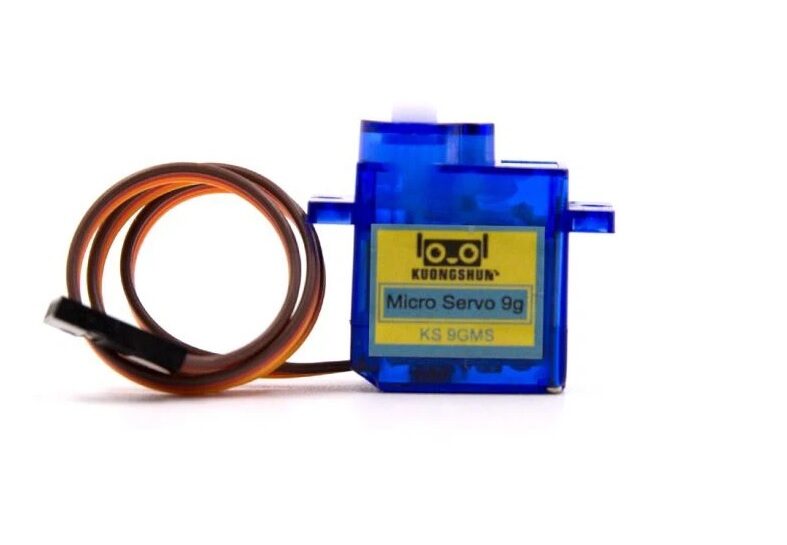
Servo SG90 9g 180 Degree
An affordable SG90 servo motor with 180° rotation — perfect for building multiple servo projects like robotic arms, pan-tilt mounts, and walking robots without breaking the budget.
SG90 vs MG90S vs MG996R
The SG90 is the starting point, but you’ll quickly encounter its siblings. Here’s how they compare:
| Spec | SG90 | MG90S | MG996R |
|---|---|---|---|
| Weight | 9g | 13.4g | 55g |
| Torque (4.8V) | 1.8 kg·cm | 1.8 kg·cm | 9.4 kg·cm |
| Gear material | Plastic | Metal | Metal |
| Best for | Lightweight robots, learning | RC planes, durable projects | Robotic arms, heavy loads |
| Price (India) | ₹80–₹150 | ₹150–₹250 | ₹300–₹600 |
When to upgrade from SG90:
- To MG90S: When plastic gears strip from overloading (or just for more durable builds in RC planes).
- To MG996R: When you need 5× more torque — robotic arms, steering systems, heavy pan-tilt heads.
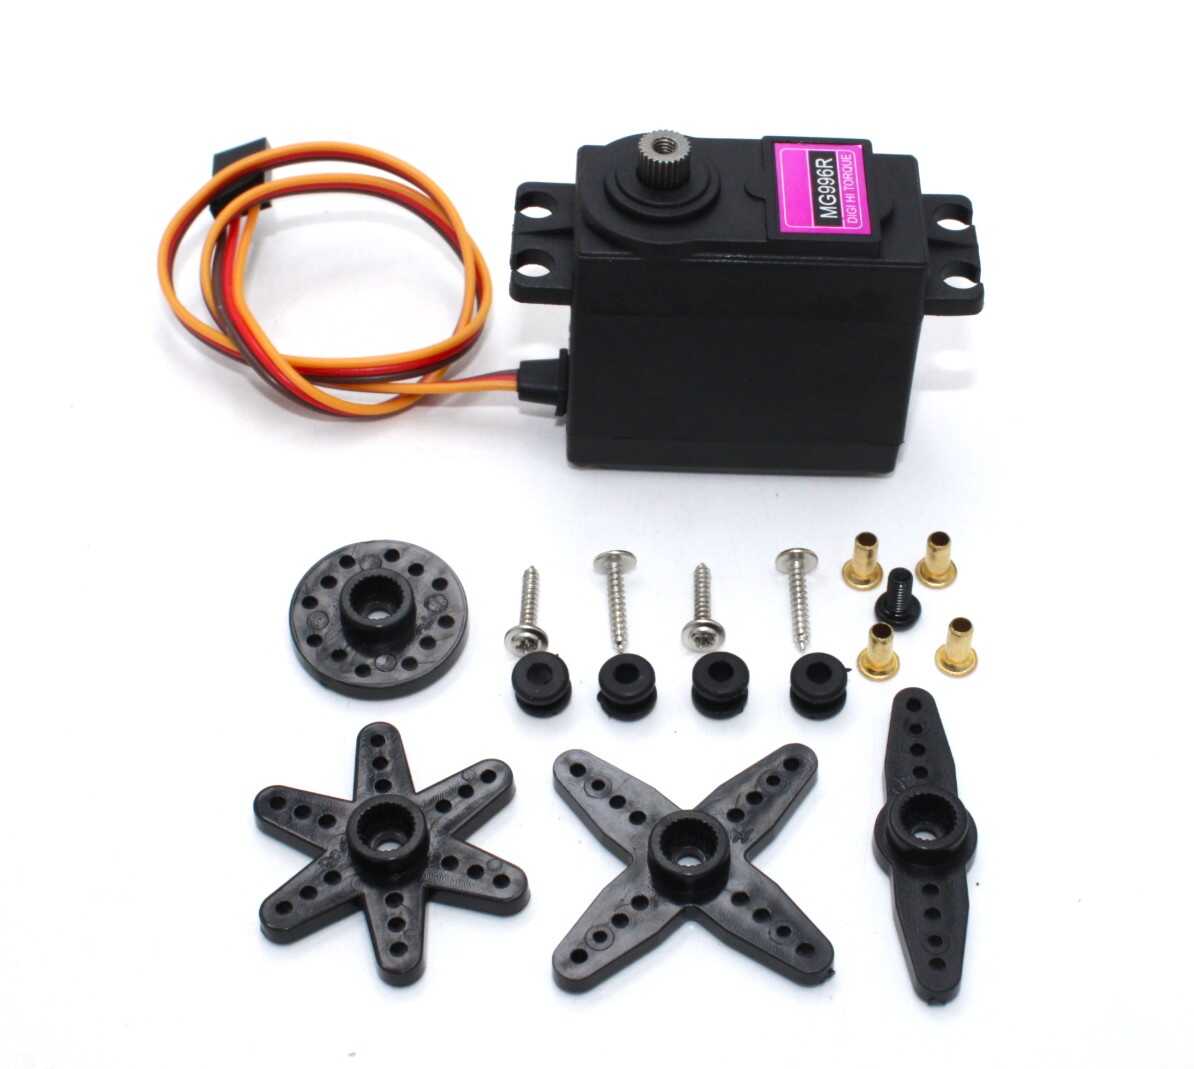
Servo MG996 13KG 180 Degree (High Quality)
Ready to handle heavier loads? The MG996 offers 13 kg·cm of torque with metal gears — the natural upgrade from SG90 for robotic arms, hexapod robots, and steering servos.
Frequently Asked Questions
Can I run an SG90 from an Arduino’s 5V pin?
For light loads and intermittent use, yes. Arduino Uno’s 5V pin from USB can supply about 500mA total. An SG90 at stall draws 500–700mA, so a single lightly-loaded servo is borderline acceptable. For any project with heavy loads, continuous operation, or multiple servos, use an external 5V power supply and share only GND with Arduino.
Why does my Arduino reset when the servo moves?
The servo is drawing too much current from Arduino’s 5V pin, causing a voltage dip that triggers the reset circuit. Solution: power the servo from an external 5V supply. Connect the servo’s GND to Arduino GND (shared reference) but connect the servo’s red wire to the external supply, not Arduino 5V.
What pins can I use for servo control on Arduino Uno?
Any digital pin (2–13). The Servo library disables PWM on pins 9 and 10 when servos are attached to those pins. For multiple servos, pins 2–13 all work. The library uses Timer1 to generate servo signals.
Can I make the SG90 do continuous rotation?
The standard SG90 is limited to 180°. Modified or purpose-built continuous rotation servos (like the FS90R) can spin continuously. You can physically modify an SG90 for continuous rotation by removing the mechanical stop and replacing the feedback potentiometer with a fixed resistor, but this voids position control. For continuous rotation applications, buy a dedicated CR servo or use a DC motor with driver instead.
What is the difference between SG90 (TowerPro) and generic SG90s?
The TowerPro SG90 is the original, with consistent specs and quality control. Generic “SG90” servos look identical but may have lower torque, imprecise positioning, or weaker gears. For learning projects, generics work fine. For anything that needs reliability (RC models, deployed robots), stick with TowerPro or MG90S metal gear versions.
How do I extend the servo cable?
Use servo extension cables — standard JR-to-JR or JR-to-Futaba extensions. These maintain signal integrity much better than splicing and reconnecting individual wires, and they’re available in 10cm, 15cm, 30cm, and longer lengths.
Can I use ESP32 or ESP8266 to control an SG90?
Yes. Both ESP32 and ESP8266 support PWM servo control. For ESP32, use the ESP32Servo library (same API as Arduino’s Servo library). For ESP8266, use the standard Servo library — it works on most GPIO pins. Ensure 3.3V signal levels are acceptable (SG90 signal pin works at 3.3V, though rated for 5V logic).
Conclusion
The SG90 servo motor is one of the most versatile and accessible components in the maker’s toolkit. With just three wires, a single Arduino library, and a few lines of code, you can add precise position control to virtually any project. From simple sweeping demonstrations to complex multi-servo robotic arms, the SG90 scales beautifully with your skill level.
Start with a single SG90, master the Servo library, then expand to multiple servos and more complex control inputs like joysticks, Bluetooth, or computer vision. The robotic skills you build with an SG90 transfer directly to larger servo systems and professional robotics platforms.
Ready to start? Pick up a TowerPro SG90 from Zbotic and get your first servo spinning today.
Shop Servo Motors at Zbotic
SG90, MG90S, MG996R, servo brackets, and extension cables — everything you need for your servo projects, shipped fast across India.


Add comment