
The ILI9486 3.5 inch TFT touch display for Raspberry Pi is one of the most popular ways to add a compact full-colour interface to your Pi projects. Measuring 3.5 inches diagonally with a 480×320 resolution, this shield-style display plugs directly onto the 40-pin GPIO header and gives you a proper touchscreen display without needing HDMI. Whether you are building a control panel, a retro gaming console with RetroPie, or a custom dashboard for your home automation setup, the ILI9486-based display offers an excellent balance of cost, quality, and ease of use.
What is the ILI9486 Controller?
The ILI9486 is a 16-bit single-chip LCD/TFT driver from Ilitek. It supports 480×320 resolution (HVGA) at 262,144 colours (18-bit colour depth), with an integrated GRAM buffer so the host processor doesn’t need to continuously push data. The 3.5-inch variants sold for Raspberry Pi use the SPI interface for data transfer and include an XPT2046 resistive touch controller on the same PCB.
Compared to the older ILI9341 (2.4-inch, 320×240), the ILI9486 offers a significantly larger canvas — 2.25x the pixel count — which is enough to display a usable desktop or a clean multi-widget dashboard without squinting. The SPI-based display doesn’t match the speed of an HDMI display, but for most interactive applications running at 15–25 FPS it is perfectly adequate.
Most 3.5-inch TFT shields for Raspberry Pi follow the Waveshare or MHS-3.5 pinout standard and are compatible with the same set of drivers. Confirm your display’s controller before installing drivers — some shields use the ILI9488 (similar but with different init sequences).
Hardware Setup and GPIO Connections
The 3.5-inch TFT shield is designed as a plug-and-play solution — it directly fits the Raspberry Pi’s 40-pin GPIO header. No separate wiring is required. However, understanding which GPIOs are used helps you plan additional peripherals:
| Function | GPIO (BCM) | Notes |
|---|---|---|
| SPI MOSI | GPIO 10 | SPI0 |
| SPI CLK | GPIO 11 | SPI0 |
| Display CS | GPIO 8 (CE0) | Chip select for TFT |
| Touch CS | GPIO 7 (CE1) | XPT2046 touch IC |
| DC (Data/Command) | GPIO 24 | — |
| Reset | GPIO 25 | — |
| Backlight | GPIO 18 (PWM) | PWM brightness control |
This leaves most GPIO pins free. The display uses the hardware SPI0 bus, which is fast and leaves SPI1 available for additional devices. I2C pins (GPIO 2/3) are completely free for sensors.

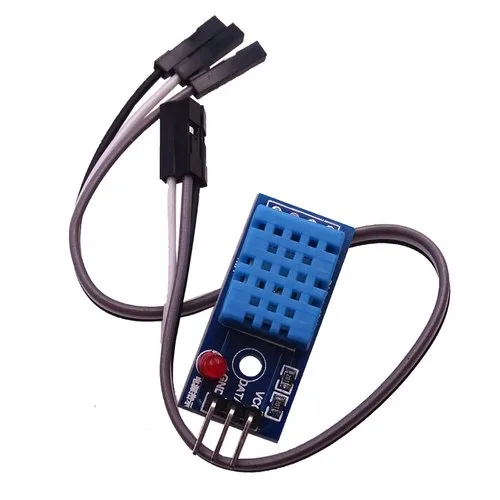
DHT11 Digital Relative Humidity and Temperature Sensor Module
Pair with your Raspberry Pi TFT display to show live temperature and humidity on screen. The free I2C pins make sensor integration seamless.
Installing Drivers on Raspberry Pi OS
The ILI9486 display requires a kernel driver to work as a standard framebuffer device (/dev/fb1). The most commonly used driver is fbcp-ili9341 (which despite the name supports ILI9486) or the LCD-show scripts from Waveshare / Goodtft.
Method 1: LCD-show Scripts (Easiest)
sudo apt update
git clone https://github.com/goodtft/LCD-show.git
chmod -R 755 LCD-show
cd LCD-show
sudo ./MHS35-show
This script modifies /boot/config.txt to enable SPI, adds the correct overlay (dtoverlay=mhs35 or similar), and reboots. After reboot, the TFT should light up with the console output.
Method 2: fbcp-ili9341 (Better Performance)
The fbcp-ili9341 userspace program mirrors /dev/fb0 (the main framebuffer) to the TFT over SPI. It supports hardware SPI DMA for smooth rendering.
sudo apt install cmake
git clone https://github.com/juj/fbcp-ili9341.git
cd fbcp-ili9341
mkdir build && cd build
cmake -DILI9486=ON -DSPI_BUS_CLOCK_DIVISOR=6
  -DGPIO_TFT_DATA_CONTROL=24 -DGPIO_TFT_RESET_PIN=25
  -DDISPLAY_ROTATE_180_DEGREES=ON ..
make -j$(nproc)
sudo ./fbcp-ili9341
Add this to /etc/rc.local before exit 0 for auto-start on boot. The SPI_BUS_CLOCK_DIVISOR controls speed — lower = faster but potential signal integrity issues. Start at 6 and go lower if stable.
For Raspberry Pi OS Bookworm (Debian 12), note that the legacy overlay method has changed. Use the spidev device tree overlay and confirm spidev0.0 appears in /dev/ before proceeding.
Touch Calibration with xinput_calibrator
Out of the box, the resistive touch coordinates rarely align perfectly with the screen pixels. Calibration maps raw ADC touch readings to screen coordinates.
sudo apt install xinput-calibrator
XINPUT_CALIBRATOR_CMD="xinput_calibrator --device 'ADS7846 Touchscreen'"
Run xinput_calibrator from a terminal on the TFT screen, touch the four calibration points, and copy the output to /etc/X11/xorg.conf.d/99-calibration.conf. The file should look like:
Section "InputClass"
  Identifier "calibration"
  MatchProduct "ADS7846 Touchscreen"
  Option "Calibration" "3932 300 294 3801"
  Option "SwapAxes" "0"
EndSection
If the touch is rotated 90° from the display, add Option "SwapAxes" "1" and adjust the calibration numbers accordingly. This is a common issue when the display and touch are oriented differently in hardware.
Running the Raspberry Pi Desktop on TFT
Once fbcp-ili9341 is running and mirroring /dev/fb0, the standard Raspberry Pi OS desktop appears on the TFT. However, the default resolution (1920×1080 or 1280×720 on HDMI) is far too large for a 480×320 display.
Set a matching resolution in /boot/config.txt:
hdmi_force_hotplug=1
hdmi_cvt=480 320 60 1 0 0 0
hdmi_group=2
hdmi_mode=87
Reboot, and the desktop renders at 480×320 — pixel-perfect on the TFT. Increase system font size to 14pt in the desktop appearance settings for comfortable reading. For a kiosk-style interface, use matchbox-window-manager or openbox with auto-started Python apps.

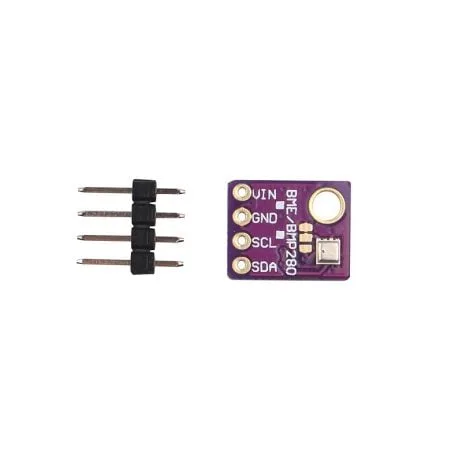
BMP280 Barometric Pressure and Altitude Sensor I2C/SPI Module
Connect via I2C (free pins on the TFT shield) to add atmospheric pressure and altitude readings to your Raspberry Pi sensor dashboard.
Writing Python Apps for the TFT
For custom Python applications drawn directly on the TFT, the best library is pygame — it supports /dev/fb1 as an output device, supports touch events via evdev, and provides full 2D graphics primitives.
import pygame
import os
os.putenv('SDL_FBDEV', '/dev/fb1')
os.putenv('SDL_MOUSEDEV', '/dev/input/touchscreen')
os.putenv('SDL_MOUSEDRV', 'TSLIB')

pygame.init()
screen = pygame.display.set_mode((480, 320))
pygame.mouse.set_visible(False)

# Draw background
screen.fill((30, 30, 30))

# Draw text
font = pygame.font.Font(None, 48)
text = font.render('Hello India!', True, (255, 107, 0))
screen.blit(text, (40, 140))
pygame.display.flip()

while True:
    for event in pygame.event.get():
        if event.type == pygame.QUIT:
            pygame.quit()
For UI-heavy applications (buttons, dropdowns, progress bars), the pygame-widgets or tkinter libraries are good alternatives. Tkinter renders via X11 which works with fbcp-ili9341’s framebuffer mirroring approach.
Building a Sensor Dashboard
A sensor dashboard is the ideal first project for your 3.5-inch TFT. The 480×320 canvas fits four to six data widgets comfortably. A typical layout:
- Top bar: Time and date (large font), WiFi status icon
- Left column: Indoor temperature (DHT11/BME280), Indoor humidity
- Right column: CPU temperature, CPU load percentage
- Bottom bar: Outdoor weather from OpenWeatherMap, IP address
Read sensors using Python’s adafruit-circuitpython-dht library for DHT sensors, adafruit-circuitpython-bmp280 for BMP280, and the psutil library for CPU/RAM stats. Refresh the display every 5 seconds in a loop — pygame handles partial screen updates efficiently at this rate.
DHT11 Temperature And Humidity Sensor Module with LED
Module version of the DHT11 with onboard LED indicator. Easy to wire directly to Raspberry Pi GPIO for your sensor dashboard project.
GY-BME280-5V Temperature and Humidity Sensor
5V-compatible BME280 module for projects powered from the Pi’s 5V pin. Measures temperature, humidity, and pressure via I2C.
Frequently Asked Questions
Q: Will this display work with Raspberry Pi 5?
Yes, but Raspberry Pi 5 changed the SPI device tree overlay names and the kernel changed the DMA SPI driver. Use the latest fbcp-ili9341 from GitHub (post-2024 commits) which has Pi 5 support. The LCD-show scripts may need updating.
Q: My TFT shows a white screen after installing drivers. What is wrong?
This usually means the SPI overlay isn’t loading correctly. Check dmesg | grep spi and ensure spidev0.0 exists. Also confirm the display is an ILI9486 and not an ILI9488 — they require different driver configurations.
Q: Can I use the HDMI port simultaneously with the TFT?
With fbcp-ili9341, the TFT mirrors the HDMI framebuffer. You can have both connected but they show the same image (mirrored). For independent displays, you would need a more complex multi-framebuffer setup.
Q: The touch input is offset by a fixed amount. How do I fix this?
Re-run xinput_calibrator and update /etc/X11/xorg.conf.d/99-calibration.conf. Make sure you run calibration at the correct display orientation. A common mistake is calibrating while the screen is rotated differently than in normal use.
Q: Is the 3.5-inch TFT fast enough for video playback?
At the default SPI clock speed (~32 MHz for ILI9486), you get around 15–20 FPS for full-screen updates. This is acceptable for video at reduced resolution. Use omxplayer with the framebuffer as output: omxplayer --display 1 video.mp4.
Get Your Display Modules and Sensors from Zbotic
Zbotic stocks a wide range of display modules, sensors, and Raspberry Pi accessories with quick delivery across India. Build your ILI9486 TFT dashboard project with components sourced locally — no long international shipping waits.


Add comment