
Table of Contents
- What is Betaflight and Why Flash It?
- Before You Begin: What You Need
- Step 1: Install USB Drivers
- Step 2: Install Betaflight Configurator
- Step 3: Enter Bootloader Mode (DFU Mode)
- Step 4: Flash the Firmware
- Step 5: Verify and Basic Configuration
- Troubleshooting Common Issues
- After Flashing: Essential Settings to Configure
- Betaflight Version Guide
- Frequently Asked Questions
What is Betaflight and Why Flash It?
Betaflight is the most widely used open-source firmware for FPV drone flight controllers in the world. It runs on the microcontroller inside your flight controller (FC) and is responsible for reading sensor data, running the PID control loop, and sending throttle commands to the ESCs — all within milliseconds of each other, thousands of times per second.
Most flight controllers come pre-loaded with Betaflight firmware from the factory, so you might wonder: why would you need to flash it again? There are several good reasons:
- Update to a newer version: Betaflight releases frequent updates with improved filtering, new features (like RPM filtering, enhanced black box logging), and bug fixes.
- Recovery after a corrupted flash: A power cut during a firmware update or a bad connection can leave your FC in an unresponsive state. Reflashing recovers it.
- Switching target: Some generic flight controllers ship with the wrong FC target. Flashing the correct target is necessary for all features to work.
- Fresh start: When troubleshooting persistent tuning problems, flashing fresh firmware and starting from scratch is often the fastest fix.
- Switching from Cleanflight/iNav: Some FCs ship with alternate firmware. You may want to switch to Betaflight for better tune-ability.
This guide covers the complete process from scratch, assuming you have never flashed firmware before. We will cover Windows (most common in India), with notes for Mac/Linux where relevant.
Before You Begin: What You Need
Hardware
- Your FPV flight controller
- USB cable (Micro-USB or USB-C depending on your FC — check before buying)
- A Windows 10/11 PC or laptop (recommended for easiest driver installation)
Software (all free)
- Betaflight Configurator (from
github.com/betaflight/betaflight-configurator/releases) - Zadig USB driver installer (from
zadig.akeo.ie) — Windows only - ImpulseRC Driver Fixer (alternative, sometimes easier) — Windows only
Know Your FC Target
Before flashing, you must know your flight controller’s Betaflight target name. This is usually printed on the FC or listed in the product page. Examples: OMNIBUSF4SD, BETAFLIGHTF4, SPEEDYBEEF405, MATEKF411. Flashing the wrong target can disable some features (like UART ports or LEDs) and in rare cases can brick the FC.
If you do not know the target, connect the FC to Betaflight Configurator first (before flashing) — it will identify the current target in the top banner.

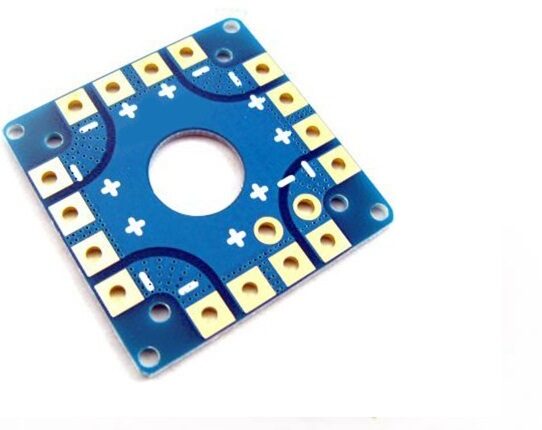
35A V2.1 2-5S 4-in-1 Brushless ESC for FPV Racing
This all-in-one ESC stack is compatible with Betaflight flight controllers and supports BLHeli_32 — the ESC firmware that pairs perfectly with Betaflight’s bidirectional DSHOT for RPM filtering. No separate ESC firmware flashing needed.
Step 1: Install USB Drivers
This is where 80% of beginners get stuck. When you plug a flight controller into Windows in DFU (bootloader) mode, Windows sees it as a generic “STM32 BOOTLOADER” device and does not know what driver to use. You need to manually assign the WinUSB driver using Zadig.
Method A: Using Zadig (Most Reliable)
- Download Zadig from
zadig.akeo.ie(portable .exe, no installation needed). - Put your FC into DFU mode (see Step 3 below for how to do this).
- Open Zadig. Go to Options → List All Devices.
- In the dropdown, find “STM32 BOOTLOADER” or “DFU in FS Mode”.
- In the driver selection box, ensure WinUSB is selected on the right side.
- Click Install Driver (or “Replace Driver” if a different driver was previously installed).
- Wait for installation to complete (30–60 seconds).
Method B: ImpulseRC Driver Fixer
Download and run the ImpulseRC Driver Fixer from impulserc.com/pages/driver-fixer. Connect FC in DFU mode, run the tool, click Fix Drivers. It is a one-click solution that does the same thing as Zadig but simpler. Works on Windows 10/11.
For Mac Users
No driver installation needed. macOS recognises DFU devices natively. Just install Betaflight Configurator and proceed to Step 4.
For Linux Users
Add udev rules to allow access without root. Run:
echo 'SUBSYSTEM=="usb", ATTRS{idVendor}=="0483", ATTRS{idProduct}=="df11", MODE="0664", GROUP="plugdev"' | sudo tee /etc/udev/rules.d/45-stdfu.rules
Then: sudo udevadm control --reload-rules
Step 3: Enter Bootloader Mode (DFU Mode)
DFU stands for Device Firmware Upgrade. This is a special mode where the FC’s processor listens for firmware instructions over USB instead of running normal flight code. There are three ways to enter DFU mode:
Method 1: Boot Pads (Most Reliable)
Most FPV flight controllers have boot pads — two small solder pads or a button labeled “BOOT” on the PCB. Bridging these pads while connecting USB puts the FC into DFU mode:
- Locate the BOOT button or BOOT pads on your FC (check the FC documentation).
- Hold the BOOT button down (or bridge the pads with a small screwdriver) while plugging in the USB cable.
- Keep holding for 2–3 seconds after connecting, then release.
- Windows will play the “device connected” sound. Check Device Manager — you should see “STM32 BOOTLOADER” under Universal Serial Bus devices.
Method 2: Betaflight Configurator
If your FC is already running and detected by Betaflight Configurator:
- Connect to Betaflight Configurator normally (not in DFU mode).
- Go to the Firmware Flasher tab.
- Click “Load Firmware [Online]” first, then click “Flash Firmware”.
- Betaflight Configurator will automatically send the FC into bootloader mode.
This method is the easiest when the FC is already communicating normally.
Method 3: Betaflight CLI
In Betaflight Configurator’s CLI tab, type bl and press Enter. The FC will immediately reboot into DFU mode.
Step 4: Flash the Firmware
Now for the actual flashing process:
- Open Betaflight Configurator.
- Click Firmware Flasher in the left sidebar (not the “Connect” button).
- With your FC in DFU mode, the COM port selector should show “DFU” in the dropdown. If it shows a COM port number, the FC is in normal mode — retry the DFU process.
- In the Board dropdown, select your FC target (e.g., OMNIBUSF4SD).
- In the Firmware Version dropdown, select the version you want. As of 2026, Betaflight 4.4.x is the stable release for most FCs. Betaflight 4.5 adds new features but some older FCs may have issues.
- Check these options:
- Full Chip Erase: TICK this for a clean flash. Erases all previous settings. Recommended when doing a major version upgrade or if you suspect configuration corruption.
- No Reboot Sequence: Only tick if your FC is already in DFU mode manually. Leave unticked if you are using Method 2 (auto-enter).
- Click Load Firmware [Online]. Wait for the firmware file to download (needs internet).
- Click Flash Firmware.
- Watch the progress bar. The process has several stages: Erasing → Programming → Verifying. Total time: 30–90 seconds.
- When complete, you will see “Programming Successful” in the status bar. The FC will automatically reboot into normal mode.
Step 5: Verify and Basic Configuration
After a successful flash, verify everything is working:
- Close and reopen Betaflight Configurator.
- Click Connect. The configurator should connect and show the Setup page.
- Check the firmware version in the top right corner — it should match what you flashed.
- The 3D drone model on the Setup page should respond to physical movement of the FC — tilt the FC forward and the model tilts forward.
- Check that all sensors are detected: Gyro and Accelerometer should show green status.
After verifying the flash worked, you will need to redo all your configuration since Full Chip Erase wiped previous settings. Save your Betaflight configuration to a backup file (Presets → Save Backup) before flashing next time, so you can restore it quickly.
Troubleshooting Common Issues
“DFU” not showing in the dropdown
The FC is not in DFU mode, or the driver is not installed correctly. Try: reinstall the driver using Zadig, try a different USB cable (data cables only — many phone charger cables are power-only with no data lines), try a different USB port on your PC.
“No response from Bootloader”
Usually a driver issue on Windows. Run ImpulseRC Driver Fixer while the FC is in DFU mode. Then try flashing again.
Progress bar stops at ~50% and fails
Often a USB cable quality issue. Use the shortest, highest-quality USB cable you have (try the cable that came with your FC). Avoid USB hubs — connect directly to the PC’s USB port. Disable USB 3.0 in BIOS and use USB 2.0 port if available.
FC connects after flash but sensors not working
You may have flashed the wrong target. The FC’s physical hardware (sensor ICs, UARTs) does not match the firmware configuration. Reflash with the correct target. If unsure, check the FC’s manual or manufacturer website for the exact Betaflight target name.
FC not detected at all after flash
The FC is in DFU mode — a previously connected FC sometimes stays in DFU after an incomplete flash. Open Betaflight Configurator → Firmware Flasher, select DFU in the dropdown, and reflash from scratch.
“Programming Successful” but settings from before are gone
This is expected and correct when using “Full Chip Erase.” You need to reconfigure Betaflight from scratch — or restore from a previously saved backup. Going forward, always save a Betaflight backup before flashing.
After Flashing: Essential Settings to Configure
A freshly flashed FC is not ready to fly — it needs minimum configuration. Here is the checklist:
- Ports tab: Enable UART for your receiver (e.g., Serial RX on UART1 for SBUS/CRSF/ELRS receiver).
- Configuration tab: Set receiver mode (SBUS, CRSF, etc.), enable Accelerometer if needed, set ESC/Motor protocol (DSHOT300 or DSHOT600 for most modern ESCs), set motor direction, set minimum throttle and motor stop.
- Receiver tab: Verify channels are responding correctly. Move your transmitter sticks and confirm the right channels respond in the right direction.
- Modes tab: Assign flight modes (Arm, Angle, Air Mode, Turtle Mode) to transmitter switches.
- Motors tab: With props off, test each motor. Verify correct spin direction.
- PID Tuning: Start with defaults — Betaflight 4.4+ defaults are flyable for most 5-inch builds. Fine-tune after maiden flight.
- OSD tab: Configure on-screen display if your FC has a built-in OSD chip.
- Blackbox tab: Enable blackbox logging if your FC has flash memory or you have an SD card slot. Invaluable for diagnosing PID tuning issues.
100A Multirotor ESC Power Distribution Battery Board
A clean PDB solution for routing power from battery to ESCs without a rats-nest of wiring. Works with Betaflight-controlled builds and supplies stable 5V/12V BEC output to power your flight controller and peripherals.
Betaflight Version Guide
Understanding which version to use can be confusing for beginners. Here is a quick reference as of 2026:
| Version | Status | Recommended For |
|---|---|---|
| Betaflight 4.2.x | Legacy | Very old FCs (F1/F3 targets) |
| Betaflight 4.3.x | Stable (EOL) | F4 FCs if 4.4 has issues |
| Betaflight 4.4.x | Stable (Current) | Most F4/F7 FCs — use this |
| Betaflight 4.5.x | Latest | Modern F7/H7 FCs, new features |
If you have an older F3-based flight controller, note that Betaflight officially dropped F3 support in version 4.0. You would need to stay on Betaflight 3.5.x for those FCs, or — recommended — upgrade to a modern F4 or F7 FC.

1/3″ CMOS 700TVL Mini FPV Camera
Complete your Betaflight build with this compact analog FPV camera. Compatible with most FPV flight stacks and connects directly to your video transmitter for low-latency live video feed. PAL/NTSC switchable for Indian frequencies.
Frequently Asked Questions
Can I brick my flight controller by flashing Betaflight?
It is extremely difficult to permanently brick a flight controller through a bad flash because the bootloader (stored in protected memory) almost never gets corrupted. The worst case scenario — a power cut during flashing — leaves the FC stuck in DFU mode, which is recoverable by reflashing. The only true brick scenario is using a high-voltage source on the wrong power pad, which is a hardware fault, not a firmware fault.
Do I need to back up my settings before flashing?
Yes, always. In Betaflight Configurator → Presets tab → Save Backup. This saves all your PID, rates, ports, receiver, and mode settings to a file. After flashing, you can restore this file. Note that backups between major versions (e.g., 4.3 to 4.4) may not restore perfectly due to parameter changes — use them as a reference rather than direct restore.
What is the difference between DFU mode and normal USB connection?
In normal mode, the FC is running Betaflight firmware and communicating with Betaflight Configurator using the MSP (MultiWii Serial Protocol). In DFU mode, the FC’s STM32 processor’s built-in ROM bootloader takes over, bypassing any installed firmware and accepting raw firmware programming commands over USB. DFU mode is only used for firmware flashing.
My FC shows up as COM port but Betaflight cannot connect — what’s wrong?
This usually means the wrong COM port driver is installed, or there is a firmware corruption. Try: restarting Betaflight Configurator, unplugging and replugging the FC, trying a different USB cable, or checking that the baud rate is set to 115200 in Configurator. If none work, reflash the firmware.
Can I flash Betaflight on an ArduPilot/Pixhawk flight controller?
No. Pixhawk and other ArduPilot hardware use a completely different processor architecture (ARM Cortex-M4/M7 with NuttX RTOS) and firmware format. Betaflight only runs on STM32-based FCs designed for FPV use (F4, F7, H7 series). For autonomous/GPS flight, use ArduCopter on Pixhawk. For manual/FPV flight, use Betaflight on an FPV FC.
Conclusion
Flashing Betaflight firmware is one of those skills that seems intimidating until you do it the first time — then it becomes routine. The process boils down to: install the right driver, enter DFU mode, select your target and version, and click Flash. Every FPV pilot should be comfortable with this process because firmware updates are a regular part of keeping your drone performing its best.
The most important thing to remember: use the correct target for your FC, do not disconnect USB during flashing, and always back up your configuration before starting. With those three rules, you will never have a problem that cannot be fixed with another reflash.
Zbotic stocks a range of FPV components including ESCs, cameras, and power distribution boards that work seamlessly with Betaflight — all available with pan-India shipping.


Add comment