
One of the most powerful combinations in modern IoT development is using Firebase Realtime Database with ESP32 for IoT data storage. Firebase, Google’s cloud platform, provides a real-time, NoSQL database that syncs data instantly across all connected clients. Combined with the ESP32’s built-in WiFi and Bluetooth, you can build robust IoT systems that store sensor readings in the cloud, trigger remote actions, and display live data on a web dashboard — all without managing your own server. In this tutorial, we will walk you through the entire process of connecting your ESP32 to Firebase Realtime Database from scratch.
Why Use Firebase with ESP32?
Before diving into the code, let us understand why Firebase is an excellent choice for ESP32 IoT projects, especially for Indian makers and students.
- Free Tier: Firebase’s Spark (free) plan gives you 1GB storage and 10GB/month download — more than enough for most hobby and small commercial IoT projects.
- Real-Time Sync: Data updates are pushed to all connected clients instantly, enabling live dashboards without polling.
- No Server Management: You don’t need to set up or maintain a backend server. Google handles infrastructure, scaling, and uptime.
- REST API Support: Firebase Realtime Database has a built-in REST API, meaning you can interact with it from the ESP32 using standard HTTP requests — no special protocol needed.
- Dashboard Integration: Build a web dashboard using Firebase hosting that automatically updates when the ESP32 posts new data.

Ai Thinker NodeMCU-32S ESP32 Development Board
The NodeMCU-32S is the go-to ESP32 board for Firebase projects — dual-core processor, 4MB flash, and built-in WiFi makes it perfect for IoT data storage applications.
Setting Up Firebase Realtime Database
The first step is creating and configuring your Firebase project. Follow these steps carefully.
Step 1: Create a Firebase Project
- Go to console.firebase.google.com and sign in with your Google account.
- Click Add project and give it a name (e.g., “ESP32-IoT-Monitor”).
- You can disable Google Analytics for simplicity, then click Create Project.
Step 2: Create a Realtime Database
- In the Firebase console, click Realtime Database in the left menu under Build.
- Click Create Database.
- Choose a location (select asia-south1 for India for lower latency).
- For now, start in Test Mode (we will add security rules later).
Step 3: Get Your Database URL and Secret
- Your database URL will look like:
https://your-project-default-rtdb.asia-southeast1.firebasedatabase.app/ - For authentication, go to Project Settings > Service Accounts and note the Database Secret (or use the Legacy token).
- Alternatively, for modern auth, go to Project Settings > General and get the Web API Key.
Installing Firebase ESP32 Client Library
The most popular library for Firebase on ESP32 is the Firebase ESP Client by Mobizt. This library supports Realtime Database, Firestore, Storage, Authentication, and more.
Installation via Arduino IDE
- Go to Sketch > Include Library > Manage Libraries
- Search for Firebase ESP Client
- Install the library by Mobizt
- Also install ArduinoJson as a dependency if not already installed
Installation via PlatformIO
[env:esp32dev]
platform = espressif32
board = esp32dev
framework = arduino
lib_deps =
  mobizt/Firebase Arduino Client Library for ESP8266 and ESP32 @ ^4.4.10
  bblanchon/ArduinoJson @ ^7.0.0
Alternative: Using Firebase REST API Directly
For simple projects, you can skip the library entirely and use the HTTPClient to interact with Firebase’s REST API. We will cover both approaches in this tutorial.
Writing Sensor Data to Firebase
Now let us write a complete sketch that reads temperature and humidity from a DHT11 sensor and saves the data to Firebase Realtime Database every 30 seconds.
#include <WiFi.h>
#include <Firebase_ESP_Client.h>
#include <addons/TokenHelper.h>
#include <addons/RTDBHelper.h>
#include <DHT.h>

// WiFi credentials
#define WIFI_SSID "YourWiFiSSID"
#define WIFI_PASSWORD "YourPassword"

// Firebase credentials
#define API_KEY "your-firebase-api-key"
#define DATABASE_URL "https://your-project-default-rtdb.asia-southeast1.firebasedatabase.app/"
#define USER_EMAIL "[email protected]"
#define USER_PASSWORD "your-firebase-password"

// DHT Sensor
#define DHTPIN 4
#define DHTTYPE DHT11
DHT dht(DHTPIN, DHTTYPE);

FirebaseData fbdo;
FirebaseAuth auth;
FirebaseConfig config;

unsigned long sendDataPrevMillis = 0;
const long sendInterval = 30000; // 30 seconds

void setup() {
  Serial.begin(115200);
  dht.begin();

  WiFi.begin(WIFI_SSID, WIFI_PASSWORD);
  Serial.print("Connecting to WiFi");
  while (WiFi.status() != WL_CONNECTED) {
    delay(500); Serial.print(".");
  }
  Serial.println(" Connected!");
  Serial.println(WiFi.localIP());

  // Configure Firebase
  config.api_key = API_KEY;
  config.database_url = DATABASE_URL;
  auth.user.email = USER_EMAIL;
  auth.user.password = USER_PASSWORD;
  config.token_status_callback = tokenStatusCallback;

  Firebase.begin(&config, &auth);
  Firebase.reconnectWiFi(true);

  Serial.println("Connecting to Firebase...");
  while (!Firebase.ready()) delay(1000);
  Serial.println("Firebase ready!");
}

void loop() {
  if (Firebase.ready() && (millis() - sendDataPrevMillis > sendInterval)) {
    sendDataPrevMillis = millis();

    float temp = dht.readTemperature();
    float hum = dht.readHumidity();

    if (!isnan(temp) && !isnan(hum)) {
      String path = "/sensors/room1/";

      if (Firebase.RTDB.setFloat(&fbdo, path + "temperature", temp)) {
        Serial.printf("Temp saved: %.1f Cn", temp);
      } else {
        Serial.println(fbdo.errorReason());
      }

      if (Firebase.RTDB.setFloat(&fbdo, path + "humidity", hum)) {
        Serial.printf("Humidity saved: %.1f%%n", hum);
      } else {
        Serial.println(fbdo.errorReason());
      }

      // Save timestamp
      Firebase.RTDB.setInt(&fbdo, path + "timestamp", millis());
    }
  }
}
After running this sketch, open your Firebase console and navigate to your Realtime Database. You should see your sensor data appearing under /sensors/room1/.

DHT11 Temperature And Humidity Sensor Module with LED
The DHT11 module with LED indicator is perfect for your Firebase ESP32 project — easily read temperature and humidity data to store in the cloud.
Reading Data from Firebase on ESP32
Reading data from Firebase is just as straightforward. This is useful when you want the ESP32 to act on commands sent from a web dashboard or mobile app.
// Read a float value
if (Firebase.RTDB.getFloat(&fbdo, "/commands/setpoint_temperature")) {
  float setpoint = fbdo.floatData();
  Serial.printf("Setpoint received: %.1f Cn", setpoint);
} else {
  Serial.println("Read failed: " + fbdo.errorReason());
}

// Read a string value
if (Firebase.RTDB.getString(&fbdo, "/commands/mode")) {
  String mode = fbdo.stringData();
  Serial.println("Mode: " + mode);
}

// Read a boolean value
if (Firebase.RTDB.getBool(&fbdo, "/commands/relay1")) {
  bool relayState = fbdo.boolData();
  digitalWrite(RELAY_PIN, relayState ? HIGH : LOW);
}
Pushing Data with Auto-Generated Keys
Instead of overwriting a single value, you can push data with an auto-generated timestamp key — useful for logging historical readings:
FirebaseJson json;
json.set("temperature", temp);
json.set("humidity", hum);
json.set("timestamp/.sv", "timestamp"); // Firebase server timestamp

if (Firebase.RTDB.pushJSON(&fbdo, "/logs/room1", &json)) {
  Serial.println("Log entry added: " + fbdo.pushName());
}
Using Firebase Real-Time Streaming
One of Firebase’s most powerful features is the ability to stream data changes. Instead of polling Firebase every few seconds, you can set up a listener on your ESP32 that is automatically called whenever data changes in the database.
// Stream callback function
void streamCallback(FirebaseStream data) {
  Serial.printf("Stream path: %sn", data.streamPath().c_str());
  Serial.printf("Event path: %sn", data.dataPath().c_str());
  Serial.printf("Data type: %sn", data.dataType().c_str());

  if (data.dataTypeEnum() == firebase_rtdb_data_type_boolean) {
    bool value = data.boolData();
    if (data.dataPath() == "/relay1") {
      digitalWrite(RELAY_PIN, value ? HIGH : LOW);
      Serial.printf("Relay 1 set to: %sn", value ? "ON" : "OFF");
    }
  }
}

void streamTimeoutCallback(bool timeout) {
  if (timeout) Serial.println("Stream timeout, resuming...");
}

// In setup():
Firebase.RTDB.beginStream(&fbdo_stream, "/commands");
Firebase.RTDB.setStreamCallback(&fbdo_stream, streamCallback, streamTimeoutCallback);
With this approach, the ESP32 reacts to database changes within milliseconds — perfect for controlling relays, LEDs, or motors from a web app or mobile dashboard.

DHT20 SIP Packaged Temperature and Humidity Sensor
The DHT20 offers improved accuracy over DHT11 with I2C interface — ideal for professional IoT data logging projects with Firebase and ESP32.
Firebase Authentication and Security Rules
Leaving your Firebase database in Test Mode (open access) is fine for development but dangerous for production. Here is how to properly secure your database.
Setting Up Email/Password Authentication
- In Firebase Console, go to Build > Authentication > Sign-in method
- Enable Email/Password provider
- Create a user for your ESP32 device under Users tab (e.g., [email protected])
Firebase Security Rules
Restrict database access so only authenticated users can read/write:
{
  "rules": {
    ".read": "auth != null",
    ".write": "auth != null"
  }
}
For more granular control, restrict by user UID:
{
  "rules": {
    "sensors": {
      ".read": "auth != null",
      ".write": "auth.uid === 'your-esp32-uid'"
    },
    "commands": {
      ".read": "auth.uid === 'your-esp32-uid'",
      ".write": "auth != null"
    }
  }
}
Data Validation Rules
Prevent invalid data from being written:
{
  "rules": {
    "sensors": {
      "room1": {
        "temperature": {
          ".validate": "newData.isNumber() && newData.val() >= -40 && newData.val() <= 85"
        }
      }
    }
  }
}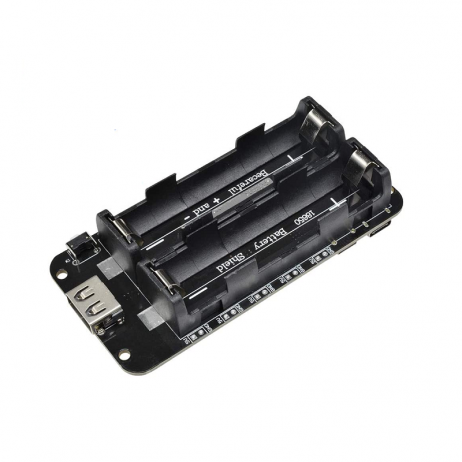
2 x 18650 Lithium Battery Shield for Arduino/ESP32/ESP8266
Make your Firebase ESP32 data logger portable with this dual 18650 battery shield — provides 5V/3A output for uninterrupted remote IoT monitoring.
Frequently Asked Questions
Q1: Can I use Firebase Realtime Database with multiple ESP32 devices?
Yes! You can connect as many ESP32 devices as you want. Simply organize your database structure to separate data by device ID (e.g., /sensors/esp32-001/, /sensors/esp32-002/). Each device authenticates independently and reads/writes to its own path.
Q2: How do I handle WiFi disconnections in a long-running Firebase project?
The Firebase ESP Client library automatically handles reconnection. Set Firebase.reconnectWiFi(true) in your setup. The library will queue operations and retry when the connection is restored. For critical applications, also implement a watchdog timer to reset the ESP32 if it stays disconnected too long.
Q3: What are the Firebase free tier limits for IoT projects?
The free Spark plan gives you 1GB of database storage, 10GB/month of download, and 100 simultaneous connections. For most hobby IoT projects with a few ESP32 devices, this is more than sufficient. If you exceed limits, the Blaze (pay-as-you-go) plan is very affordable.
Q4: Is Firebase Realtime Database or Firestore better for ESP32?
For ESP32 projects, Firebase Realtime Database is generally better because it has a simpler API, lower latency for real-time updates, and uses less bandwidth. Firestore is more feature-rich for complex queries but has higher overhead. The Firebase ESP Client library supports both.
Q5: Can I use Firebase with ESP32 without a library using just HTTP?
Yes! Firebase Realtime Database has a full REST API. You can do a PUT request to write data: https://your-db.firebaseio.com/sensors.json?auth=YOUR_SECRET with a JSON body. This approach works with the standard HTTPClient library and requires no additional dependencies.
Start Your Firebase IoT Project Today
With ESP32 and Firebase Realtime Database, you have everything you need to build a professional IoT data monitoring system. Get your ESP32 boards, sensors, and power modules from Zbotic — shipped across India with fast delivery.


Add comment