
A fire-fighting robot using a flame sensor and water pump on Arduino is one of the most popular and impactful robotics projects for engineering students in India. The concept is simple but powerful: the robot autonomously navigates a room, detects a flame source using IR flame sensors, drives toward it, and activates a water pump to extinguish the fire. This guide covers everything from hardware selection and circuit wiring to complete Arduino code and competition-ready chassis assembly, making it perfect for college mini-projects, tech fests, and IEEE competition entries.
How a Fire-Fighting Robot Works
The robot uses three key subsystems working together:
- Flame detection: Three IR flame sensors — one forward-facing, one angled 45° left, and one angled 45° right — detect the 760–1100 nm infrared radiation emitted by a candle or small fire. When a sensor detects flame, it outputs a LOW signal to the Arduino.
- Navigation: Based on which sensor fires, the Arduino drives the motors to steer toward the flame. Left sensor only → turn left; right sensor only → turn right; both or center sensor → go straight.
- Extinguishing: When the robot is within ~15 cm of the flame (all three sensors simultaneously detect high intensity), it stops and activates a small 5V submersible water pump via a relay module for 3–5 seconds.
Some advanced versions also include a servo-mounted fan (blower) instead of a water pump, which works well for candle-based competitions and avoids the water mess.
Components List
Here is the complete bill of materials for a standard fire-fighting robot:
- Arduino Uno (or Nano for compact builds)
- 3× IR Flame Sensors (YG1006 or equivalent)
- 1× L298N Dual H-Bridge Motor Driver
- 2WD or 4WD Robot Chassis with DC gear motors
- 1× 5V Submersible mini water pump + silicone tubing
- 1× 5V Relay module (single channel)
- Small water reservoir (100–200 ml plastic container)
- 7.4V 1500 mAh LiPo battery or 6× AA battery holder
- Jumper wires, perf board for sensor mounting
- Optional: SG90 servo + fan blade for air-blast variant

2WD Mini Round Double-Deck Smart Robot Car Chassis
The most popular fire-fighting robot chassis in India. Compact round design allows tight turning to home in on a flame from any angle. Two-deck layout keeps components organised and accessible.
Circuit Wiring Diagram
Connect each component to the Arduino Uno as follows:
Flame Sensors → Arduino
| Flame Sensor Pin | Arduino Pin | Notes |
|---|---|---|
| VCC (Left sensor) | 5V | All sensors share 5V and GND |
| DO (Left sensor) | D4 | Digital output (LOW = flame detected) |
| DO (Center sensor) | D5 | |
| DO (Right sensor) | D6 |
L298N Motor Driver → Arduino
| L298N Pin | Arduino Pin |
|---|---|
| IN1 | D8 |
| IN2 | D9 |
| IN3 | D10 |
| IN4 | D11 |
Relay Module (Water Pump) → Arduino
Connect the relay’s IN pin to Arduino D7. The relay’s COM terminal connects to the 5V supply; the NO (normally open) terminal connects to the pump’s positive wire. The pump’s negative wire goes to GND.
Chassis Assembly
Mount components in this order for a clean, competition-ready build:
- Lower deck: Motors, battery pack, L298N motor driver.
- Upper deck: Arduino Uno, relay module, water reservoir container.
- Front of chassis: Three flame sensors on a custom bracket angled outward. Use a 3D-printed or acrylic sensor bracket, or bend a strip of aluminium flat bar to the correct angles.
- Water pump: Mount inside or below the reservoir. Run silicone tubing to a nozzle pointing forward-downward toward the expected flame location.
Keep all wiring as short and tidy as possible using cable ties. Loose wires caught in wheels are the number-one cause of fire-fighting robot failures during competitions.

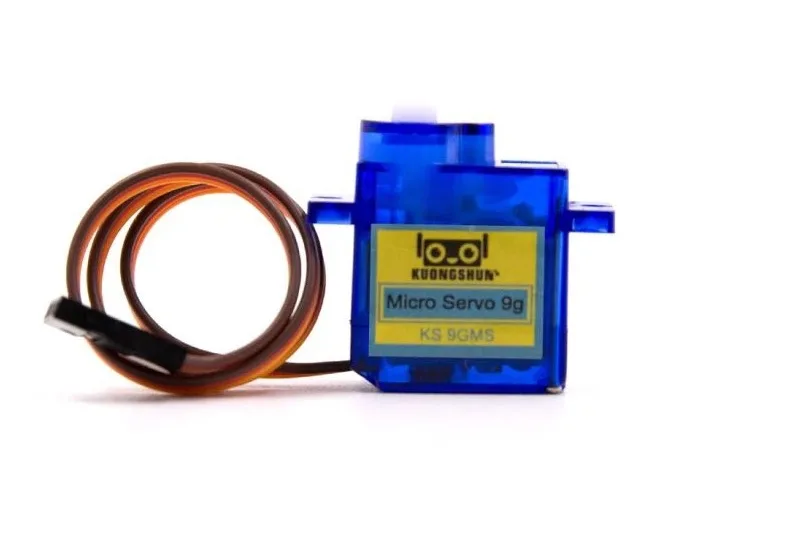
TowerPro SG90 180° Servo Motor
Use an SG90 servo to pan your flame sensor array or aim the water nozzle toward the detected fire position — adds precision targeting to your fire-fighting robot for higher competition scores.
Water Pump & Relay Setup
The mini 5V submersible water pump used in this robot draws 100–200 mA, which is within the Arduino’s relay module capability. Important setup notes:
- Always use an active-LOW relay module (most common type). The pump activates when you write
LOWto the relay IN pin. - Add a 1N4007 flyback diode across the pump terminals to protect the relay from back-EMF.
- Fill the reservoir with exactly 100 ml of water. More weight will slow the robot; less may not extinguish larger flames.
- Test the pump before mounting — some pumps require priming (holding submerged until air bubbles clear).
- Use food-grade silicone tubing of 4–6 mm inner diameter for best flow. Regular PVC tubing kinks and reduces flow significantly.
Arduino Code Walkthrough
Here is the complete Arduino code for the fire-fighting robot:
// Fire Fighting Robot — Zbotic.in
// Flame sensors: D4 (left), D5 (center), D6 (right)
// Motor driver L298N: IN1=D8, IN2=D9, IN3=D10, IN4=D11
// Relay (pump): D7

#define FLAME_L 4
#define FLAME_C 5
#define FLAME_R 6
#define RELAY_PUMP 7
#define M1_A 8
#define M1_B 9
#define M2_A 10
#define M2_B 11

void setup() {
  pinMode(FLAME_L, INPUT);
  pinMode(FLAME_C, INPUT);
  pinMode(FLAME_R, INPUT);
  pinMode(RELAY_PUMP, OUTPUT);
  digitalWrite(RELAY_PUMP, HIGH); // Relay off (active LOW)
  for (int p = M1_A; p <= M2_B; p++) pinMode(p, OUTPUT);
  Serial.begin(9600);
}

void stopMotors() {
  digitalWrite(M1_A, LOW); digitalWrite(M1_B, LOW);
  digitalWrite(M2_A, LOW); digitalWrite(M2_B, LOW);
}

void moveForward() {
  digitalWrite(M1_A, HIGH); digitalWrite(M1_B, LOW);
  digitalWrite(M2_A, HIGH); digitalWrite(M2_B, LOW);
}

void turnLeft() {
  digitalWrite(M1_A, LOW);  digitalWrite(M1_B, HIGH);
  digitalWrite(M2_A, HIGH); digitalWrite(M2_B, LOW);
}

void turnRight() {
  digitalWrite(M1_A, HIGH); digitalWrite(M1_B, LOW);
  digitalWrite(M2_A, LOW);  digitalWrite(M2_B, HIGH);
}

void activatePump(int ms) {
  stopMotors();
  digitalWrite(RELAY_PUMP, LOW);  // Pump ON
  delay(ms);
  digitalWrite(RELAY_PUMP, HIGH); // Pump OFF
}

void loop() {
  bool L = !digitalRead(FLAME_L); // LOW = flame detected
  bool C = !digitalRead(FLAME_C);
  bool R = !digitalRead(FLAME_R);

  Serial.print(L); Serial.print(C); Serial.println(R);

  if (L && C && R) {
    // All three sensors detect flame — extinguish!
    activatePump(3000);
  } else if (C || (L && R)) {
    // Center detected — move forward
    moveForward();
  } else if (L) {
    // Flame on left — turn left
    turnLeft();
    delay(150);
  } else if (R) {
    // Flame on right — turn right
    turnRight();
    delay(150);
  } else {
    // No flame — stop and scan (or add search behaviour)
    stopMotors();
  }
  delay(50); // 20 Hz loop rate
}
This code implements a simple reactive controller. The 50 ms loop delay gives 20 Hz update rate — fast enough for a slow-moving competition robot. For smoother movement, remove the fixed delays and implement a state machine instead.
Servo SG90 9g 180° (China Chip)
Budget-friendly SG90 servo for mounting your water nozzle or fan. Pan the extinguisher toward the exact flame location for accurate competition extinguishing. Works directly with Arduino Servo library.
Testing & Calibration
Calibration is essential for reliable flame detection. Follow these steps:
- Sensitivity adjustment: Each flame sensor has a potentiometer (blue trimmer). In a dark room, light a candle and adjust the trimmer until the sensor’s indicator LED lights up at ~30 cm distance. Too sensitive (triggers under room light) causes false positives.
- Motor direction check: Run
moveForward()and verify both wheels spin in the same forward direction. If one motor spins backward, swap its A/B wires at the L298N output terminals. - Pump prime test: Activate the relay manually (ground the IN pin) and verify water flows through the tube before mounting everything.
- Full system test: Place a lit candle at 30 cm, 60 cm, and 90 cm from the robot. Verify the robot detects it and drives to within 15 cm before activating the pump.
- Battery test: Run the robot on battery (not USB power) — some L298N modules need at least 6V to operate the motors reliably.
Upgrades & Advanced Features
Once the basic fire-fighting robot is working, these upgrades will impress judges and improve competition scores:
- PID steering: Replace the simple turn-left/right logic with a PID controller using the analog output (AO pin) of the flame sensors for proportional steering toward the flame.
- Bluetooth remote override: Add an HC-05 module so a judge can take manual control if the autonomous mode fails.
- Servo-mounted nozzle: Add an SG90 servo under the nozzle that pans 90° left and right. Use the servo position to fine-tune the spray direction based on sensor readings.
- Wall-following mode: Add two HC-SR04 ultrasonic sensors for maze-navigation mode — required in advanced competition formats where the robot must navigate a room layout to reach the fire.
- Fan instead of pump: For dry competitions, a 3.7V brushless fan driven by a MOSFET blows out a candle flame without the water hazard. Faster to reset between runs.

Servo Mount Holder Bracket for SG90/MG90 (Pack of 2)
Aluminium servo brackets for mounting SG90/MG90 servos at any angle on your robot chassis. Essential for building a pan-tilt flame sensor head or servo-mounted water nozzle.
Frequently Asked Questions
What type of flame sensor is best for a fire-fighting robot?
The YG1006 phototransistor-based flame sensor operating in the 760–1100 nm infrared range is the most common and reliable choice. It has both digital (DO) and analog (AO) outputs — the analog output allows proportional steering, which gives much smoother navigation than purely digital control.
Can I use this robot for a college competition?
Yes. This design is competition-ready for most Indian college fire-fighting robot events (IIT tech fests, VJTI Technovanza, Trinity competitions). Check the specific rules: some competitions use a candle in a maze, others place the flame in an open field. Add wall-following sensors if the format requires maze navigation.
Why does the robot spin in circles instead of going straight?
This is caused by mismatched motor speeds. The two DC gear motors in cheap chassis kits have slight speed differences from manufacturing tolerances. Fix: use PWM speed control (connect motor enable pins EN_A and EN_B to Arduino PWM pins D5 and D6) and tune the duty cycles until both wheels spin at the same speed.
Can I use a servo-mounted fan instead of a water pump?
Absolutely. A servo-mounted fan (small brushless fan or 3.7V brushed fan) is popular for dry competition formats. The fan must generate enough airflow to extinguish a standard candle from 10–15 cm. A 30 mm 5V fan driven by a MOSFET switch works well. This avoids water mess and is easier to reset between competition runs.
How do I power the Arduino and motors from the same battery?
You can power both from a 7.4V LiPo: connect the battery to the L298N’s 12V input (it handles 7–12V), and connect the L298N’s 5V regulated output to the Arduino’s 5V pin (not Vin). This avoids noise on the Arduino from motor switching. Add a 100 µF capacitor from L298N 5V to GND for stability.
Get all the parts for your fire-fighting robot from Zbotic! We stock robot chassis kits, servo motors, servo brackets, sensor modules, and accessories — all shipped fast across India. Shop Robotics & DIY →


Add comment