
ESP32 WiFi Manager: Auto-Connect & Captive Portal Tutorial
Setting up the ESP32 WiFi Manager captive portal is one of the smartest things you can do for your IoT projects. Instead of hardcoding your WiFi credentials into firmware every time you flash a new device or change your router, a WiFi Manager lets end-users enter network details through a browser-based portal — no serial monitor required. Whether you are building a smart home device, a weather station, or a remote sensor node, this tutorial walks you through implementing auto-connect and captive portal functionality on the ESP32 from scratch.
What is ESP32 WiFi Manager?
The ESP32 is one of the most popular microcontrollers in India for WiFi-enabled IoT projects, thanks to its dual-core processor, built-in WiFi and Bluetooth, and low cost. However, a major pain point in production deployments is credential management. Hardcoded SSIDs and passwords mean every firmware update or router change requires a reflash.
A WiFi Manager solves this elegantly. On first boot (or when saved credentials fail), the ESP32 starts its own Access Point (AP) and launches a captive portal — a web page that opens automatically when a user connects to the AP. The user enters their home WiFi details, the ESP32 saves them to flash memory, and from the next boot onward it connects automatically.
The most widely used library for this is tzapu’s WiFiManager, which works seamlessly with the Arduino IDE and PlatformIO. There is also a newer fork by khoih-prog with additional features. Both are actively maintained and support ESP32 and ESP8266.
How the Captive Portal Works
Understanding the underlying mechanism helps you troubleshoot issues faster. Here is what happens step by step:
- AP Mode Start: The ESP32 creates a soft access point with a name like
ESP32-Setup. You connect to this network from your phone or laptop. - DNS Redirect: The ESP32 runs a DNS server that resolves all domain queries to its own IP (typically
192.168.4.1). - Captive Portal Detection: Modern operating systems (Android, iOS, Windows, macOS) probe for internet connectivity on new networks. Since all DNS queries resolve to the ESP32, the OS detects no internet and automatically opens the captive portal browser.
- Credential Entry: The portal shows a list of scanned WiFi networks and a form to enter the password.
- Station Mode Connect: ESP32 tries to connect to the chosen network. On success, it saves credentials to NVS (Non-Volatile Storage) and continues with your main sketch.
If the connection fails, the portal stays open for another attempt. A configurable timeout can reset the device or enter deep sleep.
Installing the WiFiManager Library
You need the Arduino IDE (2.x recommended) with the ESP32 board package installed. If you have not added ESP32 support yet, go to File → Preferences and add https://raw.githubusercontent.com/espressif/arduino-esp32/gh-pages/package_esp32_index.json to the Additional Boards Manager URLs. Then install esp32 by Espressif Systems from Boards Manager.
To install WiFiManager:
- Open Sketch → Include Library → Manage Libraries
- Search for
WiFiManager - Install WiFiManager by tzapu (version 2.0.x or later)
For PlatformIO users, add this to platformio.ini:
lib_deps =
    tzapu/WiFiManager @ ^2.0.17
Basic Auto-Connect Sketch
Here is a minimal but fully functional sketch that handles auto-connect with captive portal fallback:
#include <WiFiManager.h>  // https://github.com/tzapu/WiFiManager

void setup() {
  Serial.begin(115200);
  delay(100);

  // Create WiFiManager instance
  WiFiManager wm;

  // Optional: reset saved credentials for testing
  // wm.resetSettings();

  // Configure AP name and password (leave password empty for open AP)
  bool connected = wm.autoConnect("ESP32-Setup", "zbotic123");

  if (!connected) {
    Serial.println("Failed to connect. Restarting...");
    delay(3000);
    ESP.restart();
  }

  Serial.println("Connected to WiFi!");
  Serial.print("IP Address: ");
  Serial.println(WiFi.localIP());
}

void loop() {
  // Your main code here
}
When this sketch runs for the first time (or after wm.resetSettings()), the ESP32 broadcasts an AP named ESP32-Setup with password zbotic123. Connect from your phone and the portal opens automatically. On subsequent boots, it skips the portal and connects directly using saved credentials.
Key methods to know:
wm.autoConnect(ssid, password)— starts AP mode and portal if not connectedwm.resetSettings()— erases saved WiFi credentials from NVSwm.setConfigPortalTimeout(120)— portal closes after 120 secondswm.setConnectTimeout(30)— connection attempt timeout in secondswm.setDebugOutput(false)— disable verbose serial output in production
Adding Custom Parameters to the Portal
One of the most powerful features of WiFiManager is the ability to add your own input fields to the portal. This is perfect for MQTT broker addresses, API keys, device names, or any configuration that varies per deployment.
#include <WiFiManager.h>
#include <Preferences.h>
Preferences preferences;
void setup() {
Serial.begin(115200);
// Load saved custom params
preferences.begin("myapp", false);
String mqttHost = preferences.getString("mqtt_host", "");
String deviceName = preferences.getString("device_name", "ESP32-Device");
preferences.end();
// Define custom fields
WiFiManagerParameter param_mqtt("mqtt", "MQTT Broker IP", mqttHost.c_str(), 40);
WiFiManagerParameter param_name("dname", "Device Name", deviceName.c_str(), 30);
WiFiManager wm;
wm.addParameter(¶m_mqtt);
wm.addParameter(¶m_name);
wm.setSaveParamsCallback([&]() {
preferences.begin("myapp", false);
preferences.putString("mqtt_host", param_mqtt.getValue());
preferences.putString("device_name", param_name.getValue());
preferences.end();
Serial.println("Custom params saved!");
});
wm.autoConnect("ESP32-Setup");
Serial.println("WiFi connected. MQTT: " + String(param_mqtt.getValue()));
}
void loop() {}The WiFiManagerParameter constructor takes: ID, label, default value, max length. Values are retrieved with getValue() after the portal submits.
Saving Credentials to NVS and Using Preferences
WiFiManager already uses the ESP32’s NVS (Non-Volatile Storage) for WiFi credentials automatically. For your own custom parameters, the Preferences library (built into the ESP32 Arduino core) is the recommended approach — it is more reliable than SPIFFS/LittleFS for small key-value data and survives OTA updates.
Here are some best practices for robust credential management:
- Namespace isolation: Use a unique namespace like
myappto avoid key collisions with other libraries. - Factory reset button: Connect a physical button to GPIO0 (BOOT button on most dev boards). If held for 5 seconds on boot, call
wm.resetSettings()and restart. This gives field technicians a reset path without USB access. - Portal trigger on demand: Instead of only triggering on failed connection, you can call
wm.startConfigPortal()from your main loop when a button is pressed — useful for changing WiFi networks without full reset. - Timeout handling: Always set a
setConfigPortalTimeout()value. Without it, the ESP32 waits indefinitely in AP mode, which blocks your application logic.
A practical factory reset implementation:
#define RESET_PIN 0  // BOOT button

void setup() {
  pinMode(RESET_PIN, INPUT_PULLUP);
  delay(1000);  // Wait for button check

  if (digitalRead(RESET_PIN) == LOW) {
    WiFiManager wm;
    wm.resetSettings();
    Serial.println("Settings cleared! Restarting...");
    ESP.restart();
  }
  // ... rest of setup
}
Common Problems and Fixes
Even with a well-tested library, you may hit snags. Here are the most common issues Indian makers encounter and how to fix them:
Portal does not open automatically on Android: Some Android versions require you to tap the notification “Sign in to network” instead of auto-launching. Make sure you are on the ESP32’s AP and open a browser to 192.168.4.1 manually if the notification does not appear.
Portal shows but credentials don’t save: This usually means the connection attempt failed silently. Check that the password is correct and the network supports 2.4GHz (ESP32 does not support 5GHz). Also ensure you are not running wm.resetSettings() every boot — that line should be commented out or behind a conditional.
ESP32 keeps restarting in a loop: If autoConnect returns false and you call ESP.restart(), this creates an infinite restart loop if the target network is unavailable. Instead, fall back to AP mode for manual reconfiguration: call wm.startConfigPortal("ESP32-Fallback") when connection fails.
Compilation errors with newer ESP32 core: WiFiManager 2.0.x+ requires ESP32 Arduino core 2.x+. If you are on core 1.x, update via Boards Manager. Also ensure DNSServer.h and WebServer.h are available (they are included with the ESP32 core).
Portal timeout too short: On slow phones, the portal page takes time to scan and load networks. Set a timeout of at least 180 seconds: wm.setConfigPortalTimeout(180).
Recommended Hardware from Zbotic
For building ESP32 WiFi Manager projects, you need a reliable ESP32 development board. Here are top picks available at Zbotic:
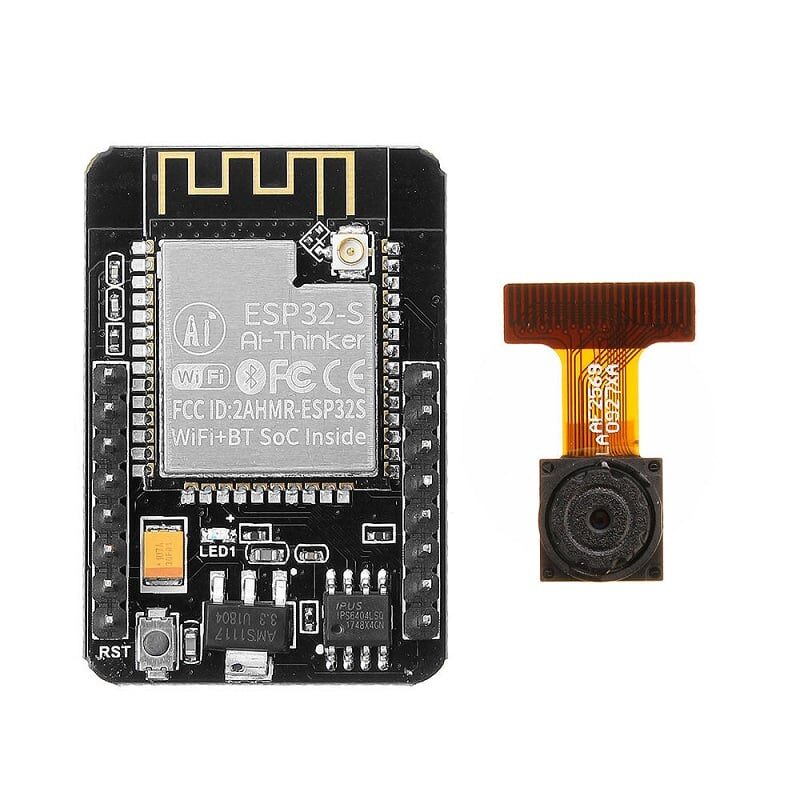
Ai Thinker ESP32 CAM Development Board WiFi+Bluetooth
A feature-packed ESP32 dev board with integrated camera, perfect for IoT portals, remote monitoring, and WiFi-connected projects. Dual-core with 4MB flash.
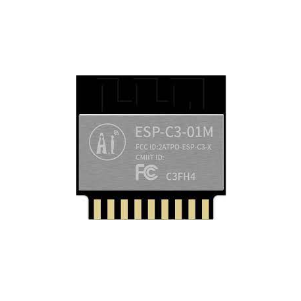
Ai Thinker ESP32-C3-01M Wi-Fi + BLE Module
Compact ESP32-C3 module with WiFi and BLE in a tiny footprint. Ideal for production IoT devices where a WiFi Manager portal is embedded in firmware.

ESP32 CAM WiFi Module Bluetooth with OV2640 Camera 2MP
The popular ESP32-CAM with OV2640 2MP camera — great for face recognition, door locks, and any project needing WiFi Manager for field deployment.

0.96 Inch I2C OLED LCD Module White SSD1306
Display the ESP32’s AP name, IP address, and connection status on this crisp 0.96″ OLED. Great user feedback while the captive portal is active.

ESP32-CAM-MB MICRO USB Download Module
Simplifies ESP32-CAM programming with a built-in USB-to-serial bridge. No GPIO0 juggling needed — just plug in and flash your WiFi Manager firmware.
Frequently Asked Questions
Q1: Can I use the WiFiManager library with ESP8266 as well?
Yes. The tzapu WiFiManager library supports both ESP32 and ESP8266. The API is nearly identical. Just select the correct board in Arduino IDE (NodeMCU or Wemos D1 Mini for ESP8266) and the library automatically uses the appropriate WiFi and WebServer headers.
Q2: Is the captive portal secure? Can someone intercept my WiFi password?
The portal operates over plain HTTP within the local AP network (no internet connection). Since only you are connected to the ESP32’s AP when entering credentials, the risk is low. For higher security, you can enable HTTPS on the portal using the ESP32’s SSL capabilities, though this adds complexity. For home/hobbyist use, the default setup is generally acceptable.
Q3: My ESP32 portal is working but does not detect my 5GHz WiFi network. Why?
The ESP32’s WiFi radio supports only 2.4GHz 802.11 b/g/n. It cannot scan or connect to 5GHz networks. If your router broadcasts only 5GHz, enable the 2.4GHz band in your router settings. Most dual-band routers in India broadcast both bands simultaneously — check your router’s admin panel.
Q4: How do I trigger the portal without erasing saved credentials (for network change)?
Use wm.startConfigPortal("ESP32-Reconfig") instead of autoConnect(). This opens the portal regardless of whether credentials are saved, without erasing them. The new credentials will overwrite the old ones upon successful connection. Trigger this from a button press or via a web endpoint in your main application.
Q5: Can I use WiFiManager in a non-blocking way so my sensor keeps reading while the portal is active?
WiFiManager 2.0+ supports non-blocking mode. Set wm.setConfigPortalBlocking(false) before calling autoConnect(), then call wm.process() in your loop. This allows other code to run while the portal handles DNS and HTTP requests. Keep in mind that WiFi operations still require some CPU time via the RTOS tasks running in the background.
Shop ESP32 development boards, OLED displays, and accessories at Zbotic’s Communication & Wireless Modules — fast shipping across India with genuine components.


Add comment