
Imagine saying “Alexa, turn on the fan” and watching your homemade relay board click on — all powered by an ESP32 sitting on your desk. ESP32 Alexa voice control is one of the most satisfying DIY smart home projects you can build, and it requires no paid cloud subscription, no complex server setup, and no Amazon developer account. In this guide, we will cover everything from the concept to working code, so you can voice-control your own devices using nothing more than an ESP32, your home Wi-Fi, and an Alexa-enabled device or the Alexa app on your phone.
How ESP32 Alexa Integration Works
Amazon Alexa normally communicates with smart home devices through the cloud: your voice goes to Amazon’s servers, gets processed, and then a command is sent to a cloud service that talks to your device. But there is a simpler, fully local approach that works entirely within your home Wi-Fi network.
This is possible because Alexa supports the Belkin WeMo and Philips Hue protocols locally on the network. The clever trick used by the Espalexa library is to make your ESP32 pretend to be a Philips Hue bridge. Alexa scans your local network for Hue bridges using the Simple Service Discovery Protocol (SSDP), finds your ESP32, and can then send on/off and brightness commands directly to it — no internet connection required for the commands, only for Alexa’s speech recognition.
This approach has major advantages:
- No Amazon developer account needed
- No cloud subscription fees
- Commands work even if your internet goes down (as long as your home network is up)
- Extremely low latency (local network speeds)
- No data leaving your home
What You Need for This Project
- ESP32 development board
- Amazon Echo device (Echo Dot, Echo, Echo Plus) OR Alexa app on Android/iPhone
- 5V relay module (for controlling AC loads) OR LED (for a simple demo)
- Jumper wires and breadboard
- USB cable and laptop/desktop for Arduino IDE
- Wi-Fi router (both Alexa and ESP32 must be on the same network)
Important for Indian users: The Alexa app is available for free on Android and iOS in India. You do not need to buy an Echo device to test this project — just install the app and enable voice input.

Ai Thinker NodeMCU-32S ESP32 Development Board – IPEX Version
The perfect ESP32 board for Alexa integration — dual-core processor, strong Wi-Fi antenna, and all GPIO pins broken out for relay control.
The Espalexa Library Explained
The Espalexa library by Christian Schwinne (github.com/Aircoookie/Espalexa) is the easiest way to add Alexa control to your ESP32 or ESP8266. It handles all the SSDP discovery protocol and HTTP server responses automatically. You only need to define your devices and write callback functions.
Install it from Arduino IDE:
- Go to Sketch → Include Library → Manage Libraries
- Search for Espalexa
- Install the latest version (also install the dependency: WebServer for ESP32)
The library supports two modes:
- On/Off only: Simple switch control. Alexa sends on or off state.
- Dimmable: Alexa can set brightness level 0–255. You can map this to PWM, motor speed, or any analogue value.
Wiring the Relay Module to ESP32
We will control a 5V relay module connected to GPIO26 of the ESP32. The relay can then switch AC loads like a bulb, fan, or table lamp.
Connections:
- Relay VCC → ESP32 5V (Vin pin, or external 5V supply)
- Relay GND → ESP32 GND
- Relay IN → ESP32 GPIO26
AC load wiring (do this carefully):
- Connect your AC device through the relay’s NO (Normally Open) and COM terminals
- When the relay is triggered HIGH (or LOW depending on module type), the AC circuit closes and the device turns on
Warning: Always exercise extreme caution when working with 220V AC mains. If you are a beginner, test with a 5V LED first before moving to AC loads. Use proper insulated wires and keep the AC section completely isolated from the ESP32 logic section.
Arduino Code for ESP32 Alexa Control
Here is a complete sketch that creates two Alexa-controllable devices: a “Living Room Light” and a “Bedroom Fan”:
#include <WiFi.h>
#include <Espalexa.h>

// Wi-Fi credentials
const char* ssid = "YourWiFiSSID";
const char* password = "YourWiFiPassword";

// GPIO pins for relay
#define RELAY_LIGHT 26
#define RELAY_FAN   27

Espalexa espalexa;

// Callback for Living Room Light
void lightChanged(uint8_t brightness) {
  Serial.print("Living Room Light: ");
  if (brightness == 0) {
    digitalWrite(RELAY_LIGHT, HIGH); // Relay OFF (active low)
    Serial.println("OFF");
  } else {
    digitalWrite(RELAY_LIGHT, LOW);  // Relay ON
    Serial.println("ON, brightness=" + String(brightness));
  }
}

// Callback for Bedroom Fan
void fanChanged(uint8_t brightness) {
  Serial.print("Bedroom Fan: ");
  if (brightness == 0) {
    digitalWrite(RELAY_FAN, HIGH);
    Serial.println("OFF");
  } else {
    digitalWrite(RELAY_FAN, LOW);
    Serial.println("ON");
  }
}

void setup() {
  Serial.begin(115200);
  pinMode(RELAY_LIGHT, OUTPUT);
  pinMode(RELAY_FAN, OUTPUT);
  digitalWrite(RELAY_LIGHT, HIGH); // Start with relays OFF
  digitalWrite(RELAY_FAN, HIGH);

  // Connect to Wi-Fi
  WiFi.begin(ssid, password);
  while (WiFi.status() != WL_CONNECTED) {
    delay(500);
    Serial.print(".");
  }
  Serial.println("nConnected! IP: " + WiFi.localIP().toString());

  // Add Alexa devices
  espalexa.addDevice("Living Room Light", lightChanged);
  espalexa.addDevice("Bedroom Fan", fanChanged);
  espalexa.begin();
}

void loop() {
  espalexa.loop();
  delay(1);
}
Upload this to your ESP32. Open the Serial Monitor at 115200 baud and wait for the IP address to appear, confirming successful Wi-Fi connection.
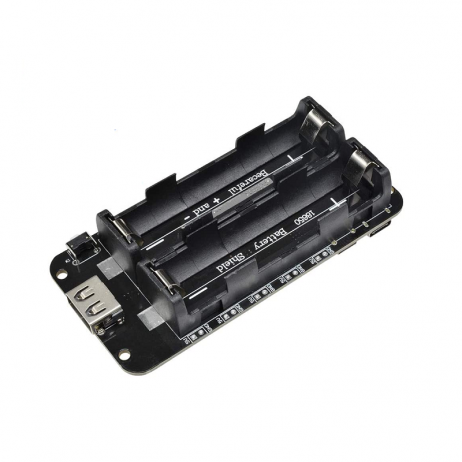
2 x 18650 Lithium Battery Shield for Arduino, ESP32, ESP8266
Make your ESP32 Alexa controller portable with this dual 18650 battery shield — ideal for cordless smart home automation devices.
Linking Alexa to Your ESP32 Device
After uploading the code, follow these steps to discover your ESP32 devices in the Alexa app:
- Open the Amazon Alexa app on your phone
- Tap the Devices tab at the bottom
- Tap the + icon (top right) → Add Device
- Scroll down and tap Other (under device type)
- Tap Discover Devices
- Alexa will scan the local network for about 45 seconds
- Your devices “Living Room Light” and “Bedroom Fan” should appear
You can also say “Alexa, discover devices” to your Echo speaker to start the scan.
Once discovered, say:
- “Alexa, turn on the living room light”
- “Alexa, turn off the bedroom fan”
- “Alexa, set living room light to 50 percent” (if using dimmable mode)
Advanced: Dimming and Multiple Devices
For PWM-controlled loads like LED strips or DC motor speed control, switch to dimmable mode by using Espalexa::DIMMABLE:
// Add as dimmable device
espalexa.addDevice("LED Strip", ledChanged, EspalexaDeviceType::dimmable);

void ledChanged(uint8_t brightness) {
  // brightness is 0-255 from Alexa
  int pwmVal = map(brightness, 0, 255, 0, 1023);
  ledcWrite(0, pwmVal); // ESP32 LEDC PWM channel 0
}
You can add up to 10 devices per ESP32 with the Espalexa library. For more devices or for grouping, use Alexa routines and groups in the app. For example, create a group called “All Lights” containing all your ESP32 light devices, then say “Alexa, turn off all lights” to control them all at once.
Grouping devices by room: In the Alexa app, go to Devices → Groups → Add Group. Assign your discovered devices to rooms like “Living Room” or “Bedroom”. Then you can say “Alexa, turn off the living room” to control all devices in that room.
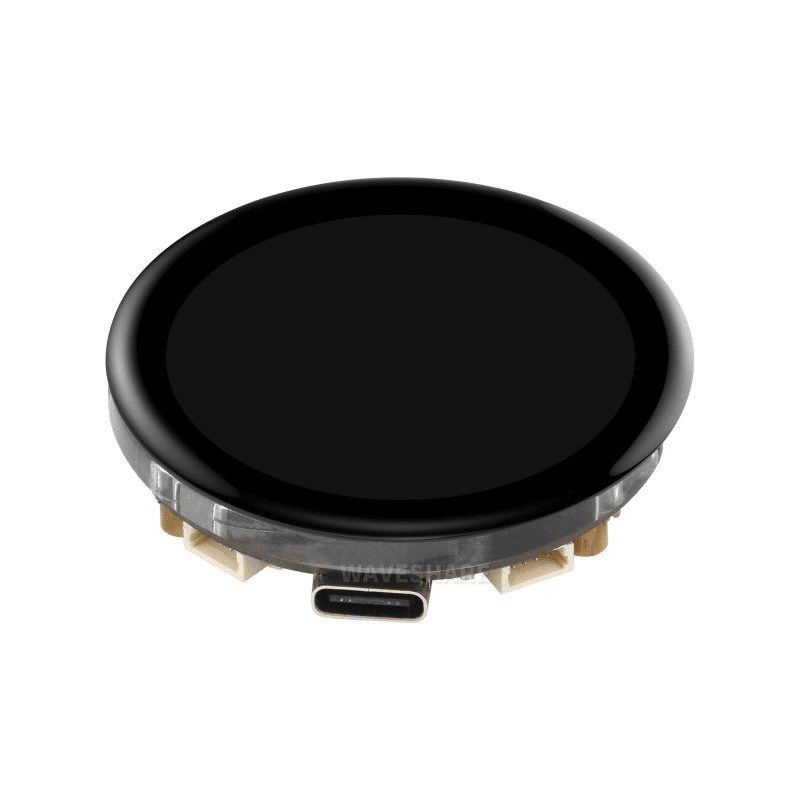
Waveshare ESP32-S3 1.43inch AMOLED Display Development Board
Build an Alexa smart home controller with a beautiful round AMOLED display showing device status — combines voice control with a visual interface.
Frequently Asked Questions
Does ESP32 Alexa control work without internet?
Partially. The Espalexa library uses local network communication, so commands from a local Echo device travel entirely within your home network. However, Alexa’s speech recognition still requires an internet connection to Amazon’s servers. The actual relay switching happens locally. If your internet goes down, physical Echo devices cannot process voice commands, but the ESP32 will still respond correctly once a command arrives.
Can I use the Alexa app on my phone instead of an Echo device?
Yes! The Amazon Alexa app for Android and iOS works exactly like an Echo device for smart home control. Both devices must be on the same Wi-Fi network as your ESP32 for local device discovery to work. Download the Alexa app from Play Store or App Store for free.
How many ESP32 devices can Alexa control?
Each ESP32 can emulate up to 10 devices using Espalexa. You can have multiple ESP32 boards on your network, each with up to 10 virtual devices, giving you effectively unlimited control points. Alexa can discover and manage hundreds of devices across multiple boards.
Why is Alexa not discovering my ESP32?
The most common reasons are: (1) Alexa and ESP32 are on different VLANs or subnets, (2) your router has IGMP/multicast snooping blocking SSDP packets, (3) the ESP32 has not fully connected to Wi-Fi before discovery scan. Make sure both are on the same 2.4 GHz Wi-Fi network and retry the discovery after a fresh ESP32 reboot.
Is this approach secure for home use?
For a personal home network this is reasonably secure since the ESP32 only listens on your local LAN. Do not expose port 80 of your ESP32 to the internet. For extra security, use your router’s device isolation features to restrict which devices can communicate with the ESP32 on the network.
Start Building Your Voice-Controlled Smart Home!
Get ESP32 boards, relay modules, and all smart home DIY components from Zbotic. Fast delivery across India with genuine components and technical support.


Add comment