
Emergency Solar Lantern DIY: Build with 18650 and Panel
Power cuts are a reality across much of India, especially during monsoon season and summer peak demand. Building your own solar lantern DIY project with an 18650 battery and solar panel is one of the most practical weekend projects an electronics enthusiast can undertake — it is useful the very next time the lights go out. This guide walks you through every component, every connection, and every consideration to build a bright, reliable, solar-rechargeable emergency lantern that costs under ₹500 in parts.
Table of Contents
- Components You Will Need
- How the Circuit Works
- Choosing the Right Solar Panel
- Setting Up the 18650 Battery
- The Charging Module: Heart of the System
- LED Selection and Driver
- Step-by-Step Assembly
- Frequently Asked Questions
Components You Will Need
Here is the full parts list for this emergency solar lantern project. All components are widely available at Zbotic or your local electronics market:
- 1× 18650 Li-ion cell (3.7V, 2000–3500mAh — salvaged from old laptop packs or purchased new)
- 1× 18650 battery holder (single cell)
- 1× TP4056 charging module with protection (the version with overcharge/overdischarge protection is essential)
- 1× 5V 1W or 6V 1W solar panel (small enough to fit on the lid)
- 1× MT3608 or similar boost converter (to regulate panel voltage for charging, if needed)
- 1× High-brightness LED or LED strip (1W or 3W white LED, 6500K for bright output)
- 1× Slide switch or push-button switch for on/off
- 1× Small plastic enclosure or repurposed container (a tiffin box works great!)
- Hookup wire, soldering iron, hot glue gun
Total estimated cost: ₹350–₹550 depending on LED wattage and enclosure choice.

1 x 18650 Battery Holder with 18.4MM Bore Diameter – Pack of 4
Sturdy single-cell 18650 holder — the foundation of your solar lantern build. Pack of 4 so you have spares for future projects.
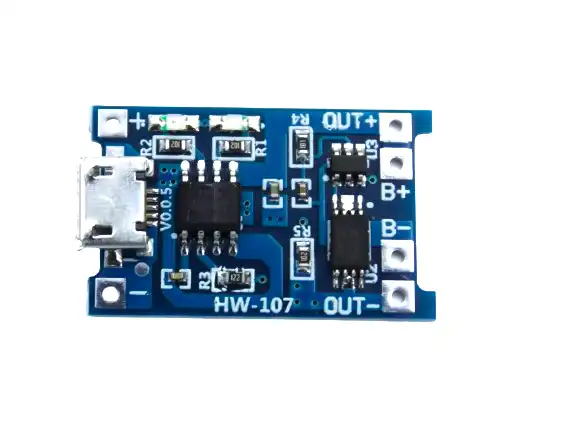
TP4056 1A Li-Ion Battery Charging Board Micro USB with Current Protection
The TP4056 with integrated DW01A protection chip handles CC/CV charging, overcharge, over-discharge, and short-circuit protection — perfect for solar lantern builds.
How the Circuit Works
The circuit is elegantly simple, which is why this project is suitable even for beginners. Here is the signal flow:
- Solar panel generates 5–6V DC in sunlight
- TP4056 module receives this voltage at its IN+ and IN− pads (or via the Micro USB port with a solar-to-USB adapter) and charges the 18650 cell at a controlled 1A using Constant Current / Constant Voltage (CC/CV) profile
- 18650 cell stores the energy at 3.7V nominal (4.2V fully charged)
- OUT+ and OUT− of the TP4056 protection circuit supply the LED circuit
- A slide switch in series with the LED turns the light on/off
- The LED operates directly from the 3.7V cell voltage (for a 1W LED with appropriate current limiting resistor, or via a boost converter for higher brightness)
You can also add a USB output from the TP4056’s OUT pads so the lantern doubles as a phone charger during emergencies — a very popular modification in India.
Choosing the Right Solar Panel
For a single 18650 cell, you need a solar panel that outputs 5–6V at 0.5–1W under standard sunlight conditions. Here is what to look for:
- Voltage: 5V–6V open circuit (Voc). This ensures the TP4056 gets enough voltage headroom to charge. Do not use a 3.7V panel — it will barely charge the cell even in full sun.
- Current: 100–200mA (0.5–1W panel) for slow but reliable charging. A 1W panel will fully charge a 2000mAh 18650 in about 2–3 hours of good sunlight.
- Size: A 1W panel is roughly 110mm × 60mm — compact enough to mount on a lantern lid.
- Avoid series-wired 12V panels: These output 18V+ Voc and will damage the TP4056 directly. Use small 5V or 6V panels, or add a voltage regulator/buck converter between the panel and charger.
In India, usable sunlight (insolation) averages 4–6 peak sun hours per day depending on your location and season. A 1W panel gives approximately 1Wh × 5 hours = 5Wh of energy per day — enough to charge a 2000mAh 18650 (7.4Wh at 3.7V) in about 1.5 days of good sun, or one day if your panel is larger or your cell smaller.
Setting Up the 18650 Battery
The 18650 format (18mm diameter × 65mm length) is the workhorse of DIY energy storage. A single cell gives you 2000–3500mAh at 3.7V nominal, which translates to 7.4–13Wh of energy — enough to power a 1W LED for 7–13 hours on a full charge.
Key points for safe 18650 use:
- Always use a BMS/protection circuit. The TP4056 modules with the DW01A chip handle this, but if you use a bare TP4056 (without protection), add a separate BMS board.
- Check cell polarity before inserting. Reversing polarity can instantly destroy the protection circuit.
- Use matched cells if using multiple 18650s in parallel. For this single-cell lantern, just ensure your cell is not heavily discharged (above 2.5V resting).
- Salvaged laptop cells: If you use cells salvaged from old laptop packs, test them first. Many retain only 30–50% of original capacity. They still work for this project but give shorter runtime.
The Charging Module: Heart of the System
The TP4056 is a dedicated single-cell Li-ion charger IC with CC/CV charging, charge termination, and (in the protected version) cell protection via the DW01A + 8205A MOSFET combo. It is the perfect IC for this project because:
- It accepts 4.5–5.5V input (ideal for 5V solar panels or USB)
- Charges at up to 1A (adjustable via the PROG resistor — 1.2kΩ = 1A, 2kΩ = 580mA)
- Charges to exactly 4.2V (safe maximum for Li-ion) and stops automatically
- Has status LEDs: red = charging, blue/green = full
- The protection version cuts off output if cell voltage drops below 2.5V (over-discharge protection)
For solar input, connect the panel’s positive terminal to IN+ and negative to IN−. The module also has a Micro USB socket — you can charge via USB on cloudy days.
Important: If your solar panel has no diode, add a 1N4007 diode in series between the panel positive and IN+. This prevents reverse current flow from the battery back into the panel at night (which would slowly discharge your cell).

18650 5V 1A/2A Lithium Battery Digital Display & Charging Module, Dual USB Output
This all-in-one module includes a battery charge controller, boost converter to 5V, dual USB output, and a digital voltage/capacity display — ideal for an upgraded solar lantern.
LED Selection and Driver
For emergency lighting, brightness matters. Here are the LED options and how to drive them from a 3.7V 18650 cell:
Option 1: Direct Drive with Current Limiting Resistor (Simple, Less Efficient)
A 5mm white LED drops about 3.2–3.4V at 20mA. At 3.7V cell voltage, a 15–47Ω resistor in series gives safe operation. However, as the cell discharges from 4.2V to 3.0V, brightness will visibly change.
Option 2: 1W LED with Resistor (Medium Brightness)
A 1W white LED (3.2–3.4V forward voltage, 300–350mA) can be driven directly from a 3.7V cell with a 1Ω–2Ω current limiting resistor at the cost of some efficiency. Gives roughly 80–100 lumens.
Option 3: Boost Converter + 1W LED (Best Efficiency and Consistency)
Use an MT3608 or XL6009 boost converter to step up to 5V–9V, then drive a constant-current LED driver (like the PT4115 or AMC7135). Brightness stays constant as battery discharges. This is the recommended approach for a quality lantern.
For most indoor emergency lighting needs, a single 1W LED gives more than adequate illumination. If you want to light up a full room, use three 1W LEDs in parallel with individual current limiting, drawing about 900mA–1A total — within the TP4056 protection circuit’s output capability.
Step-by-Step Assembly
- Prepare the enclosure: Drill holes for the LED (top), solar panel cable entry (side), switch (side), and optional USB output port (side).
- Mount the solar panel: Hot glue or screw it to the lid/top of the enclosure. Route the two wires inside through a grommet or silicone sealant to weatherproof.
- Add the blocking diode: Solder a 1N4007 in series with the solar panel positive wire (anode toward panel, cathode toward TP4056 IN+).
- Wire the TP4056: Connect solar panel (via diode) to IN+ and IN−. Connect the 18650 holder to B+ and B−. Connect the LED circuit to OUT+ and OUT− via the slide switch.
- Prepare the LED: If using a 1W LED with resistor, solder a 2Ω 1W resistor in series. If using a boost converter, set output voltage appropriately and wire to LED driver.
- Test before sealing: Cover the solar panel briefly with your hand, then expose to sunlight. The charging LED on the TP4056 should turn red. Turn on the switch — LED should light up.
- Seal and finish: Hot glue all internal components to prevent vibration rattling. Apply silicone around the panel cable entry for basic weather resistance.

1S 3.7V 2A 1MOS BMS Li-ion 18650 Battery Protection Board
Add this BMS board as an extra layer of battery protection if using a bare TP4056 charger without integrated protection in your solar lantern build.
Frequently Asked Questions
Can I charge this lantern via USB as well as solar?
Absolutely — the TP4056 module has a Micro USB port built in. On cloudy days or nights, simply plug it into any USB charger or power bank via Micro USB. Solar and USB can both charge the cell (though ideally not simultaneously at full current from both sources).
How long will one charge last?
With a 2500mAh 18650 and a 1W LED drawing approximately 270mA at 3.7V, you get roughly 9 hours of runtime per full charge. With a 3500mAh cell, that extends to about 13 hours.
Is it safe to leave the lantern charging in the sun all day?
Yes, with the TP4056. Once the cell reaches 4.2V, the IC automatically stops charging and goes into standby mode. It will not overcharge. The cell is safe to leave connected to the panel indefinitely.
What if my solar panel voltage is 6V instead of 5V?
6V panels work fine with the TP4056 — its maximum input is 6.5V (check your specific module’s specs). Keep it under 5.5V for best thermal performance of the IC. If you have a higher voltage panel, use a small LDO or buck converter to regulate to 5V first.
Can I scale this up with two or three 18650 cells in parallel?
Yes. Wiring 18650 cells in parallel (matching voltage within 0.1V before connecting) multiplies capacity proportionally. Use one TP4056 per cell for safe individual cell management, or upgrade to a multi-cell BMS and a more capable charger IC like the TP5100 or CN3722.
Conclusion: Lights Out? Never Again
This emergency solar lantern DIY project is one of those builds that is simultaneously simple, educational, and genuinely useful. It teaches you CC/CV charging, solar panel characteristics, LED current driving, and basic enclosure design — all in a single afternoon of building. And once it is done, it sits on your shelf ready for every power cut India’s grid throws at you.
Scale it up with larger panels and more 18650 cells, add a USB charging port, or build a string of them for your home — the principles remain the same. The best maker projects are the ones that solve real problems, and this one absolutely does.
Get all the components you need from Zbotic’s power and charging section — fast shipping across India with all components in stock.


Add comment