
Cinewhoop Drone Build: Safe Indoor Filming with Ducts
Cinewhoop drones have completely changed the game for indoor aerial videography in India. Whether you are shooting a product launch at a corporate event in Bengaluru, capturing the interiors of a luxury apartment in Mumbai, or creating cinematic reels inside a factory in Pune, cinewhoops deliver buttery-smooth footage in tight spaces where traditional drones simply cannot go safely.
Unlike open-prop freestyle quads that can slice through anything they touch, cinewhoops feature propeller guards (ducts) that protect both the props and anything — or anyone — nearby. This makes them the only responsible choice for indoor flying. In this complete build guide, we walk you through every component, every decision, and every trick you need to get your cinewhoop airborne and filming stunning indoor footage.
1. What is a Cinewhoop and Why Use Ducts?
A cinewhoop is a small FPV quadcopter, typically 2.5 to 3.5 inches in prop size, built around a ducted frame design where each propeller sits inside a protective duct or guard. The word “cinewhoop” comes from “cinematic” and the characteristic “whoosh” sound the ducted fans make during flight.
The ducts serve three critical purposes:
- Safety: Spinning carbon fibre props are essentially flying blades. Ducts prevent them from contacting walls, ceilings, people, and expensive camera equipment.
- Stability: The duct acts like a shroud around the propeller, increasing thrust efficiency at low speeds and reducing turbulence-induced wobble — essential for smooth indoor footage.
- Regulatory compliance: DGCA guidelines and most venue insurance policies require prop guards for any drone operated indoors near people.
Cinewhoops typically carry a GoPro or similar action camera on top for cinema-quality recording while simultaneously streaming FPV video to the pilot’s goggles via a lightweight analog or digital FPV system. The result is footage that looks like a high-end gimbal shot but with the agility to fly through doorways, under tables, and around staircases.
2. Choosing the Right Cinewhoop Frame
The frame is the soul of your cinewhoop build. For indoor filming, you want a frame that balances rigidity, weight, and camera mounting flexibility. Here are the key parameters:
Frame Size
2.5-inch cinewhoops are ultralight (under 100g AUW possible) and extremely agile but can only carry nano-sized cameras like the GoPro Bones or Runcam Thumb. They are ideal for ultra-narrow corridors.
3-inch cinewhoops are the sweet spot for most builds. They can carry a full-sized GoPro Hero 12, offer excellent stability, and fly comfortably in rooms as small as 20×20 feet.
3.5-inch cinewhoops give you more payload capacity and better wind resistance for semi-outdoor/warehouse shooting but get heavier fast.
Frame Material
Most cinewhoop frames use a combination of injection-moulded polycarbonate for the duct arms (flexible, crash-resistant) and carbon fibre for the central plate (rigid, lightweight). Pure carbon fibre ducts are available but they crack on impact — not ideal for indoor beginners.
Popular Frame Options
The Geprc CineLog 25/35, Flywoo Firefly Hex, and BetaFPV Pavo 25 are among the most popular cinewhoop frames globally. In India, availability and pricing through local vendors make these attractive. For surveillance and professional work, purpose-built frames like EFT’s lineup offer rugged designs suited for demanding environments.
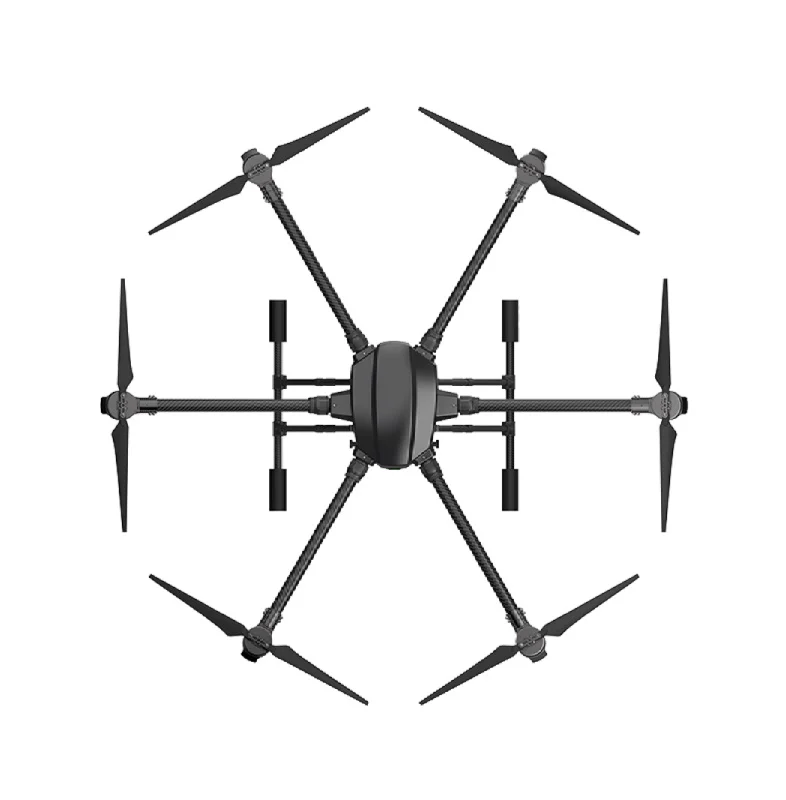
EFT 6120 Multifunction Surveillance Drone Frame
A robust professional-grade drone frame built for surveillance and cinematic applications. Ideal for building a heavy-duty indoor filming drone with excellent payload capacity.
View on Zbotic3. Motors and Propellers for Indoor Flying
Motor selection for a cinewhoop is a careful balancing act. You want enough thrust to carry your camera payload smoothly, but not so much power that you get violent oscillations that ruin footage.
Motor KV and Size
For a 3-inch cinewhoop on 4S LiPo:
- 1404 or 1504 stator size, 3800–4500KV — smooth, efficient, good for 4S builds
- 1203 or 1302 stator size, 5000–6000KV — for ultralight 2.5-inch builds on 3S
Lower KV motors on higher cell counts give you better efficiency and smoother throttle response — exactly what you want for cinematic video. High KV motors on low cell counts tend to be twitchy and power-hungry.
Propellers
For indoor cinewhoops, you will almost always use 3-blade or 4-blade propellers in the 3-inch size range. The extra blades reduce vibration and produce a smoother audio profile (important if your camera records audio). Avoid aggressive pitch props indoors — they create turbulence in enclosed spaces that makes the drone feel unstable near walls and ceilings.
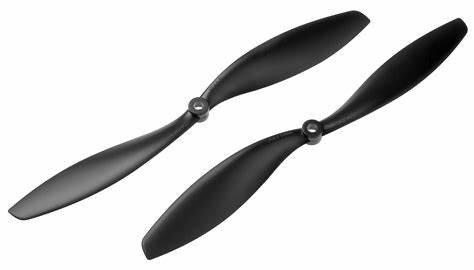
1045 Carbon Fiber Propeller CW&CCW
High-quality carbon fibre propellers with excellent stiffness and low vibration profile. Perfect for smooth cinematic footage and efficient indoor flight.
View on Zbotic4. ESC and Flight Controller Selection
Modern cinewhoop builds use an AIO (All-In-One) board that combines the flight controller and 4-in-1 ESC on a single PCB. This dramatically reduces weight and wiring complexity — critical for a sub-250g indoor flier.
AIO Board Specifications to Look For
- F4 or F7 processor: F7 offers better processing headroom for gyro filtering, which directly translates to smoother video
- 30x30mm or 20x20mm mounting: 20x20mm for ultralight builds
- ESC current rating: 25-35A per motor is sufficient for 3-inch cinewhoops; go higher if you plan payload upgrades
- Onboard OSD: Essential for monitoring battery voltage during indoor flights where you cannot see the drone clearly
- BlackBox logging: Enables post-flight analysis to dial in PID tuning for smoother footage

35A V2.1 2-5S 4-in-1 Brushless ESC for RC Drone FPV Racing
A compact 4-in-1 ESC stack ideal for cinewhoop and FPV builds. Supports 2S–5S LiPo with 35A continuous per motor — perfect for 3-inch cinewhoops carrying action cameras.
View on Zbotic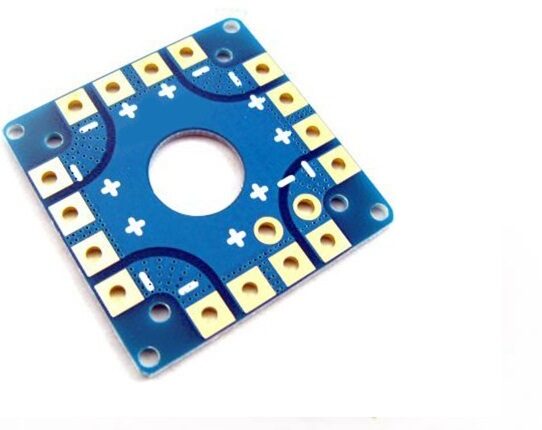
100A Multirotor ESC Power Distribution Battery Board
Heavy-duty power distribution board for quadcopter builds. Supports high current loads, making it suitable for larger payload-carrying indoor drones.
View on Zbotic5. FPV Camera and Video Transmitter
A cinewhoop runs two camera systems simultaneously: the FPV camera for pilot visibility and the cinema camera for actual recording.
FPV Camera
For indoor flying, you want an FPV camera with:
- Wide dynamic range (WDR/DWDR): Indoor environments mix harsh spotlights and dark corners — WDR cameras handle this much better than standard sensors
- Low latency: Especially important in tight indoor spaces where reaction time is critical
- Compact form factor: Nano or micro size to keep weight down

1/3″ CMOS 700TVL Mini FPV Camera 2.1mm Lens PAL/NTSC
Compact mini FPV camera with 700TVL resolution and 2.1mm wide-angle lens. NTSC/PAL switchable and lightweight — perfect for cinewhoop builds where every gram counts.
View on ZboticVideo Transmitter (VTX)
For indoor use, you need a VTX with adjustable power output. Running 200mW or even 25mW indoors is perfectly adequate and reduces interference with other electronics at the venue. A VTX with OSD integration lets you display battery voltage in your goggles.
6. Battery and Power System
Battery selection has a huge impact on both flight time and footage smoothness for cinewhoops.
Cell Count
- 3S (11.1V): Lighter but less punch; good for ultralight 2.5-inch builds
- 4S (14.8V): The preferred choice for 3-inch cinewhoops — better efficiency, smoother throttle control, longer flight times
Capacity
For a 3-inch cinewhoop carrying a GoPro, aim for a 650mAh–850mAh 4S pack. This gives you 4–6 minutes of flight time while keeping the drone light enough to remain nimble. Heavier packs (1100mAh+) increase stability due to lower-frequency vibrations but reduce agility in tight spaces.
C-Rating
A 75C+ rating is recommended. Cinewhoops demand sudden power bursts when correcting position near walls and ceilings, and a battery that sags under load will cause the flight controller to fight voltage drops, introducing jello in your footage.

2-6S 5V 5A BEC For Quadcopter Drone
High-efficiency BEC to power flight controller, cameras, and VTX from the main LiPo. Supports 2S–6S input — essential for clean, noise-free power delivery to sensitive electronics.
View on Zbotic7. Step-by-Step Build Guide
Now let us put it all together. Here is a complete build walkthrough for a 3-inch cinewhoop targeted at Indian builders:
Step 1: Frame Assembly
Start by assembling the frame ducts onto the centre plate. Use threadlocker (Loctite Blue 243) on all frame screws — vibration from the motors will loosen them over time. Route motor wires through the duct arms before tightening them down; you cannot thread them through easily after assembly.
Step 2: Motor Installation
Mount motors to the duct arm motor mounts. Check rotation direction against your frame’s motor direction diagram — incorrect motor direction is the most common first-build mistake. Typical quad motor layout: front-left CCW, front-right CW, rear-left CW, rear-right CCW (props-in configuration is preferred for cinewhoops as it reduces propwash at low throttle).
Step 3: AIO/ESC Stack Installation
Mount the AIO board on the central stack using anti-vibration grommets (M3 nylon). Never use rigid metal standoffs — this transmits motor vibration directly to the gyro and ruins footage. Solder motor wires to the ESC pads, following the motor numbering convention.
Step 4: Receiver Installation
Bind your receiver to your transmitter before installing it in the frame. Route the antenna wires away from carbon fibre and motor wires. For an ELRS (ExpressLRS) receiver, mount the antenna perpendicular to the motor shaft axes for best signal pattern indoors.
Step 5: Camera and VTX
Mount the FPV camera in the front camera slot. Connect the VTX to the FC’s dedicated VTX UART with the camera plugged into the VTX camera input. Run VTX power through a capacitor-filtered line to reduce noise bars in the FPV feed.
Step 6: Cinema Camera Mount
Install the top-mount camera plate. Use a TPU (3D-printed) mount with vibration dampers between the plate and the GoPro. Even with perfect PID tuning, some vibration reaches the top mount — the TPU isolator is your last line of defence against jello.
Step 7: Power Wiring and Battery Connector
Solder an XT30 connector (not XT60 — too heavy for cinewhoops) to the power input pads. Install a 470µF or 1000µF ESR capacitor across the battery pads to absorb voltage spikes from motor commutation. This is critical for preventing de-sync events and protecting your ESC during aggressive indoor flying.
8. Betaflight Setup and Tuning for Cinematic Flight
A well-tuned cinewhoop is the difference between jello-filled unusable footage and silky professional video. Here is a tuning approach specifically for cinematic indoor flying:
Gyro Filtering
Run RPM filtering (if your ESC supports DSHOT600/DSHOT300 with bidirectional DSHOT). This dramatically reduces the amount of filtering needed, which translates to faster control response and less gyro lag. Lower gyro LPF cutoffs to reduce jitter at the cost of slightly slower response — for cinema flying, this trade-off is always worth it.
PID Tuning
Start with conservative PIDs:
- P gains: Start at 30–35 on Roll/Pitch, 20 on Yaw
- I gains: Higher I (40–50) helps resist wind and position disturbances near walls
- D gains: Start at 15–20; increase to reduce oscillation, but watch for motor heat
- FF (Feed Forward): Keep low (20–30) for smooth cinematic moves — high FF creates snappy response unsuitable for cinema
Rates and Expo
For cinema flying, use very low rates (200–250°/s max roll rate) with high expo (0.5–0.7). This gives you precise control at the centre stick position where most cinematic moves happen, while still allowing emergency corrections at full stick.
Throttle Settings
Set Throttle MID to 0.5 and Throttle EXPO to 0.2. For a cinewhoop carrying camera weight, you hover at approximately 45–55% throttle — you want maximum control resolution right at the hover point.
9. DGCA Regulations for Indoor Flying in India
Indoor flying in India exists in a regulatory grey zone that every serious cinewhoop pilot must understand.
What DGCA Says
The Drone Rules 2021 and subsequent DGCA circulars govern all drone operations in India. The regulations primarily address outdoor flight in airspace. Flying inside a fully enclosed building technically falls outside the airspace rules — there is no airspace to regulate inside a building.
However, any drone operations — indoor or outdoor — where the drone could affect people requires:
- A valid Remote Pilot Certificate (RPC) for commercial operations
- Drone registration on the DigitalSky platform (for drones above 250g MTOW)
- Third-party liability insurance for commercial shoots
- Written permission from the venue owner
Sub-250g Advantage
Keeping your cinewhoop build under 250g MTOW (including battery and camera) places it in the Nano category, which has significantly relaxed requirements. No type certificate, no import licence, no RPC required for Nano drones. This is why many professional indoor filmers target sub-250g builds even when it means compromising on camera quality.
10. Indoor Filming Tips and Techniques
Scout the Venue First
Always walk through the venue before flying. Look for: low-hanging lights that can snag props, reflective surfaces (glass, mirrors) that confuse FPV cameras, air conditioning vents that create unpredictable airflow, and narrow passages where the ducts will get close to walls.
Use a Spotter
In any venue with other people, designate a spotter who watches the drone’s physical position while you focus on the FPV monitor/goggles. Communication between pilot and spotter (headset recommended) prevents accidents.
Plan Your Shot List
Unlike outdoor freestyle, indoor cinematic flying requires pre-planned shots. A typical indoor shoot includes: sweeping reveal shots through doorways, low-altitude tracking shots along corridors, and slowly rising reveals from near-ground level to ceiling height. Plan each shot, practice it a few times on a spare battery, then record on a fresh one.
Lighting Considerations
Indoor lighting is often a mix of colour temperatures (warm tungsten, cool LED, natural window light). Set your GoPro to manual white balance rather than auto. For events with dynamic lighting changes (concerts, shows), shoot in Log mode and grade in post.
ND Filters
Use ND filters on your cinema camera even indoors. The 180-degree shutter rule (shutter speed = 2× frame rate) requires ND filters to achieve correct motion blur in brightly lit venues. ND8 or ND16 filters are typically suitable for indoor event lighting.
Ready to Build Your Cinewhoop?
Zbotic stocks all the components you need for your indoor filming drone — from ESCs and power distribution boards to FPV cameras and propellers. Everything ships fast across India.
Shop Drone Components at ZboticFrequently Asked Questions
Is a cinewhoop legal to fly indoors in India?
Flying inside a fully enclosed private building is generally not regulated by DGCA airspace rules since there is no airspace involved. However, for commercial shoots you need venue owner permission, third-party liability insurance, and a Remote Pilot Certificate. Sub-250g Nano category drones have the most relaxed requirements — no type certificate or RPC needed for personal/hobby use.
What is the best prop size for a cinewhoop?
3-inch props are the sweet spot for most cinewhoop builds. They offer enough thrust to carry a GoPro or similar camera, generate manageable noise levels for indoor venues, and fit in ducts small enough to navigate corridors. 2.5-inch cinewhoops are lighter but can only carry nano cameras. 3.5-inch or larger builds become difficult to fly in standard indoor spaces.
How do I eliminate jello in my cinewhoop footage?
Jello (rolling shutter wobble) has multiple causes. First, use a TPU soft-mount between your cinema camera and the frame. Second, enable RPM filtering in Betaflight to suppress motor resonances. Third, balance your propellers using a prop balancer. Fourth, check that all motor screws are tight and that motor bell bearings are not worn. Finally, tune D-term gains to suppress high-frequency oscillations that couple into the camera mount.
Can I use a GoPro Hero 12 on a 3-inch cinewhoop?
Yes, the standard GoPro Hero 12 (weighing approximately 158g) can be carried by a properly built 3-inch cinewhoop with a 4S LiPo. Your total AUW will likely be 280–320g, placing it in the Micro category under DGCA rules. For sub-250g total weight, use the GoPro Hero Bones (stripped PCB, ~35g) or a lighter action camera like the Runcam Thumb Pro.
What flight time can I expect from an indoor cinewhoop?
A typical 3-inch cinewhoop carrying a full GoPro on a 4S 650mAh LiPo will give 4–6 minutes of flight time at indoor hover-and-cruise speeds. With a lighter camera or larger battery (750–850mAh), you can push 6–8 minutes. Always land at 3.7V per cell (or higher) to preserve battery health — LiPo cells discharged below 3.5V under load degrade quickly in India’s heat.
Where can I buy cinewhoop components in India?
Zbotic.in is a leading Indian electronics and drone components store that stocks ESCs, motors, propellers, FPV cameras, and power electronics required for cinewhoop builds. They offer fast shipping across India with GST invoices for commercial purchases. Other options include local hobby shops in metros, though stock variety is typically limited compared to online stores.


Add comment