
Thermal imaging is no longer limited to expensive industrial equipment. The AMG8833 thermal camera from Panasonic brings 8×8 infrared pixel sensing to your Arduino projects at a fraction of the cost of professional systems. Whether you want to detect human presence, monitor temperatures across a surface, or build a contactless thermometer, the AMG8833 opens up a world of possibilities for makers and engineers in India.
In this comprehensive tutorial, we will walk you through everything you need to know about the AMG8833 — from hardware connections and library installation to generating a colour-coded heat map visualisation on Arduino. By the end of this guide, you will have a working thermal camera system displaying real-time temperature data.
1. What Is the AMG8833 Thermal Camera?
The AMG8833 is a far-infrared array sensor manufactured by Panasonic. Unlike a traditional temperature sensor that measures a single point, the AMG8833 captures an 8×8 grid of 64 temperature pixels, allowing it to generate a rudimentary thermal image. It operates over I2C, making integration with microcontrollers like Arduino, ESP8266, ESP32, and Raspberry Pi straightforward.
At its heart, the sensor contains a 8×8 array of thermopile elements. Each element generates a voltage proportional to the infrared radiation it receives from objects in its field of view. The sensor’s onboard ADC and signal processor convert these voltages into temperature readings, which are transmitted to your microcontroller over I2C at up to 400 kHz.
The term heat map visualisation refers to the technique of colour-coding these 64 temperature values — cool regions shown in blue, warm in yellow, and hot in red — to create an intuitive thermal image. With some clever interpolation, even a low-resolution 8×8 sensor can produce surprisingly useful thermal maps.
2. Key Specifications
| Parameter | Value |
|---|---|
| Pixel Array | 8 × 8 (64 pixels) |
| Temperature Range | 0°C to 80°C |
| Accuracy | ±2.5°C (typ) |
| Frame Rate | 1 fps or 10 fps |
| Interface | I2C (up to 400 kHz) |
| Supply Voltage | 3.0V – 3.6V |
| Current Consumption | 4.5 mA (typ) |
| Field of View | 60° × 60° |
| I2C Address | 0x68 or 0x69 (selectable) |
| Package | SMD (typically on breakout board) |
3. How the AMG8833 Works
Understanding the operating principle of the AMG8833 helps you get the most out of your projects.
Thermopile Array Technology
Each of the 64 pixels in the AMG8833 is a thermopile element — essentially a set of thermocouple junctions. When infrared radiation from objects in the sensor’s field of view hits a thermopile element, a temperature difference develops across the junction, generating a small voltage according to the Seebeck effect. The sensor’s ADC converts this voltage to a digital value representing temperature.
I2C Data Format
The AMG8833 stores temperature data in 64 registers, two bytes per pixel. Each 12-bit value represents temperature in 0.25°C increments. Reading all 64 pixels requires a burst read of 128 bytes starting at register 0x80. The onboard thermistor provides the sensor’s own temperature for compensation, accessible at registers 0x0E–0x0F.
Interrupt Function
The AMG8833 includes a built-in interrupt engine. You can set upper and lower threshold temperatures; the INT pin goes low when any pixel exceeds these thresholds. This is extremely useful for motion detection and alarm systems — no need to poll the sensor constantly.
4. Components Needed
- AMG8833 thermal camera breakout module
- Arduino Uno, Nano, or Mega (or ESP8266/ESP32)
- 0.96-inch I2C OLED display (optional but highly recommended)
- Jumper wires (male-to-female)
- USB cable for Arduino programming
- 10 kΩ pull-up resistors (usually on breakout board)
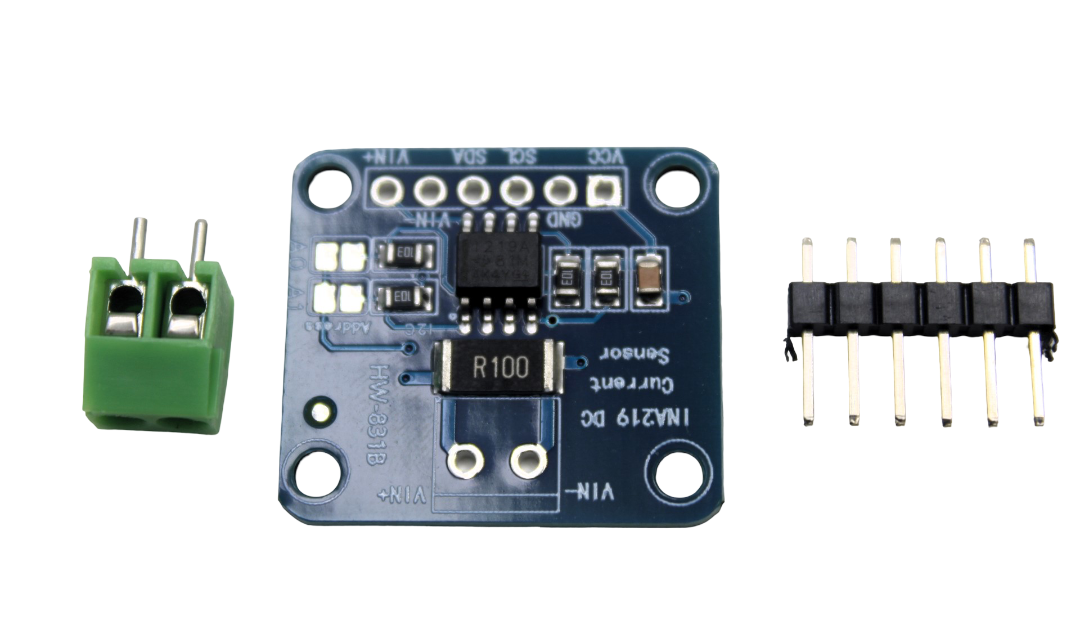
CJMCU-219 INA219 I2C Interface Current/Power Monitoring Module
An excellent companion I2C sensor for monitoring your project’s power consumption — pairs well with any I2C-based sensor like the AMG8833.

BMP280 Barometric Pressure and Altitude Sensor I2C/SPI Module
Another popular I2C sensor — combine with AMG8833 on the same bus to add altitude and pressure data to your environmental monitoring station.
5. Wiring Diagram: AMG8833 to Arduino
The AMG8833 breakout board typically operates at 3.3V logic. Most Arduino Uno boards operate at 5V, so you may need a logic level converter or use a 3.3V microcontroller like the Arduino Pro Mini 3.3V or ESP8266/ESP32. Many breakout boards include onboard voltage regulators and level shifters for direct 5V connection — check your module’s datasheet.
| AMG8833 Pin | Arduino Uno Pin |
|---|---|
| VCC | 3.3V (or 5V if breakout supports it) |
| GND | GND |
| SDA | A4 (SDA) |
| SCL | A5 (SCL) |
| INT | D2 (optional, for interrupts) |
| AD_SELECT | GND = 0x68, 3.3V = 0x69 |
Important: Always verify your breakout board’s voltage requirements before connecting. Applying 5V to a 3.3V-only sensor will permanently damage it.
6. Library Installation
The easiest way to interface with the AMG8833 is using Adafruit’s dedicated library.
Step 1: Install Adafruit AMG88xx Library
- Open Arduino IDE
- Go to Sketch → Include Library → Manage Libraries
- Search for
Adafruit AMG88xx - Click Install
- Also install Adafruit BusIO and Adafruit GFX Library when prompted
Step 2: Install OLED Library (Optional)
- Search for
Adafruit SSD1306in Library Manager - Install the library along with its dependencies
7. Basic Temperature Reading Code
Before building the heat map visualisation, let’s verify the sensor is working with a simple temperature read sketch.
#include <Wire.h>
#include <Adafruit_AMG88xx.h>

Adafruit_AMG88xx amg;
float pixels[AMG88xx_PIXEL_ARRAY_SIZE]; // 64 pixels

void setup() {
  Serial.begin(115200);
  Serial.println("AMG8833 Thermal Camera Test");

  bool status = amg.begin();
  if (!status) {
    Serial.println("Could not find AMG88xx sensor!");
    while (1);
  }
  Serial.println("Sensor found!");
  delay(100); // Sensor stabilisation
}

void loop() {
  amg.readPixels(pixels);

  Serial.println("--- Thermal Grid (8x8) ---");
  for (int i = 1; i <= AMG88xx_PIXEL_ARRAY_SIZE; i++) {
    Serial.print(pixels[i-1]);
    Serial.print("t");
    if (i % 8 == 0) Serial.println();
  }
  Serial.println();
  delay(500);
}
Open the Serial Monitor at 115200 baud. You should see an 8×8 grid of temperature values updating every 500ms. Point the sensor at your hand and watch the values increase in the region corresponding to your hand’s position.
8. Heat Map Visualisation on Serial Plotter
The Arduino Serial Plotter can display multiple variables simultaneously. While it is not a true 2D heat map, we can output all 64 values in a format that tools like Processing or Python can render as a colour heat map.
Sending CSV Data for Processing
#include <Wire.h>
#include <Adafruit_AMG88xx.h>

Adafruit_AMG88xx amg;
float pixels[AMG88xx_PIXEL_ARRAY_SIZE];

void setup() {
  Serial.begin(115200);
  amg.begin();
  delay(100);
}

void loop() {
  amg.readPixels(pixels);

  // Output as comma-separated values
  for (int i = 0; i < AMG88xx_PIXEL_ARRAY_SIZE; i++) {
    Serial.print(pixels[i]);
    if (i < AMG88xx_PIXEL_ARRAY_SIZE - 1) Serial.print(",");
  }
  Serial.println();
  delay(100); // ~10 fps
}
Python Heat Map Renderer
Run this Python script on your PC to display a live colour heat map:
import serial
import numpy as np
import matplotlib.pyplot as plt
import matplotlib.animation as animation
from scipy.interpolate import zoom

ser = serial.Serial('COM3', 115200)  # Change to your port
fig, ax = plt.subplots()
im = ax.imshow(np.zeros((8, 8)), cmap='inferno',
               vmin=20, vmax=40, interpolation='bilinear')
plt.colorbar(im, label='Temperature (°C)')
plt.title('AMG8833 Thermal Heat Map')

def update(frame):
    try:
        line = ser.readline().decode().strip()
        values = list(map(float, line.split(',')))
        if len(values) == 64:
            grid = np.array(values).reshape(8, 8)
            im.set_data(grid)
    except:
        pass
    return [im]

ani = animation.FuncAnimation(fig, update, interval=100, blit=True)
plt.show()
9. Displaying Heat Map on OLED
For a standalone heat map display without a PC, we can render a simple colour-coded thermal image on a 128×64 OLED. Since OLED is monochrome, we use different fill patterns to represent temperature intensity.
#include <Wire.h>
#include <Adafruit_AMG88xx.h>
#include <Adafruit_SSD1306.h>

#define SCREEN_WIDTH 128
#define SCREEN_HEIGHT 64
#define OLED_RESET -1

Adafruit_SSD1306 display(SCREEN_WIDTH, SCREEN_HEIGHT, &Wire, OLED_RESET);
Adafruit_AMG88xx amg;
float pixels[AMG88xx_PIXEL_ARRAY_SIZE];

const int PIXEL_SIZE = 8; // Each thermal pixel = 8x8 OLED pixels

void setup() {
  Serial.begin(115200);
  amg.begin();
  display.begin(SSD1306_SWITCHCAPVCC, 0x3C);
  display.clearDisplay();
  delay(100);
}

void loop() {
  amg.readPixels(pixels);
  display.clearDisplay();

  float minTemp = pixels[0], maxTemp = pixels[0];
  for (int i = 1; i < 64; i++) {
    minTemp = min(minTemp, pixels[i]);
    maxTemp = max(maxTemp, pixels[i]);
  }

  for (int row = 0; row < 8; row++) {
    for (int col = 0; col < 8; col++) {
      float temp = pixels[row * 8 + col];
      float normalised = (temp - minTemp) / (maxTemp - minTemp + 0.001);
      int intensity = (int)(normalised * 4); // 0-4 intensity levels

      int x = col * PIXEL_SIZE;
      int y = row * PIXEL_SIZE;

      if (intensity >= 3) {
        display.fillRect(x, y, PIXEL_SIZE, PIXEL_SIZE, SSD1306_WHITE);
      } else if (intensity == 2) {
        for (int px = x; px < x + PIXEL_SIZE; px += 2)
          for (int py = y; py < y + PIXEL_SIZE; py += 2)
            display.drawPixel(px, py, SSD1306_WHITE);
      } else if (intensity == 1) {
        for (int px = x; px < x + PIXEL_SIZE; px += 4)
          display.drawPixel(px, y + 3, SSD1306_WHITE);
      }
      // intensity 0 = black (cold)
    }
  }

  display.setCursor(68, 0);
  display.setTextSize(1);
  display.setTextColor(SSD1306_WHITE);
  display.print("Max:");
  display.print(maxTemp, 1);
  display.print((char)247); // Degree symbol
  display.setCursor(68, 10);
  display.print("Min:");
  display.print(minTemp, 1);

  display.display();
  delay(100);
}
10. Bilinear Interpolation for Smoother Maps
The raw 8×8 grid looks blocky. Bilinear interpolation upscales the grid to a higher resolution by calculating intermediate values between known pixel temperatures. Here’s a simple Arduino implementation that upscales to 16×16:
float interpolated[16][16];

void bilinearInterpolate(float src[8][8], float dst[16][16]) {
  for (int y = 0; y < 16; y++) {
    for (int x = 0; x < 16; x++) {
      float srcX = x * 7.0 / 15.0;
      float srcY = y * 7.0 / 15.0;
      int x0 = (int)srcX, y0 = (int)srcY;
      int x1 = min(x0 + 1, 7), y1 = min(y0 + 1, 7);
      float fx = srcX - x0, fy = srcY - y0;

      dst[y][x] = src[y0][x0] * (1-fx) * (1-fy)
                + src[y0][x1] * fx * (1-fy)
                + src[y1][x0] * (1-fx) * fy
                + src[y1][x1] * fx * fy;
    }
  }
}
For even smoother results, consider bicubic interpolation or running the AMG8833 output through OpenCV on a Raspberry Pi, which can upscale the 8×8 grid to 640×480 with excellent quality.
11. Real-World Applications
Human Presence Detection
The AMG8833 excels at detecting human bodies, which radiate at approximately 37°C. By setting a temperature threshold of ~30°C and checking if any pixel exceeds it, you can build a highly reliable occupancy detector that works in complete darkness and is immune to pet false-positives (pets are generally shorter and have different thermal signatures).
Contactless Fever Screening
During health screening scenarios, the AMG8833 can flag individuals whose forehead temperature is elevated. While not medically certified, it is useful for preliminary screening in educational institutions, offices, and factories.
PCB Hot Spot Detection
Electronics engineers use thermal cameras to identify overheating components on PCBs. The AMG8833 can locate hot spots during circuit debugging — a dramatically cheaper alternative to professional thermal cameras costing lakhs of rupees.
Home Automation
Combine the AMG8833 with an ESP8266 for Wi-Fi connectivity. Detect room occupancy and automatically control lighting, air conditioning, and fans based on whether people are present and where they are in the room.
Industrial Monitoring
Monitor motor and bearing temperatures in industrial machinery to detect failures before they occur. The AMG8833’s I2C interface integrates easily with industrial microcontrollers and PLCs.

LM35 Temperature Sensors
For single-point precision temperature measurement to complement your AMG8833 thermal array — ideal as a reference sensor for calibration.
12. Troubleshooting Common Issues
Sensor Not Detected
- Run an I2C scanner sketch to verify the sensor is on the bus (address 0x68 or 0x69)
- Check SDA/SCL connections and confirm they are not swapped
- Verify supply voltage — 3.3V sensors damaged by 5V will not respond
- Check that pull-up resistors (4.7 kΩ) are present on SDA and SCL lines
Incorrect Temperature Readings
- Allow 30 seconds of warm-up time after power-on for thermal stabilisation
- Avoid placing the sensor near heat sources that could influence the thermopile reference temperature
- The sensor measures apparent temperature — emissivity of different materials affects readings
Noisy or Jittery Readings
- Add decoupling capacitors (100 nF + 10 µF) close to the sensor’s VCC pin
- Implement a simple moving average filter over the last 3-5 readings
- Keep I2C wires short (under 20 cm) to reduce interference
Low Frame Rate
- The AMG8833 supports 1 fps and 10 fps modes. Check the
amg.setFrameRate()function in the library - Increase I2C clock to 400 kHz:
Wire.setClock(400000)

DHT11 Digital Relative Humidity and Temperature Sensor Module
Add ambient temperature and humidity sensing to your thermal camera project for comprehensive environmental monitoring.
Frequently Asked Questions
Can the AMG8833 see through walls or glass?
No. The AMG8833 measures far-infrared radiation, which cannot penetrate solid walls. Glass also blocks far-infrared — the sensor cannot see through standard glass. It only detects the surface temperature of objects directly in its line of sight within the 60° field of view.
What is the maximum detection distance of the AMG8833?
The AMG8833 has no hard-coded maximum distance. It can detect a human body from several metres away. However, as distance increases, the body occupies fewer pixels and spatial resolution decreases. For reliable human detection, a distance of 1–3 metres is practical. The 60° FOV means at 2 metres, you are covering roughly a 2.3 m × 2.3 m area across all 8×8 pixels.
Can I use multiple AMG8833 sensors on the same I2C bus?
Yes, but only two units simultaneously, as the AMG8833 has only two selectable I2C addresses (0x68 and 0x69) via the AD_SELECT pin. For more sensors, use an I2C multiplexer like the TCA9548A, which provides eight independent I2C channels on a single bus.
Is the AMG8833 compatible with ESP32 and Raspberry Pi?
Absolutely. The AMG8833 works with any microcontroller supporting I2C at 3.3V logic, including ESP8266, ESP32, and Raspberry Pi. For Python on Raspberry Pi, Adafruit provides the adafruit-circuitpython-amg88xx library. For ESP32 using Arduino IDE, the standard Adafruit AMG88xx library works without modification.
How accurate is the AMG8833 for fever detection?
The AMG8833 has a typical accuracy of ±2.5°C, which is too imprecise for certified medical fever screening (which requires ±0.3°C per international standards). It can be used for preliminary non-contact screening to flag individuals for more accurate follow-up measurement, but should not replace calibrated medical thermometers. Accuracy improves with controlled distance, stable ambient temperature, and proper calibration.
Start Your Thermal Camera Project Today
Explore the full range of sensors and modules at Zbotic — India’s trusted source for electronics components, Arduino boards, and IoT hardware.


Add comment