
VTOL Drone Build: Tilt-Rotor Transition from Hover to Flight
VTOL (Vertical Take-Off and Landing) drones represent the perfect marriage between the hover capability of a multirotor and the efficiency and speed of a fixed-wing aircraft. Among the various VTOL configurations, the tilt-rotor design is arguably the most elegant — rotors tilt forward to transition from vertical hover to horizontal forward flight, giving you the best of both worlds.
In India, VTOL drones are gaining massive traction for surveying, agriculture, surveillance, and logistics — sectors where fixed-wing efficiency is needed but runway-independent operation is a must. This guide walks you through a complete tilt-rotor VTOL drone build, from frame selection to flight controller tuning and the critical transition phase.
1. VTOL Types — Why Tilt-Rotor?
There are several VTOL configurations popular in the drone community:
- Tailsitter: The entire aircraft pitches 90° to transition. Simple mechanically but hard to tune.
- QuadPlane (Tri+Fixed Wing): Separate lift and cruise motors. Heavy, but proven by ArduPlane.
- Tilt-Rotor: Front rotors tilt forward while rear rotors (or elevons) maintain control. Best power efficiency in cruise.
- Tilt-Wing: The whole wing tilts with the motors. Complex mechanically.
The tilt-rotor design wins for Indian builders because:
- Efficient forward flight (50–80 km/h cruise) without carrying dead-weight fixed-wing motors
- Reliable hover in high-wind coastal and plains conditions common in India
- Well-supported by ArduPlane and PX4 firmware
- Suitable for surveying, border surveillance, and precision agriculture
2. Essential Components for a Tilt-Rotor Build
Here is the complete bill of materials for a mid-size tilt-rotor VTOL with ~1.5m wingspan and 30–45 min endurance:
| Component | Specification |
|---|---|
| Frame | Fixed-wing VTOL frame, 1.2–1.5m wingspan, carbon or EPO foam |
| Tilt Motors (x2) | T-Motor A-series, 120KV–500KV depending on prop size |
| Rear Motor (x1, pusher) | Medium KV, fixed-mount pusher for forward cruise |
| ESCs | BLHeli_32 or KISS, 40A+ per motor |
| Flight Controller | Pixhawk 4 / Cube Orange (ArduPlane VTOL support) |
| GPS | u-blox M8N or M9N with compass |
| Telemetry | 915MHz or 433MHz radio telemetry |
| Tilt Servos (x2) | High-torque digital servos, 15kg·cm minimum |
| Battery | 6S LiPo, 10,000–16,000 mAh |
| RC System | 2.4GHz, minimum 8-channel |
3. Choosing the Right Frame
Your frame choice defines the entire build. For a tilt-rotor VTOL, you need a frame with:
- Rigid motor nacelles that can house a tilting servo mechanism
- Sufficient wingspan for aerodynamic lift (1.2m minimum for >1kg payload)
- Carbon fiber or reinforced EPO construction for vibration resistance
- Modular design for easy disassembly — important for India’s transport regulations
The EFT 6120 surveillance frame is a solid choice for builders who want to adapt an industrial-grade multirotor base into a VTOL hybrid, especially for surveillance and long-range mapping missions.
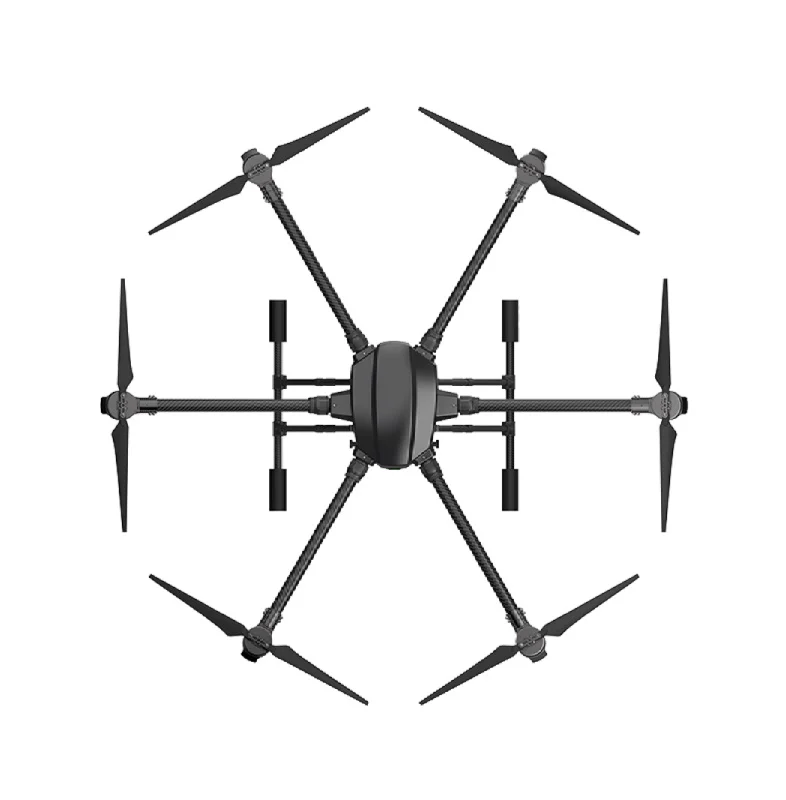
EFT 6120 Multifunction Surveillance Drone Frame
Heavy-duty carbon and aluminium frame built for surveillance and industrial VTOL hybrid missions. Foldable arms, robust motor mounts, excellent for long-range builds.
View on ZboticFor wingspan-based VTOL platforms, the EFT E410P agricultural frame base offers a wide, stable stance ideal for adapting into a tilt-rotor VTOL with custom wing extensions.
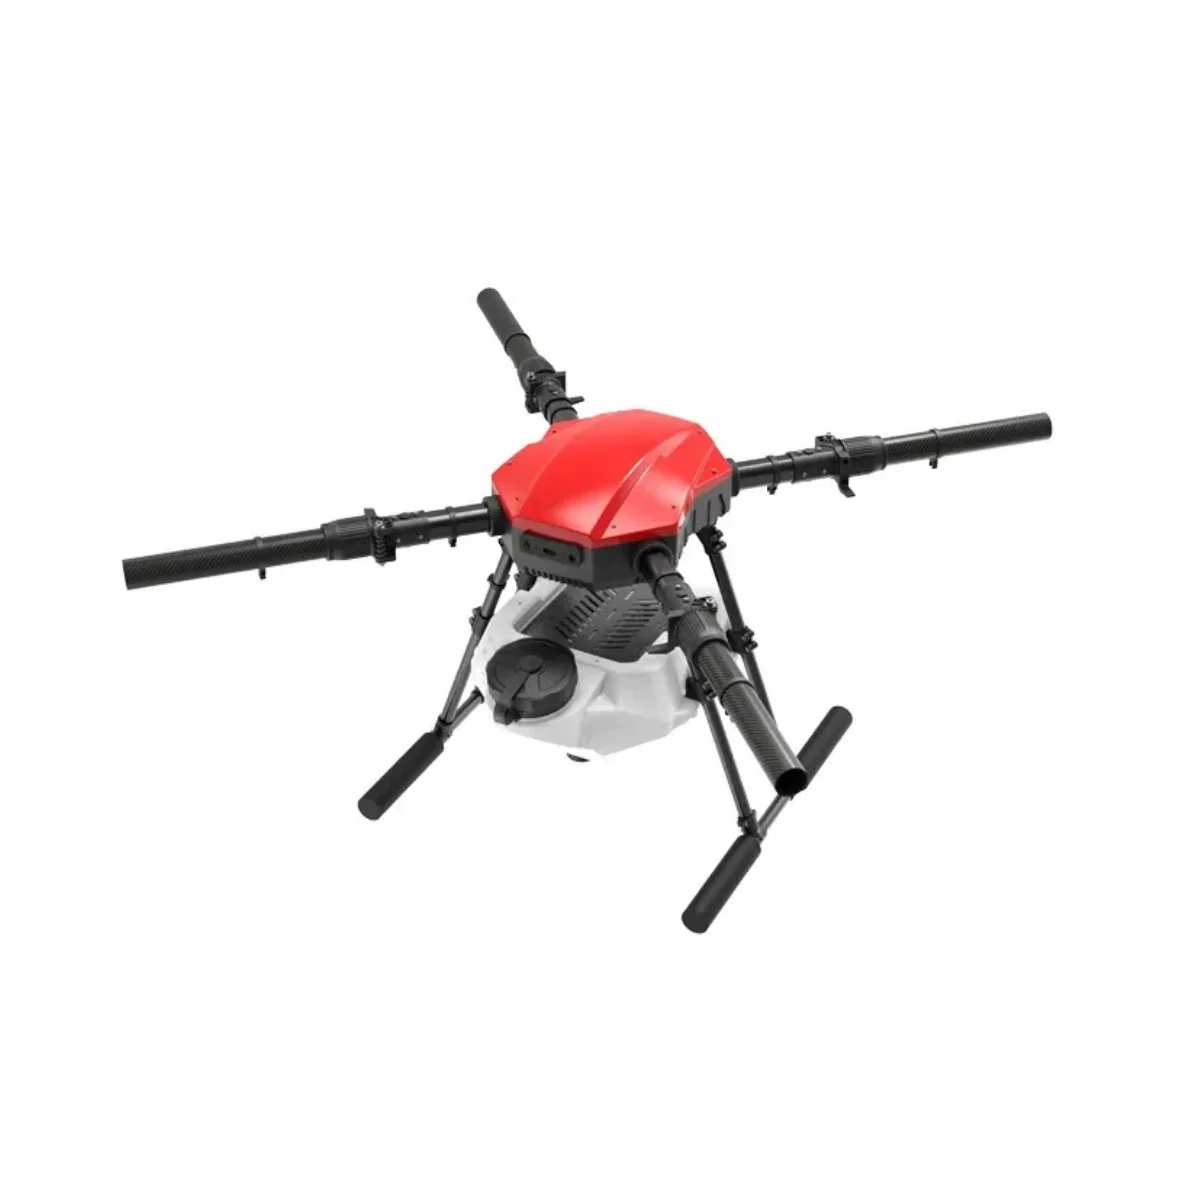
EFT E410P 10L 4 Axis Agricultural Drone Frame
Rugged 4-axis frame with 10L payload capacity. Wide stance and modular arms make it an excellent base for VTOL research and agricultural drone projects.
View on Zbotic4. Motors, ESCs, and Propellers
Tilt-rotor VTOLs demand motors that perform across two very different operating points:
- Hover: High static thrust, vertical load, low efficiency concern
- Cruise: Lower throttle, high RPM, forward thrust, aerodynamic drag on tilt assembly
The ideal motor KV depends on prop size:
- Large props (18″–22″): 120–200 KV
- Medium props (12″–15″): 300–450 KV
- Small racing-style (8″–10″): 900–1200 KV
T-Motor’s A-series modular propulsion systems are specifically designed for VTOL applications — they come with matched prop, motor, and ESC in a single unit, simplifying the build significantly.
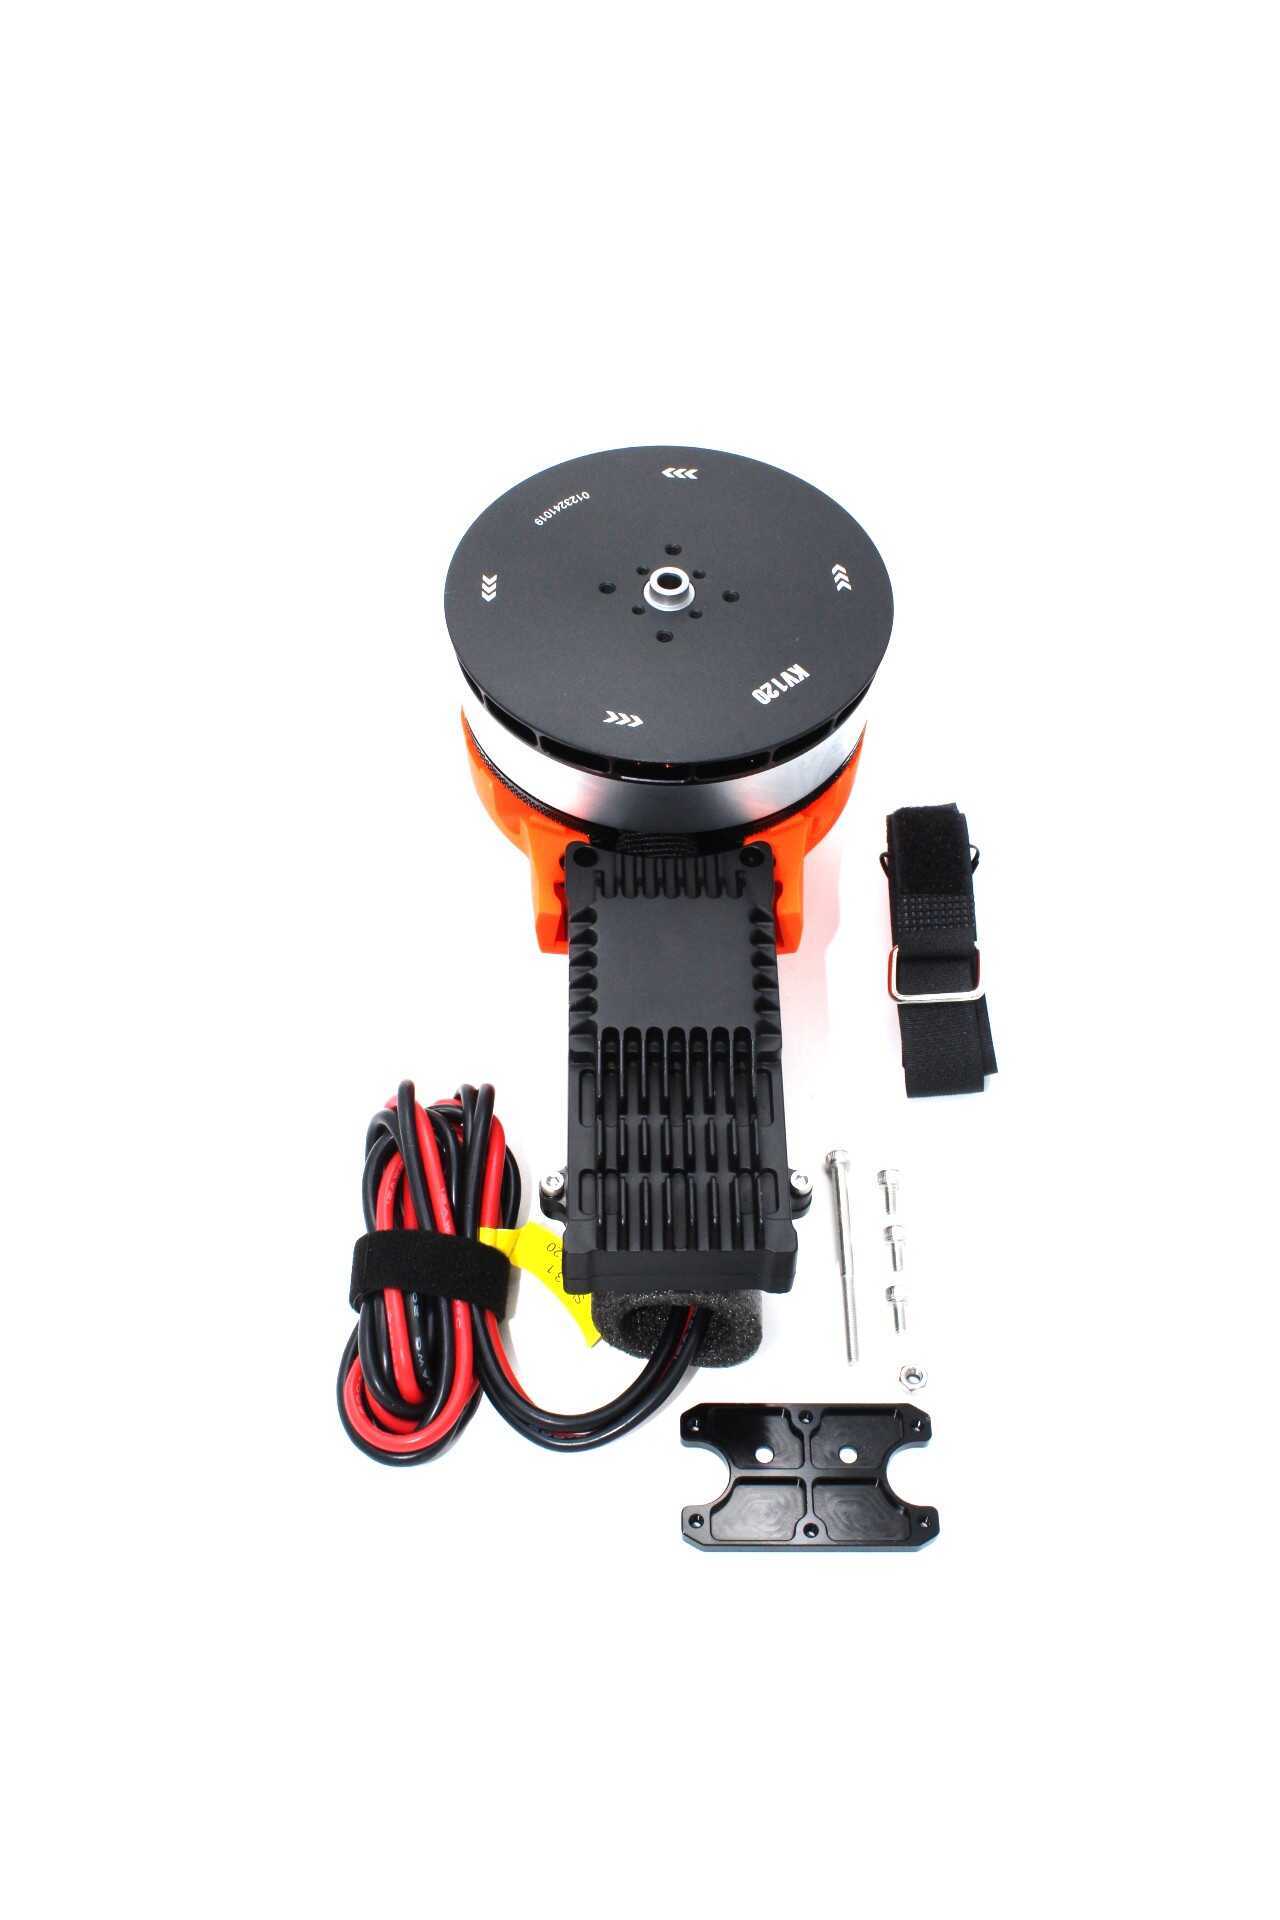
T-Motor A10-KV120-CCW Modular Propulsion System
High-efficiency low-KV motor optimized for large-prop VTOL applications. Excellent static thrust-to-weight ratio. CCW rotation for tilt-rotor port-side mounting.
View on Zbotic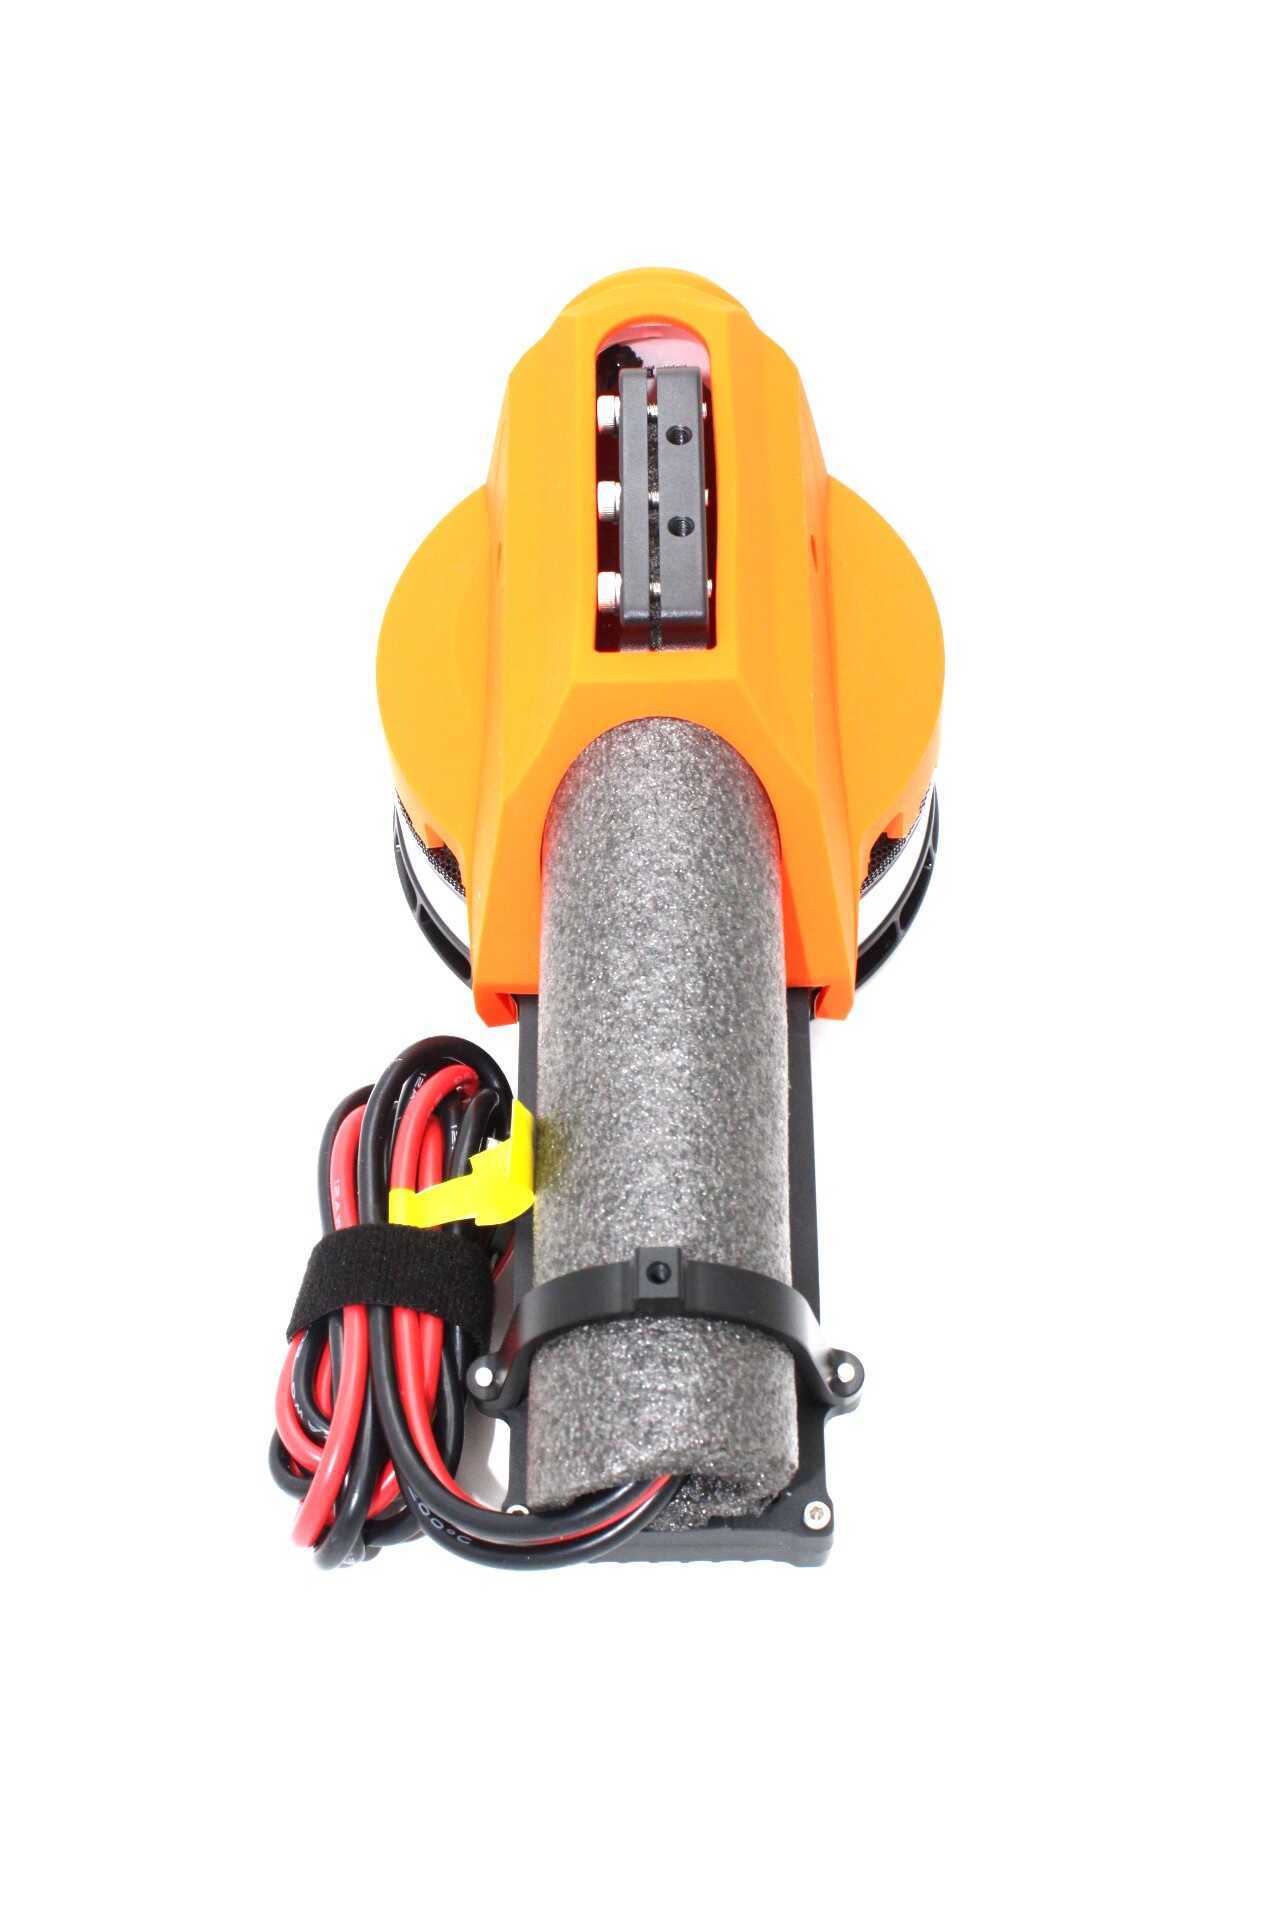
T-Motor A10-KV120-CW Modular Propulsion System
CW rotation counterpart for starboard-side tilt motor. Paired with the CCW version for torque-balanced hover without yaw drift.
View on ZboticFor propellers, carbon fiber blades are strongly recommended for VTOL builds — the rigidity reduces vibration during the transition phase where motor angle is changing rapidly.
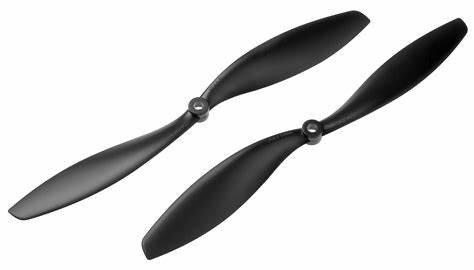
1045 2-Blade Carbon Fiber Propeller CW & CCW
Stiff, lightweight 10-inch carbon fiber props. Low vibration profile during VTOL transitions. Sold as CW+CCW matched pairs.
View on Zbotic5. Flight Controller and Firmware
The flight controller is the heart of any VTOL build. You have two main firmware options:
ArduPlane (Recommended for India Builders)
- Mature VTOL support (Tiltrotor, Tailsitter, QuadPlane modes)
- Mission Planner GCS is free and runs on Windows — widely used in Indian aerospace colleges
- Parameters:
Q_TILT_TYPE=1(continuous tilt),Q_TILT_MAX=90 - Excellent logging for post-flight analysis
PX4
- More modern architecture, better ROS2 integration
- VTOL support via QGroundControl
- Preferred for research and commercial development
Key ArduPlane VTOL parameters to configure:
Q_ENABLE=1— Enable VTOL modeQ_TILT_MASK— Which motors tilt (bitmask)Q_TRANSITION_MS— Duration of transition in milliseconds (typically 8000–15000)Q_TILT_RATE_DN / Q_TILT_RATE_UP— Tilt rate in degrees/secondARSPD_FBW_MIN— Minimum airspeed for fixed-wing flight (set to stall speed + 20%)
Use anti-vibration mounting for the flight controller — the tilt mechanism introduces mechanical vibration spikes that corrupt IMU data.
Anti-Vibration Shock Absorber for APM/KK/MWC/Pixhawk
Silicone damping mount with M3 standoffs. Isolates the flight controller from motor and airframe vibrations — essential for VTOL transition stability.
View on Zbotic6. Building the Tilt Mechanism
The tilt mechanism is the most mechanically challenging part of the build. Here’s the step-by-step approach:
Servo Selection
You need servos with:
- Minimum 15 kg·cm torque at 6V (the motor + prop assembly will weigh 200–400g and experience aerodynamic load)
- Metal gears (plastic strips under vibration)
- Coreless or brushless motor for fast response
- 180° travel capability (you need 0° to 90° reliably)
Mechanical Design
- Nacelle pivot: Use 8mm carbon tube as pivot shaft with 8mm flanged bearings on both sides
- Servo horn geometry: The servo arm should be positioned so mid-stroke corresponds to 45° — this gives equal resolution in hover and cruise positions
- Hard stops: Install 0° and 90° mechanical stops. Never rely on software alone — a servo runaway in mid-transition can destroy the aircraft
- Linkage: Use 2mm carbon pushrods with M2 ball joints. Avoid flex — even 1–2° play in the linkage shows up as oscillation in flight
- Motor wire routing: Route motor phase wires and ESC signal wires through the pivot axis using a short loop. Use silicone wire for flex tolerance
Calibration
After mechanical build, calibrate servo travel in Mission Planner:
- Set
Q_TILT_SERVO1_SCL=1.0and adjust until rotor is exactly vertical (hover position = 0°) - Full forward stick should drive to 90° (horizontal forward)
- Verify both nacelles reach the same angle simultaneously — any asymmetry causes yaw torque during transition
7. Wiring and Power Distribution
VTOL builds are power-hungry during the hover phase (all motors at high throttle). Your power system must handle the peak current draw:
- For a 6kg all-up weight VTOL, expect 80–120A peak during takeoff
- Use a 100A+ power distribution board with integrated current sensor
- Separate the tilt servo power rail from the motor ESC rail — servo voltage spikes from the tilting mechanism can brown-out ESC microcontrollers
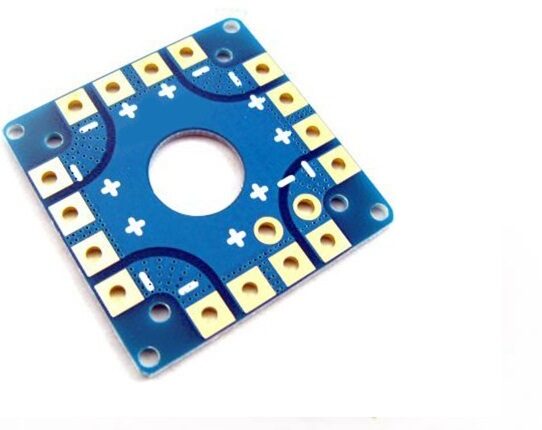
100A Multirotor ESC Power Distribution Battery Board
High-current PDB with integrated current and voltage sensing. Supports up to 6S LiPo and multiple ESC connections — ideal for VTOL power distribution.
View on ZboticFor telemetry — essential for VTOL because you’ll be flying at longer range and higher altitudes — a 915MHz telemetry radio gives reliable 1–3 km range and integrates directly with Mission Planner.

3DR 100mW Radio Telemetry 915MHz for APM / PX4 / Pixhawk
Reliable 915MHz telemetry link. Plug directly into Mission Planner for live parameter tuning, data logging, and geofence monitoring during VTOL test flights.
View on Zbotic8. Tuning the Transition
The transition phase — from hover to forward flight — is where most VTOL builds either succeed or crash. Here is a structured tuning approach:
Phase 1: Bench Test
- Props off, verify tilt servos move correctly from 0° to 90° on mode switch
- Confirm motor output matches ArduPlane’s expected mixing for your configuration
- Check that elevons/ailerons respond correctly in fixed-wing mode
Phase 2: Tethered Hover
- Tie nylon cord to 4 corners of the aircraft, 50cm slack
- Hover in QSTABILIZE mode, verify attitude stability
- Check for any resonance at hover throttle
Phase 3: Free Hover and Transition
- Switch from QHOVER to FBWA mode at low altitude (3–5m AGL) over a large open area
- ArduPlane will manage transition automatically once airspeed >
ARSPD_FBW_MIN - Watch for altitude drop during transition — add 20% airspeed buffer to your minimum
- Log and check
Q_TILT_MAX,Q_TRANSITION_MS— extend transition time if altitude drops
Common Transition Problems
| Symptom | Likely Cause | Fix |
|---|---|---|
| Altitude drop during transition | Transition too fast | Increase Q_TRANSITION_MS |
| Yaw during hover | Asymmetric tilt calibration | Re-calibrate servo endpoints |
| Oscillation after transition | PID too aggressive for FW mode | Lower RLL_RATE_P and PTCH_RATE_P |
| Won’t complete transition | Not enough airspeed | Lower ARSPD_FBW_MIN or increase throttle |
9. Maiden Flight Checklist
- ✅ Center of gravity at 28–32% mean aerodynamic chord
- ✅ All control surfaces move in correct direction (elevon mixing verified)
- ✅ Tilt servos reach full 0° and 90° without binding
- ✅ GPS 3D fix acquired, HDOP < 1.5
- ✅ Telemetry connected and displaying live data in Mission Planner
- ✅ Geofence set to 200m radius, 50m altitude (first flight)
- ✅ Failsafe configured: RTL on RC loss, battery failsafe at 20%
- ✅ Area clear of people, buildings, and restricted airspace
- ✅ DGCA UAS Digital Sky platform permission obtained (mandatory in India)
- ✅ Video recording enabled on GCS for post-flight review
FAQs
A: Yes, but you are limited to older ArduPlane firmware versions (3.x series). For full tilt-rotor VTOL support with the latest parameters, use Pixhawk 4 or Cube Orange which supports ArduPlane 4.x.
A: A functional single-payload tilt-rotor VTOL starts at around ₹60,000–80,000 for a DIY build using locally sourced components and a mid-range frame. Professional-grade builds with T-Motor propulsion and Cube Orange FC typically run ₹1.5–2.5 lakh.
A: Transition from full hover to fixed-wing cruise typically takes 8–20 seconds depending on aircraft size and airspeed. ArduPlane manages this automatically once airspeed threshold is crossed.
A: Generally yes — tilt-rotors maintain a more conventional attitude throughout the transition, making them easier to recover from disturbances. Tailsitters must pitch 90° which is riskier in gusty Indian weather conditions.
A: A single high-quality GPS (u-blox M8N or M9N) is sufficient for most VTOL builds. For professional applications or where GPS reliability is critical, dual GPS with EKF3 blending is recommended in ArduPlane.
Ready to Build Your VTOL Drone?
Zbotic stocks all the components you need — frames, T-Motor propulsion, flight controllers, telemetry, and propellers. Get everything from one trusted Indian supplier.
Shop Drone Components


Add comment