
Water quality monitoring is a critical application in agriculture, aquaculture, environmental science, and industrial processes across India. A turbidity sensor measures the cloudiness or haziness of a liquid caused by suspended particles — essentially quantifying how clear or dirty the water is. When interfaced with Arduino, a turbidity sensor enables you to build automated water quality monitors, irrigation system alerts, and IoT-based environmental data loggers.
This comprehensive guide covers everything about turbidity sensors — from the physics of light scattering in water to complete Arduino code and practical calibration methods.
What is Turbidity and Why Measure It?
Turbidity refers to the optical clarity of water. It is measured in NTU (Nephelometric Turbidity Units). The higher the NTU value, the murkier the water. Here are some reference points:
- 0–1 NTU: Crystal clear drinking water (WHO recommended below 1 NTU)
- 1–5 NTU: Acceptable municipal water, slightly hazy
- 5–50 NTU: Visible cloudiness, not suitable for drinking without treatment
- 50–500 NTU: Heavily turbid, typical of run-off or floodwater
- 500+ NTU: Extremely turbid, muddy water
In India, turbidity monitoring is relevant for:
- Water treatment plants and municipal supply networks
- Fish farms and aquaculture ponds (fish are sensitive to turbidity changes)
- Irrigation systems (drip systems clog above certain turbidity levels)
- Flood detection and river level monitoring
- Industrial effluent monitoring for environmental compliance
- Home RO/filter system monitoring — know when to change the filter
How Turbidity Sensors Work
Optical turbidity sensors work on the principle of light scattering. An LED emits light into the water sample. A photodetector (photodiode or phototransistor) is placed at a specific angle relative to the light source:
- Transmission turbidity sensors (180°): Measure how much light passes straight through. More particles = less light transmitted = lower sensor output.
- Nephelometric sensors (90°): Measure scattered light perpendicular to the beam. More particles = more scatter = higher sensor output. This is the standard NTU measurement method.
Most affordable Arduino-compatible turbidity sensors (like the TS-300B or TSD-10) use the transmission method. They output an analog voltage between 0–5V that decreases as turbidity increases — an inverse relationship.
Types of Turbidity Sensors
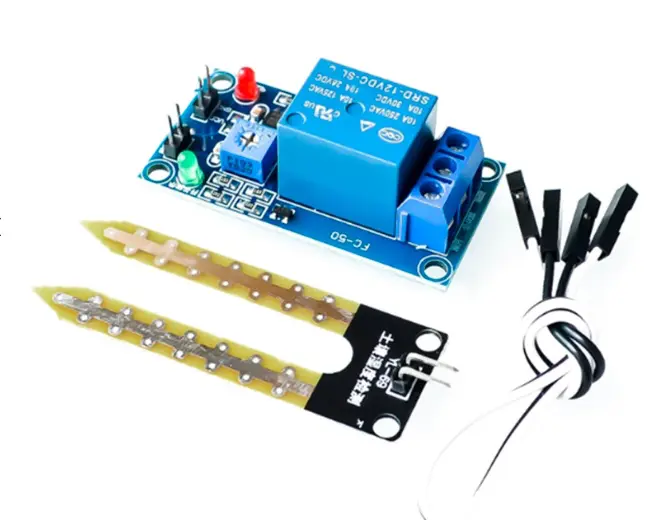
Analog Turbidity Sensor Module (e.g., TS-300B)
The most common type for Arduino projects. Consists of a detector board and a probe with LED and phototransistor. Outputs 0–4.5V (approximately) — lower voltage means higher turbidity. Easy to interface with Arduino’s analog input.
Digital Turbidity Sensor with I2C/UART
Higher-end sensors that output calibrated NTU values directly over I2C or UART protocol. More expensive but eliminates the need for manual calibration. Used in professional water quality stations.
Infrared Turbidity Sensor
Uses infrared light instead of visible light, reducing interference from colored liquids. Better for industrial applications where the liquid color may vary.

Capacitive Soil Moisture Sensor
Pair with a turbidity sensor to build a complete water and soil quality monitoring system for smart agriculture or IoT garden projects.
Components Needed
- 1 × Arduino Uno or Nano
- 1 × Turbidity sensor module (TS-300B or equivalent)
- 1 × 16×2 LCD with I2C adapter (optional for display)
- 1 × Buzzer or LED for alert output
- Jumper wires and breadboard
- Known turbidity reference samples (clean water, milk solution)
- USB cable and Arduino IDE
Circuit Diagram and Wiring
Connecting a typical analog turbidity sensor module to Arduino is straightforward:
Turbidity Sensor to Arduino Uno
- VCC (sensor) → Arduino 5V
- GND (sensor) → Arduino GND
- Signal/AO (sensor) → Arduino A0
If your sensor has a separate probe and detector board connected via a cable, ensure the cable connections are secure and the probe is fully submerged (or immersed to the waterline marked on the probe).
Adding a Buzzer Alert
- Connect buzzer positive to Arduino D8
- Connect buzzer negative to Arduino GND
Arduino Code: Analog and Digital Readings
Basic Reading and Serial Output
// Turbidity Sensor Basic Reading
// Sensor analog output to A0

const int turbidityPin = A0;
const int buzzerPin = 8;
float voltage = 0;
float ntu = 0;

void setup() {
  pinMode(buzzerPin, OUTPUT);
  Serial.begin(9600);
  Serial.println("Turbidity Water Quality Monitor");
  Serial.println("================================");
}

void loop() {
  // Average 800 samples for stable reading
  int sum = 0;
  for (int i = 0; i < 800; i++) {
    sum += analogRead(turbidityPin);
  }
  float avgADC = sum / 800.0;

  // Convert ADC to voltage (5V reference)
  voltage = avgADC * (5.0 / 1023.0);

  Serial.print("Voltage: ");
  Serial.print(voltage);
  Serial.print("V | ");

  // Simple turbidity indicator based on voltage
  if (voltage >= 4.2) {
    Serial.println("Water Quality: CLEAR (Low turbidity)");
    digitalWrite(buzzerPin, LOW);
  } else if (voltage >= 2.5) {
    Serial.println("Water Quality: CLOUDY (Medium turbidity)");
    digitalWrite(buzzerPin, LOW);
  } else {
    Serial.println("Water Quality: MUDDY (High turbidity) - ALERT!");
    digitalWrite(buzzerPin, HIGH);
    delay(200);
    digitalWrite(buzzerPin, LOW);
  }

  delay(1000);
}
Calibration: Converting Voltage to NTU
To get actual NTU values from voltage readings, you need to calibrate the sensor using known reference solutions. The TS-300B sensor has an approximate relationship described by a polynomial equation derived from the manufacturer’s datasheet:
// NTU Calibration Equation for TS-300B type sensors
// Valid range: 0-3000 NTU at 25°C
// Source: manufacturer characteristic curve

float voltageToNTU(float volt) {
  if (volt < 2.5) {
    return 3000; // Above sensor's measurable range
  }

  // Polynomial approximation
  float ntu = -1120.4 * (volt * volt)
              + 5742.3 * volt
              - 4352.9;

  if (ntu < 0) ntu = 0;
  return ntu;
}

void loop() {
  int sum = 0;
  for (int i = 0; i < 800; i++) {
    sum += analogRead(A0);
  }
  float avgADC = sum / 800.0;
  float voltage = avgADC * (5.0 / 1023.0);
  float ntu = voltageToNTU(voltage);

  Serial.print("Turbidity: ");
  Serial.print(ntu, 1);
  Serial.println(" NTU");

  delay(1000);
}
Field Calibration Method: For better accuracy, collect voltage readings from three known reference points:
- 0 NTU: Measure voltage with freshly distilled or boiled water in clean container
- ~100 NTU: Use a 0.1% milk-water solution (approximately 100 NTU)
- ~500 NTU: Use a 0.5% milk-water solution
Use these three data points to fit a linear or polynomial equation specific to your sensor and container.
Displaying Turbidity on LCD
// Turbidity Monitor with I2C LCD Display
#include <Wire.h>
#include <LiquidCrystal_I2C.h>

LiquidCrystal_I2C lcd(0x27, 16, 2);
const int turbPin = A0;

float voltageToNTU(float v) {
  if (v < 2.5) return 3000;
  float n = -1120.4 * v * v + 5742.3 * v - 4352.9;
  return max(0.0f, n);
}

void setup() {
  lcd.init();
  lcd.backlight();
  lcd.setCursor(0, 0);
  lcd.print("Turbidity Meter");
  delay(2000);
  lcd.clear();
}

void loop() {
  int sum = 0;
  for (int i = 0; i < 800; i++) sum += analogRead(turbPin);
  float volt = (sum / 800.0) * (5.0 / 1023.0);
  float ntu = voltageToNTU(volt);

  lcd.setCursor(0, 0);
  lcd.print("Turbidity:");
  lcd.setCursor(0, 1);
  lcd.print(ntu, 1);
  lcd.print(" NTU    ");

  delay(1000);
}
Soil Moisture Sensor Relay Control Module
Add automatic irrigation control to your water quality monitoring system. Trigger pumps or solenoids when turbidity or moisture readings exceed set thresholds.
Real-World Applications
1. RO Water Filter Monitor
Place the turbidity sensor in the output line of a home RO water purifier. An Arduino monitors turbidity continuously and alerts you via a buzzer and LED when water quality drops below an acceptable threshold — indicating the filter cartridge needs replacement. This is a highly practical and popular DIY project in India.
2. Smart Aquarium / Fish Tank Monitor
Fish are sensitive to sudden turbidity changes. Install a turbidity sensor in your aquarium along with a temperature sensor. Alert the owner via a buzzer or Blynk push notification if the water becomes too cloudy, indicating overfeeding, algae bloom, or filter malfunction.
3. Agricultural Canal Monitoring
Monitor irrigation canal water quality in real time. High turbidity in irrigation water can clog drip irrigation emitters, reduce crop yields, and indicate upstream erosion or contamination. An Arduino with GSM/GPRS module can send SMS alerts to farmers.
4. Flood Detection System
Rising floodwater has drastically higher turbidity than normal river water. A turbidity sensor mounted near a river bank or stormwater drain can provide an early warning of flooding events by detecting the sudden jump in turbidity that precedes visible water level rise.
5. Industrial Effluent Monitoring
Indian environmental regulations (CPCB standards) limit turbidity in industrial discharge. An Arduino-based turbidity monitor provides real-time compliance monitoring, logging data to an SD card or cloud platform for regulatory reporting.
Troubleshooting
Sensor gives constant maximum or minimum reading
Verify the probe is fully immersed and the measurement window (the optical part) is submerged. Air bubbles on the optical surface will cause erratic readings. Clean the probe with a soft cloth. Also check all wiring connections and confirm the sensor is powered with 5V.
Readings vary widely even in still water
Turbidity sensors are sensitive to vibration, bubbles, and movement. Always average a large number of readings (800+) as shown in the code. Let the water settle completely before taking measurements. Even nearby walking can cause ripples that affect optical sensors.
NTU values are inconsistent with known standards
The polynomial calibration equation is an approximation. For precise NTU values, perform a three-point calibration with your own reference solutions. Temperature significantly affects turbidity readings — the sensor should be calibrated at the operating temperature of your application.
Sensor output decreases but water looks cleaner
Remember: for transmission-type sensors, higher voltage = cleaner water (more light transmitted). If voltage is decreasing, turbidity is increasing. Ensure you haven’t confused the relationship — refer to your specific sensor’s datasheet to confirm whether it’s an inverted or direct output.
Frequently Asked Questions
What is the difference between turbidity and TDS (Total Dissolved Solids)?
Turbidity measures light scattering by suspended (undissolved) particles and is measured in NTU. TDS measures the concentration of dissolved substances in water and is measured in ppm or mg/L. Both affect water quality but are different parameters measured by different sensor types. A water sample can have high TDS but low turbidity (like mineral water) or high turbidity but relatively low TDS (like muddy rainwater).
Is a turbidity sensor the same as a water quality sensor?
No. Water quality is a broad term encompassing turbidity, pH, temperature, dissolved oxygen, TDS, conductivity, and various chemical parameters. A turbidity sensor measures only one aspect of water quality. For comprehensive monitoring, you’d combine multiple sensors — turbidity, pH electrode, temperature probe, and conductivity probe.
Can I use this sensor to check if water is safe to drink?
Turbidity alone is not sufficient to determine drinking water safety. While high turbidity (above 1 NTU for drinking water per WHO guidelines) indicates the water is not suitable for drinking, low turbidity does not guarantee safety — water can be clear but contaminated with bacteria, heavy metals, or dissolved chemicals. Turbidity is one parameter in a multi-parameter water quality assessment.
How deep can I submerge the turbidity sensor probe?
Standard Arduino-compatible turbidity sensor probes are typically rated for immersion up to about 50cm depth. They are not designed for deep underwater deployment. For deeper applications, use a waterproof enclosure or select a sensor rated for the required depth and pressure.
What maintenance does the turbidity sensor need?
Clean the optical window of the probe regularly with a soft, lint-free cloth. Algae, mineral deposits, and biological fouling on the optical surface will cause erroneous readings. For continuous deployment, schedule weekly cleaning. Replace the sensor if the optical window becomes scratched or permanently fogged.
Can I use the turbidity sensor with ESP32 or NodeMCU for IoT?
Yes. The analog output of turbidity sensors works with any microcontroller that has an ADC input. ESP32 has a 12-bit ADC (0–4095) compared to Arduino’s 10-bit (0–1023), so adjust your voltage conversion formula accordingly. Use ESP32’s built-in Wi-Fi to upload turbidity data to cloud platforms like ThingSpeak, Blynk, or AWS IoT Core for remote monitoring.
Build Your Water Quality Monitor
Zbotic.in stocks a wide range of sensors for water quality, environmental monitoring, and IoT projects. Browse our sensor collection for turbidity sensors, pH modules, soil moisture sensors, and more — with fast delivery across India.
Conclusion
Turbidity sensors offer an accessible entry point into water quality monitoring for Arduino makers, students, and IoT developers in India. Whether you’re building a simple home filter monitor or a full-scale environmental sensing station, the principles covered in this guide — sensor working, wiring, code, calibration, and averaging — give you a solid foundation.
The key to accurate turbidity measurements is consistent sampling technique: average many readings, keep the probe clean, and calibrate your specific sensor with known reference standards. Once calibrated, your turbidity sensor becomes a reliable tool for real-time water quality assessment in applications ranging from home aquariums to agricultural irrigation monitoring.


Add comment