
The ST7789 240×240 TFT display is one of the most visually impressive small screens you can add to an ESP32 project. At just 1.3–1.54 inches diagonal but packed with 57,600 pixels in full RGB color, it produces crisp, vibrant images that make your projects look genuinely professional. Unlike older TFT displays that need 8-bit parallel data, the ST7789 uses SPI and works beautifully with the ESP32’s hardware SPI at high speeds. In this guide you’ll learn exactly how to set up the st7789 240×240 tft esp32 combination — from hardware wiring and TFT_eSPI configuration through to displaying sensor data and custom graphics.
ST7789 Overview & Why It’s Great for ESP32
The ST7789 is a 262K-color TFT LCD driver IC from Sitronix. It’s been widely adopted in smartwatch displays, portable game consoles, and compact IoT devices. The square 240×240 format is particularly clean — no letterboxing, no unused pixels, just a perfect canvas for UI elements, icons, and gauges.
Why it pairs so well with ESP32:
- High SPI speed: ST7789 supports up to 80MHz SPI clock. ESP32’s hardware SPI can match this, allowing full-screen redraws in milliseconds — far faster than an Arduino Uno at 8MHz.
- 3.3V native: ESP32 operates at 3.3V logic, and so does the ST7789. No level shifting needed.
- Color depth: 16-bit (65K colors) or 18-bit (262K colors). TFT_eSPI defaults to 16-bit RGB565, which is the sweet spot for speed and visual quality.
- DMA support on ESP32: The TFT_eSPI library can use ESP32’s DMA to push pixel data in the background, freeing the CPU for sensor reading between frames.
The result is a display that can refresh at 40+ FPS with smooth animations — remarkable for an embedded project costing under ₹300.
Module Variants & Common Pinouts
ST7789 modules come in several form factors. The most common:
- 1.3″ 240×240 IPS TFT: The most popular. Square display, excellent viewing angles (IPS panel). Typically 7-pin SPI (GND, VCC, SCL, SDA, RES, DC, BLK).
- 1.54″ 240×240 TFT: Slightly larger, same resolution. Often used in smartwatch clones and Lilygo T-Wristband.
- 2.0″ 240×320 ST7789: Wider format, same driver. Add more screen real estate if the square format is limiting.
- Waveshare 1.69″ 240×280: Rounded corners display using ST7789V variant.
Standard 7-pin module pinout (1.3″ IPS square):
| Module Pin | Function | Notes |
|---|---|---|
| GND | Ground | Common ground |
| VCC | Power | 3.3V (some modules accept 5V) |
| SCL | SPI Clock | SPI CLK / SCLK |
| SDA | SPI Data | SPI MOSI |
| RES | Reset | Active low reset |
| DC | Data/Command | High=data, Low=command |
| BLK | Backlight | Connect to 3.3V or PWM pin for brightness control |
Note: No MISO pin — the ST7789 is write-only over SPI. This means you can’t read back pixel data, but it also simplifies wiring and allows you to share the SPI bus with other devices.
Wiring ST7789 to ESP32
Recommended GPIO assignments for ESP32 DevKit (using VSPI bus):
| ST7789 Pin | ESP32 GPIO | Notes |
|---|---|---|
| GND | GND | |
| VCC | 3.3V | Use 3.3V, NOT 5V |
| SCL (CLK) | GPIO18 | VSPI CLK (hardware) |
| SDA (MOSI) | GPIO23 | VSPI MOSI (hardware) |
| RES | GPIO4 | Any digital GPIO |
| DC | GPIO2 | Any digital GPIO |
| BLK | 3.3V or GPIO15 | GPIO15 allows PWM brightness control |
There is no CS (chip select) pin needed if the ST7789 is the only SPI device. If sharing the bus with other SPI devices (SD card, etc.), connect CS to any free GPIO and configure it in TFT_eSPI.
TFT_eSPI Library Configuration
The TFT_eSPI library by Bodmer is the gold standard for driving TFT displays on ESP32 and ESP8266. Install it via the Arduino Library Manager.
The critical step is editing the User_Setup.h file inside the library folder (Documents/Arduino/libraries/TFT_eSPI/User_Setup.h). Comment out all driver defines except ST7789, and set your pin numbers:
// In User_Setup.h:

// 1. Select driver
#define ST7789_DRIVER

// 2. Set display dimensions
#define TFT_WIDTH  240
#define TFT_HEIGHT 240

// 3. Pin assignments (ESP32)
#define TFT_MOSI 23
#define TFT_SCLK 18
#define TFT_CS   -1  // Not connected (or GPIO5 if using CS)
#define TFT_DC    2
#define TFT_RST   4
#define TFT_BL   15  // Optional backlight pin

// 4. SPI frequency (up to 80MHz on ESP32)
#define SPI_FREQUENCY  40000000
#define SPI_READ_FREQUENCY  6000000
After saving User_Setup.h, run the TFT_eSPI diagnostics example (File → Examples → TFT_eSPI → Test and Diagnostic → TFT_print_test) to verify the display works before writing your own code.
Important: Every time you update TFT_eSPI from Library Manager, it overwrites User_Setup.h with defaults. Consider creating a custom setup file and pointing to it via User_Setup_Select.h to preserve your config across updates.
Drawing Graphics & Text
TFT_eSPI provides a rich API. Here’s a starter sketch demonstrating the key capabilities:
#include <TFT_eSPI.h>
TFT_eSPI tft = TFT_eSPI();

void setup() {
  tft.init();
  tft.setRotation(0);  // 0-3 for portrait/landscape
  tft.fillScreen(TFT_BLACK);

  // Draw title bar
  tft.fillRect(0, 0, 240, 30, TFT_NAVY);
  tft.setTextColor(TFT_WHITE, TFT_NAVY);
  tft.setTextSize(2);
  tft.setCursor(50, 8);
  tft.print("Zbotic");

  // Draw colored shapes
  tft.fillCircle(120, 120, 50, TFT_RED);
  tft.drawCircle(120, 120, 55, TFT_WHITE);
  tft.fillRoundRect(30, 180, 180, 40, 8, TFT_GREEN);

  // Smooth anti-aliased text
  tft.setTextColor(TFT_YELLOW, TFT_BLACK);
  tft.setFreeFont(&FreeSansBold12pt7b); // Adafruit GFX font
  tft.drawString("Hello ESP32!", 10, 90);
}

void loop() {
  // Sprite-based double buffering for flicker-free animation
  TFT_eSprite spr = TFT_eSprite(&tft);
  spr.createSprite(100, 50);
  spr.fillSprite(TFT_BLACK);
  spr.setTextColor(TFT_GREEN);
  spr.drawNumber(millis() / 1000, 5, 10, 4);
  spr.pushSprite(70, 150);
  spr.deleteSprite();
}
Key TFT_eSPI features to know:
- TFT_eSprite: Off-screen frame buffer — draw into it, then push to screen in one shot for smooth, flicker-free updates
- Free fonts: Smooth proportional fonts far superior to the default chunky bitmap fonts
- fillScreen / drawString / drawNumber: The workhorse functions for UI layouts
- setRotation(0-3): Portrait and landscape modes, including mirrored variants
Building a Sensor Dashboard
The 240×240 canvas divides naturally into sections for a sensor dashboard. A clean layout for a weather/environment monitor:
- Top 30px: Title bar with device name and current time
- Rows 30–120: Two large numeric readouts (e.g., temperature left, humidity right)
- Rows 120–180: A 120×40 scrolling line graph for temperature history
- Rows 180–240: Status row showing pressure, battery level icon, and Wi-Fi signal strength
For this layout, use TFT_eSprite for the graph area to avoid redrawing the entire screen every second. Only update the regions that change — this keeps refresh fast and prevents flicker.
With an ESP32 fetching data over Wi-Fi and a BME280 reading local sensors, you can build a standalone desk weather station that updates every 10 seconds and looks sharp on the vivid ST7789 IPS panel.
Recommended Products from Zbotic
Complete your ST7789 ESP32 project with these components:
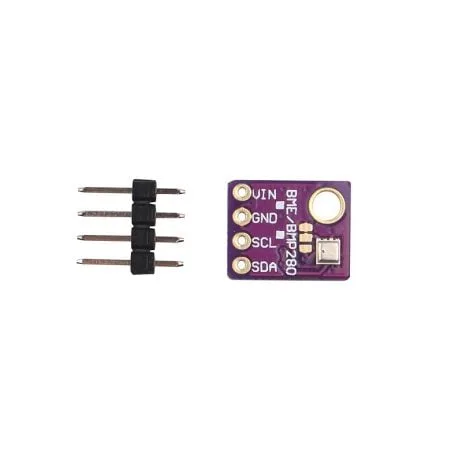
GY-BME280-5V Temperature and Humidity Sensor
The BME280 measures temperature, humidity, and pressure over I2C — perfect sensor data to display on an ST7789 dashboard. This 5V version is easy to use with 5V Arduinos.

CJMCU-219 INA219 I2C Bi-directional Current/Power Monitor
Build a live power monitor — display voltage, current, and wattage as large numerics and bar gauges on the ST7789 color screen. I2C interface won’t conflict with SPI display.
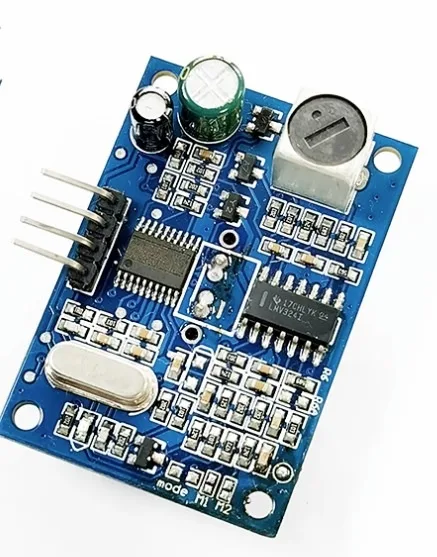
A86 JSN-SR04T Waterproof Ultrasonic Rangefinder Module
Measure distance and display a live bar graph on the ST7789. Great for tank level monitors, parking sensors, or proximity displays with color-coded alerts.

BMP280 Barometric Pressure and Altitude Sensor I2C/SPI Module
Add altitude and pressure readings to your color TFT dashboard. The BMP280 uses I2C or SPI — use I2C to keep the SPI bus dedicated to the ST7789 display for maximum speed.
Frequently Asked Questions
What SPI frequency should I use for ST7789 with ESP32?
Start with 40MHz in User_Setup.h — this is reliable on most boards and modules. You can push to 80MHz if your wiring is short (under 10cm) and you’re using solid connections rather than a breadboard. At 80MHz, a full 240×240 screen clear takes about 3ms, enabling buttery-smooth UI updates. If you see display corruption or color errors, drop back to 27MHz or 40MHz.
My display shows a white or black screen. What’s wrong?
Most common causes: (1) Incorrect User_Setup.h — verify you selected ST7789_DRIVER and set the correct pin numbers. (2) Wrong power voltage — use 3.3V, not 5V. (3) RES pin not connected — the display won’t initialize without a reset pulse. (4) Display is a different variant (e.g., 240×320 ST7789) — adjust TFT_HEIGHT to 320. (5) Some modules need tft.invertDisplay(true) to get correct colors.
Can I display JPEG or PNG images on ST7789 with ESP32?
Yes — the TJpg_Decoder library (also by Bodmer) integrates with TFT_eSPI to decode and render JPEG images from SPIFFS or SD card. For PNG with transparency, the PNGdec library works similarly. Store images in ESP32’s SPIFFS flash and render them on boot for splash screens or UI icons. JPEG decode on ESP32 takes 50–200ms per image depending on size and quality.
Is ST7789 better than ILI9341 for ESP32 projects?
It depends on what you need. The ST7789 240×240 is ideal when you want a compact, square, IPS display with excellent color accuracy. The ILI9341 240×320 gives more vertical space for lists and scrolling content, is wider for some layouts, and has even more library examples. For tight, icon-heavy UIs and wearable-style projects, ST7789 wins. For dashboard-heavy data displays, ILI9341 or ST7789 320-height variants are better.
How do I rotate the ST7789 display orientation?
Use tft.setRotation(n) where n is 0–3: 0 = portrait (default), 1 = landscape (90°), 2 = portrait upside-down (180°), 3 = landscape mirrored (270°). After rotating, TFT_WIDTH and TFT_HEIGHT swap automatically in TFT_eSPI, so tft.width() and tft.height() always return the current dimensions. Note that some ST7789 modules need a slight offset correction — if content appears shifted after rotation, adjust with tft.writecommand(0x36); tft.writedata(0x70); for your specific module variant.
Find sensors, ESP32 boards, and display modules at Zbotic.in — fast shipping across India with genuine components for makers and engineers.


Add comment