
Indoor air quality is a growing concern in homes, offices, schools, and factories across India. While temperature and humidity sensors are common, CO2 concentration is one of the most critical — and often overlooked — indicators of indoor air quality. High CO2 levels cause drowsiness, reduced cognitive performance, headaches, and poor sleep. The SCD41 CO2 sensor from Sensirion is one of the most accurate and affordable ways to measure true CO2 indoors using Arduino or any microcontroller.
This comprehensive tutorial covers everything you need to know about the SCD41: how it works, how it differs from cheaper “eCO2” sensors, how to wire it and write Arduino code, and how to build a complete indoor air quality monitor.
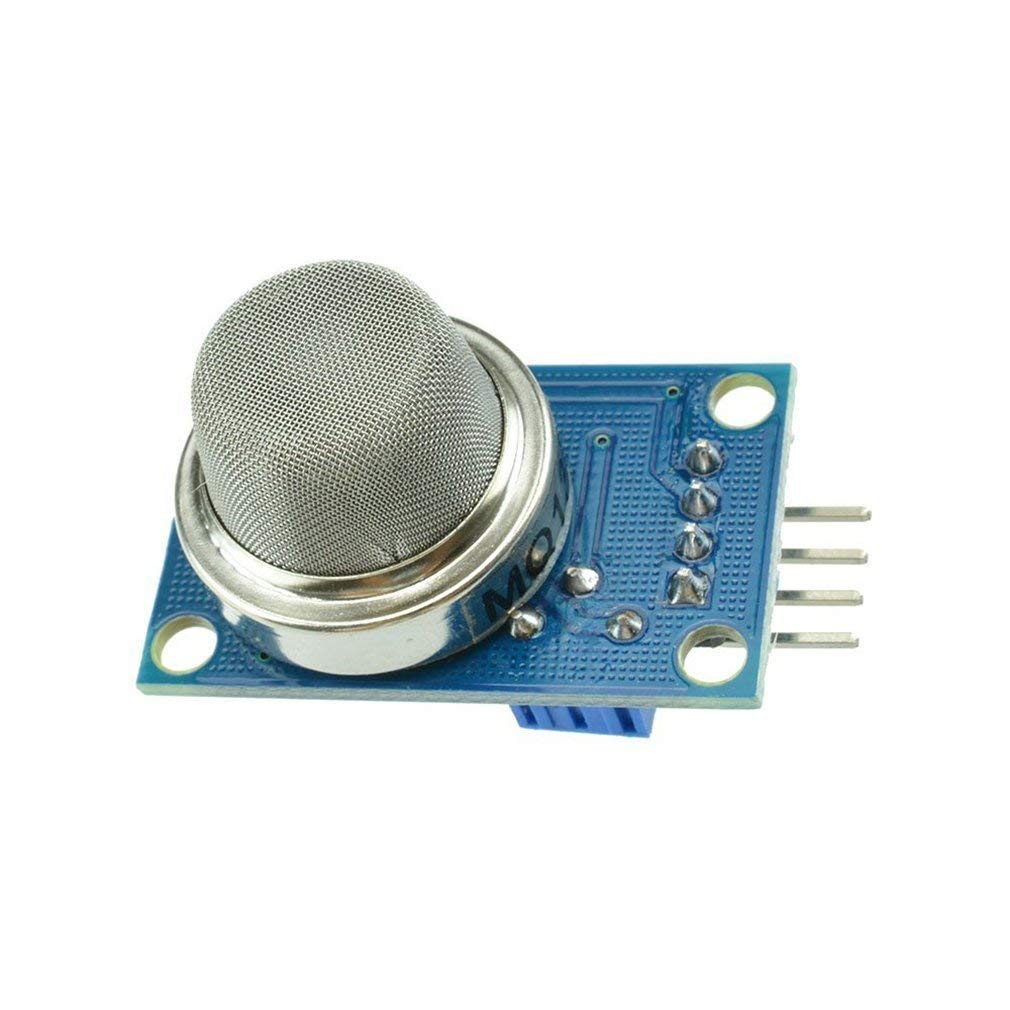
1. What Is the SCD41 CO2 Sensor?
The SCD41 is a miniaturized CO2 sensor made by Sensirion, a Swiss sensor company known for precision sensing components. Unlike budget “air quality” sensors that estimate CO2 from VOC levels, the SCD41 uses Photoacoustic Spectroscopy (PAS) — a true optical measurement technique — to directly measure CO2 molecules in the air.
In addition to CO2 (in ppm), the SCD41 also includes an on-chip temperature and humidity sensor. This is important because the CO2 measurement is automatically temperature and humidity compensated, making readings far more accurate than uncompensated sensors.
The SCD41 communicates via I2C, making it easy to integrate with Arduino, ESP32, Raspberry Pi, and virtually any microcontroller with an I2C bus. The default I2C address is 0x62.
2. How Photoacoustic Spectroscopy Works
Understanding why the SCD41 is special starts with understanding Photoacoustic Spectroscopy. Here’s a simplified explanation:
- Light emission: A pulsed infrared (IR) light source illuminates the gas sample inside the sensor cavity.
- Selective absorption: CO2 molecules absorb IR light specifically at a wavelength of ~4.26 µm. Other gases (N2, O2) do not absorb at this wavelength.
- Heating and expansion: When CO2 absorbs the IR pulse, it briefly heats up and causes a local pressure wave (sound wave) in the gas.
- Microphone detection: A tiny microphone inside the sensor detects this pressure wave. The amplitude of the wave is directly proportional to the CO2 concentration.
- Digital output: On-chip processing converts this acoustic signal to a CO2 ppm value via I2C.
The key advantage of PAS is that it directly detects CO2 molecules — there is no drift from competing gases, no cross-sensitivity to alcohol or other VOCs, and no warm-up period needed for chemical equilibrium (as required by electrochemical sensors).
3. SCD41 vs eCO2 Sensors: A Critical Difference
Many beginners confuse the SCD41 with cheap sensors like the MQ-135, CCS811, or SGP30. These sensors measure eCO2 (equivalent CO2) — an estimated CO2 value derived from VOC gas concentration. Here’s why that matters:
| Feature | SCD41 (True CO2) | CCS811 / MQ-135 (eCO2) |
|---|---|---|
| Measurement method | Photoacoustic spectroscopy | VOC estimation |
| Accuracy | ±40 ppm ±5% of reading | ±60–200 ppm (varies widely) |
| Cross-sensitivity | None (optical detection) | High (VOC, humidity, temp) |
| Baseline drift | Very low (ASC corrects) | Significant (recalibration needed) |
| Warm-up time | ~5 seconds | 20–60 minutes |
| Range | 400–5000 ppm | 400–8192 ppm (estimated) |
| Integrated T&H | Yes (for compensation) | Requires external sensor |
| Cost | Higher | Very low |
Bottom line: eCO2 sensors are fine for air quality awareness. But if you need to know the actual CO2 ppm — for HVAC control, school classroom ventilation, server room monitoring, or health tracking — you need a true CO2 sensor like the SCD41.
4. SCD41 Full Specifications
- CO2 Range: 0 – 5000 ppm (400–5000 ppm recommended operating range)
- CO2 Accuracy: ±40 ppm + 5% of reading (400–2000 ppm) after calibration
- Temperature Range: -10°C to 60°C
- Temperature Accuracy: ±0.8°C (typ)
- Humidity Range: 0–100% RH
- Humidity Accuracy: ±6% RH (typ)
- Supply Voltage: 2.4V to 5.5V
- Average Current (periodic measurement, 5s interval): 3.2 mA
- Peak Current: 205 mA (during measurement burst)
- Interface: I2C (address 0x62)
- Measurement interval: 5 seconds (standard), 30 seconds (low-power mode)
- Package: LCC (Leadless Chip Carrier), 10.1 × 10.1 × 6.5 mm on breakout boards
- Lifetime: 10+ years
- Calibration: Factory calibrated; supports Automatic Self-Calibration (ASC) and Forced Recalibration (FRC)
5. Wiring SCD41 to Arduino
The SCD41 uses I2C at its core. The breakout module (Adafruit SCD-41 or similar) makes wiring straightforward with 4 pins:
| SCD41 Module Pin | Arduino Uno | ESP32 |
|---|---|---|
| VIN / VCC | 5V | 3.3V |
| GND | GND | GND |
| SDA | A4 | GPIO 21 |
| SCL | A5 | GPIO 22 |
Important: The SCD41 requires 100 nF decoupling capacitors on VDD. Most breakout modules include these. Always power the SCD41 from a stable 3.3V or 5V supply — avoid powering from a noisy source as the microphone is sensitive to power supply noise.
Use 4.7kΩ pull-up resistors on SDA and SCL if they are not already on the breakout board. I2C communication uses 400 kHz (fast mode) maximum with the SCD41.
6. Installing the Library
Sensirion publishes an official Arduino library for the SCD4x family (SCD40, SCD41, SCD42). Install it via the Arduino Library Manager:
- Open Arduino IDE → Tools → Manage Libraries
- Search for “Sensirion I2C SCD4x”
- Install the library by Sensirion (ensure you also install the Sensirion Arduino Core dependency when prompted)
Alternatively, use the Adafruit SCD4x library which provides a slightly simpler API for beginners:
- Search for “Adafruit SCD4x” in Library Manager
- Install it along with the Adafruit BusIO and Adafruit Unified Sensor dependencies
7. Basic Arduino Code
// SCD41 CO2 Sensor - Basic Reading
// Uses Sensirion I2C SCD4x library
#include <Arduino.h>
#include <SensirionI2cScd4x.h>
#include <Wire.h>

SensirionI2cScd4x scd4x;

void setup() {
  Serial.begin(115200);
  Wire.begin();
  scd4x.begin(Wire, SCD41_I2C_ADDR_62);

  // Stop any previous measurement
  scd4x.stopPeriodicMeasurement();
  delay(500);

  // Start periodic measurement (every 5 seconds)
  uint16_t error = scd4x.startPeriodicMeasurement();
  if (error) {
    Serial.println("Error starting measurement!");
  } else {
    Serial.println("SCD41 started. Waiting for first measurement...");
  }
  delay(5000); // Wait for first reading
}

void loop() {
  bool isDataReady = false;
  scd4x.getDataReadyStatus(isDataReady);

  if (isDataReady) {
    uint16_t co2;
    float temperature, humidity;

    uint16_t error = scd4x.readMeasurement(co2, temperature, humidity);
    if (!error) {
      Serial.print("CO2: "); Serial.print(co2); Serial.println(" ppm");
      Serial.print("Temperature: "); Serial.print(temperature, 1); Serial.println(" °C");
      Serial.print("Humidity: "); Serial.print(humidity, 1); Serial.println(" %RH");

      // Air quality assessment
      if (co2 < 800) Serial.println("Air quality: EXCELLENT");
      else if (co2 < 1000) Serial.println("Air quality: GOOD");
      else if (co2 < 1500) Serial.println("Air quality: MODERATE");
      else if (co2 < 2500) Serial.println("Air quality: POOR");
      else Serial.println("Air quality: VERY POOR - Ventilate now!");

      Serial.println("---");
    }
  }
  delay(5000);
}
8. Full IAQ Monitor with OLED Display
Here is a more complete example that displays CO2, temperature, and humidity on a 0.96″ SSD1306 OLED display, with a color-coded alert system:
// SCD41 + SSD1306 OLED Indoor Air Quality Monitor
#include <Wire.h>
#include <Adafruit_SSD1306.h>
#include <SensirionI2cScd4x.h>

#define SCREEN_WIDTH 128
#define SCREEN_HEIGHT 64
#define OLED_ADDR 0x3C

Adafruit_SSD1306 display(SCREEN_WIDTH, SCREEN_HEIGHT, &Wire, -1);
SensirionI2cScd4x scd4x;

void setup() {
  Serial.begin(115200);
  Wire.begin();

  display.begin(SSD1306_SWITCHCAPVCC, OLED_ADDR);
  display.clearDisplay();
  display.setTextColor(WHITE);
  display.setTextSize(1);
  display.setCursor(0, 0);
  display.println("SCD41 IAQ Monitor");
  display.println("Warming up...");
  display.display();

  scd4x.begin(Wire, SCD41_I2C_ADDR_62);
  scd4x.stopPeriodicMeasurement();
  delay(500);
  scd4x.startPeriodicMeasurement();
  delay(5500);
}

void loop() {
  bool ready = false;
  scd4x.getDataReadyStatus(ready);

  if (ready) {
    uint16_t co2;
    float temp, hum;
    scd4x.readMeasurement(co2, temp, hum);

    display.clearDisplay();

    // CO2 display with status
    display.setTextSize(2);
    display.setCursor(0, 0);
    display.print(co2);
    display.println(" ppm");

    display.setTextSize(1);
    display.setCursor(0, 20);
    if (co2 < 800) display.println("Status: EXCELLENT");
    else if (co2 < 1000) display.println("Status: GOOD");
    else if (co2 < 1500) display.println("Status: MODERATE");
    else display.println("!! VENTILATE NOW !!");

    display.setCursor(0, 35);
    display.print("Temp: "); display.print(temp, 1); display.println(" C");
    display.setCursor(0, 47);
    display.print("Hum:  "); display.print(hum, 1); display.println(" %");

    display.display();
  }
  delay(5000);
}
Install Adafruit SSD1306 and Adafruit GFX libraries for the display portion. Both are available in the Arduino Library Manager.
9. Calibration: FRC and ASC Explained
The SCD41 ships factory-calibrated but supports two calibration modes that you should understand before deploying:
Automatic Self-Calibration (ASC)
ASC is enabled by default. It assumes that the sensor will be exposed to fresh outdoor air (approximately 400–420 ppm CO2) at least once every 7 days. Over time, it corrects baseline drift by assuming the lowest CO2 reading in the past week was at outdoor ambient levels.
When to disable ASC: If your sensor is permanently installed in an environment that never reaches outdoor air levels (e.g., inside an airtight grow tent, submarine, or mine), disable ASC using scd4x.setAutomaticSelfCalibrationEnabled(false). Otherwise, ASC will erroneously lower the baseline and underreport CO2.
Forced Recalibration (FRC)
FRC allows you to manually set the CO2 reference point. To perform FRC:
- Place the sensor in a known CO2 environment (typically fresh outdoor air at ~420 ppm)
- Wait 3+ minutes for readings to stabilize
- Call
scd4x.performForcedRecalibration(420, correction)
This is the most accurate calibration method and should be done after first installation and once a year thereafter.
10. Low-Power Mode for Battery Projects
The SCD41 supports a Low Power Periodic Measurement mode that takes one measurement every 30 seconds instead of every 5 seconds. Average current drops from ~3.2 mA to ~0.5 mA — a 6× improvement.
// Start low-power measurement (30-second interval)
scd4x.stopPeriodicMeasurement();
delay(500);
scd4x.startLowPowerPeriodicMeasurement();

// Between measurements, put the MCU to sleep
// e.g., for ESP32:
esp_sleep_enable_timer_wakeup(30 * 1000000ULL); // 30 seconds
esp_light_sleep_start();
For ultra-low-power applications, use the Single Shot measurement mode where the SCD41 only powers up its measurement engine when explicitly triggered. Average current can drop below 100 µA in this mode, making it viable for coin-cell or solar-powered nodes.
11. Understanding CO2 Level Thresholds
Knowing the number is only half the battle. Here’s how to interpret CO2 readings for indoor air quality:
| CO2 Level (ppm) | Classification | Health Effects | Recommended Action |
|---|---|---|---|
| 400 – 600 | Excellent | None — outdoor equivalent | No action needed |
| 600 – 1000 | Good | Negligible | Normal ventilation adequate |
| 1000 – 1500 | Moderate | Slight drowsiness, reduced focus | Increase ventilation |
| 1500 – 2500 | Poor | Drowsiness, headache, poor concentration | Open windows immediately |
| > 2500 | Very Poor | Nausea, dizziness, impaired judgement | Evacuate and ventilate |
In typical Indian urban homes with closed windows (especially during hot summers), CO2 levels regularly exceed 1500 ppm in bedrooms at night. An SCD41-based monitor can alert you to open a window before health effects set in.
12. Recommended Products from Zbotic
Build a complete indoor air quality station by combining the SCD41 with these complementary sensors available at Zbotic:

DHT11 Digital Relative Humidity and Temperature Sensor Module
Add a redundant temperature and humidity sensor alongside your SCD41 to cross-validate readings, or use DHT11 for outdoor reference to calibrate the SCD41 via FRC.
MQ-135 Air Quality/Gas Detector Sensor Module
Complement your true CO2 monitor with MQ-135 for VOC/ammonia/benzene detection — together they give a comprehensive indoor air quality picture beyond just CO2.

GY-BME280-3.3 Precision Altimeter Atmospheric Pressure Sensor Module
Add barometric pressure to your IAQ station — pressure data helps correlate ventilation efficiency and supports altitude compensation for CO2 readings.
13. Frequently Asked Questions
What is the difference between SCD40, SCD41, and SCD42?
All three use photoacoustic spectroscopy. The SCD40 is the base model with ±50 ppm accuracy. The SCD41 adds a single-shot measurement mode for ultra-low-power operation and achieves ±40 ppm. The SCD42 is the newest, adding 400 Hz I2C speed and lower power in single-shot mode. For most projects, the SCD41 is the best balance of accuracy, features, and availability.
How often does the SCD41 need calibration?
With Automatic Self-Calibration (ASC) enabled, the SCD41 self-calibrates continuously and typically requires no manual intervention for years. For highest accuracy, perform a Forced Recalibration (FRC) at fresh outdoor air (~420 ppm) once a year. Without ASC (sealed environments), annual FRC is recommended.
Can I use the SCD41 with ESP32 or NodeMCU?
Yes. The SCD41 works with ESP32 and ESP8266 (NodeMCU) via I2C. Both platforms operate at 3.3V which is ideal for the SCD41. Use GPIO 21 (SDA) and GPIO 22 (SCL) on ESP32. The Sensirion library works on all Arduino-compatible platforms including ESP boards.
Why does my SCD41 read 0 ppm CO2?
A reading of 0 ppm usually means no I2C communication is happening. Check: (1) the I2C address is 0x62, (2) SDA and SCL are connected correctly, (3) VCC is stable 3.3V or 5V, (4) the measurement has been started with startPeriodicMeasurement(), (5) you waited at least 5 seconds after starting before reading. Run an I2C scanner sketch to confirm the sensor is detected.
Is the SCD41 suitable for outdoor CO2 measurement?
The SCD41 is designed for indoor use (0–50°C, 0–95% RH non-condensing). It can measure outdoor air, but the sensor needs protection from direct rain and condensation. For outdoor deployment, house it in a radiation shield with ventilation holes to protect from weather while allowing air exchange.
What CO2 ppm is dangerous for humans?
Outdoor air is ~420 ppm. In normal indoor spaces: below 1000 ppm is considered good, 1000–2000 ppm causes drowsiness and reduced focus, 2000–5000 ppm causes headaches and impaired thinking. Above 5000 ppm (over 8 hours) is the OSHA workplace permissible exposure limit. Immediately dangerous concentrations start above 40,000 ppm. For health-conscious indoor monitoring, trigger ventilation at 1000–1200 ppm.
14. Conclusion
The SCD41 is genuinely one of the best CO2 sensors available for makers and engineers. Its combination of photoacoustic spectroscopy (true CO2 measurement), built-in temperature and humidity sensing, I2C interface, low power modes, and Sensirion’s excellent library support make it the go-to choice for any serious indoor air quality project.
Whether you’re building a smart home dashboard, a classroom CO2 alert system, a HVAC controller, or a portable air quality meter, the SCD41 will give you the accurate, reliable CO2 data you need. Pair it with a DHT20 or BME280 for redundant environmental sensing, and you have a professional-grade IAQ station at a maker’s price.


Add comment