
Choosing the right robot chassis is the foundation of any successful DIY robotics project in India. With dozens of options available across 2WD, 4WD, acrylic, and aluminium builds — and prices ranging from ₹200 to ₹5,000 — it is easy to overspend on features you don’t need or underbuy and run into mounting problems later. This robot chassis buying guide for India covers every key specification, material trade-off, and compatibility concern so you can make a confident purchase under ₹1,000.
Types of Robot Chassis
Before comparing prices, understand the major chassis types available in India:
- 2WD Smart Car Chassis: Two driven wheels + one or two caster wheels. Simplest to program, least expensive (₹200–₹600). Ideal for beginners.
- 4WD Car Chassis: Four driven wheels for more traction and payload. Better for rough surfaces, heavier sensor payloads. Cost: ₹400–₹900.
- Tank/Tracked Chassis: Rubber belt tracks instead of wheels. Best traction on uneven terrain, low ground clearance for stability. Cost: ₹600–₹2,000.
- Mecanum Wheel Chassis: Four mecanum (omni-directional) wheels for holonomic movement — the robot can move sideways, rotate in place, and drive diagonally. Cost: ₹1,500–₹4,000.
- Hexapod / Biped: Legged robots using servos. Not wheel-based; excellent for learning servo kinematics but much more expensive and complex.
- Circular/Round Chassis: Compact round deck popular for SLAM robots and Raspberry Pi builds. Minimises footprint.
Acrylic vs Aluminium vs ABS Plastic
The chassis material affects rigidity, weight, repairability, and price significantly:
| Material | Rigidity | Weight | Repairability | Price |
|---|---|---|---|---|
| Acrylic | Medium (brittle) | Light | Easy — drill/cut | Low |
| Aluminium | High | Medium | Good — bend/drill | Medium–High |
| ABS Plastic | Medium | Very light | Easy | Very low |
| Steel | Very high | Heavy | Difficult | Medium |
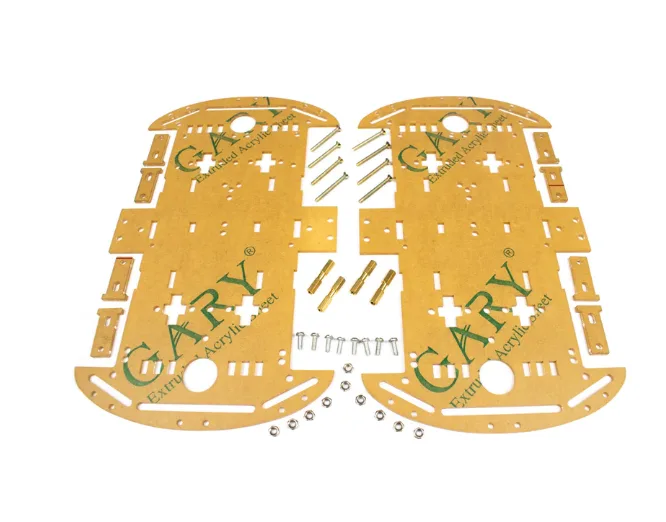
For beginners: Acrylic is the most popular choice in India because it is lightweight, easy to drill for custom mounting holes, and available at very low prices. The main weakness is brittleness — acrylic cracks on hard impacts. Treat it gently and avoid dropping the robot.
For intermediate builders: Aluminium chassis are worth the extra cost if you’re mounting heavy payloads (laptop, Jetson Nano, camera rigs) or if the robot will operate outdoors on rough terrain.

2WD Mini Round Double-Deck Smart Robot Car Chassis DIY Kit
A compact round two-deck acrylic chassis with dual DC gear motors, pre-drilled mounting holes for Arduino/Raspberry Pi, and all hardware included. Best beginner chassis under ₹600.
2WD vs 4WD: Which Should You Choose?
This is the most common question from beginner robotics students in India. Here is a direct comparison:
Choose 2WD if:
- You are writing your first motor control code and want simplicity
- The robot will run on smooth indoor surfaces (tile, wood floor)
- You want to minimise cost (2WD kits are ₹100–₹200 cheaper)
- You plan a line-following or maze-solving project (2WD turns more sharply)
Choose 4WD if:
- The robot needs to carry a heavy sensor payload (RPi + camera + ultrasonic array)
- You are building an outdoor robot for rough terrain
- You want more traction for pushing or climbing small obstacles
- You plan to implement mecanum wheels later (4WD platforms are compatible)
For most school and college projects in India, a 2WD chassis is the right choice for a first build. It is simpler to wire (only one motor driver needed for 2 motors), easier to code differential steering, and forgiving of beginner mistakes.
4 Wheels Car Chassis Acrylic Frame
A sturdy four-wheel acrylic chassis with four gear motors and encoder wheel slots. Excellent for Arduino 4WD projects, obstacle avoidance bots, and remote-controlled car builds.
Key Specifications to Compare
When reading a chassis product listing, focus on these specifications:
- Motor voltage range: Most hobby chassis motors are 3–6V or 6–12V. Match to your power supply.
- Gear ratio: Higher gear ratio = more torque, less speed. A 1:48 gear ratio gives slower but more powerful movement than 1:20.
- Wheel diameter: Larger wheels mean more ground clearance and higher linear speed per RPM. Standard: 65–80mm.
- Platform dimensions: Check that your microcontroller board fits on the deck with room for a breadboard and battery.
- Motor shaft type: D-shaft motors require D-hole wheel hubs or hex couplings. Round shafts use set-screw hubs.
- Payload capacity: Listed or estimated from motor specifications. Typical acrylic 2WD chassis: 0.5–1.5 kg.
- Mounting hole pattern: Check that the chassis has mounting holes compatible with your controller (Arduino Uno, Raspberry Pi have standard 3.5mm hole spacing).
Top Chassis Picks Under ₹1000
Here are the best robot chassis options available in India within budget:
1. 2WD Mini Round Double-Deck Chassis (~₹400–₹550)
Best for: Beginners, line following, obstacle avoidance. Comes with motors, wheels, encoder discs, and all hardware. The double-deck layout gives you a clean upper platform for electronics.
2. 4 Wheels Acrylic Car Chassis (~₹500–₹700)
Best for: 4WD beginners, outdoor use, heavier builds. Four gear motors with dedicated driver terminals. Slightly longer assembly time but much better traction.
3. ACEBOTT ESP32 Tank Robot Car Expansion Pack (~₹800–₹1,000)
Best for: Track-based builds needing ESP32 intelligence, camera integration, and WiFi control. Includes the robot structure and expansion board.

ACEBOTT ESP32 Tank Robot Car Expansion Pack (QD001–QD004)
Upgrade your existing ACEBOTT robot with a tank-tracked chassis and ESP32 expansion board. Adds WiFi control, camera integration, and IR obstacle sensing to your build.
Controller Compatibility: Arduino, Pi, ESP32
All the popular chassis in the under-₹1,000 range are designed to work with standard development boards:
- Arduino Uno/Nano: Fits on any standard chassis. Use L298N or L293D motor driver between the Arduino GPIO and DC motors.
- Raspberry Pi (any model): The Pi’s GPIO is 3.3V logic. Use a separate motor driver (L298N works, or TB6612FNG for cleaner integration). Ensure the Pi has its own 5V power rail.
- ESP32/ESP8266: Most versatile option — WiFi and Bluetooth built in for wireless control. 3.3V GPIO; use TB6612FNG or L293D. The ACEBOTT chassis kits are designed specifically for ESP32.
- Arduino Mega: Ideal for complex multi-sensor robots (more PWM pins, more serial ports). Fits the same standard mounting hole pattern as Uno.
Pro tip: Always power motors from a separate battery/supply, not the microcontroller’s onboard regulator. A motor driver handles the power separation automatically when you wire the motor supply to the driver’s VM pin and the logic supply to the VCC pin separately.
Essential Accessories
Budget for these accessories alongside the chassis itself:
- Motor driver: L298N (~₹80) for 2A per channel, TB6612FNG (~₹120) for cleaner PWM
- Hex couplings: 4mm or 5mm to connect motor shafts to wheels securely
- Battery holder: 4×AA or 18650 Li-Ion holder with switch
- Jumper wires: Male-to-male and male-to-female dupont wires
- Spacers/standoffs: M3 nylon or brass to mount the controller board off the chassis floor
- Breadboard: 400-point half breadboard for sensor connections

4mm Hex Coupling for Robot Smart Car Wheel (30mm)
Secure motor-to-wheel coupling that eliminates shaft slippage. Fits most 4mm D-shaft DC gear motors used in Indian robot car kits — a must-have accessory for any chassis build.
Buying Tips for India
- Buy from specialist robotics stores like Zbotic.in rather than general e-commerce sites — you get accurate product descriptions, compatible accessories, and helpful customer support for technical queries.
- Check if motors are included: Some chassis kits (especially the cheaper ones on general marketplaces) are listed without motors. Zbotic.in kits always clearly list what is included.
- Verify motor voltage: Confirm the included motors match your available power supply — 3V–6V motors can be damaged by a 12V supply.
- Read the hole pattern specs: If you already have an Arduino Uno, verify the chassis deck has compatible M3 mounting holes in the standard 48.26×53.34mm Arduino footprint.
- Order extra couplings: Hex couplings and wheel screws strip over time — order a spare set with your chassis.
- Plan for a second deck: Many beginner chassis only have one platform. A double-deck chassis is worth the extra ₹50–₹100 — the second level keeps sensors and the battery separated from motor wiring.
Frequently Asked Questions
What is the best robot chassis for a school project under ₹500 in India?
The 2WD Mini Round Double-Deck Smart Robot Car Chassis is the best option under ₹500 for school projects. It includes motors, wheels, encoder discs, and all mounting hardware. It is compatible with Arduino Uno and Raspberry Pi and has enough deck space for breadboards and sensor modules.
Do I need a separate motor driver for a robot chassis?
Yes, always. Arduino and Raspberry Pi GPIO pins cannot supply enough current to drive DC motors directly — you will damage the microcontroller. A motor driver (L298N, L293D, or TB6612FNG) sits between the controller and the motors, allowing the microcontroller’s low-power GPIO signals to control high-current motor power from a separate battery.
What battery is best for a robot chassis with Arduino?
A 4× AA NiMH rechargeable battery pack (4.8V–6V) is the easiest option for beginners — widely available, safe, and rechargeable. For longer run time and smaller size, a single 3.7V 18650 Li-Ion cell (with boost converter to 5V) is better. Never use alkaline AA batteries for motors — their high internal resistance causes rapid voltage sag under motor load.
Can I use mecanum wheels on a standard 4WD chassis?
Yes, if the wheel hub diameter matches. Most 4WD chassis use 65mm or 80mm wheels with 4mm or 5mm D-shaft motors. Check the coupling inner diameter against the motor shaft size before ordering mecanum wheels. Zbotic stocks both 60mm and 80mm mecanum wheel sets with 6.7mm coupling adapters.
How do I mount a Raspberry Pi on a robot chassis?
The Raspberry Pi uses 2.5mm mounting holes in a 58×49mm pattern. Most acrylic robot chassis have standard 3mm holes — use M2.5 nylon standoffs (10–15mm height) to raise the Pi off the deck and protect the PCB. Secure with M2.5 screws and nylon lock nuts. Always use nylon standoffs (not metal) to avoid short-circuiting the Pi’s bottom-side components.
Get Your Robot Chassis Today
Zbotic.in stocks the widest range of robot chassis and DIY robotics kits in India, from ₹300 beginner 2WD sets to advanced mecanum and biped platforms. All products ship pan-India with fast delivery — start building today.


Add comment