
A Raspberry Pi rover with autonomous navigation using Python and OpenCV combines the accessibility of single-board computing with the power of computer vision — giving your robot the ability to see, understand, and react to its environment. This project is ideal for engineering students, researchers, and enthusiasts in India who want to move beyond simple line followers into real machine-vision-based autonomy. By the end of this guide, your rover will navigate corridors, detect and avoid obstacles, track coloured objects, and follow a path — all without remote control.
Why Raspberry Pi for an Autonomous Rover?
The Raspberry Pi 4 (or 5) is uniquely suited for computer vision robotics because it combines:
- Full Linux OS: Run Python, OpenCV, ROS, TensorFlow Lite — the full software ecosystem.
- Camera interface: Dedicated CSI camera port with up to 1080p30 without USB overhead.
- GPIO: 40-pin header for direct motor driver and sensor connection.
- WiFi/Bluetooth built-in: Wireless control and data streaming without extra hardware.
- Community support: Massive global and Indian community with tutorials, libraries, and forums.
Compared to Arduino, the Raspberry Pi trades real-time hard-deadline motor control for rich computing capability. The common approach is to use the Pi for vision and high-level decisions, and a co-processor (Arduino/ESP32) for low-level motor PWM and encoder reading via serial or I2C.
Hardware Bill of Materials
Here’s the complete hardware list for a vision-capable autonomous rover:
| Component | Specification | Note |
|---|---|---|
| Raspberry Pi 4B | 4GB RAM | Main compute |
| Camera | Pi Camera Module v2 (8MP) | CSI interface |
| Chassis | 4WD acrylic or 2WD round kit | With motors |
| Motor driver | L298N or MX1508 | PWM control |
| Ultrasonic sensor | HC-SR04 | Front obstacle |
| IMU | MPU6050 (I2C) | Orientation |
| Power bank / LiPo | 10000mAh 5V USB or 3S LiPo | Pi + motors |
| SD Card | 32GB Class 10 A1 | OS + code |
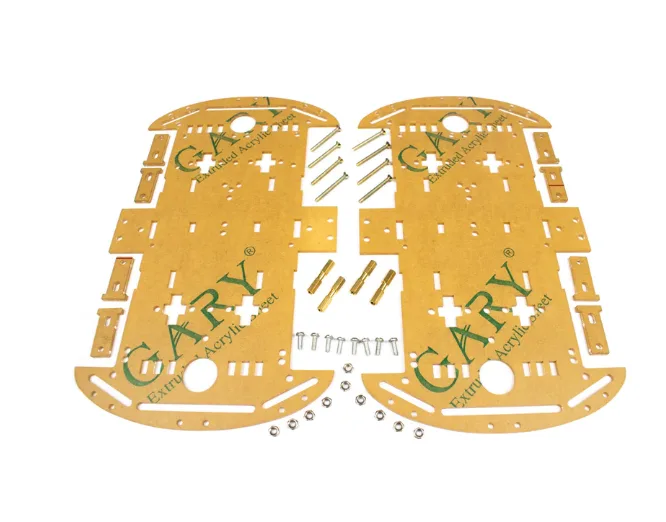
4 Wheels Car Chassis Acrylic Frame
Flat-deck 4WD acrylic chassis — excellent base for a Raspberry Pi rover. The wide upper deck accommodates the Pi, camera mount, motor driver, and battery pack with room to spare.

2WD Mini Round Double-Deck Smart Robot Car Chassis DIY Kit
Compact round 2WD chassis kit — lightweight and nimble, perfect for indoor Pi rover projects where tight turning and quick response are priorities.
Mechanical Assembly & Chassis Prep
Before writing a line of code, get the physical build solid:
- Chassis: Assemble the frame, motors, and wheels per the kit instructions. Ensure all wheels are parallel and the chassis sits level.
- Camera mount: Position the camera at the front, angled 10–15° downward to see the ground ~1 m ahead — critical for lane following.
- Cable management: Route motor cables away from the camera to prevent vibration-induced blur and EMI interference.
- Centre of gravity: Place the battery as low and centred as possible. High CoG causes the rover to tip on turns.
- Voltage separation: Power the Pi from a dedicated 5V source (USB power bank). Never power it from the same supply as the motors — motor switching causes voltage spikes that crash the Pi.
OS & Software Setup
Flash Raspberry Pi OS (64-bit, Bookworm) using Raspberry Pi Imager. Enable SSH and configure WiFi credentials in the imager for headless setup. Then install the required Python packages:
sudo apt update && sudo apt upgrade -y
sudo apt install -y python3-opencv python3-picamera2 python3-smbus
pip3 install RPi.GPIO gpiozero smbus2 numpy imutils

# Verify OpenCV
python3 -c "import cv2; print(cv2.__version__)"
Enable the camera interface:
sudo raspi-config
# Interface Options → Camera → Enable
# Or for Pi 5 / Picamera2:
sudo apt install -y python3-picamera2
Motor Control with Python & RPi.GPIO
Create a motors.py module to abstract the motor driver:
import RPi.GPIO as GPIO
GPIO.setmode(GPIO.BCM)

# L298N pins
IN1, IN2, ENA = 17, 18, 12  # Left motor
IN3, IN4, ENB = 22, 23, 13  # Right motor

for pin in [IN1, IN2, IN3, IN4, ENA, ENB]:
    GPIO.setup(pin, GPIO.OUT)

left_pwm  = GPIO.PWM(ENA, 1000)  # 1kHz
right_pwm = GPIO.PWM(ENB, 1000)
left_pwm.start(0)
right_pwm.start(0)

def drive(left_speed, right_speed):
    """Speed: -100 to +100 (negative = reverse)"""
    # Left motor
    GPIO.output(IN1, left_speed > 0)
    GPIO.output(IN2, left_speed  0)
    GPIO.output(IN4, right_speed < 0)
    right_pwm.ChangeDutyCycle(abs(right_speed))

def stop():
    drive(0, 0)
OpenCV Basics: Camera Pipeline on Raspberry Pi
Use Picamera2 (Pi Camera Module v2/v3) with OpenCV for the fastest pipeline on modern Raspberry Pi OS:
from picamera2 import Picamera2
import cv2

pcam = Picamera2()
pcam.configure(pcam.create_preview_configuration(
    main={"format": "RGB888", "size": (640, 480)}
))
pcam.start()

while True:
    frame = pcam.capture_array()
    # frame is a numpy array (H, W, 3)
    gray = cv2.cvtColor(frame, cv2.COLOR_RGB2GRAY)
    # Process frame...
    # Display (if monitor connected):
    cv2.imshow("Rover Cam", frame)
    if cv2.waitKey(1) == ord('q'):
        break
pcam.stop()
For headless operation (no monitor), stream the processed frame over HTTP using flask or save debug images with cv2.imwrite().
Colour Object Tracking & Following
Colour tracking is the simplest form of computer vision autonomy — the rover follows a brightly coloured object (a red ball, orange cone, etc.). Convert the frame to HSV colour space for robust colour segmentation:
import cv2, numpy as np

# Red ball tracking (HSV ranges for red)
lower_red1 = np.array([0,   120, 70])
upper_red1 = np.array([10,  255, 255])
lower_red2 = np.array([170, 120, 70])
upper_red2 = np.array([180, 255, 255])

def track_colour(frame):
    hsv = cv2.cvtColor(frame, cv2.COLOR_RGB2HSV)
    mask1 = cv2.inRange(hsv, lower_red1, upper_red1)
    mask2 = cv2.inRange(hsv, lower_red2, upper_red2)
    mask  = cv2.bitwise_or(mask1, mask2)
    mask  = cv2.erode(mask,  None, iterations=2)
    mask  = cv2.dilate(mask, None, iterations=2)

    contours, _ = cv2.findContours(mask, cv2.RETR_EXTERNAL,
                                   cv2.CHAIN_APPROX_SIMPLE)
    if contours:
        c = max(contours, key=cv2.contourArea)
        if cv2.contourArea(c) > 500:  # ignore noise
            (x, y), radius = cv2.minEnclosingCircle(c)
            cx = int(x)
            frame_cx = frame.shape[1] // 2
            error = cx - frame_cx  # pixels from centre
            return error, int(radius)
    return None, None

# In main loop:
error, radius = track_colour(frame)
if error is not None:
    correction = int(error * 0.3)  # P-controller
    drive(60 - correction, 60 + correction)
else:
    stop()  # Object lost — wait
Lane/Line Detection for Autonomous Driving
For corridor following or lane driving, use Canny edge detection and Hough line transform. The rover processes a Region of Interest (ROI) — the lower portion of the frame where the line/lane is visible:
def detect_lane_centre(frame):
    h, w = frame.shape[:2]
    roi = frame[h//2:, :]  # Bottom half only
    gray = cv2.cvtColor(roi, cv2.COLOR_RGB2GRAY)
    blur = cv2.GaussianBlur(gray, (5, 5), 0)
    edges = cv2.Canny(blur, 50, 150)
    lines = cv2.HoughLinesP(edges, 1, np.pi/180,
                            threshold=50,
                            minLineLength=50,
                            maxLineGap=20)
    if lines is None:
        return None
    # Average x-position of all detected line midpoints
    xs = [(x1 + x2) / 2 for line in lines for x1, y1, x2, y2 in line]
    lane_centre = int(np.mean(xs))
    frame_centre = w // 2
    return lane_centre - frame_centre  # error signal
Feed this error into a PID controller exactly as in the colour tracking section. Tune Kp around 0.3–0.5 for smooth lane following at BASE_SPEED=50.
Obstacle Detection & Avoidance
Combine the ultrasonic HC-SR04 with OpenCV obstacle detection for a layered safety system. The ultrasonic handles close-range obstacles reliably; OpenCV detects objects at medium range (0.5–3 m):
import time

TRIG, ECHO = 24, 25
GPIO.setup(TRIG, GPIO.OUT)
GPIO.setup(ECHO, GPIO.IN)

def get_distance_cm():
    GPIO.output(TRIG, False)
    time.sleep(0.01)
    GPIO.output(TRIG, True)
    time.sleep(0.00001)
    GPIO.output(TRIG, False)
    start = time.time()
    while GPIO.input(ECHO) == 0:
        start = time.time()
    while GPIO.input(ECHO) == 1:
        stop = time.time()
    return (stop - start) * 17150  # cm

# In navigation loop:
if get_distance_cm() < 25:
    stop()
    time.sleep(0.3)
    # Choose avoidance direction based on camera
    drive(-40, 40)  # Rotate right
    time.sleep(0.5)
    stop()
For camera-based obstacle detection, run a background subtraction or use a pretrained MobileNet SSD model via OpenCV’s DNN module. On Raspberry Pi 4, MobileNet-SSD runs at ~10 FPS — sufficient for slow-moving rover navigation.

ACEBOTT Biped Robot Kit – QD021
Advanced robot kit for those ready to go beyond rovers — program this biped robot with Python to explore gait algorithms and balance control after mastering your rover project.
Integrating All Modules: Autonomous Navigation Loop
The final autonomous navigation loop integrates all modules with a priority system:
import threading

class Rover:
    def __init__(self):
        self.mode = 'lane_follow'  # or 'colour_track'
        self.running = True

    def navigation_loop(self):
        while self.running:
            frame = pcam.capture_array()

            # Priority 1: Obstacle check (ultrasonic)
            dist = get_distance_cm()
            if dist < 20:
                stop()
                self.avoid_obstacle()
                continue

            # Priority 2: Vision-based navigation
            if self.mode == 'lane_follow':
                error = detect_lane_centre(frame)
                if error is not None:
                    kp = 0.4
                    correction = int(kp * error)
                    drive(60 - correction, 60 + correction)
                else:
                    stop()
            elif self.mode == 'colour_track':
                error, _ = track_colour(frame)
                if error is not None:
                    drive(50 - error//3, 50 + error//3)
                else:
                    drive(30, -30)  # Rotate to search

    def avoid_obstacle(self):
        drive(-50, -50); time.sleep(0.4)
        drive(50, -50);  time.sleep(0.6)
        stop()
Run the navigation loop in a thread and use the main thread for monitoring, logging, or web dashboard updates. This keeps the control loop responsive even when Flask or WebSocket handlers are busy.

4mm Hex Coupling for Robot Smart Car Wheel
Precision hex couplings ensure wheels don’t slip on motor shafts — vital for consistent odometry and predictable turning behaviour in your autonomous Pi rover.
Frequently Asked Questions
Which Raspberry Pi model is best for this project?
Raspberry Pi 4B with 4GB RAM is recommended. The 2GB version works but leaves little headroom when running OpenCV + motors + web server concurrently. The Pi 5 is even better if budget allows — it runs OpenCV DNN inference roughly 2× faster.
Can I use a USB webcam instead of the Pi Camera Module?
Yes. Replace Picamera2 with cv2.VideoCapture(0) for any USB webcam. USB webcams introduce slightly higher latency (~50ms vs ~15ms for CSI) but work perfectly for most rover applications.
How do I prevent the Raspberry Pi from rebooting when motors draw current?
Power motors from a separate supply (LiPo or dedicated regulator). Share only ground with the Pi. Never power the Pi from the motor supply — even brief voltage dips below 4.7V cause resets.
What is the best base speed for indoor lane following?
Start at 40–50% PWM duty cycle (roughly 0.3 m/s for TT motors). This gives enough time for the Pi to process each frame and issue a correction before the rover has moved too far off course.
Can I run this project entirely on battery for 1+ hour?
Yes. A 10,000mAh USB power bank for the Pi (USB-C, 5V 3A) + a separate 3S 2200mAh LiPo for motors gives approximately 90 minutes of autonomous operation. Use a BEC or 7805 regulator between the LiPo and motor driver logic supply.
Build Your Autonomous Pi Rover Today
Get your chassis, motor couplings, servo motors, and robotics accessories from Zbotic.in. We offer fast delivery across India, genuine components, and GST invoices for college and institutional projects.


Add comment