
Setting up a Raspberry Pi print server is one of the most practical projects you can build with this tiny computer. Whether you have an old USB printer gathering dust or want to make your existing printer accessible from every device in your home or office, a Raspberry Pi print server is the perfect solution. In this comprehensive guide, we will walk you through everything you need to know to set up, configure, and manage a wireless print server using a Raspberry Pi — all for a fraction of what a commercial print server costs.
What is a Raspberry Pi Print Server?
A print server is a dedicated device that connects a printer to a network, allowing multiple computers and devices to send print jobs wirelessly. Traditionally, print servers were expensive dedicated hardware devices or a feature built into premium printers. With a Raspberry Pi, you can build your own print server for under ₹3,000 and give any USB printer wireless capability.
The magic happens through a software package called CUPS (Common Unix Printing System), which is available on Linux-based systems including Raspberry Pi OS. CUPS acts as the bridge between your networked devices and the physical printer, handling print queues, driver management, and protocol translation.
This project is extremely popular in India because many offices and homes still use older inkjet or laser printers that lack built-in Wi-Fi. Instead of buying a new wireless printer costing ₹10,000–₹30,000, you can extend the life of your existing printer with a Raspberry Pi for a fraction of the cost.

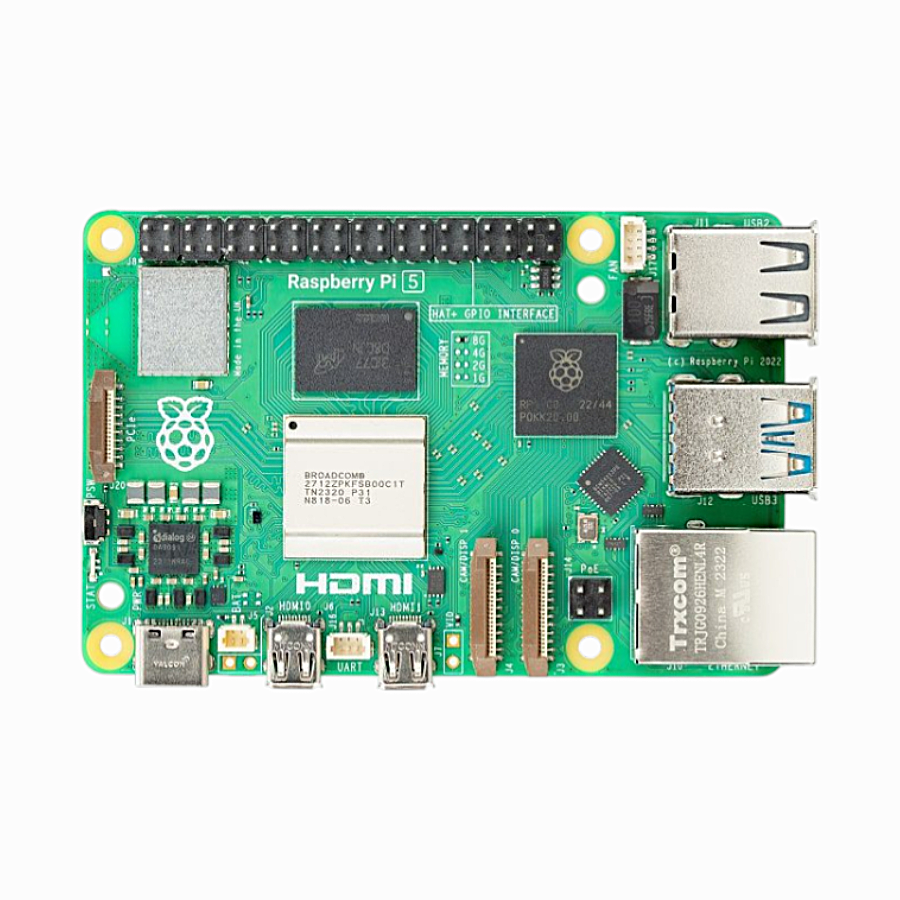
Raspberry Pi 5 Model 4GB RAM
The Raspberry Pi 5 with 4GB RAM is the ideal choice for a print server — powerful enough to handle multiple simultaneous print jobs while remaining energy-efficient enough to run 24/7.
What You Need
Before you start building your Raspberry Pi print server, gather the following components:
- Raspberry Pi (any model): A Raspberry Pi 3B+, 4B, or 5 works best. Even a Pi Zero 2W can work for light usage.
- MicroSD card: 16GB or larger with Raspberry Pi OS installed
- Power supply: Official Raspberry Pi power adapter
- USB printer: Any USB printer — inkjet, laser, dot matrix
- USB cable: To connect the printer to Raspberry Pi
- Network connection: Ethernet (preferred for stability) or Wi-Fi
- Optional — a case: To protect your Raspberry Pi
For the software side, you will need Raspberry Pi OS (formerly Raspbian) with internet access during setup. The headless setup (no monitor required) works perfectly well once you are comfortable with SSH.
Setting Up Raspberry Pi OS
If you are starting fresh, download the latest Raspberry Pi OS Lite (no desktop) from the official Raspberry Pi website. Use the Raspberry Pi Imager tool to flash the image onto your microSD card. During imaging, you can pre-configure Wi-Fi credentials and enable SSH directly from the imager — this eliminates the need for a monitor and keyboard entirely.
Here is the quick setup process:
- Download and install Raspberry Pi Imager on your laptop or PC
- Select Raspberry Pi OS Lite (64-bit) as the operating system
- Click the settings gear icon and configure hostname, SSH, Wi-Fi SSID and password, and locale settings
- Flash the SD card, insert it into your Raspberry Pi, and power it on
- Wait 2-3 minutes, then SSH into it:
ssh [email protected] - Run
sudo apt update && sudo apt upgrade -yto update the system
For Indian users, make sure to set your timezone to Asia/Kolkata and locale to en_IN.UTF-8 in raspi-config for accurate print timestamps and system logs.
Installing and Configuring CUPS
CUPS is the heart of your Raspberry Pi print server. It is a mature, well-supported open source printing system that supports hundreds of printer models and multiple printing protocols including IPP (Internet Printing Protocol), LPD, and Samba/SMB for Windows compatibility.
Install CUPS with the following commands:
sudo apt install cups -y
sudo usermod -aG lpadmin pi
sudo systemctl enable cups
sudo systemctl start cups
By default, CUPS only listens on localhost. To access the web interface from other devices on your network, you need to edit the configuration file:
sudo nano /etc/cups/cupsd.confFind and change the following lines:
# Change: Listen localhost:631
# To:
Listen 0.0.0.0:631

# Add under <Location /> section:
Allow @LOCAL

# Add under <Location /admin> section:
Allow @LOCAL
Also add ServerAlias * near the top of the file to allow access from any hostname. Restart CUPS after saving:
sudo systemctl restart cupsNow you can access the CUPS web interface at http://raspberrypi.local:631 from any browser on your network. The interface is intuitive and allows you to add printers, manage jobs, and configure settings.
Raspberry Pi 5 Model 2GB RAM
The 2GB RAM version of Raspberry Pi 5 offers excellent value for a dedicated print server. It handles CUPS and Samba efficiently while keeping power consumption low for always-on operation.
Adding Your Printer
With CUPS running, connect your USB printer to the Raspberry Pi. You can add it through the web interface or via command line. We will cover both methods.
Via Web Interface
- Open
http://raspberrypi.local:631in your browser - Go to Administration → Add Printer
- Select your printer from the list of detected USB printers
- Enter a name, description, and location for the printer
- Check “Share This Printer” to make it available on the network
- Select the appropriate driver — CUPS may auto-detect it, or you can search by model number
- Set default options (paper size: A4 for India, quality, color/mono) and click Add Printer
Adding Windows SMB Support
For Windows PCs to discover and use the printer, you need Samba:
sudo apt install samba -yEdit the Samba configuration to share printers:
sudo nano /etc/samba/smb.conf

# Find [printers] section and set:
[printers]
   comment = All Printers
   browseable = yes
   path = /var/spool/samba
   printable = yes
   guest ok = yes
   read only = yes
   create mask = 0700
Restart Samba: sudo systemctl restart smbd
Windows machines will now discover the printer through the network neighbourhood or you can add it manually using \raspberrypiPrinterName.
Connecting Devices to the Print Server
Windows
Open Settings → Devices → Printers & Scanners → Add a printer or scanner. If the printer appears in the list, click Add device. If not, click “The printer that I want isn’t listed” and enter the printer’s URL in IPP format: http://raspberrypi.local:631/printers/PrinterName.
macOS
Go to System Preferences → Printers & Scanners → click the + button. Your Raspberry Pi printer should appear automatically via Bonjour. Select it and install the driver.
Android
Install the CUPS Mobile Printing app from the Play Store. Add the server at http://raspberrypi.local:631 and you can print from any Android app that supports printing.
iPhone/iPad
iOS devices use AirPrint. Install the avahi-daemon and cups-pdf packages to enable AirPrint broadcasting:
sudo apt install avahi-daemon -y
sudo systemctl enable avahi-daemon
sudo systemctl start avahi-daemon
Your printer will appear automatically in the iOS print dialogue.
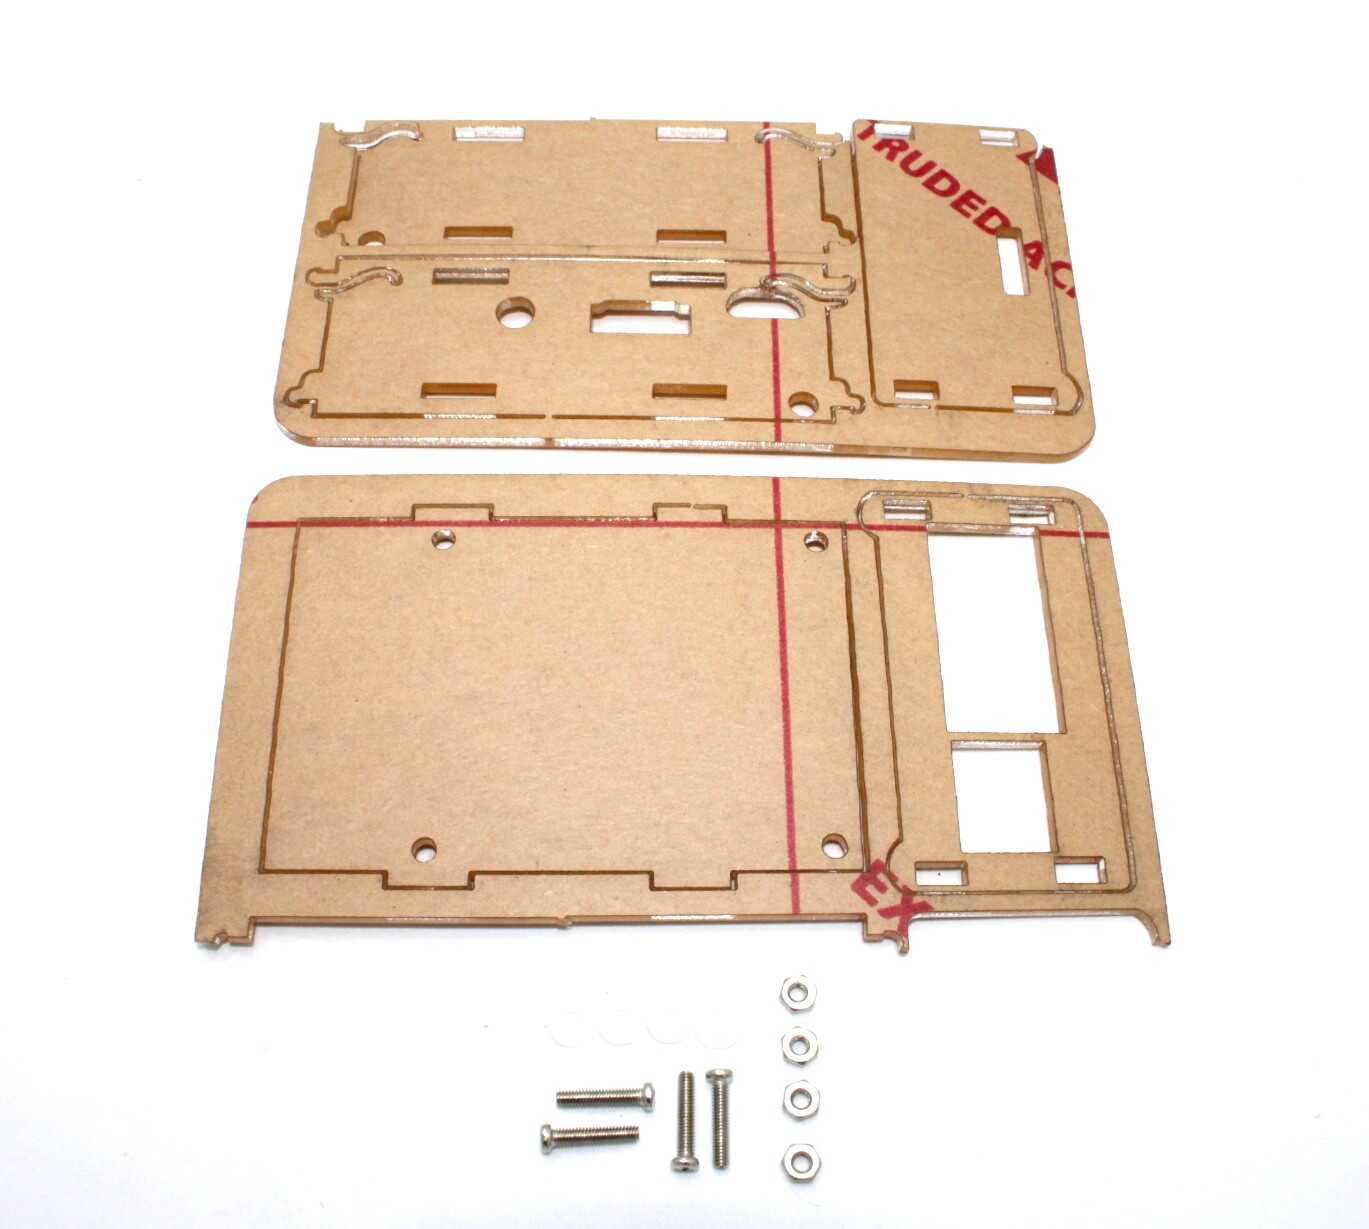
Acrylic Case for Raspberry Pi 4 with 3.5 inch LCD
This acrylic case protects your Raspberry Pi when deployed as a permanent print server. The transparent design allows easy status monitoring and it mounts neatly behind any printer.
Advanced Tips and Troubleshooting
Assign a Static IP Address
For a print server, a static IP prevents connection issues when the router assigns a different IP after reboot. Edit /etc/dhcpcd.conf and add:
interface eth0
static ip_address=192.168.1.100/24
static routers=192.168.1.1
static domain_name_servers=8.8.8.8
Enable Print Job Logging
Useful for office environments to track who printed what and when. In cupsd.conf, set:
AccessLog /var/log/cups/access_log
LogLevel info
PageLog /var/log/cups/page_log
Common Troubleshooting
- Printer not detected: Run
lsusbto check if the Pi sees the printer. Try a different USB cable or port. - Driver not found: Install
printer-driver-gutenprintfor many inkjet printers:sudo apt install printer-driver-gutenprint - Windows can’t connect: Make sure Samba is running and the firewall allows port 445
- Print jobs stuck in queue: Restart CUPS:
sudo systemctl restart cupsand check logs at/var/log/cups/error_log - Slow printing: Use Ethernet instead of Wi-Fi for the Pi; also ensure the SD card is not worn out
Power Outage Recovery
Add CUPS and Samba to systemd startup (they should be by default) and consider a small UPS for your router and Raspberry Pi to prevent queue corruption during power cuts — which is especially important in India where power fluctuations are common.
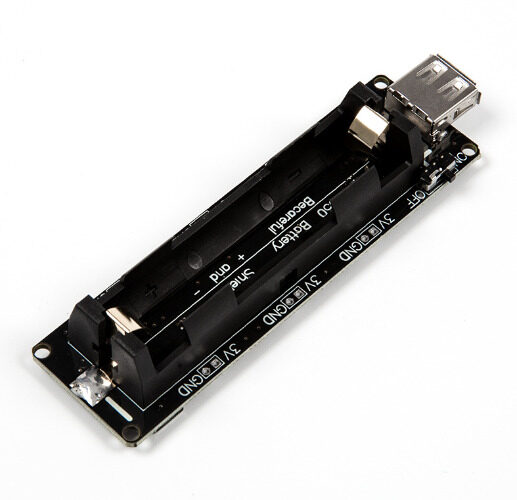
18650 Battery Holder Development Board V3 for Raspberry Pi
This battery backup board keeps your Raspberry Pi print server running during power cuts, preventing print job corruption. Supports Raspberry Pi 3B, 3B+, and 4B.
Frequently Asked Questions
Which Raspberry Pi model is best for a print server?
Any Raspberry Pi model from the Pi 3 onwards works well. The Pi 5 (2GB or 4GB RAM) is recommended for offices with multiple users printing simultaneously. For a home with 2-3 devices, even a Pi Zero 2W is sufficient for basic USB printing via CUPS.
Can I use a Raspberry Pi print server with wireless printers?
Yes, but it is less common. If your printer has a USB port, connect it directly. If it is a network printer, CUPS can still manage it as a remote printer backend, acting as a central print queue manager for your entire office.
Will my HP/Canon/Epson printer work with Raspberry Pi?
Most popular printer brands like HP, Canon, Epson, and Brother are well-supported. HP printers work excellently with HPLIP (sudo apt install hplip). Canon and Epson provide Linux drivers on their websites. Check the OpenPrinting database (openprinting.org) for your specific model’s Linux compatibility.
Can multiple people print at the same time?
Yes. CUPS manages a print queue, so multiple simultaneous print jobs are handled in order. For a busy office, you may want to set job priorities and limits per user through the CUPS web interface.
How much does it cost to build a Raspberry Pi print server in India?
The Raspberry Pi itself costs approximately ₹3,000–₹7,000 depending on the model. Add a ₹300 MicroSD card and ₹500 for a case, and the total project cost is ₹3,800–₹7,800 — far cheaper than a commercial print server or a new wireless printer.
Ready to Build Your Raspberry Pi Print Server?
Get all the Raspberry Pi hardware you need from Zbotic — India’s trusted electronics components store. We stock the full range of Raspberry Pi 5 models, cases, power supplies, and accessories.


Add comment