
Walk into any Indian electronics market or browse any local online store, and you will find NodeMCU boards listed as “V2” or “V3” — often at nearly the same price. But what exactly is the difference between NodeMCU V2 and V3? Which one should you buy? Are they compatible with each other? And why do some boards labelled “V3” not match the original specifications?
These questions confuse thousands of Indian makers every year. This guide clears up all the confusion with a detailed technical comparison, buying advice, and everything you need to know to get started with your NodeMCU project.
1. A Brief History of NodeMCU
NodeMCU started as an open-source firmware for the ESP8266 chip that allowed programming in the Lua scripting language — hence the name “Node” (from Node.js inspiration) and “MCU” (microcontroller unit). The firmware was created in 2014 by a group of Chinese developers.
Soon after, the community created development boards to make prototyping easier. The NodeMCU Devkit boards became the standard ESP8266 development platform worldwide, including in India.
The version history:
- V1.0 (Devkit 0.9): Original board, larger size, ESP-12 module, CP2102 USB chip
- V2.0 (Devkit 1.0): Redesigned, more compact, ESP-12E module, CP2102, breadboard-friendly
- V3 (various manufacturers): Not an official NodeMCU version — this is the LoLin variant made by different manufacturers, usually slightly wider than V2 with CH340G USB chip
The important thing to understand: there is no official NodeMCU V3. “V3” is a marketing label used by manufacturers (primarily LoLin/WeMos clones) for their version of the NodeMCU board, which differs from V2 in a few important ways.
2. NodeMCU V2 Specifications
- ESP Module: ESP-12E (ESP8266EX chip)
- USB-UART Chip: CP2102 (Silicon Labs)
- Width: 25.5 mm — fits standard 830-point breadboards with one column free on each side
- Length: 48.7 mm
- Flash: 4 MB
- GPIO: 11 usable, exposed on two rows of pins
- Power: 5V via Micro-USB, onboard 3.3V regulator
- PCB Color: Usually blue
3. NodeMCU V3 (LoLin) Specifications
- ESP Module: ESP-12E or ESP-12F (functionally identical to V2)
- USB-UART Chip: CH340G (WCH) — this is the main hardware difference
- Width: 30.5 mm — wider than V2, occupies all columns on a standard breadboard
- Length: 58.5 mm — longer than V2
- Flash: 4 MB
- GPIO: Same 11 usable GPIO as V2, same pin layout
- Power: 5V via Micro-USB, onboard 3.3V regulator
- PCB Color: Usually black
- Additional pins: Often includes extra GND and 5V pins at the board ends
4. V2 vs V3: Side-by-Side Comparison
| Feature | NodeMCU V2 | NodeMCU V3 (LoLin) |
|---|---|---|
| Official Version? | Yes (Devkit 1.0) | No (manufacturer variant) |
| ESP Chip | ESP8266EX | ESP8266EX (identical) |
| USB Chip | CP2102 (Silicon Labs) | CH340G (WCH) |
| Width | 25.5 mm | 30.5 mm (wider) |
| Length | 48.7 mm | 58.5 mm (longer) |
| Breadboard Compatible | Yes (1 column free each side) | No (fills all columns) |
| Flash Memory | 4 MB | 4 MB (identical) |
| GPIO Pins | 11 usable | 11 usable (identical) |
| Extra Power Pins | No | Yes (extra GND + 5V) |
| PCB Color | Blue (usually) | Black (usually) |
| Price in India | ₹150–₹220 | ₹140–₹200 |
| Firmware | Identical (same chip) | Identical (same chip) |
| Arduino IDE Board | NodeMCU 1.0 (ESP-12E) | NodeMCU 1.0 (ESP-12E) |
5. The USB Chip Difference: CP2102 vs CH340G
The most significant functional difference between V2 and V3 is the USB-to-UART bridge chip:
CP2102 (NodeMCU V2)
- Made by Silicon Labs
- Slightly higher quality, more stable at higher baud rates
- Drivers included natively in most modern Windows 10/11 installations
- Slightly more expensive — contributes to V2’s higher price
- Supports baud rates up to 1 Mbps
CH340G (NodeMCU V3)
- Made by WCH (a Chinese company)
- Requires driver installation on older Windows versions (Windows 7, 8)
- Works natively on Windows 10/11, macOS 10.14+, and Linux (via ch341 kernel module)
- Lower cost — reduces board manufacturing cost
- Perfectly reliable for ESP8266 programming at standard baud rates (115200, 921600)
- The same chip used in the Wemos D1 Mini
For practical purposes in 2026, both chips work equally well for programming your ESP8266. On modern operating systems, both are plug-and-play. The CP2102 has a slight edge for industrial applications requiring very stable high-speed serial communication, but this is irrelevant for typical maker projects.
6. The Size Problem: Why V3 Does Not Fit Standard Breadboards
This is the most important practical difference that affects day-to-day use:
A standard 830-point breadboard has a central divider with 5 columns of holes on each side (63 columns total). The NodeMCU V2 is exactly 25.5 mm wide — this means it fits across the divider with one column of holes available on each side for connecting wires.
The NodeMCU V3 is 30.5 mm wide — it spans all available columns on both sides, leaving no room to insert component leads or jumper wires into the same rows as the board pins.
This makes the V3 very awkward to use on a breadboard. You have two workarounds:
- Use two breadboards side by side and bridge the V3 across both
- Use female header pins and jumper wires to extend the board’s connections to a separate breadboard
If breadboard prototyping is important to you, the NodeMCU V2 (or the Wemos D1 Mini, which is much smaller) is the better choice.
7. Which One Should You Buy in India?
Buy NodeMCU V2 if:
- You frequently prototype on breadboards and want free columns for wires
- You prefer the CP2102 USB chip for its slightly better driver compatibility
- You are following tutorials that specify V2 (most established tutorials)
- You want a slightly more compact board
Buy NodeMCU V3 if:
- Price is the primary consideration (V3 is usually ₹10–₹30 cheaper)
- You are not using a breadboard (mounting on perfboard, custom PCB, or enclosure)
- You want the extra power/ground pins for convenience
- V2 is out of stock at your local supplier
Consider the Wemos D1 Mini instead if:
- Size matters for your project (D1 Mini is half the size of NodeMCU)
- You want to use the shield ecosystem
- You need the project to fit in a small enclosure
Bottom line for most Indian makers: If you are buying your first ESP8266 board for learning and breadboard projects, get the NodeMCU V2 or Wemos D1 Mini. If you are buying in bulk for a project that does not use breadboards, the V3 is fine and may save a few rupees per unit.
8. Setting Up NodeMCU in Arduino IDE
Both V2 and V3 are set up identically in Arduino IDE:
- Install Arduino IDE 2.x
- Go to File → Preferences, add this URL to Additional Board Manager URLs:
https://arduino.esp8266.com/stable/package_esp8266com_index.json - Go to Tools → Board → Boards Manager, search “esp8266”, install ESP8266 Community
- Select Tools → Board → NodeMCU 1.0 (ESP-12E Module)
- Set Upload Speed to 115200 (safer) or 921600 (faster)
- Select the correct COM port
For CH340G (V3) on older Windows: download the CH340 driver from the WCH website and install it before connecting the board.
9. NodeMCU Pinout and GPIO Mapping
NodeMCU uses its own pin numbering (D0–D10) that differs from ESP8266 GPIO numbers. Here is the complete mapping:
| NodeMCU Pin | ESP8266 GPIO | Special Functions |
|---|---|---|
| D0 | GPIO16 | Wake from deep sleep (connect to RST) |
| D1 | GPIO5 | I2C SCL |
| D2 | GPIO4 | I2C SDA |
| D3 | GPIO0 | Boot mode (must be HIGH) |
| D4 | GPIO2 | Onboard LED (active LOW), must be HIGH on boot |
| D5 | GPIO14 | SPI SCK |
| D6 | GPIO12 | SPI MISO |
| D7 | GPIO13 | SPI MOSI |
| D8 | GPIO15 | SPI CS (must be LOW on boot) |
| D9 (RX) | GPIO3 | UART RX |
| D10 (TX) | GPIO1 | UART TX |
| A0 | ADC0 | Analog input (max ~3.3V via divider) |
Important: In Arduino code, use the D-pin labels (e.g., `D1`, `D2`) or the `#define D1 5` mappings. Do NOT use raw GPIO numbers directly — the mapping from GPIO to physical pin is confusing and error-prone without the D-label convention.
10. Project Ideas with NodeMCU
1. Home Automation with NodeMCU and Relay
Connect a 4-channel relay module to the NodeMCU and build a simple web-controlled smart switch for your lights and fans. Use the Arduino ESP8266WebServer library to create a web UI accessible from your phone.
2. BME280 Weather Station with ThingSpeak
Connect a BME280 to D1 (SCL) and D2 (SDA), read temperature, humidity, and barometric pressure, and send data to ThingSpeak every 1 minute. View live graphs from anywhere in the world on your ThingSpeak dashboard.

GY-BME280-3.3 Precision Altimeter Atmospheric Pressure Sensor Module
I2C/SPI sensor measuring temperature, humidity, and barometric pressure — perfect for NodeMCU weather station builds across India.
View on Zbotic3. PIR Motion-Activated Telegram Alert
Connect a PIR sensor to D5, and when motion is detected, send a Telegram bot message with the timestamp. Add a buzzer to D6 for an optional audible alert. Use deep sleep between checks to save power.
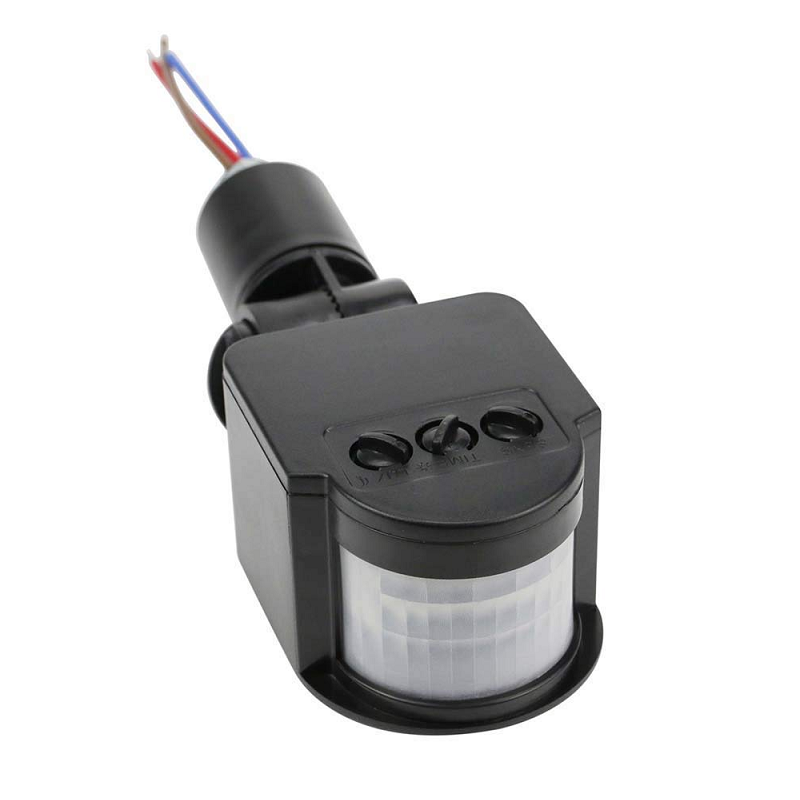
AC 220V Security PIR Human Body Motion Sensor Detector LED Light Switch
Reliable PIR motion sensor — pair with NodeMCU for Wi-Fi-connected home security and motion alert systems.
View on Zbotic4. DS18B20 Multi-Sensor Temperature Logger
The DS18B20 uses the Dallas 1-Wire protocol, meaning you can connect up to 10+ sensors on a single GPIO pin. Connect multiple DS18B20 sensors to D2 and log temperatures from different rooms, a refrigerator, and an outdoor sensor simultaneously.

DS18B20 Programmable Resolution Temperature Sensor
1-Wire digital thermometer with ±0.5°C accuracy — daisy-chain multiple sensors on one NodeMCU pin for multi-zone temperature monitoring.
View on Zbotic5. MQTT Smart Home Gateway
Use the NodeMCU as an MQTT hub that collects data from multiple BLE or RF sensors, processes it, and publishes to a Home Assistant instance running on a local server. The NodeMCU’s Wi-Fi capability makes it an ideal lightweight edge gateway.
11. Buy NodeMCU from Zbotic
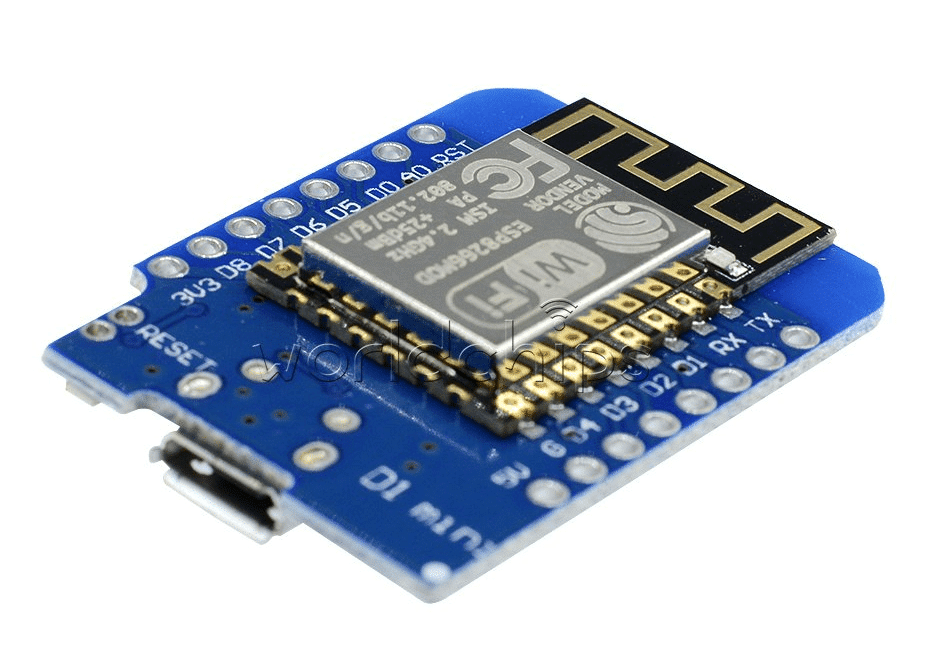
D1 Mini V2 NodeMCU 4M Bytes Lua Wi-Fi IoT Development Board (ESP8266)
The classic Wemos D1 Mini — a compact alternative to the full-sized NodeMCU that fits standard breadboards perfectly with room to spare.
View on Zbotic
ESP8266 ESP-12F Serial WiFi Witty Cloud Development Board + Mini NodeMCU
Complete ESP8266 development kit with onboard LDR, RGB LED, and LiPo port — ideal starter kit for NodeMCU and ESP8266 learning projects.
View on Zbotic12. Frequently Asked Questions
Are NodeMCU V2 and V3 programmed the same way?
Yes, completely. Both boards use the same ESP8266EX chip, same pin layout, and the same Arduino IDE board selection (NodeMCU 1.0 ESP-12E). The only physical difference in programming is the USB driver you need to install (CP2102 for V2, CH340G for V3). Once programmed, code runs identically on both.
Can I use NodeMCU with 5V sensors?
The NodeMCU’s GPIO pins are 3.3V logic. Connecting a 5V signal directly to a GPIO pin can damage the ESP8266. For 5V sensors, use a level shifter or a simple voltage divider (two resistors) to scale 5V down to 3.3V. The 5V pin on the NodeMCU outputs 5V from USB — you can use this to power 5V sensors, but route their data signals through a level shifter.
What does “NodeMCU” mean?
NodeMCU combines “Node” (inspired by Node.js, reflecting the event-driven programming model) and “MCU” (microcontroller unit). It originally referred to the Lua-based firmware for the ESP8266, but the name is now commonly used to describe the development boards themselves, even when they are running Arduino or MicroPython firmware instead of Lua.
Why does my NodeMCU not connect to Wi-Fi?
Common causes: (1) Wrong SSID or password in code, (2) 5 GHz Wi-Fi — ESP8266 only supports 2.4 GHz, (3) Router has blocked the MAC address, (4) Signal too weak — try moving closer to the router, (5) DHCP pool full on your router — restart the router. The Serial Monitor output at 115200 baud is your best debugging tool.
Is NodeMCU good for commercial product development?
For prototyping and small-batch production, yes. For volume manufacturing, you would typically move from the NodeMCU development board to the bare ESP-12E or ESP-12F module, which is much smaller and cheaper. The module costs around ₹60–₹80 and can be soldered directly onto a custom PCB. The NodeMCU board is essentially a prototyping convenience around the same module.
Get Your NodeMCU and Start Building
Shop genuine NodeMCU boards, ESP8266 modules, and all the sensors you need — with fast delivery across India from Zbotic.
Shop NodeMCU & ESP8266 Boards


Add comment