
iNAV Setup Guide: GPS Autonomous Flight Step-by-Step
iNAV (Inertial Navigation) is the premier open-source flight controller firmware for autonomous GPS-guided drones in 2026. While Betaflight dominates the racing quad scene and ArduPilot is the choice for commercial UAV development, iNAV occupies a uniquely practical middle ground — it’s sophisticated enough to fly fully autonomous waypoint missions, yet accessible enough for an enthusiastic hobbyist to set up over a weekend.
This step-by-step guide takes you from a blank flight controller to a fully GPS-enabled, autonomous drone capable of GPS hold, return-to-home, and waypoint missions. Whether you’re building a fixed wing, a hexacopter survey drone or a freestyle quad with GPS backup, this guide has you covered.
Hardware Requirements
Before flashing iNAV, ensure you have the right hardware. iNAV supports a wide range of flight controllers, but GPS autonomous flight requires specific features.
Minimum Requirements for GPS Flight
- Flight Controller: STM32 F4, F7, or H7 processor. F1 and F3 boards are NOT supported in modern iNAV versions. Popular choices: Matek F405-CTR, SpeedyBee F405 Wing, Matek H743-Wing.
- Barometer: Either integrated on the FC (most modern FCs have BMP280 or MS5611) or external. Required for altitude hold.
- GPS Module: uBlox M8N or later. M9N is the current sweet spot. M7N minimum. 6M modules are too old and lack multi-GNSS support.
- Compass (Magnetometer): Strongly recommended for fixed wings; required for certain navigation modes on multirotors. Use an external compass on the GPS module puck to avoid EMI from ESCs.
- Telemetry: Not strictly required but strongly recommended so you can monitor flight status remotely.
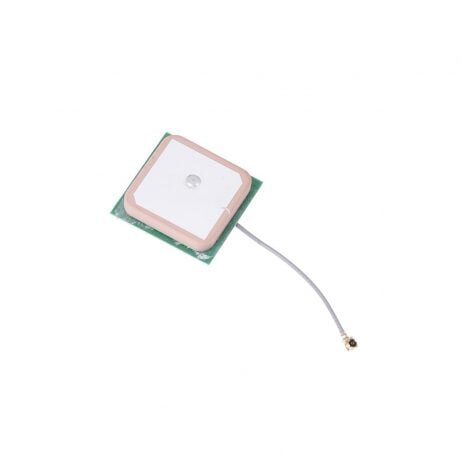
25x25mm 28dB High Gain Ceramic Active GPS Antenna for NEO-6M/7M/8M
High-gain ceramic patch antenna for uBlox GPS modules. Improves satellite acquisition time and maintains lock in challenging conditions — essential for iNAV GPS reliability in India.
View on Zbotic
3DR 100mW Radio Telemetry 915MHz for APM/PX4/Pixhawk
915MHz telemetry pair for real-time ground station monitoring. Works with iNAV’s MSP/MAVLink telemetry protocol. Allows monitoring GPS status, battery and position on your laptop during flight.
View on ZboticFlashing iNAV Firmware
Step 1: Download iNAV Configurator
Go to the iNAV Configurator GitHub releases page and download the latest stable version for your operating system. As of 2026, iNAV 8.x is the current stable release series. Install the Configurator application — it works on Windows, macOS and Linux.
Step 2: Enter DFU Mode
To flash new firmware, your FC needs to be in DFU (Device Firmware Upgrade) mode. Most modern FCs enter DFU automatically when you click “Flash Firmware” in Configurator. If that fails, hold the BOOT button while connecting USB.
Step 3: Select Target and Flash
In Configurator, go to Firmware Flasher. Select your FC target from the dropdown — for example, “MATEKF405CTR” or “SPEEDYBEEF405WING”. Ensure “Full Chip Erase” is checked for a clean flash. Click “Load Firmware [Online]” then “Flash Firmware”.
Step 4: Verify Connection
After flashing, unplug and replug USB. The FC should appear in Configurator’s port dropdown. Select the port, set baud to 115200, and click Connect. You should see the Setup tab with a 3D model of the drone showing orientation.
GPS Module Configuration
Physical Mounting
Mount the GPS module as high as possible on the drone, away from ESCs and power wires. These components emit electromagnetic interference (EMI) on frequencies that GPS receivers are sensitive to. A mast of 5–10cm above the main frame is ideal. Arrow marking on the GPS puck must align with the drone’s forward direction.
Connecting to the FC
Connect GPS TX → FC UART RX, GPS RX → FC UART TX. Use a dedicated UART port, not UART1 (used for USB/Configurator on many boards). Power the GPS from the FC’s 3.3V or 5V rail according to the module’s specification.
iNAV Configurator Settings
- In Ports tab: Set the UART connected to GPS to “GPS” function, baud 115200
- In Configuration tab → GPS section:
- Provider: uBLOX
- Ground Assistance Type: Auto-detect or Indoor (for initial testing only)
- In CLI tab, enter:
set gps_ublox_use_galileo = ON— Galileo adds 4–8 more visible satellites from South Asia, dramatically improving fix quality. - Enable NavIC satellite system if available in your iNAV version:
set gps_ublox_use_navic = ON— India’s own satellite navigation system with excellent coverage over the subcontinent.
Verifying GPS Fix
In the Configurator’s GPS tab, you should see satellite count climbing over 30–60 seconds after powering on outdoors. For iNAV to allow arming in GPS modes, you typically need 6+ satellites with HDOP below 2.5. Enable GPS satellite overlay in your OSD to monitor this in the field.
Compass Calibration
The compass (magnetometer) is critical for autonomous flight — iNAV uses it to know which direction the drone is facing during position hold and RTH. An uncalibrated or magnetically disturbed compass causes “toilet bowl” spiraling and missed RTH approaches.
Choosing Compass Axis
External GPS/compass modules have the compass pre-aligned to the GPS module’s orientation arrow. In iNAV Configurator, set the magnetometer alignment to match your GPS module’s mounted orientation relative to the FC. If the GPS arrow points forward on the drone, alignment is typically “CW 0” (no rotation).
Calibration Procedure
- Go to Calibration tab in Configurator (or use CLI command
mag_calibrate) - Click “Calibrate Magnetometer” — you have 30 seconds
- Rotate the drone through all orientations — point nose up, down, left, right, flip upside down, spin on all three axes
- The goal is to trace a sphere with the drone’s motion
- Calibration data is saved automatically
Recalibrate the compass any time you fly in a new location or after any significant hardware changes. Steel buildings, reinforcement in concrete, and underground utilities all affect local magnetic field.
Accelerometer and Level Calibration
The accelerometer defines what “level” means to iNAV. Incorrect calibration causes the drone to drift in Angle mode and makes GPS hold less accurate.
Procedure
- Place the drone on a perfectly level surface (use a spirit level to verify)
- In Configurator’s Setup tab, click “Calibrate Accelerometer”
- Wait 5 seconds for calibration to complete — do not move the drone
- The 3D model should show the drone perfectly level after calibration
If your drone hovers with a persistent drift in one direction despite GPS hold, recalibrate the accelerometer with the drone physically levelled more carefully.
Flight Modes Configuration
iNAV’s flight modes build on each other hierarchically. Understanding this is essential to safe autonomous flight.
Core Modes
- MANUAL: Direct passthrough control — no stabilisation. Use for prop testing only.
- ANGLE: Self-levelling — the drone returns to level when sticks are centred. GPS not required.
- HORIZON: Self-levelling at low stick input, acrobatic at full stick. GPS not required.
GPS-Dependent Modes
- GPS HOLD (POSHOLD): Drone holds its current GPS position when sticks are centred. You can still fly manually by moving sticks.
- RTH (Return to Home): Drone autonomously climbs to RTH altitude, flies home, hovers above home point, then lands.
- WP (Waypoint): Drone follows a pre-programmed waypoint mission autonomously.
- CRUISE (Fixed Wing): Fixed wing-specific cruise mode with GPS-assisted heading hold.
Recommended Mode Switch Configuration
Use a 3-position switch for the main mode: Position 1 = ANGLE, Position 2 = ANGLE + GPS HOLD, Position 3 = RTH. Use a separate 2-position switch for ARM/DISARM. Always assign RTH as your failsafe mode — not MANUAL or ANGLE, which will not save a lost aircraft.
Failsafe and RTH Settings
Failsafe configuration is the most safety-critical part of your iNAV setup. A misconfigured failsafe on a GPS drone can result in a fly-away or dangerous uncontrolled descent.
Stage 1 Failsafe (Link Loss)
When the RC link drops for the Stage 1 delay period (set to 0.5–1 second), iNAV enters Stage 1: it holds the last known position briefly. This handles momentary dropouts without triggering full RTH for every brief signal hiccup.
Stage 2 Failsafe (Sustained Link Loss)
After the Stage 2 delay (set to 5–10 seconds for long range flights), iNAV takes the configured emergency action. Always set this to RTH.
RTH Altitude
Set your RTH altitude to safely clear all obstacles between your launch point and flying area. In India:
- Open farmland / flat terrain: 50–80m is typically adequate
- Hilly terrain (Sahyadris, Aravalli, Shivalik foothills): 100–150m
- Urban areas: 100m + height of surrounding buildings
iNAV will climb to RTH altitude before flying home if the current altitude is lower. If already above RTH altitude, it maintains current altitude during the home flight.
Home Position Update
Set iNAV to update the home position after arming (not at first GPS fix). This ensures if you move after the GPS locks but before arming, the home position is accurate. CLI: set nav_rth_home_altitude = 80
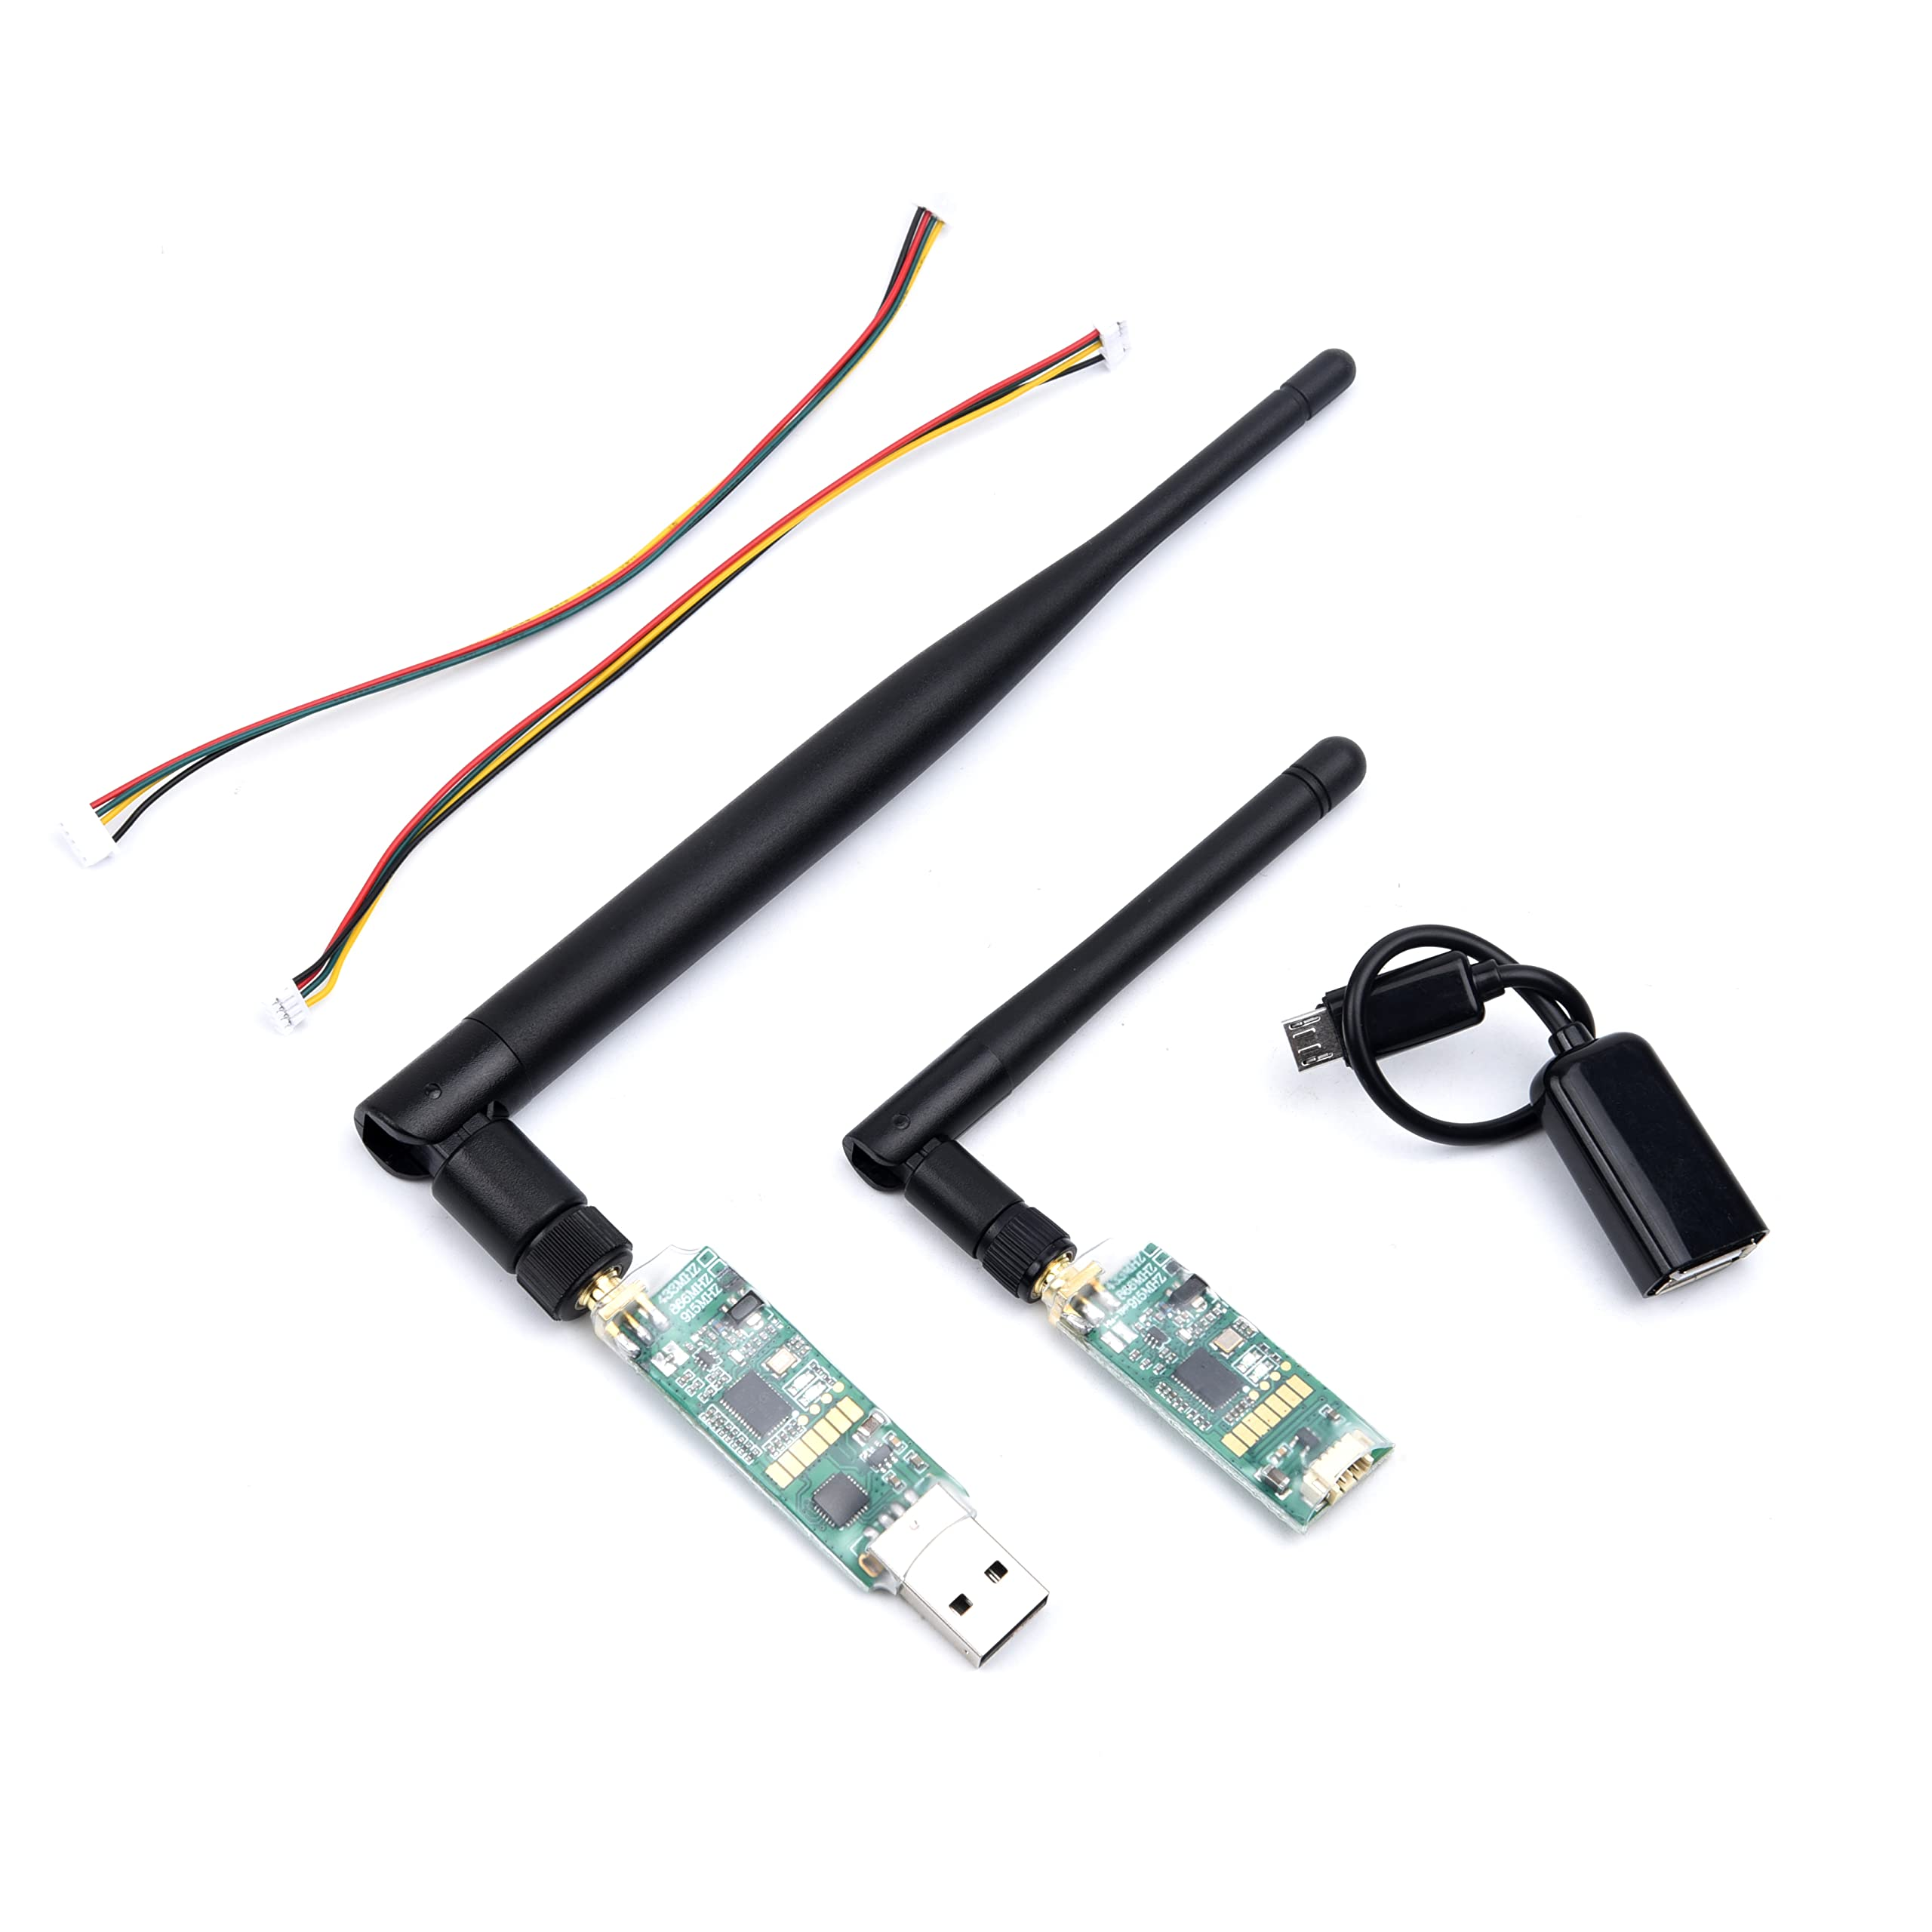
3DR Single TTL MINI Radio Telemetry 433MHz 500mW for Pixhawk and APM FC
Compact 433MHz telemetry module for monitoring iNAV flight data. 500mW output provides 2–4km ground station link. Essential for verifying GPS lock and failsafe status before every autonomous flight.
View on ZboticPID and Navigation Tuning
iNAV’s navigation works best when the underlying attitude controller (PID) is already well-tuned. GPS modes are built on top of the angle mode stabilisation — if the drone is sluggish or oscillates in angle mode, GPS hold will compound these problems.
Attitude PID (First Priority)
Tune P, I and D gains in Angle mode without GPS first. The drone should:
- Return to level quickly and smoothly when sticks are released
- Hold a tilted position without oscillating when sticks are held
- Not exhibit any “bobbing” or “bouncing” on quick stick inputs
Navigation PIDs (Second Priority)
After attitude tuning, enable POSHOLD and check performance:
- Nav-POS-XY-P: Controls how aggressively the drone corrects position errors. Too high: oscillating GPS hold. Too low: drifts far from target position before correcting.
- Nav-VEL-XY-P: Controls velocity correction. Tune similarly to position P but for velocity response.
A good GPS hold should keep the drone within 1–2 metres of the target position in calm wind. In 15kph wind, expect 3–5m drift tolerance.
Planning Waypoint Missions
Waypoint missions allow your drone to autonomously fly a predefined route without pilot input. This is the feature that makes iNAV drones genuinely useful for survey and mapping work.
Mission Planning Tools
- iNAV Configurator (built-in): Basic waypoint editor. Create, upload and download missions directly.
- mwp (Mission Planner for iNAV): Dedicated GCS application with advanced mission planning, terrain following, and live telemetry overlay on map.
- EasyMap: Web-based mission planner with export to iNAV format
Mission Upload Procedure
- Plan your mission in the configurator’s Mission Control tab, setting each waypoint’s coordinates, altitude and any actions (loiter, set speed, take photo trigger)
- Click “Save to FC” to upload the mission to the flight controller’s memory
- Power cycle to verify the mission survived the reboot (missions persist in FC flash)
- Arm in Angle mode, take off manually to 5–10m, then switch to WP mode
- The drone will fly to the first waypoint and then complete the mission automatically
Indian Aviation Compliance
BVLOS (Beyond Visual Line of Sight) autonomous missions require a DGCA BVLOS waiver under UAS Rules 2021. For Visual Line of Sight (VLOS) autonomous missions under 400ft, you need a registered drone and remote pilot certificate. Always get area permission via Digital Sky before any autonomous mission in Yellow or Red zones.
First GPS Flight Checklist
Follow this checklist before every GPS-assisted flight, especially the first time:
- ☐ GPS has 6+ satellites with HDOP below 2.5
- ☐ Home position set correctly (check Configurator GPS tab shows your physical location)
- ☐ Compass calibration valid — 3D model in Configurator shows correct heading when you rotate the drone
- ☐ Failsafe RTH altitude set to clear all obstacles
- ☐ Battery voltage above 95% for first test
- ☐ Test failsafe by removing RC power briefly — verify drone enters RTH mode
- ☐ Hover in Angle mode first, trim if needed, then test GPS Hold at low altitude (5–10m)
- ☐ Test RTH manually by switching to RTH mode while hovering — verify it climbs and approaches home
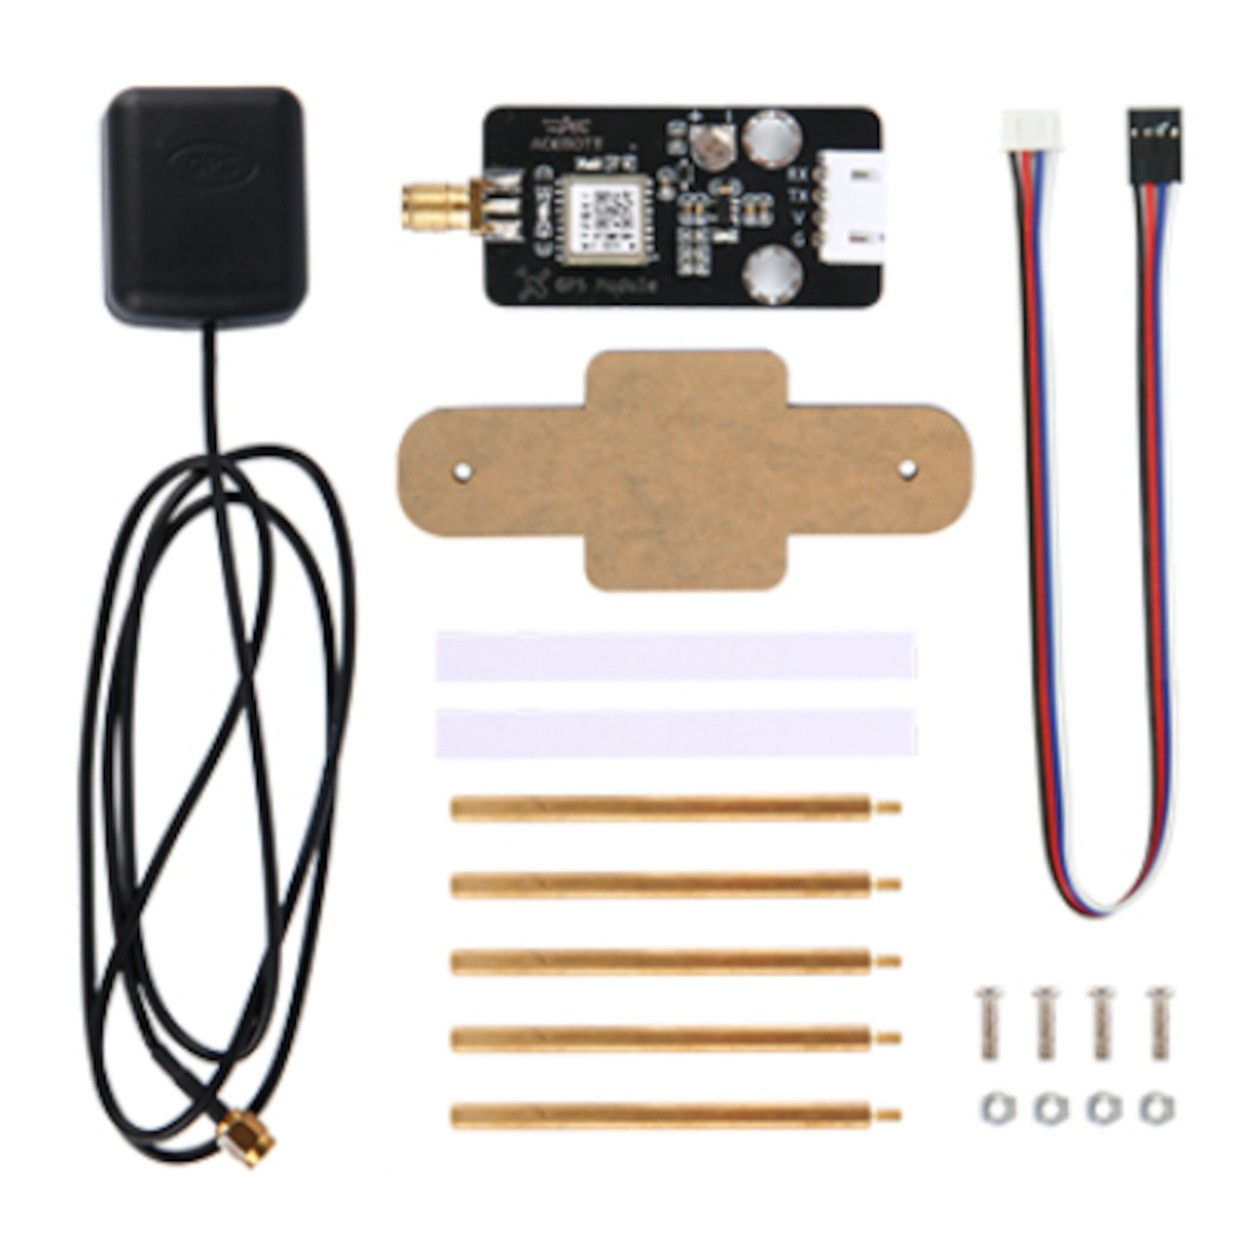
ACEBOTT QD009 GPS Expansion DIY Kit for QD001
GPS expansion kit for DIY drone projects. Easy-to-integrate GPS module for adding positioning and navigation to your iNAV-based drone build.
View on ZboticFrequently Asked Questions
Betaflight is optimised for freestyle and racing — fast loop times, minimal latency, no native GPS navigation modes. iNAV is specifically designed for GPS-assisted navigation, position hold, RTH and autonomous waypoint missions. For any drone where GPS guidance matters, use iNAV. For pure FPV racing, use Betaflight.
iNAV requires a minimum of 6 satellites before allowing arming in GPS-dependent modes (configurable). For reliable position hold, 8–10 satellites with HDOP below 2.0 is ideal. In India, enabling Galileo and NavIC satellite constellations in addition to GPS and GLONASS significantly increases satellite count.
Toilet bowl circling in GPS hold is almost always caused by compass (magnetometer) interference or miscalibration. Common causes: compass mounted too close to power wires, ESC EMI, steel frame components near the compass, or calibration done indoors near steel reinforcement. Remount the GPS/compass higher and further from power wires, then recalibrate outdoors away from metal structures.
Yes, iNAV has excellent fixed wing support with dedicated modes like CRUISE, CRUISE+GPS HOLD, and SOARING. Fixed wing specific features include automatic takeoff, autoland, terrain following, and automatic navigation. It’s arguably the best open-source firmware for fixed wing autonomous flight.
No. Pixhawk hardware uses ArduPilot or PX4 firmware exclusively. iNAV runs on its own supported targets (Matek, SpeedyBee, HGLRC and similar). If you want to use Pixhawk hardware for GPS autonomous flight, use ArduPilot firmware (Mission Planner GCS).
Get GPS Components for Your iNAV Drone
Zbotic stocks GPS modules, telemetry radios, flight controllers and all the accessories needed for your iNAV autonomous drone build in India.
Shop GPS and Navigation Components


Add comment