
Building your own 18650 battery pack with BMS is one of the most rewarding DIY electronics projects you can undertake. Whether you need a custom power bank, a lithium battery for your e-bike, a portable solar storage pack, or a replacement for an expensive proprietary battery, a homemade 18650 pack can deliver exactly what you need at a fraction of the cost. This step-by-step guide walks Indian makers through the entire process — from cell selection to final testing.
Table of Contents
- What You Need: Tools and Components
- Understanding Series and Parallel Configurations
- Choosing the Right 18650 Cells in India
- Choosing and Understanding the BMS
- Step-by-Step: Building the Pack
- Charging Your DIY Battery Pack
- Safety Precautions and Common Mistakes
- Frequently Asked Questions
What You Need: Tools and Components
Before starting, gather all necessary materials. Rushing with incomplete components causes safety hazards and poor results.
Components
- 18650 lithium-ion cells (matched capacity and internal resistance)
- BMS (Battery Management System) — matched to cell count and discharge current
- Nickel strip (0.15mm or 0.2mm, pure nickel — not nickel-plated steel)
- 18650 cell holders (optional, for holder-based builds)
- Insulating rings (for cell positive terminal)
- Kapton tape / PVC heat shrink tubing
- Silicone wire (12–18 AWG depending on current)
- XT60 or DC barrel connectors
- Fishpaper or cardboard cell spacers
Tools
- Spot welder (18650 builds really require this — soldering directly on cells damages them)
- Multimeter (voltage measurement for every step)
- Soldering iron and solder
- Wire strippers and cutters
- Heat gun (for heat shrink)
- Insulating gloves (strongly recommended)

1 x 18650 Battery Holder with 18.4MM Bore Diameter – Pack of 4
High-quality 18650 cell holders ideal for prototyping and holder-based battery pack builds. No spot welding required — great for beginners.
Understanding Series and Parallel Configurations
18650 cells can be connected in two fundamental ways, and most practical battery packs use a combination of both. Understanding this is critical before buying cells or a BMS.
Series (nS)
Cells connected in series increase the total voltage while keeping capacity the same. Three 3.7V cells in series = 11.1V nominal (3S pack). The number before “S” is the cell count in series. Common configurations:
- 1S → 3.7V (single cell, for small electronics)
- 2S → 7.4V (RC toys, smaller devices)
- 3S → 11.1V (most DIY power tools, 12V systems)
- 4S → 14.8V (some laptop replacements)
- 7S → 25.9V (24V e-bike systems)
- 13S → 48.1V (48V e-bike systems — most common in India)
Parallel (nP)
Cells in parallel share the same voltage but add their capacities. Three 2500mAh cells in parallel = 7500mAh at the same voltage. The “P” number follows the “S” in naming — a 3S4P pack has 3 cells in series per group and 4 cells in parallel per group, totalling 12 cells.
Key rule: Always match cells in parallel by capacity AND internal resistance. Mixing different cells or cells at different charge states in parallel can cause dangerous equalisation currents.
Choosing the Right 18650 Cells in India
Cell quality is the most important variable in DIY battery packs. The Indian market is unfortunately flooded with counterfeit and recycled cells, especially on general e-commerce platforms.
Recommended Genuine Cells
- Samsung INR18650-25R: 2500mAh, 20A continuous — excellent all-rounder for moderate discharge
- LG INR18650-HG2: 3000mAh, 20A — high capacity and current, popular for power banks and e-bikes
- Panasonic NCR18650B: 3400mAh, 4.875A — highest capacity, low discharge rate, ideal for power banks
- Samsung INR18650-30Q: 3000mAh, 15A — good balance for most applications
- Molicel P26A: 2600mAh, 35A — high drain applications
Red Flags: Fake Cells to Avoid
- Any cell claiming over 3600mAh capacity in 18650 format — physically impossible
- “9800mAh” or similar absurd ratings on cheap platforms
- Cells that feel noticeably lighter than genuine cells
- Very cheap cells from unknown sellers — often salvaged, re-wrapped, or graded-out rejects
Matching cells: Before building, measure the open-circuit voltage (should be within 0.05V of each other) and ideally capacity-test each cell. Unmatched cells in series develop imbalances that shorten pack life.
Choosing and Understanding the BMS
The Battery Management System (BMS) is the safety brain of your pack. It monitors individual cell voltages, controls charging and discharging, prevents over-current, and balances cells during charging.
BMS Specifications to Match
- Cell count: A 3S BMS for a 3S pack, 13S BMS for a 13S pack, etc.
- Continuous discharge current: Must exceed your maximum load current. A 20A BMS for a tool that draws 15A.
- Balancing: Passive balancing is standard. Active balancing is better but expensive.
- Chemistry: Ensure BMS is rated for Li-Ion (4.2V/cell cutoff), not LiFePO4 (3.65V/cell).
- Charging current rating: Must handle your charger’s output current.
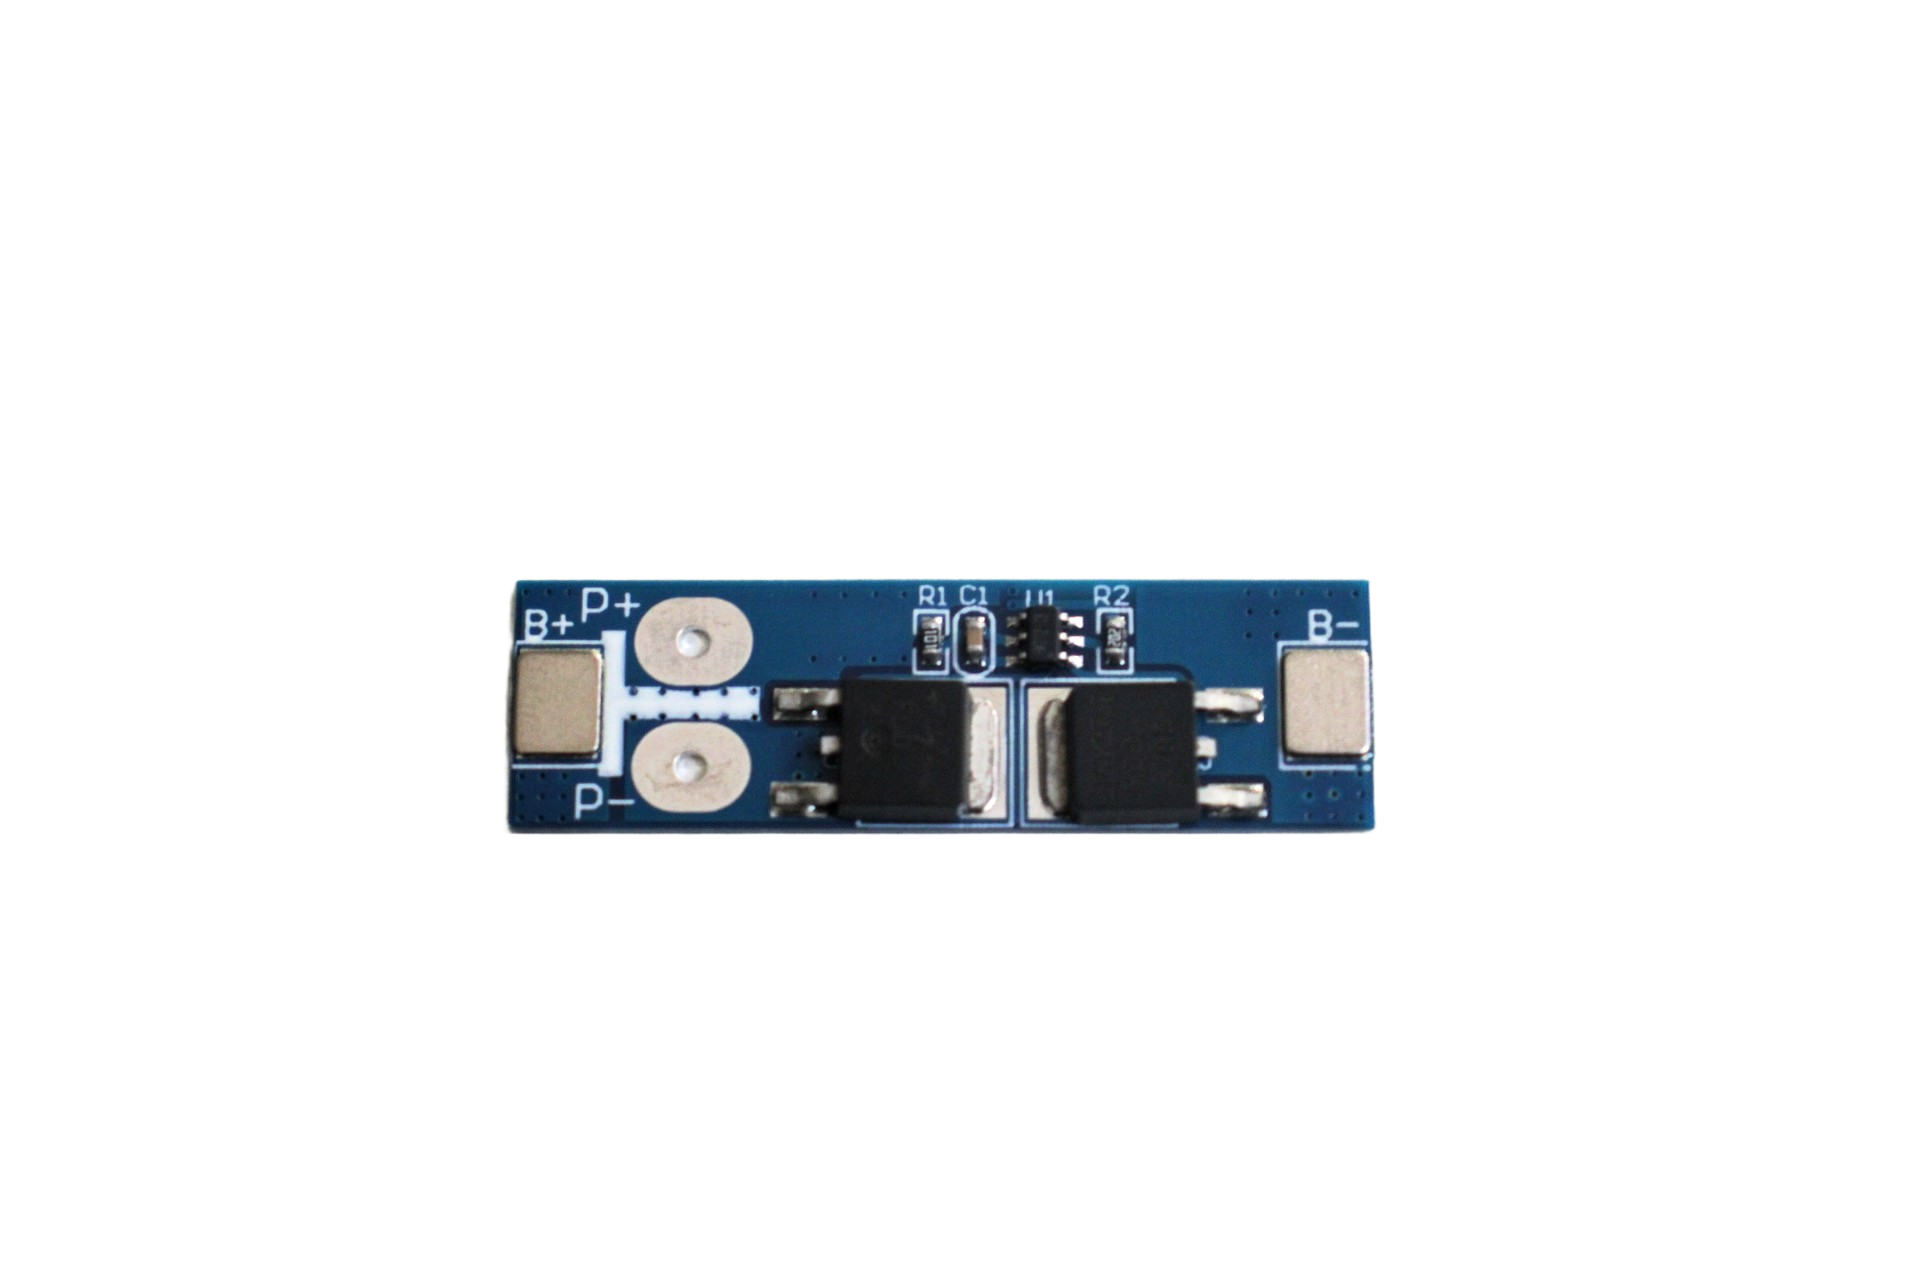
1S 12A 3.6V BMS Battery Protection Board for Li-Ion Cell
Compact 1S protection board for single 18650 cells. Provides over-charge, over-discharge, and over-current protection at up to 12A continuous.
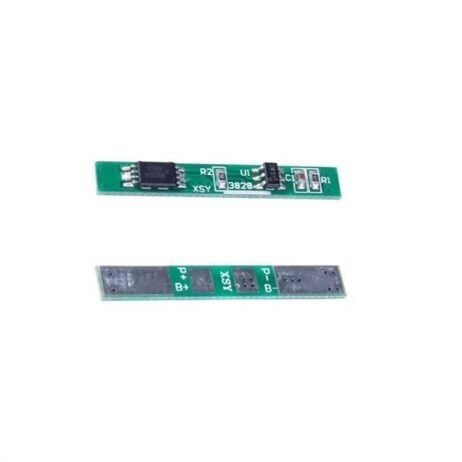
1S 3.7V 2A 1MOS BMS Li-Ion 18650 Battery Protection Board
Slim single-cell BMS for low-current applications. Ideal for IoT devices, sensors, and other electronics powered by a single 18650 cell.
Step-by-Step: Building the Pack
Step 1: Charge All Cells to the Same Voltage
Before building, charge all cells individually and verify they are within 0.02–0.05V of each other using a multimeter. This prevents dangerous equalisation currents when you first connect them. Ideal storage is around 3.6–3.8V per cell.
Step 2: Arrange Cells in the Correct Configuration
Lay out your cells in the intended configuration. For a 3S2P pack (6 cells), arrange 2 cells side by side in each of 3 groups. Cells in the same parallel group must have matching polarity — all positive terminals facing the same direction within the group. Adjacent series groups alternate polarity direction in a typical stacked arrangement.
Insert insulating rings on the positive terminal of each cell. These rings prevent accidental shorts between the positive terminal cap and the nickel strip if the strip contacts the side of the cell.
Step 3: Spot Weld Nickel Strips
Spot welding is strongly preferred over soldering for connecting cells. Soldering applies prolonged heat to the cell terminals, degrading the cell and potentially causing venting. A spot welder delivers a brief, intense pulse that bonds the nickel strip without heating the cell body.
Weld the negative end first across all parallel cells in a group, then the positive end. For higher current packs, use double-layer nickel strips or wider strips. Inspect every weld — it should be firmly bonded and not peel off with finger pressure.
Step 4: Insulate Between Groups
Place fishpaper or Kapton tape between adjacent cell groups to prevent shorts. The gap between positive of one group and negative of the adjacent group is where most accidents happen.
Step 5: Wire the BMS
The BMS has balance wires (B0, B1, B2… Bn) that connect to each cell group junction, plus the main B- (battery negative), C- (charge negative), and P- (discharge negative/load negative) terminals. Wire these exactly per the BMS datasheet — incorrect connections will damage or destroy the BMS.
- B- connects to the pack’s overall negative terminal
- B1, B2… connect to the junctions between cell groups (tapped off the nickel strips)
- P- and C- connect to your output connector and charger respectively (some BMS combine these into one output)
Step 6: Test Before Sealing
Before wrapping in heat shrink, measure the output voltage. A fully charged 3S pack should read ~12.6V (3 × 4.2V). Test the BMS protection by connecting a load and then attempting to over-discharge (the BMS should cut off). Apply the charger and verify it charges correctly.
Step 7: Wrap and Label
Wrap the complete assembly in PVC heat shrink tube or use a custom enclosure. Label with the configuration (e.g., “3S2P 22.2Wh”), chemistry, and date of manufacture. Store the pack in a cool, dry location away from flammable materials.
Charging Your DIY Battery Pack
Always use a charger that matches your pack voltage and chemistry. A 3S Li-Ion pack (3 × 4.2V = 12.6V) requires a CC/CV charger set to 12.6V. Never use a generic 12V power adapter — it outputs a fixed 12V, which is below the full charge voltage and will never fully charge the pack.
For balanced charging (important for pack longevity), use a charger that connects to the BMS balance leads. This ensures each cell group charges to exactly 4.2V, preventing drift between groups over time.
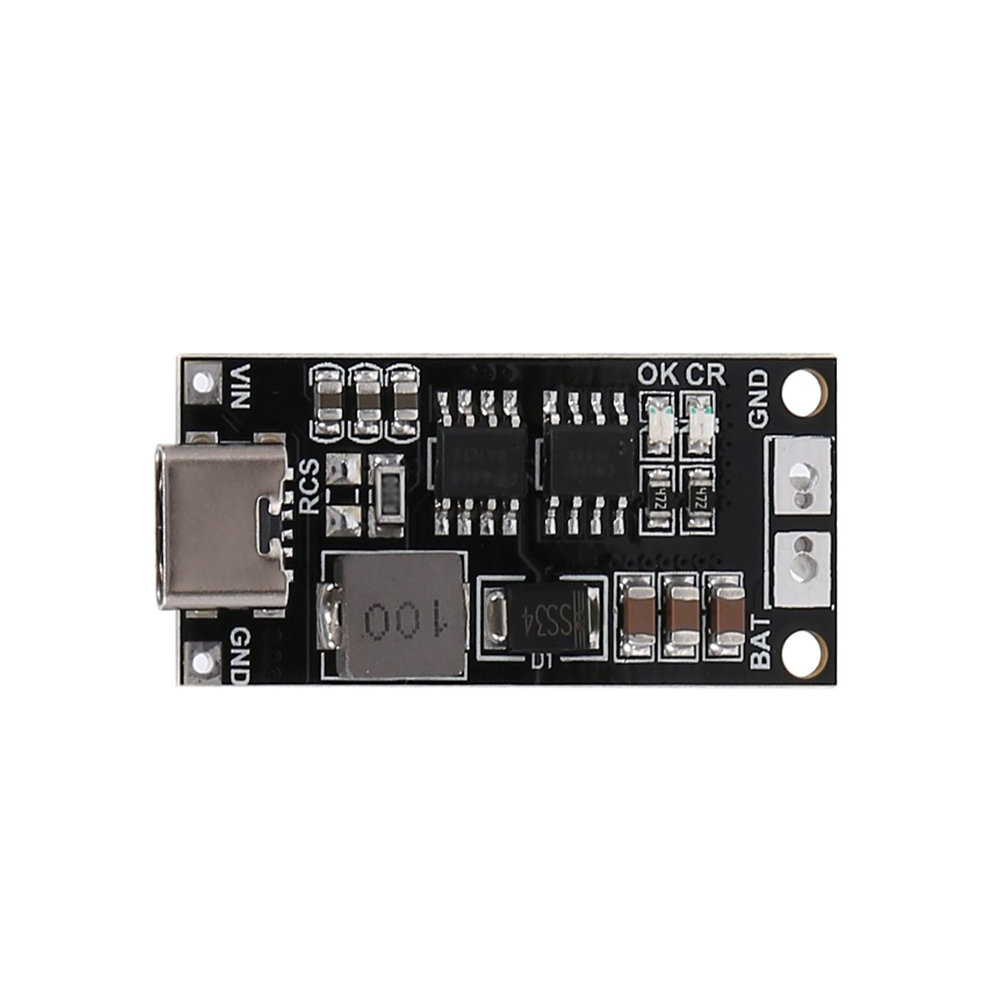
18650 Polymer Li-Ion Charger Type-C to 3S 12.6V 2A Booster Module
Charge your 3S 18650 battery pack via USB Type-C at 2A. Perfect for portable DIY battery packs that need convenient USB charging.
Safety Precautions and Common Mistakes
18650 battery pack building involves working with high-current, high-energy cells. Mistakes can cause fires, burns, and in rare cases, explosions. Follow these rules without exception:
- Never short circuit cells or the pack. Even a single 18650 can deliver 15–30A continuously. A short circuit with a screwdriver or nickel strip will cause immediate heating, venting, or fire.
- Work on an insulating surface. A wooden bench or rubber mat prevents accidental shorts through the work surface.
- Never mix old and new cells in the same pack — capacity mismatch causes accelerated degradation.
- Do not solder directly on cell terminals for more than 1 second — heat damages the internal components.
- Do not charge without a proper BMS — even once. An unprotected Li-Ion cell charged beyond 4.25V can vent or catch fire.
- Keep a fire extinguisher nearby (Class B or multipurpose ABC) during building and initial testing.
- Never store fully charged packs in hot spaces (cars in Indian summer, direct sunlight enclosures).
Frequently Asked Questions
Can I build an 18650 battery pack without a spot welder?
You can use cell holders instead of welded nickel strips for low-current applications (power banks, small electronics). For high-current packs (power tools, e-bikes), holders have too much contact resistance and can arc. Spring-contact holders are safer than direct soldering but still suboptimal compared to spot welding.
How long does a DIY 18650 battery pack last?
Quality 18650 cells last 300–500 cycles to 80% capacity with proper management. With a well-designed BMS that prevents over-charge and over-discharge, packs built with genuine cells regularly last 3–5 years in daily use. Salvaged cells from old laptop packs will have far fewer remaining cycles.
What is the best BMS current rating for a 48V e-bike battery?
A typical 48V hub motor draws 15–25A continuously and up to 40–50A in bursts on Indian roads. Use a 13S BMS rated for at least 30A continuous, with a 60A peak (or separate discharge BMS). Always buy a BMS rated significantly above your expected load for longevity.
How do I know if my DIY battery pack has a bad cell?
Monitor individual cell group voltages under load. A bad cell will drop faster than others, causing the BMS to cut off early even when other cells still have charge. A capacity tester or smart charger with logging can identify weak cells before the pack is fully assembled.
Can I use recycled laptop 18650 cells for a power bank?
Yes, but test every cell first. Capacity test each cell individually — discard any below 70% of rated capacity or with high internal resistance. Only use matched cells in the same parallel group. Recycled cells for a simple USB power bank are a great budget option, but never use them in high-current or safety-critical applications.
Start Building Your Battery Pack Today
A DIY 18650 battery pack with BMS is a learnable, rewarding project that saves money and teaches you the fundamentals of battery technology. Start small — a simple 1S or 2S power bank — before tackling a large e-bike or solar storage pack. Invest in quality cells and a proper BMS from the start, and your pack will serve you reliably for years.
Get all the components you need for your battery pack build. Shop 18650 holders, BMS boards, chargers and more at Zbotic — fast shipping across India!


Add comment