
The HC-12 433MHz wireless serial module is one of the most practical long-range communication tools available to Indian hobbyists. With a claimed range of up to 1800 metres in open air and a simple UART interface that any Arduino can speak, it bridges the gap between basic RF links and complex LoRa setups. This tutorial walks you through everything — from pinout and wiring to AT command configuration, multi-node networks, and real-world range tips.
What Is the HC-12 Module?
The HC-12 is a half-duplex wireless serial transceiver operating in the 433 MHz ISM band. It contains an Si4463 RF chip paired with a STM8L151G4U6 microcontroller that handles frequency hopping, modulation, and power management internally. From the user’s perspective, it presents a simple UART port — whatever bytes you send in come out the other end, wirelessly, up to 1 kilometre away (and beyond with a good antenna and line of sight).
Key Specifications
- Frequency range: 433.4 – 473.0 MHz (100 channels, 400 kHz spacing)
- Power output: Up to 100mW (20dBm) in FU3 mode
- Operating voltage: 3.2V – 5.5V (5V tolerant, ideal for Arduino)
- Default baud rate: 9600 bps
- Default channel: CH001 (433.4 MHz)
- Range: 100m (FU1 low power) to 1800m (FU4 with antenna, open air)
- Interface: UART (RX, TX) + SET pin for AT mode
- Current draw: 16mA receive, 100mA transmit (FU3 mode at 100mW)
Pinout & Wiring to Arduino
The HC-12 has 4 essential pins plus the antenna pad:
- VCC: 3.2V–5.5V power supply
- GND: Ground
- TXD: Module transmit → Arduino receive (RX)
- RXD: Module receive ← Arduino transmit (TX)
- SET: Pull LOW to enter AT command mode; leave HIGH (or float) for normal transparent serial mode
Wiring for two Arduino Uno boards:
Arduino A (Transmitter / Node 1):
- HC-12 VCC → 5V
- HC-12 GND → GND
- HC-12 TXD → Arduino pin 10 (SoftwareSerial RX)
- HC-12 RXD → Arduino pin 11 (SoftwareSerial TX)
- HC-12 SET → Arduino pin 9 (digital, optional for AT config)
Repeat the same wiring on Arduino B (Receiver / Node 2). Both modules default to the same channel and baud rate, so they’ll talk to each other right out of the box.
AT Command Configuration
To configure the HC-12, pull the SET pin LOW (connect to GND) before powering on, or pull it LOW and wait 40ms before sending commands. The baud rate for AT commands is always 9600 regardless of the configured data baud rate.
| Command | Description | Example |
|---|---|---|
AT |
Test communication | Returns OK |
AT+Bxxxx |
Set baud rate | AT+B115200 |
AT+Cxxx |
Set channel (001–100) | AT+C005 (435.4 MHz) |
AT+FUx |
Set transmission mode | AT+FU3 (max range) |
AT+Px |
Set power (1–8, 1=–1dBm, 8=20dBm) | AT+P8 |
AT+RX |
Read all parameters | Returns current config |
AT+DEFAULT |
Reset to factory defaults | — |
Transmission Modes:
- FU1: Low power mode, 250mW, up to 100m range. Baud rate fixed at 1200/2400.
- FU2: Low power, 9600 bps, <100m. For local sensor networks.
- FU3 (default): Full power, all baud rates, up to 1000m.
- FU4: Special long-range mode, baud fixed at 500 bps, range up to 1800m. Very slow but maximum distance.
First Sketch: Point-to-Point Wireless Serial
Here’s a minimal Arduino sketch for bidirectional communication between two HC-12 modules:
#include <SoftwareSerial.h>

// HC-12 on pins 10 (RX) and 11 (TX)
SoftwareSerial HC12(10, 11);

const int SET_PIN = 9; // SET pin for AT mode

void setup() {
  Serial.begin(9600);   // USB Serial for debugging
  HC12.begin(9600);     // HC-12 default baud
  pinMode(SET_PIN, OUTPUT);
  digitalWrite(SET_PIN, HIGH); // HIGH = normal transparent mode
  Serial.println("HC-12 Ready");
}

void loop() {
  // Forward USB Serial → HC-12 (transmit)
  if (Serial.available()) {
    HC12.write(Serial.read());
  }
  // Forward HC-12 → USB Serial (receive)
  if (HC12.available()) {
    Serial.write(HC12.read());
  }
}
Upload this identical sketch to both Arduinos. Open Serial Monitor on each at 9600 baud. Type on one — it appears on the other. That’s your wireless serial link. Now you can extend this to send sensor data, commands, or structured packets.
Sending Structured Sensor Data
For a real project, send comma-separated values and parse them on the receiver:
// Transmitter side — send temperature + humidity every 5s
void loop() {
  float temp = readTemperature(); // your sensor read function
  float hum  = readHumidity();
  HC12.print(temp);
  HC12.print(",");
  HC12.println(hum); // n marks end of packet
  delay(5000);
}

// Receiver side — parse incoming line
void loop() {
  if (HC12.available()) {
    String line = HC12.readStringUntil('n');
    int comma = line.indexOf(',');
    float temp = line.substring(0, comma).toFloat();
    float hum  = line.substring(comma + 1).toFloat();
    Serial.print("Temp: "); Serial.print(temp);
    Serial.print(" Hum: "); Serial.println(hum);
  }
}
Multi-Node Networks with HC-12
HC-12 supports up to 100 channels. You can create a simple star network by assigning different channels to different sensor nodes and a hub that cycles through channels to collect data. Alternatively, use a time-division scheme where each node transmits in a fixed time slot on the same channel.
For a simple multi-sensor network:
- Assign Node 1 to CH001 (433.4 MHz), Node 2 to CH002 (433.8 MHz), etc.
- The hub switches channels via AT commands (pulling SET pin low, sending AT+Cxxx, releasing SET pin) to poll each node in sequence.
- Channel switching takes about 40ms — fast enough for sensor polling applications.
Maximising Range: Antennas & Placement
The HC-12 comes with a short spring antenna that gives ~300–500m in practice. To push towards the advertised 1km+:
- Use a 1/4-wave monopole: For 433 MHz, a 1/4-wave antenna is 17.3cm of wire soldered to the antenna pad. Keep it vertical and clear of ground planes.
- Line of sight matters: 433 MHz Fresnel zone at 1km requires about 3m clearance above obstructions. Mount antennas as high as possible.
- Avoid metal enclosures: Place the module near the enclosure wall or use an external antenna connector.
- FU4 mode for max distance: At 500 bps (FU4), range nearly doubles. Use this for infrequent telemetry (GPS pings every 30 seconds, alarm notifications).
- Reduce interference: Channel 1 (433.4 MHz) is crowded in India — try channels 20–50 if you experience packet loss.
Project Ideas for Indian Makers
- Agricultural monitoring: Place soil moisture + temperature sensors across a farm. One HC-12 per node sends readings to a central Arduino with a display or GSM uplink, no Wi-Fi infrastructure needed.
- Wireless weather station: Sensor unit on the roof sends temperature, humidity, and rain gauge data to an indoor display via HC-12.
- RC robot control: Replace short-range 2.4GHz NRF24L01 links with HC-12 for driving robots or drones across a field with reliable 1km control range.
- Security perimeter: PIR sensors at boundary gates send wireless alerts to a central alarm panel via HC-12 links.
- Multi-point water tank level monitoring: Monitor water tanks in different buildings of a housing society without running cables.
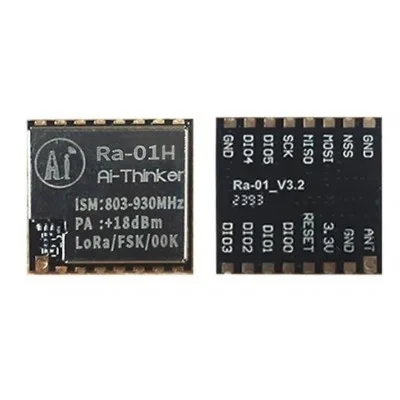
Ai Thinker LoRa Ra-01H Module
Need more range than HC-12? The Ra-01H LoRa module operates at 868/915 MHz with up to 10km line-of-sight range. Uses SPI interface with SX1276 chipset. Ideal for long-range IoT networks across large farms or campuses.

Ai Thinker LoRa Ra-01SC Module
A compact 433 MHz LoRa module with SPI interface. Complements or replaces HC-12 for projects needing LoRaWAN protocol support. Range up to 5km in open terrain with appropriate antennas.

0.96 Inch I2C OLED Module SSD1306
Display received sensor data on a compact OLED screen at your base station. The SSD1306 I2C OLED works perfectly with Arduino Uno and Nano, uses only 2 wires (SDA/SCL), and displays crisp white text on black background.
Frequently Asked Questions
Does HC-12 need a licence to operate in India?
The 433 MHz ISM band is licence-exempt in India under WPC (Wireless Planning & Coordination Wing) guidelines for low-power devices. The HC-12 at 100mW (20dBm) falls within the permitted limits. No individual licence is required for hobbyist and prototyping use. Commercial deployments in large quantities should verify current WPC regulations.
What is the real-world range of HC-12 in India?
In a typical Indian urban/suburban environment (trees, buildings, partial obstructions), expect 200–400m reliably in FU3 mode with the stock antenna. In rural open-field conditions with a 17cm wire antenna and FU4 mode, 800m–1.2km is achievable. The 1800m spec is best-case open-air lab measurement.
Can multiple HC-12 modules on the same channel interfere?
Yes. HC-12 uses a simple transparent UART bridge without collision detection (CSMA/CD). Multiple transmitters on the same channel will collide and corrupt data. Use different channels for simultaneous transmitters, or implement a time-division scheme where only one node transmits at a time.
Can I use HC-12 with ESP32 or Raspberry Pi instead of Arduino?
Absolutely. HC-12 is just a UART serial device. Connect TXD/RXD to any UART-capable GPIO. On ESP32, use Serial2 (GPIO16/17). On Raspberry Pi, use /dev/serial0. The module operates at 3.3V logic levels, making it compatible without level shifting for 3.3V systems like ESP32.
What is the difference between HC-12 and NRF24L01?
NRF24L01 operates at 2.4 GHz with a range of 100–1000m (with PA+LNA version) but requires SPI interface and a more complex library. HC-12 at 433 MHz has better obstacle penetration, simpler UART interface, and comparable or better range in real environments. HC-12 is preferred for longer distances and simpler code; NRF24L01 for higher data rates (2 Mbps) and lower latency.
Start Your Wireless Project Today
Zbotic stocks HC-12 modules, LoRa transceivers, OLED displays, and all the components you need for long-range wireless Arduino projects. Fast delivery across India.


Add comment