
If you are building a wheeled robot in India — whether a line follower, autonomous delivery bot, or differential drive robot — one of the most important hardware decisions you will make is whether to use a geared motor with encoder or to assemble your own combination from separate parts. This choice affects your cost, your assembly complexity, your code, and ultimately how precisely your robot can navigate.
This guide is specifically written for Indian makers and students who are weighing the buy-vs-DIY decision on geared encoder motors. We cover the technical essentials, the cost landscape as it exists in India’s electronics market, compatibility with popular controllers like Arduino and Raspberry Pi, and how to get the best performance from whichever path you choose.
What Is a Geared Motor with Encoder?
A geared motor with encoder is a DC motor combined with a reduction gearbox (to trade speed for torque) and a rotary encoder (to measure how far and how fast the shaft has turned). These three components — motor, gearbox, and encoder — are packaged together in a single unit with a standardised connector.
The gearbox reduces the raw motor speed (which might be 10,000–15,000 RPM) down to a usable wheel speed, typically 100–1500 RPM depending on the gear ratio selected. Common ratios are 1:20, 1:50, and 1:100. A higher ratio means more torque and slower speed — appropriate for heavy robots or robots climbing inclines. A lower ratio gives faster movement at the cost of torque.
The encoder sits on the rear of the motor shaft (before the gearbox), counting pulses as the shaft rotates. Many cheap encoders give 11–20 pulses per revolution of the motor shaft; after the gear reduction, this multiplies by the gear ratio. A 1:50 gearbox with an 11 PPR encoder gives an effective resolution of 550 pulses per output shaft revolution — enough for millimetre-level positioning on a typical robot wheel.
Encoder Types: Optical vs Magnetic
Two technologies dominate geared motor encoders at the hobbyist price range:
Optical encoders use an LED and photodetector pair looking through a slotted disc attached to the motor shaft. As the shaft turns, slots pass the light beam and generate pulses. They are accurate, immune to magnetic interference, and reliable. However, they can be fooled by vibration if the disc develops play, and dust can block the optical path in very harsh environments.
Magnetic encoders (Hall effect) use a small magnet on the shaft and Hall-effect sensors that detect the rotating magnetic field. They are more robust in dusty or wet conditions and have no mechanical slotted disc to wear out. Most modern geared encoder motors in the Indian hobbyist market (like the 25GA-370 series) use magnetic Hall-effect encoders. These require a supply voltage (typically 3.3 V or 5 V) and output two quadrature signals (Channel A and Channel B) that let you determine both speed and direction.
Why Encoders Matter for Wheel Odometry
Without an encoder, a wheeled robot is blind to how far it has actually travelled. You can command a motor to run at a certain PWM duty cycle for a certain duration, but real-world variables — battery voltage, surface friction, wheel slip, motor wear — mean the actual distance covered varies significantly. On a polished floor, a robot running open-loop might end up centimetres off from its intended destination after just a metre of travel.
With encoders, you implement closed-loop wheel odometry: the microcontroller reads encoder pulses, calculates actual wheel speed and distance, and adjusts PWM in real time to match the commanded velocity. Two popular control algorithms are used:
- PID velocity control — maintains a commanded speed despite load changes. Essential for differential drive robots to drive in a straight line.
- Position control — moves to a target encoder count and stops. Used for precise manoeuvres, parking, or turn-in-place operations.
For competition robots (RoboRace, WRO, Tech Fest challenges in India), encoders are essentially mandatory. Even for classroom projects, a robot with encoders impresses judges far more than one that just runs open-loop.
Buying a Ready-Made Geared Encoder Motor
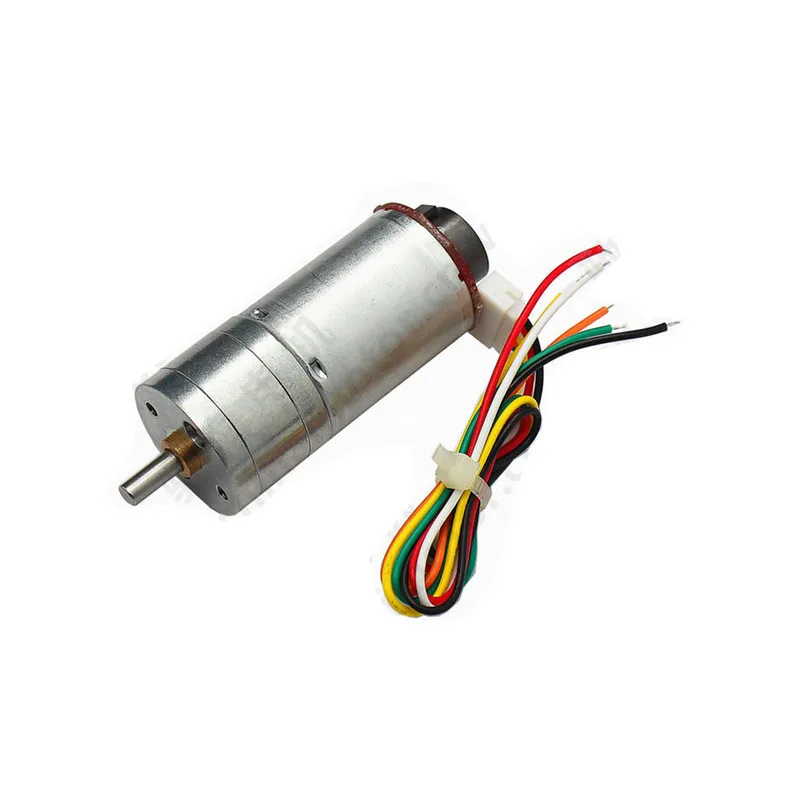
Ready-made geared encoder motors come as a complete assembly: DC motor + gearbox + encoder board, with a multi-pin connector (typically 6-pin: two for motor power, two for encoder supply, two for encoder output A/B). The most popular form factors in India are:
25GA-370 series — 25 mm diameter, 370-type motor core, available in multiple gear ratios. Available with and without encoder. This is the sweet spot for most wheeled robots: compact, good torque, widely available in India at reasonable prices. The encoder version adds Hall sensors and 11 PPR resolution.
GA37 / TT motor with encoder — Smaller, used in mini robots and educational kits. Less torque than 25GA but lighter and cheaper.
JGA25-370 / JGB37-520 — Larger, higher-torque variants with a longer motor body and stronger gearboxes, suitable for heavier robots (1–10 kg).
Advantages of buying ready-made:
- Perfect shaft alignment between motor and encoder (critical for accuracy)
- Factory-assembled, consistent quality
- Single connector handles all wiring
- Compact — fits into tight chassis designs
- Comes with datasheet specifying PPR, gear ratio, torque, and no-load speed
Disadvantages:
- Limited customisation — you cannot change gear ratio or encoder PPR
- If the encoder board fails, you may need to replace the whole unit
- Higher unit cost than a plain geared motor
The DIY Approach: Separate Motor + Encoder
The DIY path involves buying a plain geared DC motor and attaching your own encoder. Common approaches include:
Disc encoder on output shaft — You 3D print or laser-cut a slotted encoder disc and mount it on the output shaft, paired with an IR sensor module. This works but gives low resolution (typically 10–20 slots per revolution of the output shaft) and is mechanically delicate.
Magnetic encoder on motor shaft — More sophisticated DIYers remove the motor’s rear cap and attach a tiny diametrically-magnetised magnet to the back of the rotor shaft, then mount an AS5048 or similar magnetic encoder IC on a custom PCB. This gives high resolution but requires precision machining and PCB fabrication skills.
Hall effect add-on board — Some open-source encoder PCBs (like those designed for N20 or 775 motors) can be adapted to other motor bodies. This requires drilling, tapping, and careful alignment.
Why DIY is usually not worth it in India:
- Shaft alignment is critical — even 0.1 mm eccentricity causes counting errors
- 3D printing an accurate encoder disc is harder than it looks — FDM printers struggle with the fine slots needed for high PPR
- The cost saving versus buying a 25GA-370 encoder motor is often only ₹100–200, which buys nothing at the cost of hours of work
- Ready-made solutions are now cheap enough in India that DIY rarely makes economic sense for this specific task
DIY encoders make sense when: you have an existing motor with a non-standard form factor, you need extremely high resolution beyond what packaged motors offer, or you are specifically studying encoder design as a learning objective.
Cost Comparison in India
| Option | Approx. Cost (₹) | Time to Build |
|---|---|---|
| 25GA-370 plain gear motor | ₹180–250 | Plug and play |
| 25GA-370 with encoder (ready) | ₹320–450 | Plug and play |
| Plain motor + DIY disc encoder | ₹200–320 (+ filament + time) | 3–8 hours |
| Plain motor + AS5048 magnetic encoder | ₹400–700 (PCB + IC + magnet) | Days (PCB fab + assembly) |
The verdict is clear: for most Indian robotics projects, buying a 25GA-370 with encoder is the most cost-effective, time-efficient, and reliable solution. The ₹150–200 premium over a plain motor buys you a factory-calibrated, precisely aligned encoder that will give consistent readings from day one.
Using Encoder Motors with Arduino and Raspberry Pi
Wiring a 25GA-370 encoder motor (6-pin connector) to an Arduino or Raspberry Pi involves two subsystems:
Motor power (2 wires): Connect to an H-bridge driver (L298N, L293D, or TB6612FNG). Never connect motor wires directly to a microcontroller GPIO — the current draw will damage the pin or the controller.
Encoder (4 wires): VCC (3.3 V or 5 V), GND, Channel A, Channel B. Connect A and B to interrupt-capable GPIO pins on Arduino (pins 2 and 3 on Uno, or any pin on Mega/ESP32). Use an interrupt service routine (ISR) to count pulses accurately at high speeds.
Sample Arduino ISR pattern:
volatile long encoderCount = 0;

void setup() {
  pinMode(2, INPUT_PULLUP); // Encoder A
  pinMode(3, INPUT_PULLUP); // Encoder B
  attachInterrupt(digitalPinToInterrupt(2), encoderISR, CHANGE);
}

void encoderISR() {
  if (digitalRead(2) == digitalRead(3)) {
    encoderCount++;
  } else {
    encoderCount--;
  }
}
For Raspberry Pi, use the pigpio library which handles encoder callbacks in a real-time thread, giving much better accuracy than RPi.GPIO. For ROS2 users, a dedicated differential drive node with encoder feedback is the standard approach.
Which Should You Choose?
Buy a ready-made geared encoder motor if:
- You are building a wheeled robot for a competition or course project
- You need reliable, repeatable performance from multiple motors
- You want to spend your time on software and algorithm development, not hardware assembly
- Your budget allows ₹300–450 per motor
Build DIY if:
- You are learning encoder design as a specific educational goal
- You have a large, custom motor that has no packaged encoder option
- You need very high resolution (>1000 PPR at output shaft) not available in packaged units
Recommended Products from Zbotic
25GA-370 12V 12RPM DC Reducer Gear Motor with Encoder
Low-speed, high-torque 25mm gear motor with Hall encoder — perfect for slow-moving heavy robots that need precise position control.
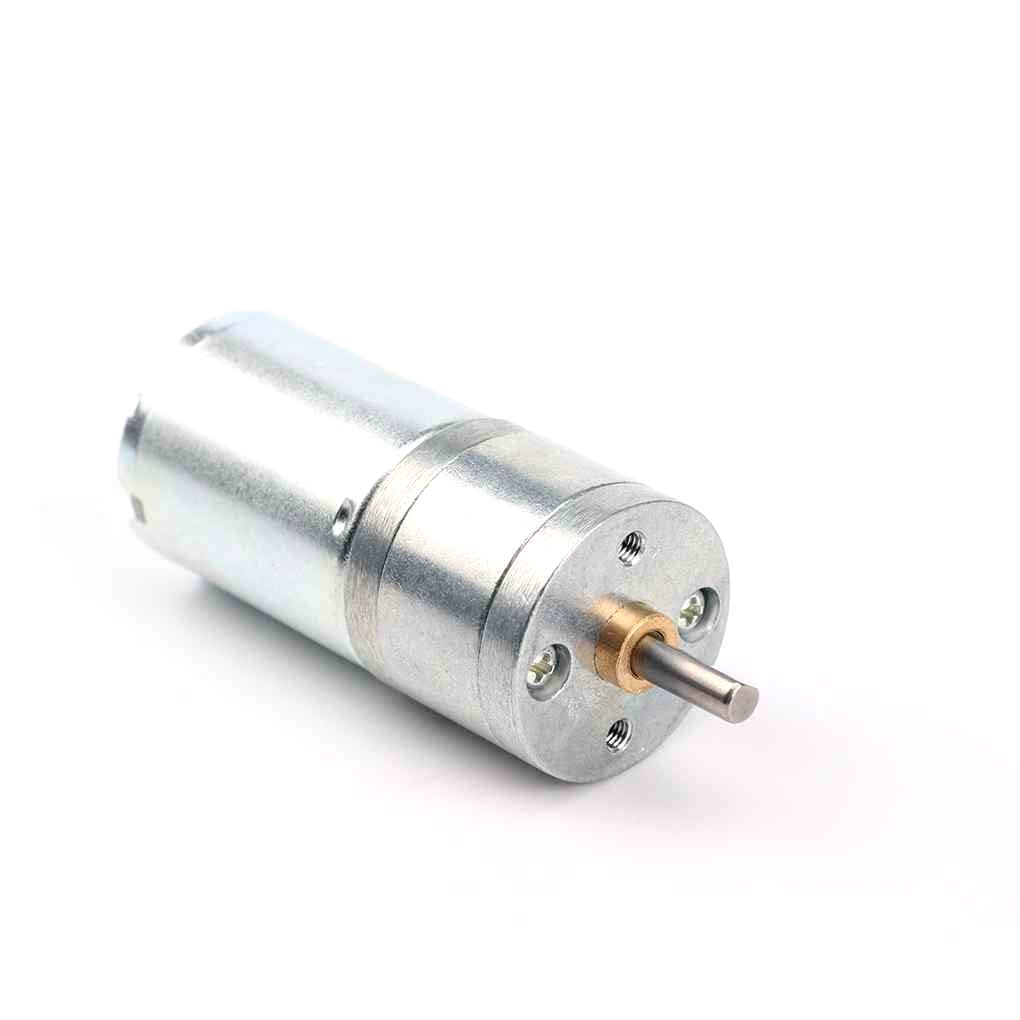
25GA-370 12V 12RPM DC Reducer Gear Motor (Plain)
The plain version without encoder — ideal if you just need reliable gear motor power and plan to add your own sensing, or for open-loop drive systems.

25GA-370 12V 1360RPM DC Reducer Gear Motor
Higher-speed variant of the 25GA-370 series — suited for fast-moving robots on flat surfaces where speed matters more than holding torque.
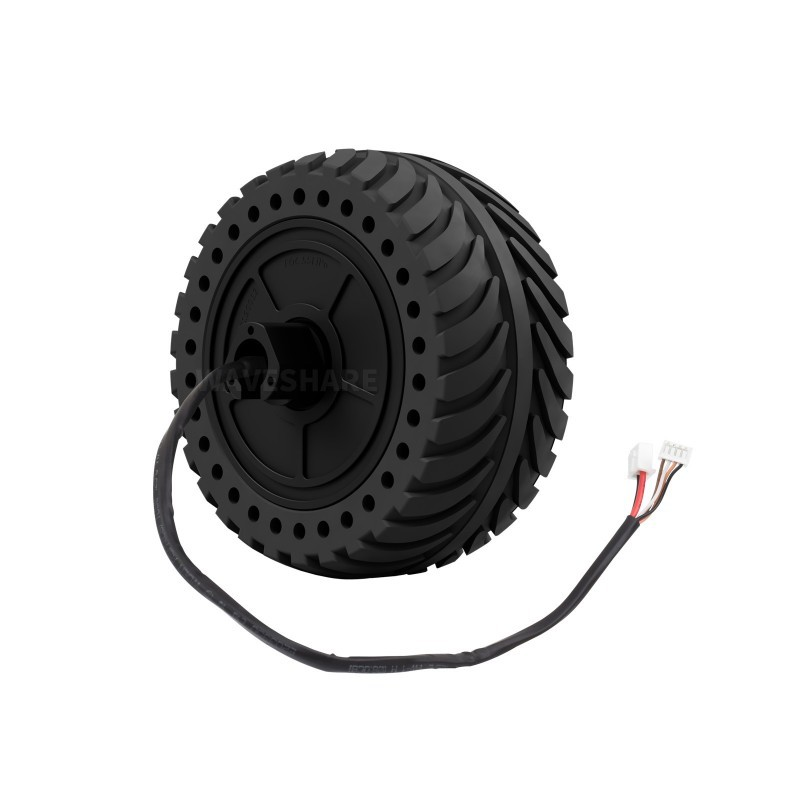
Waveshare DDSM115 Direct Drive Servo Hub Motor
Premium hub motor for UGV platforms — built-in closed-loop control and encoder, no external driver needed, ideal for research-grade wheeled robots.
Frequently Asked Questions
What does PPR mean for a geared motor encoder?
PPR stands for Pulses Per Revolution — the number of encoder counts generated per full revolution of the motor shaft. After the gearbox, multiply PPR by the gear ratio to get effective counts per wheel revolution. A 1:50 gearbox with 11 PPR motor encoder gives 550 counts/revolution of the output shaft.
What voltage do I supply to the encoder on a 25GA-370?
Most 25GA-370 encoder variants accept 3.3 V or 5 V on the encoder VCC pin. Check the datasheet for your specific module. The motor itself runs on 6–12 V DC. Never connect 12 V to the encoder VCC — this will destroy the Hall-effect ICs.
Can I use these motors with an L298N motor driver?
Yes. Connect the two motor power wires to an L298N output. Connect the four encoder wires (VCC, GND, A, B) directly to your microcontroller — the L298N does not handle encoder signals. Keep encoder signal wires away from motor power wires to avoid noise pickup.
How accurate is wheel odometry with a 25GA-370 encoder?
With a 1:50 gear ratio and 11 PPR encoder, you get 550 counts/revolution. On a 65 mm diameter wheel (common in robot kits), circumference is ~204 mm, giving resolution of ~0.37 mm per count. Practically, expect ±5–10 mm accuracy over 1 m of travel, which is excellent for most indoor robots.
Do I need two encoders for a differential drive robot?
Yes — one encoder per driven wheel. Differential drive relies on measuring the independent velocity of each wheel to calculate heading and distance. A single encoder can only tell you total forward distance, not turns. Always use matched motors and encoder specifications for both sides.
Zbotic stocks geared encoder motors, motor drivers, and complete robotics wheel kits — fast shipping across India.


Add comment