
If you are building a battery-powered IoT device with the ESP8266, understanding and reducing ESP8266 power consumption in sleep mode is absolutely critical. The ESP8266 is an incredibly capable WiFi microcontroller, but its active current draw of 60-170mA makes battery life very short without careful power management. The good news is that the ESP8266 has multiple sleep modes that can reduce current consumption to as low as 20 microamps — extending battery life from hours to months or even years. In this comprehensive guide, we will explore all sleep modes, how to implement them, and the best practices for building ultra-low-power ESP8266 IoT devices in India.
ESP8266 Power Consumption Overview
Before you can reduce power consumption, you need to understand how much current the ESP8266 draws in different operating states. These numbers are crucial for estimating battery life.
ESP8266 Current Consumption Reference Table
| Operating Mode | Typical Current | Notes |
|---|---|---|
| TX (Transmitting at max power) | 170mA peak | Short bursts during WiFi TX |
| Active (WiFi on, no TX) | 60-80mA | Connected to router, idle |
| Modem Sleep | 15-20mA | CPU active, WiFi off |
| Light Sleep | 0.5-1mA | CPU suspended, timer wake |
| Deep Sleep (RF off) | 20µA | Only RTC active |
| Deep Sleep (RF calibration on wake) | ~70µA average | Includes wake-up burst |
The difference between active mode (80mA) and deep sleep (20µA) is a factor of 4000. This difference translates directly into battery life. An ESP8266 running continuously at 80mA would drain a 2000mAh 18650 cell in about 25 hours. The same device spending 99% of its time in deep sleep could last over 3 years on the same battery.
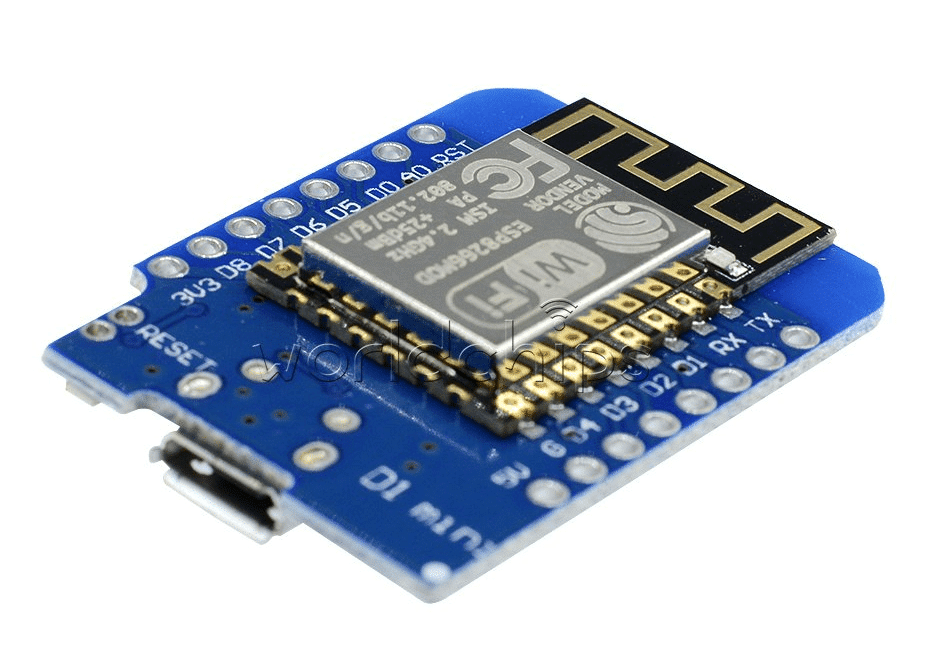
D1 Mini V2 NodeMCU 4M Bytes Wi-Fi IoT Development Board (ESP8266)
The compact D1 Mini is the perfect ESP8266 board for battery-powered projects — its small size and low standby current make it ideal for sleep-mode IoT sensors.
ESP8266 Sleep Modes Explained
The ESP8266 supports three distinct sleep modes, each offering a different trade-off between power savings and functionality.
Mode 1: Modem Sleep
In Modem Sleep, the WiFi modem is turned off between DTIM (Delivery Traffic Indication Message) beacon intervals. The CPU continues running normally. This is the least power-saving mode but maintains the WiFi connection, allowing the device to wake when data arrives.
Best for: Devices that need to stay connected and respond to server-initiated commands, but don’t need to transmit constantly.
Mode 2: Light Sleep
In Light Sleep, the CPU is also suspended between DTIM intervals. Clock speed is reduced. The device remains associated with the WiFi access point. Wake sources include a timer, GPIO pin change, or incoming WiFi packet.
Best for: Devices that must stay on the network but can tolerate brief delays (50-100ms) to wake up and respond.
Mode 3: Deep Sleep
In Deep Sleep, everything is powered off except the Real-Time Clock (RTC). No WiFi connection is maintained. The device wakes up after a set timer, performs its task (read sensor + send data), and goes back to sleep. Wake-up requires RST pin to be connected to GPIO16.
Best for: Sensors that send data periodically (every 1-60 minutes) and can afford the 1-3 second reconnection time after waking.
Modem Sleep Implementation
Modem Sleep is the easiest to implement and works with the standard Arduino WiFi library for the ESP8266.
#include <ESP8266WiFi.h>

void setup() {
  Serial.begin(115200);
  WiFi.begin("YourSSID", "YourPassword");
  while (WiFi.status() != WL_CONNECTED) delay(500);
  Serial.println("WiFi connected");

  // Enable Modem Sleep
  wifi_set_sleep_type(MODEM_SLEEP_T);
  Serial.println("Modem sleep enabled");
}

void loop() {
  // Your normal code here
  // WiFi modem automatically sleeps between DTIM intervals
  // WiFi wakes automatically when you need to transmit
  delay(1000);
}
Modem Sleep reduces current from ~80mA to ~15-20mA. For a device that only transmits data occasionally but needs to stay connected, this gives 3-4x better battery life with no code changes beyond enabling it.
Light Sleep Implementation
Light Sleep suspends the CPU between wake events. On the ESP8266 Arduino SDK, you can enable it similarly to Modem Sleep:
#include <ESP8266WiFi.h>
extern "C" {
  #include "user_interface.h"
}

void setup() {
  Serial.begin(115200);
  WiFi.begin("YourSSID", "YourPassword");
  while (WiFi.status() != WL_CONNECTED) delay(500);

  // Enable Light Sleep
  wifi_set_sleep_type(LIGHT_SLEEP_T);

  // Set DTIM interval (how often to check for incoming packets)
  // Higher value = more sleep = better battery but higher latency
  // Default is 3 (listen every 3 beacon intervals = ~307ms)
}

void loop() {
  // CPU auto-sleeps between loop() calls when using delay()
  // Use delay() to give the system time to actually sleep
  Serial.println("Running...");
  delay(5000); // During this delay, CPU and modem can sleep
}
Light Sleep reduces current from ~80mA down to about 0.5-1mA between transmissions — roughly 80-160x improvement over fully active mode.
Deep Sleep: Maximum Power Saving
Deep Sleep is the most powerful energy-saving mode for the ESP8266 and is the go-to choice for battery-powered sensor nodes. The key hardware requirement is connecting GPIO16 (D0 on NodeMCU) to RST pin — this allows the RTC to trigger a reset and wake the ESP8266 from deep sleep.
Hardware Requirement
Connect a wire (or a 10K resistor) from GPIO16 (D0) to RST on your ESP8266 board. Without this connection, the ESP8266 cannot wake itself from deep sleep.
Deep Sleep Code Example
#include <ESP8266WiFi.h>
#include <DHT.h>

#define DHTPIN D4
#define DHTTYPE DHT11
DHT dht(DHTPIN, DHTTYPE);

const char* ssid     = "YourSSID";
const char* password = "YourPassword";
const char* server   = "http://your-server.com/api/data";

// Deep sleep for 10 minutes (in microseconds)
#define SLEEP_INTERVAL_US 600000000UL

void setup() {
  Serial.begin(115200);
  Serial.println("nWoke from deep sleep!");

  dht.begin();
  delay(2000); // DHT11 warm-up time

  float temp = dht.readTemperature();
  float hum  = dht.readHumidity();

  if (!isnan(temp) && !isnan(hum)) {
    Serial.printf("Temp: %.1fC, Humidity: %.1f%%n", temp, hum);

    // Connect WiFi with quickest possible connection
    WiFi.mode(WIFI_STA);
    WiFi.begin(ssid, password);

    int attempts = 0;
    while (WiFi.status() != WL_CONNECTED && attempts < 20) {
      delay(500);
      attempts++;
    }

    if (WiFi.status() == WL_CONNECTED) {
      sendData(temp, hum);
    }
  }

  Serial.printf("Going to deep sleep for %lu seconds...n", SLEEP_INTERVAL_US / 1000000);
  Serial.flush();
  ESP.deepSleep(SLEEP_INTERVAL_US);
  // Execution resumes from setup() after waking up
}

void sendData(float temp, float hum) {
  // HTTP POST to server
  WiFiClient client;
  // ... HTTP code here
}

void loop() {
  // Never reached in deep sleep application
}
Saving WiFi Credentials to RTC Memory for Faster Wake
The biggest power cost after waking from deep sleep is the WiFi reconnection (1-3 seconds at ~70mA). You can save WiFi connection parameters to RTC memory to skip the channel scan:
// Save before sleeping:
RTCData rtcData;
rtcData.channel = WiFi.channel();
memcpy(rtcData.bssid, WiFi.BSSID(), 6);
rtcData.ip = WiFi.localIP();
// ... save other IP config
ESP.rtcUserMemoryWrite(0, (uint32_t*)&rtcData, sizeof(rtcData));

// On wake, use saved channel/BSSID to reconnect instantly:
WiFi.begin(ssid, password, rtcData.channel, rtcData.bssid, true);
This technique reduces WiFi reconnection time from 3 seconds to about 1 second — saving significant energy in high-frequency wake cycles.

ESP8266 ESP-12F Module – Serial WiFi Witty Cloud Development Board
The ESP8266 ESP-12F offers maximum deep sleep efficiency with its minimal board design — ideal for custom low-power sensor nodes with optimized power circuitry.
Calculating Battery Life for Your Project
Use this formula to estimate how long your battery will last:
Battery Life (hours) = Battery Capacity (mAh) ÷ Average Current (mA)
Example: Sensor Node Waking Every 10 Minutes
- Deep sleep current: 0.02mA (20µA) for 598 seconds
- Active current: 80mA for 2 seconds (WiFi connect + send + back to sleep)
- Average current = (0.02 × 598 + 80 × 2) / 600 = (11.96 + 160) / 600 = 0.287mA
- Battery: 2 × 18650 = 6000mAh
- Battery life = 6000 / 0.287 = 20,907 hours = about 2.4 years!
Example: High-Frequency Node (Every 1 Minute)
- Average current = (0.02 × 57 + 80 × 3) / 60 = (1.14 + 240) / 60 = 4.02mA
- Battery life = 6000 / 4.02 = 1492 hours = about 62 days
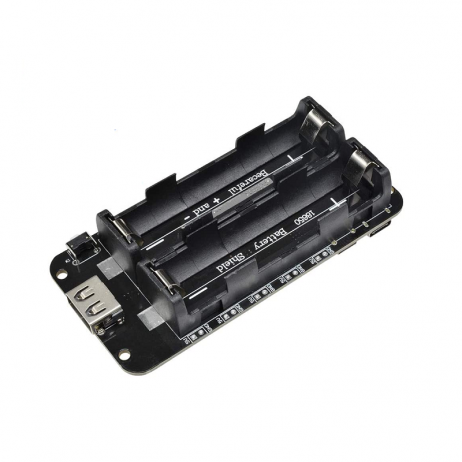
2 x 18650 Lithium Battery Shield for Arduino/ESP32/ESP8266
Power your battery-operated ESP8266 IoT sensor with this dual 18650 shield — combine it with deep sleep mode for weeks or months of autonomous operation.
Hardware Tips for Ultra-Low Power Design
Reducing ESP8266 sleep mode current is not just about software — hardware decisions have an equally large impact.
1. Remove or Bypass the USB-UART Chip
On NodeMCU and similar development boards, the USB-to-UART chip (CH340 or CP2102) consumes 5-10mA constantly. For production battery-powered devices, use a bare ESP-12F module instead of a development board, or desolder/disable the UART chip.
2. Replace or Remove the Power LED
The power LED on most ESP8266 boards draws 1-5mA continuously. Desolder it or put a larger resistor in series for production builds.
3. Use an LDO Regulator with Low Quiescent Current
The AMS1117 3.3V regulator on most ESP8266 boards has a quiescent current of ~5mA. Replace it with an XC6206 (Iq = 1µA) or MCP1703 (Iq = 2µA) for dramatic deep sleep improvements.
4. Power Down External Sensors During Sleep
If you have sensors like DHT11, BMP280, or soil moisture sensors, power them from a GPIO pin rather than the 3.3V rail. Set the GPIO LOW before sleeping to cut sensor power entirely.
#define SENSOR_POWER_PIN D3

// Before reading sensor:
digitalWrite(SENSOR_POWER_PIN, HIGH);
delay(500); // Let sensor power up
// ... read sensor

// Before sleeping:
digitalWrite(SENSOR_POWER_PIN, LOW);
5. Disable WiFi Before Sleeping
WiFi.disconnect();
WiFi.mode(WIFI_OFF);
delay(1);
ESP.deepSleep(SLEEP_INTERVAL_US, WAKE_RF_DISABLED);
Frequently Asked Questions
Q1: What is the maximum deep sleep duration for the ESP8266?
The ESP8266’s RTC timer is a 32-bit register with ~3.5 hours maximum. If you need longer sleep periods, wake up, immediately check if it’s time to actually send data, and if not, go back to deep sleep without connecting to WiFi. Use RTC memory to count the number of sleep cycles.
Q2: My ESP8266 won’t wake from deep sleep — what is wrong?
The most common cause is a missing or incorrectly wired GPIO16-to-RST connection. GPIO16 must be connected directly to RST. Also, make sure GPIO16 is not driven by any other circuit during normal operation, as it doubles as the wake pin. On NodeMCU boards with a button, the RST button should still function normally.
Q3: Does deep sleep affect the WiFi connection?
Yes. Deep sleep completely disconnects from WiFi. On waking, the ESP8266 must go through the full WiFi association process (scan, authenticate, associate, DHCP). This takes 1-3 seconds. Use static IP and saved BSSID/channel in RTC memory to reduce this to about 1 second.
Q4: Can I use an external RTC like DS3231 to wake the ESP8266 from deep sleep?
Yes! You can configure the DS3231 alarm to pull the ESP8266’s RST pin LOW at a specific time. This gives you extremely accurate wake-up timing (within 1 second) independent of the ESP8266’s own RTC, which can drift over time, especially with temperature changes.
Q5: How does ESP8266 deep sleep compare to ESP32 deep sleep?
The ESP32 achieves approximately 10µA in deep sleep (vs 20µA for ESP8266) and has more flexible wake sources including touch pins, GPIO level, timer, and ULP coprocessor activity. The ESP32 also has built-in hall sensor and can run a simple coprocessor during deep sleep without waking the main cores.
Build Ultra-Long Battery Life IoT Sensors
With the right sleep mode strategy, your ESP8266 sensor can run for months or years on a single charge. Find ESP8266 modules, DHT11 sensors, and 18650 battery shields at Zbotic — your one-stop IoT components store in India.


Add comment