
One of the most satisfying beginner-to-intermediate ESP32 projects is building an ESP32 HTTP web server GPIO control browser application — turning on an LED, relay, or motor by clicking a button on a webpage hosted directly on the chip. No cloud service, no app, no internet required. Your ESP32 serves a webpage over your local Wi-Fi, and any device on the same network — phone, laptop, tablet — can control it just by opening a browser. In this comprehensive guide, we’ll build a fully-featured GPIO control web server from scratch, progressively adding features from a simple LED toggle to a multi-channel relay controller with real-time feedback.
- How ESP32 HTTP Web Server Works
- Project 1: Simple LED Toggle Server
- Project 2: ESPAsyncWebServer for Better Performance
- Project 3: Multi-GPIO Control with Status Display
- Project 4: Sensor Dashboard with Auto-Refresh
- Adding Basic Security: Password Protection
- mDNS: Access Your ESP32 by Name
- Frequently Asked Questions
How ESP32 HTTP Web Server Works
The ESP32 HTTP web server GPIO control browser concept is simple: the ESP32 connects to your Wi-Fi router as a station (client), gets an IP address (e.g., 192.168.1.45), and runs an HTTP server on port 80. When you type that IP address into your browser, the browser sends an HTTP GET request to the ESP32. The ESP32’s web server handles the request, generates an HTML response, and sends it back — just like any web server, but running on a microcontroller.
GPIO control happens via URL paths. For example:
http://192.168.1.45/— Serves the main control pagehttp://192.168.1.45/gpio/2/on— Turns GPIO 2 HIGHhttp://192.168.1.45/gpio/2/off— Turns GPIO 2 LOWhttp://192.168.1.45/status— Returns JSON with current pin states
This URL-based control makes it trivial to automate from scripts, integrate with home automation platforms like Home Assistant, or trigger from Telegram bot webhooks.
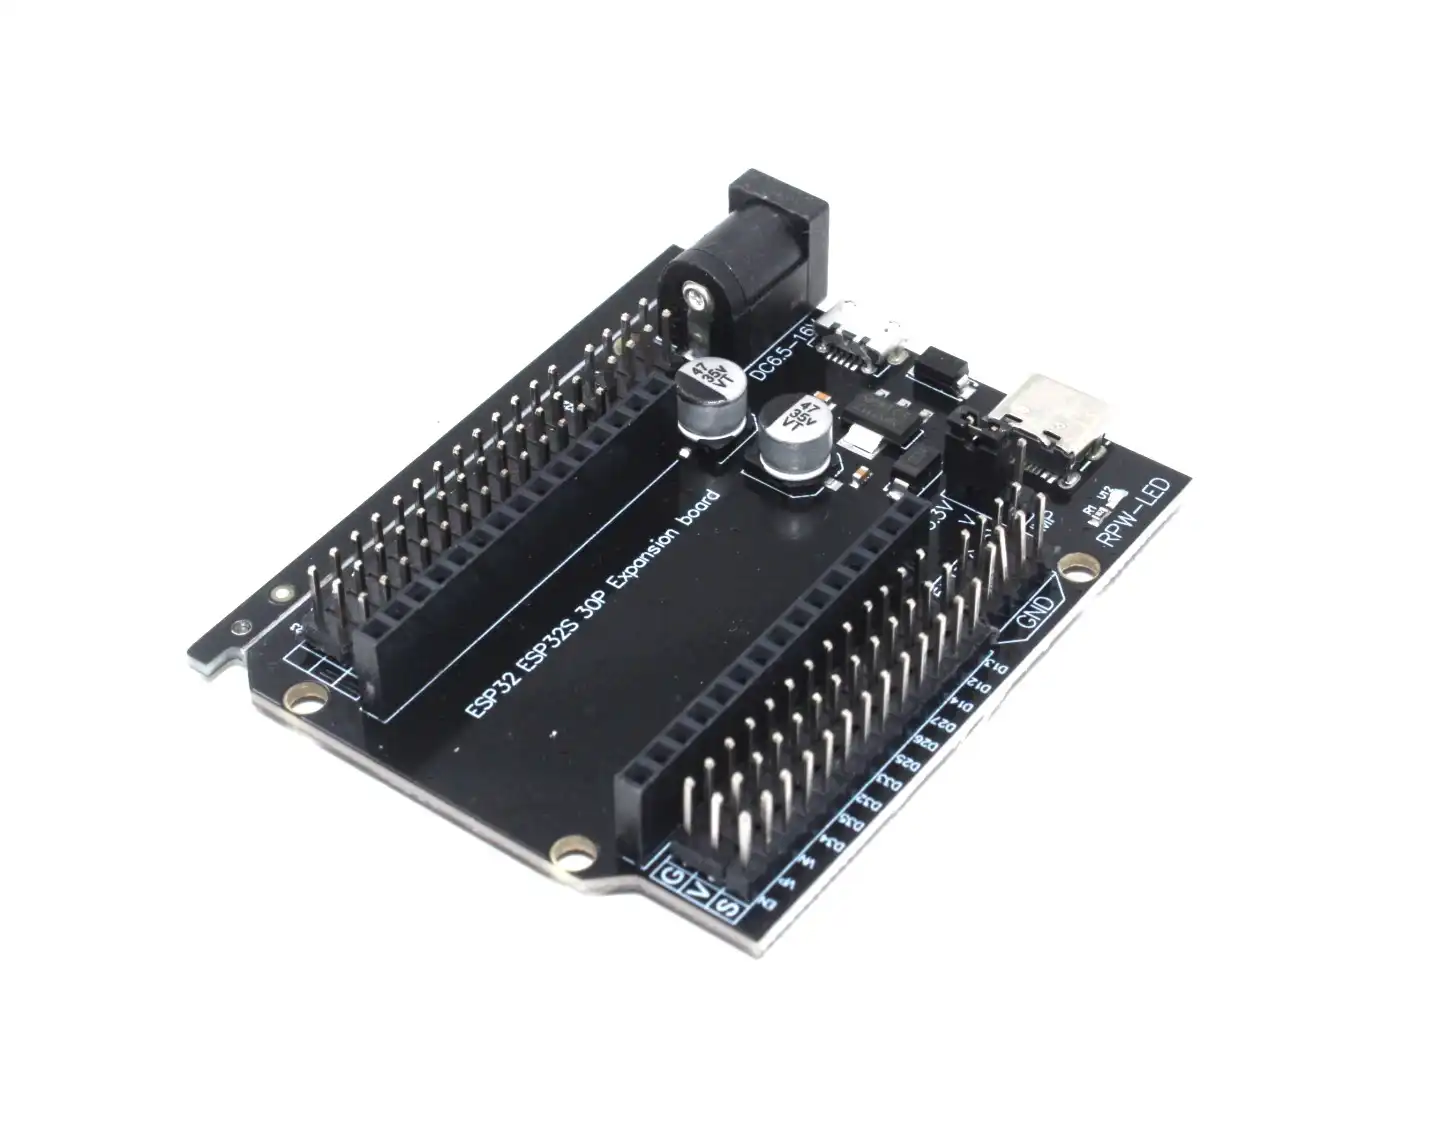
30Pin ESP32 Expansion Board with Type-C USB and Micro USB
This expansion board breaks out all ESP32 GPIO pins with labelled headers, making it easy to connect LEDs, relays, and sensors for your HTTP web server control project.
Project 1: Simple LED Toggle Server
Let’s start with the simplest possible implementation using the built-in WebServer library included with the ESP32 Arduino core:
#include <WiFi.h>
#include <WebServer.h>

const char* ssid = "YourWiFi";
const char* password = "YourPassword";

#define LED_PIN 2
WebServer server(80);
bool ledState = false;

const char* htmlPage = R"(
<!DOCTYPE html>
<html>
<head>
  <meta charset='UTF-8'>
  <meta name='viewport' content='width=device-width,initial-scale=1'>
  <title>ESP32 GPIO Control</title>
  <style>
    body { font-family: Arial, sans-serif; text-align: center; margin: 50px; }
    .btn { padding: 20px 40px; font-size: 20px; border: none; border-radius: 8px;
           cursor: pointer; margin: 10px; }
    .on  { background: #4CAF50; color: white; }
    .off { background: #f44336; color: white; }
  </style>
</head>
<body>
  <h1>ESP32 LED Control</h1>
  <p>LED is: <strong id='state'>...</strong></p>
  <button class='btn on'  onclick="fetch('/on') .then(()=>document.getElementById('state').innerText='ON')">Turn ON</button>
  <button class='btn off' onclick="fetch('/off').then(()=>document.getElementById('state').innerText='OFF')">Turn OFF</button>
  <script>
    fetch('/status').then(r=>r.json()).then(d=>document.getElementById('state').innerText=d.led?'ON':'OFF');
  </script>
</body>
</html>
)";

void handleRoot() {
  server.send(200, "text/html", htmlPage);
}

void handleOn() {
  ledState = true;
  digitalWrite(LED_PIN, HIGH);
  server.send(200, "text/plain", "LED ON");
}

void handleOff() {
  ledState = false;
  digitalWrite(LED_PIN, LOW);
  server.send(200, "text/plain", "LED OFF");
}

void handleStatus() {
  String json = "{"led":" + String(ledState ? "true" : "false") + "}";
  server.send(200, "application/json", json);
}

void setup() {
  Serial.begin(115200);
  pinMode(LED_PIN, OUTPUT);
  WiFi.begin(ssid, password);
  while (WiFi.status() != WL_CONNECTED) delay(500);
  Serial.println("IP: " + WiFi.localIP().toString());

  server.on("/", handleRoot);
  server.on("/on", handleOn);
  server.on("/off", handleOff);
  server.on("/status", handleStatus);
  server.begin();
}

void loop() {
  server.handleClient();
}
Flash this to your ESP32, open the Serial Monitor to see the IP address, and type that IP into any browser on the same Wi-Fi network. You’ll see a clean web page with ON and OFF buttons that control the built-in LED in real time.
Project 2: ESPAsyncWebServer for Better Performance
The blocking WebServer library handles one request at a time in the main loop. For production-quality applications — especially when multiple users might access the device simultaneously, or when you’re running other time-sensitive tasks — use ESPAsyncWebServer:
Install from Arduino Library Manager: search for “ESP Async WebServer” by me-no-dev. Also install “AsyncTCP” as a dependency.
#include <WiFi.h>
#include <AsyncTCP.h>
#include <ESPAsyncWebServer.h>

AsyncWebServer server(80);

void setup() {
  WiFi.begin("SSID", "Password");
  while (WiFi.status() != WL_CONNECTED) delay(500);

  // URL parameter-based GPIO control
  // Usage: /gpio?pin=2&state=1
  server.on("/gpio", HTTP_GET, [](AsyncWebServerRequest* req) {
    if (req->hasParam("pin") && req->hasParam("state")) {
      int pin = req->getParam("pin")->value().toInt();
      int state = req->getParam("state")->value().toInt();
      // Whitelist allowed pins for security
      if (pin == 2 || pin == 4 || pin == 16 || pin == 17) {
        pinMode(pin, OUTPUT);
        digitalWrite(pin, state ? HIGH : LOW);
        req->send(200, "application/json",
          "{"pin":" + String(pin) + ","state":" + String(state) + "}");
      } else {
        req->send(403, "text/plain", "Pin not allowed");
      }
    } else {
      req->send(400, "text/plain", "Missing parameters");
    }
  });

  server.begin();
}

void loop() {
  // loop() is free for other tasks!
  // ESPAsyncWebServer runs on a separate task
}
The key advantage of ESPAsyncWebServer is that it runs entirely on FreeRTOS tasks in the background. Your loop() function is completely free for other work — reading sensors, controlling actuators, running state machines.

Ai Thinker ESP32 CAM Development Board WiFi+Bluetooth with AF2569 Camera Module
Extend your web server project with live camera streaming. Serve a live MJPEG stream alongside GPIO control from the same ESP32-CAM HTTP server.
Project 3: Multi-GPIO Control with Status Display
Here’s a more complete web interface for controlling multiple GPIO pins, styled to look professional on a mobile browser:
// Relay/GPIO definitions
struct GPIOPin {
  int pin;
  const char* name;
  bool state;
};

GPIOPin pins[] = {
  {2,  "Bedroom Light",  false},
  {4,  "Fan",            false},
  {16, "Water Pump",     false},
  {17, "Gate Lock",      false}
};
const int numPins = 4;

String buildDashboard() {
  String html = "<!DOCTYPE html><html><head><meta charset='UTF-8'>";
  html += "<meta name='viewport' content='width=device-width,initial-scale=1'>";
  html += "<title>Home Control</title><style>";
  html += "body{font-family:Arial,sans-serif;max-width:500px;margin:20px auto;padding:15px}";
  html += ".card{border:1px solid #ddd;border-radius:10px;padding:15px;margin:10px 0;";
  html += "display:flex;justify-content:space-between;align-items:center;box-shadow:0 2px 4px rgba(0,0,0,.1)}";
  html += ".switch{position:relative;width:60px;height:30px}";
  html += ".switch input{opacity:0;width:0;height:0}";
  html += ".slider{position:absolute;cursor:pointer;top:0;left:0;right:0;bottom:0;";
  html += "background:#ccc;border-radius:30px;transition:.4s}";
  html += ".slider:before{content:"";position:absolute;height:22px;width:22px;left:4px;";
  html += "bottom:4px;background:white;border-radius:50%;transition:.4s}";
  html += "input:checked+.slider{background:#ff6b00}";
  html += "input:checked+.slider:before{transform:translateX(30px)}</style></head><body>";
  html += "<h2 style='text-align:center;color:#ff6b00'>Home Control Panel</h2>";

  for (int i = 0; i < numPins; i++) {
    html += "<div class='card'><span>" + String(pins[i].name) + "</span>";
    html += "<label class='switch'><input type='checkbox' ";
    if (pins[i].state) html += "checked ";
    html += "onchange="fetch('/gpio?pin=" + String(pins[i].pin) + "&state='+(this.checked?1:0))">";
    html += "<span class='slider'></span></label></div>";
  }
  html += "</body></html>";
  return html;
}
Project 4: Sensor Dashboard with Auto-Refresh
Combine GPIO control with sensor reading for a full home monitoring dashboard. This example reads DHT11 temperature/humidity and displays it alongside GPIO controls:
// Add sensor data endpoint
server.on("/data", HTTP_GET, [](AsyncWebServerRequest* req) {
  float temp = dht.readTemperature();
  float hum = dht.readHumidity();
  String json = "{"temperature":" + String(temp, 1) +
                ","humidity":" + String(hum, 1) + "}";
  req->send(200, "application/json", json);
});

// In the HTML, add auto-refresh every 5 seconds:
// <script>
// setInterval(() => {
//   fetch('/data').then(r => r.json()).then(d => {
//     document.getElementById('temp').innerText = d.temperature + '°C';
//     document.getElementById('hum').innerText = d.humidity + '%';
//   });
// }, 5000);
// </script>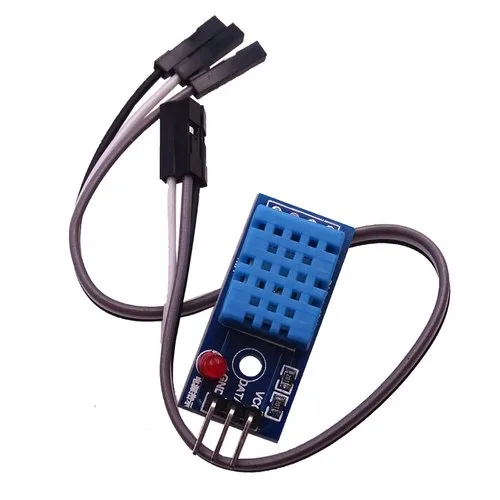
DHT11 Temperature And Humidity Sensor Module with LED
Add environmental monitoring to your ESP32 web server dashboard. Read temperature and humidity data and display it in real-time on the browser control page.
Adding Basic Security: Password Protection
An open ESP32 web server on your local network means anyone on your Wi-Fi can control your GPIO pins. Add HTTP Basic Authentication to protect it:
// ESPAsyncWebServer basic auth
server.on("/", HTTP_GET, [](AsyncWebServerRequest* req) {
  if (!req->authenticate("admin", "zbotic123")) {
    return req->requestAuthentication();
  }
  req->send(200, "text/html", buildDashboard());
});

// For API endpoints, check a token in the header or URL:
server.on("/gpio", HTTP_GET, [](AsyncWebServerRequest* req) {
  String token = req->header("X-API-Token");
  if (token != "my-secret-token-2026") {
    req->send(401, "text/plain", "Unauthorized");
    return;
  }
  // ... handle GPIO control
});
For devices exposed to the internet (via port forwarding or VPN), always use HTTPS. The ESP32 supports TLS with WiFiClientSecure, though memory constraints mean you should use elliptic curve certificates (smaller key sizes) for embedded use.
mDNS: Access Your ESP32 by Name
Instead of memorizing the IP address (which can change if your router reassigns it), set up mDNS so you can access your ESP32 at http://esp32control.local:
#include <ESPmDNS.h>

void setup() {
  // ... WiFi setup ...
  if (MDNS.begin("esp32control")) {
    Serial.println("mDNS responder started: http://esp32control.local");
    MDNS.addService("http", "tcp", 80);
  }
  // ... server setup ...
}
mDNS works on Windows, macOS, iOS, and Android (Android requires Bonjour/mDNS support, which is built into modern Android versions). On Windows, you may need to install Apple Bonjour Print Services if mDNS doesn’t resolve.

D1 Mini V2 NodeMCU 4M Bytes Lua Wi-Fi Internet Of Things Development Board Based ESP8266
The ESP8266 D1 Mini supports the same HTTP web server concept at a lower cost. Perfect for simple single-channel GPIO control projects where ESP32’s extra power isn’t needed.
Frequently Asked Questions
Can I access the ESP32 web server from outside my home network?
Yes, but it requires port forwarding on your router (risky) or a VPN/tunnel solution. Better options include using a free service like Ngrok for temporary remote access, or setting up a WireGuard VPN server on a Raspberry Pi for permanent secure remote access. Never expose an unprotected ESP32 web server directly to the internet.
How many simultaneous connections can the ESP32 web server handle?
The blocking WebServer library handles 1 request at a time. ESPAsyncWebServer can handle 4–8 simultaneous connections (limited by ESP32 TCP/IP stack configuration). For typical home automation use with a handful of users, either approach is fine. For higher concurrency, use an MQTT-based architecture instead.
Why does my ESP32 web page load slowly or time out?
Common causes: (1) The ESP32 is busy in loop() and not calling server.handleClient() often enough — switch to ESPAsyncWebServer. (2) The HTML response is too large — keep pages under 50KB. (3) Wi-Fi signal is weak — try moving the router closer or use an ESP32 with external antenna. (4) PSRAM is not available and the string is fragmenting heap — split large HTML into chunks using chunked transfer encoding.
Can I serve files from SPIFFS/LittleFS instead of hardcoding HTML?
Yes! Storing HTML, CSS, and JavaScript in SPIFFS or LittleFS flash file system is much better for complex UIs. Use ESPAsyncWebServer’s server.serveStatic("/", SPIFFS, "/www/") to automatically serve files. This allows updating the UI without recompiling firmware — just upload new HTML files via a file upload endpoint.
What GPIO pins are safe to use for output on ESP32?
Safe output GPIO pins: 2, 4, 5, 12, 13, 14, 15, 16, 17, 18, 19, 21, 22, 23, 25, 26, 27, 32, 33. Avoid: GPIO 0 (boot mode), GPIO 1 (TX), GPIO 3 (RX), GPIO 6–11 (connected to flash SPI), GPIO 34–39 (input-only, no pullup). Always check your specific board’s pinout diagram as some pins may be used by on-board components.
Get Your ESP32 Web Server Project Started
Shop for ESP32 development boards, sensors, relay modules, and expansion boards at Zbotic. Quality components, competitive Indian prices, and fast delivery nationwide.


Add comment