
If you love Python, you are going to love ESP32 MicroPython. MicroPython is a lean implementation of Python 3, optimised to run on microcontrollers with limited RAM and flash. The ESP32, with its 520 KB SRAM and 4 MB flash, is one of the best-supported platforms for MicroPython. You get a Python REPL directly on the chip — type commands and see results in real time, just like on a desktop Python shell. In this complete getting-started guide, we will take you from zero to a working IoT project using ESP32 and MicroPython, with all steps tested and confirmed for the Indian maker community.
Why Choose MicroPython for ESP32?
The two most common firmware choices for ESP32 are the Arduino framework (C++) and MicroPython. Both are excellent — the right choice depends on your background and project needs.
Choose MicroPython if you:
- Already know Python and want to avoid learning C++ syntax.
- Value fast iteration — edit a file on the ESP32’s filesystem and run it instantly, no compile step.
- Need an interactive REPL for debugging and experimentation.
- Are teaching beginners or students — Python is far more approachable.
- Are prototyping quickly before committing to a production firmware.
Choose Arduino (C++) if you:
- Need maximum performance or precise timing (like PWM, hardware interrupts at µs precision).
- Want to use the full ecosystem of Arduino libraries.
- Are deploying production firmware at scale.
For most hobbyist and student IoT projects in India, MicroPython is the faster and more enjoyable path. Let’s get started.

Ai Thinker NodeMCU-32S ESP32 Development Board
One of the best ESP32 boards for MicroPython beginners — comes with built-in USB-UART, 4MB flash, and breadboard-friendly pinout for easy wiring.
Flashing MicroPython Firmware onto ESP32
The first step is to replace the factory firmware on your ESP32 with MicroPython. This is called “flashing” and takes about 2 minutes.
Step 1: Download the Firmware
Go to micropython.org/download/ESP32_GENERIC/ and download the latest stable .bin file. As of 2025, MicroPython 1.23+ for ESP32 is stable and recommended.
Step 2: Install esptool
esptool is the official Espressif tool for flashing firmware. Install it via pip:
pip install esptoolStep 3: Erase the Flash
Connect the ESP32 via USB. Find its COM port (Windows: Device Manager → Ports; Linux/Mac: ls /dev/tty* — usually /dev/ttyUSB0 or /dev/ttyACM0). Then erase the flash:
esptool.py --chip esp32 --port COM3 erase_flash
# On Linux: esptool.py --chip esp32 --port /dev/ttyUSB0 erase_flash
Step 4: Flash MicroPython
esptool.py --chip esp32 --port COM3 --baud 460800 write_flash -z 0x1000 ESP32_GENERIC-20240602-v1.23.0.binThe process takes 15–30 seconds. When complete, reset the board. MicroPython is now running.
Your First MicroPython REPL Session
Open any serial terminal at 115200 baud on the ESP32’s COM port. We recommend Thonny IDE (free, specifically designed for MicroPython) or PuTTY (Windows) or screen (Linux/Mac).
Press Enter — you should see the >>> prompt. You are now in a live Python interpreter on the ESP32. Try these commands:
>>> print("Hello from ESP32 MicroPython!")
Hello from ESP32 MicroPython!

>>> import sys
>>> sys.platform
'esp32'

>>> import machine
>>> machine.freq()     # CPU frequency in Hz
240000000

>>> import gc
>>> gc.mem_free()      # Available RAM in bytes
108976
Everything works just like desktop Python. The machine module is the key module for hardware access — GPIO, I2C, SPI, UART, PWM, ADC, and timers are all in there.
Controlling GPIOs and Reading Sensors
Blink an LED
from machine import Pin
import time

led = Pin(2, Pin.OUT)  # GPIO2 is the built-in LED on most ESP32 boards

while True:
    led.on()
    time.sleep(0.5)
    led.off()
    time.sleep(0.5)
Read a DHT11 Sensor
MicroPython includes a dht module built in:
import dht
from machine import Pin
import time

sensor = dht.DHT11(Pin(4))  # DHT11 data pin connected to GPIO4

while True:
    sensor.measure()
    temp = sensor.temperature()
    humidity = sensor.humidity()
    print(f"Temp: {temp}°C  Humidity: {humidity}%")
    time.sleep(2)
Use I2C (for BME280 or other I2C sensors)
from machine import I2C, Pin

i2c = I2C(0, scl=Pin(22), sda=Pin(21), freq=400000)
devices = i2c.scan()
print("I2C devices found:", [hex(d) for d in devices])
BMP280 Barometric Pressure and Altitude Sensor I2C/SPI Module
Accurate I2C pressure and temperature sensor — works great with MicroPython’s machine.I2C, with community-written MicroPython drivers available.
Connecting to Wi-Fi and Making HTTP Requests
The network module handles Wi-Fi in MicroPython:
import network
import time

wlan = network.WLAN(network.STA_IF)
wlan.active(True)
wlan.connect('YourSSID', 'YourPassword')

while not wlan.isconnected():
    print('Connecting...')
    time.sleep(1)

print('Connected! IP:', wlan.ifconfig()[0])
Once connected, use urequests (a MicroPython port of Python’s requests) for HTTP:
import urequests as requests
response = requests.get('http://api.open-meteo.com/v1/forecast?latitude=19.08&longitude=72.88¤t_weather=true')
data = response.json()
print('Temperature in Mumbai:', data['current_weather']['temperature'], '°C')
response.close()Full Project: MicroPython IoT Temperature Logger
This project combines everything above: read a DHT11, connect to Wi-Fi, and POST the reading to a free ThingSpeak channel every 30 seconds.
Hardware
- ESP32 development board
- DHT11 sensor module (data pin → GPIO4)
- USB power supply or 18650 battery shield
main.py
import network, urequests, dht, time
from machine import Pin

SSID = 'YourSSID'
PASSWORD = 'YourPassword'
API_KEY = 'YOUR_THINGSPEAK_WRITE_KEY'
CHANNEL_URL = 'https://api.thingspeak.com/update'

sensor = dht.DHT11(Pin(4))

wlan = network.WLAN(network.STA_IF)
wlan.active(True)
wlan.connect(SSID, PASSWORD)
while not wlan.isconnected():
    time.sleep(1)
print('Wi-Fi connected:', wlan.ifconfig()[0])

while True:
    try:
        sensor.measure()
        temp = sensor.temperature()
        hum = sensor.humidity()
        url = f'{CHANNEL_URL}?api_key={API_KEY}&field1={temp}&field2={hum}'
        r = urequests.get(url)
        print(f'Sent: {temp}°C {hum}% → response: {r.text}')
        r.close()
    except Exception as e:
        print('Error:', e)
    time.sleep(30)
Save this as main.py on the ESP32 filesystem using Thonny (File → Save As → MicroPython device). It will run automatically every time the ESP32 boots. You can view the data as live charts on your ThingSpeak channel dashboard.
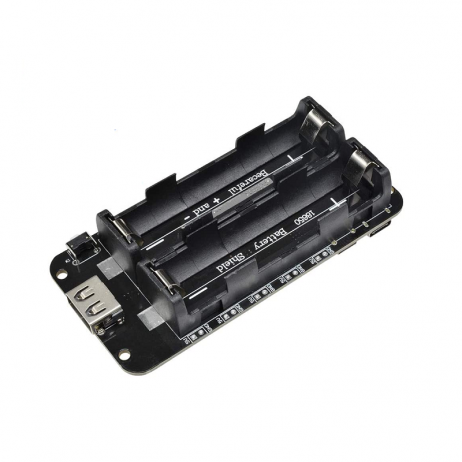
2×18650 Lithium Battery Shield for Arduino/ESP32/ESP8266
Run your MicroPython IoT logger untethered from USB for days — dual 18650 battery shield with 5V/3A output and USB charging built in.
Essential Tools: Thonny, ampy, mpremote
Developing with MicroPython requires tools to transfer files to and from the ESP32 filesystem. Here are the three most useful:
- Thonny IDE (recommended for beginners): Free Python IDE with native MicroPython support. Includes file browser, REPL, and one-click firmware flashing. Download from thonny.org.
- mpremote (official, CLI): Install with
pip install mpremote. Commands likempremote connect COM3 cp main.py :copy files to the board. Fast and scriptable. - ampy (older, still widely used):
pip install adafruit-ampy. Simple file transfer:ampy --port COM3 put main.py. - WebREPL: MicroPython includes a WebSocket-based REPL accessible over Wi-Fi — once enabled, you can code wirelessly through a browser without a USB cable.

DHT11 Digital Humidity and Temperature Sensor Module
MicroPython includes a built-in DHT driver — just plug this module into your ESP32 and start reading temperature and humidity in two lines of Python.
Frequently Asked Questions
Is MicroPython slower than Arduino C++ on ESP32?
Yes — MicroPython is roughly 10–100x slower than equivalent C++ code for computation-heavy tasks. However, for most IoT applications (reading a sensor, connecting to Wi-Fi, posting data to a server), the bottleneck is I/O (network, sensor response), not CPU speed. MicroPython is perfectly fast enough for the vast majority of hobby and educational IoT projects.
Can I use MicroPython libraries from PyPI?
Not directly — standard PyPI packages often have dependencies on CPython internals not available in MicroPython. However, micropython-lib (mpremote mip install) provides a growing collection of ports of popular libraries including umqtt, urequests, ucryptolib, and many sensor drivers. Many Arduino sensor libraries also have community MicroPython ports.
How do I update MicroPython firmware without losing my files?
Firmware updates overwrite the flash, potentially erasing files. To be safe: first back up your files using mpremote or Thonny’s file browser. Then flash the new firmware and restore your files. Alternatively, some boards have separate filesystem and firmware flash areas — check the MicroPython documentation for your specific board.
Does MicroPython support multithreading on ESP32?
Yes, partially. The _thread module provides basic threading support on ESP32 (both cores can be used). For most concurrent tasks like running a web server while reading a sensor, asyncio (via uasyncio) is more reliable and memory-efficient than threads on MicroPython.
Get Your ESP32 MicroPython Kit from Zbotic
Zbotic ships ESP32 development boards, DHT11/BME280 sensors, and battery shields across India with fast delivery. Order today and start your MicroPython journey.


Add comment