
If your ESP32 project needs to talk to a REST API, parse a weather service response, or read sensor data from a server, you’ll need to handle JSON — and ESP32 JSON parsing with ArduinoJson is the industry-standard approach used by hundreds of thousands of makers and professionals worldwide. ArduinoJson v7 is a header-only C++ library that works on all ESP32 variants, Arduino boards, and even Linux/Windows environments, giving you a consistent JSON workflow across your entire stack.
This tutorial walks you through everything from basic deserialization to advanced streaming, error handling, and memory optimization techniques that matter on a microcontroller with limited RAM. All code examples are tested on the standard ESP32 (Xtensa dual-core) and ESP32-C3 (RISC-V), using the Arduino IDE and PlatformIO.
- Why ArduinoJson for ESP32?
- Installation: Arduino IDE and PlatformIO
- Basic JSON Parsing (Deserialization)
- Parsing a Real API Response (OpenWeatherMap)
- Creating and Sending JSON (Serialization)
- Memory Management on ESP32
- Streaming Large JSON Documents
- Recommended ESP32 Boards from Zbotic
- Frequently Asked Questions
Why ArduinoJson for ESP32?
Before ArduinoJson, ESP32 developers had to write custom string-parsing code or use heavyweight libraries that didn’t fit in embedded memory budgets. ArduinoJson solves this with a zero-copy parser, a DOM-like API, and a static memory model that lets you know your RAM usage at compile time.
Key advantages over alternatives:
- No dynamic allocation: Uses a single memory pool (stack or heap), preventing heap fragmentation — critical for long-running ESP32 devices.
- Zero copy: In deserialization mode, strings point directly into the input buffer rather than being duplicated.
- Type-safe access:
doc["key"].as<int>()returns a typed value; wrong-type access returns a default (no crashes). - Compact size: Adds only 5–8 KB to your firmware binary.
- Well maintained: ArduinoJson v7 (released 2024) introduced major API improvements including a new
JsonDocumenttype that auto-allocates from the heap.
Installation: Arduino IDE and PlatformIO
Arduino IDE
Go to Sketch → Include Library → Manage Libraries, search for “ArduinoJson”, and install version 7.x by Benoit Blanchon. The library manager will automatically download all dependencies.
PlatformIO
Add to your platformio.ini:
[env:esp32dev]
platform = espressif32
board = esp32dev
framework = arduino
lib_deps =
    bblanchon/ArduinoJson @ ^7.0.0
ESP-IDF (without Arduino)
Add via IDF Component Manager in your idf_component.yml:
dependencies:
  bblanchon/arduinojson: "^7.0.0"
Basic JSON Parsing (Deserialization)
Let’s start with the most common use case: parsing a JSON string received from a Wi-Fi server.
#include <Arduino.h>
#include <ArduinoJson.h>

void setup() {
    Serial.begin(115200);

    // Example: JSON response from a sensor API
    const char* json = R"(
        {
            "sensor": "DHT11",
            "temperature": 32.5,
            "humidity": 65,
            "location": "Mumbai",
            "readings": [31.8, 32.1, 32.5]
        }
    )";

    // ArduinoJson v7: JsonDocument auto-allocates from heap
    JsonDocument doc;
    DeserializationError error = deserializeJson(doc, json);

    if (error) {
        Serial.print("Parse failed: ");
        Serial.println(error.c_str());
        return;
    }

    // Access fields
    const char* sensor   = doc["sensor"];      // "DHT11"
    float temperature    = doc["temperature"]; // 32.5
    int humidity         = doc["humidity"];    // 65
    const char* location = doc["location"];   // "Mumbai"

    Serial.printf("Sensor: %sn", sensor);
    Serial.printf("Temp: %.1f°C, Humidity: %d%%n", temperature, humidity);

    // Access array
    JsonArray readings = doc["readings"];
    for (float r : readings) {
        Serial.printf("Reading: %.1fn", r);
    }
}

void loop() {}
In ArduinoJson v7, JsonDocument replaces the old DynamicJsonDocument and StaticJsonDocument. It allocates memory from the heap automatically, resizing as needed. If you know your exact size requirements and want deterministic memory behavior, you can still use the pool allocator via JsonDocument doc(capacity).
Parsing a Real API Response (OpenWeatherMap)
Here’s a complete, production-ready example that fetches weather data for an Indian city and parses the JSON response over HTTPS:
#include <Arduino.h>
#include <WiFi.h>
#include <HTTPClient.h>
#include <ArduinoJson.h>

const char* SSID     = "YourWiFi";
const char* PASSWORD = "YourPassword";
const char* API_KEY  = "your_openweathermap_key";
const char* CITY     = "Pune,IN";

void setup() {
    Serial.begin(115200);
    WiFi.begin(SSID, PASSWORD);
    while (WiFi.status() != WL_CONNECTED) {
        delay(500);
        Serial.print(".");
    }
    Serial.println("nConnected!");
    fetchWeather();
}

void fetchWeather() {
    HTTPClient http;
    String url = String("http://api.openweathermap.org/data/2.5/weather?q=")
                 + CITY + "&appid=" + API_KEY + "&units=metric";

    http.begin(url);
    int httpCode = http.GET();

    if (httpCode == HTTP_CODE_OK) {
        String payload = http.getString();

        JsonDocument doc;
        DeserializationError err = deserializeJson(doc, payload);

        if (!err) {
            float temp     = doc["main"]["temp"];
            float feels    = doc["main"]["feels_like"];
            int humidity   = doc["main"]["humidity"];
            const char* desc = doc["weather"][0]["description"];
            float windSpeed  = doc["wind"]["speed"];

            Serial.printf("City: %sn", CITY);
            Serial.printf("Temp: %.1f°C (Feels like: %.1f°C)n", temp, feels);
            Serial.printf("Humidity: %d%%n", humidity);
            Serial.printf("Condition: %sn", desc);
            Serial.printf("Wind: %.1f m/sn", windSpeed);
        } else {
            Serial.printf("JSON error: %sn", err.c_str());
        }
    } else {
        Serial.printf("HTTP error: %dn", httpCode);
    }
    http.end();
}

void loop() {
    delay(300000); // Refresh every 5 minutes
    fetchWeather();
}
This pattern is the foundation of hundreds of Indian hobbyist projects: weather displays, farm sensor dashboards, air quality monitors, and factory floor dashboards all follow this exact flow.
Creating and Sending JSON (Serialization)
To send data to a server (POST request to a REST API, MQTT broker, or webhook), you need to serialize a JSON document:
#include <ArduinoJson.h>
#include <HTTPClient.h>

void sendSensorData(float temp, int humidity, const char* deviceId) {
    JsonDocument doc;
    doc["device_id"] = deviceId;
    doc["temperature"] = temp;
    doc["humidity"] = humidity;
    doc["timestamp"] = millis();

    // Add nested object
    JsonObject location = doc["location"].to<JsonObject>();
    location["city"] = "Hyderabad";
    location["state"] = "Telangana";

    // Add array
    JsonArray tags = doc["tags"].to<JsonArray>();
    tags.add("indoor");
    tags.add("bedroom");

    // Serialize to string
    String output;
    serializeJson(doc, output);
    Serial.println(output);
    // Output: {"device_id":"esp32-01","temperature":32.5,...}

    // Send via HTTP POST
    HTTPClient http;
    http.begin("https://your-api.example.com/sensors");
    http.addHeader("Content-Type", "application/json");
    int code = http.POST(output);
    http.end();
}
Memory Management on ESP32
The ESP32 has 520 KB SRAM, but after Wi-Fi stack and operating system overhead, your application typically has 250–300 KB of heap available. Large JSON documents can exhaust this quickly if not managed carefully.
The ArduinoJson Assistant
The most useful tool for sizing your document correctly is the ArduinoJson Assistant at arduinojson.org. Paste your example JSON and it calculates the exact capacity you need.
Best Practices for ESP32
- Use filter documents to parse only the fields you need — dramatically reduces RAM for large API responses
- Declare
JsonDocumentas a local variable (stack) for small documents, not as a global (avoids permanent heap allocation) - For streaming HTTP responses over 10 KB, use the streaming deserializer directly against the
WiFiClient— avoids buffering the full response in RAM - Call
doc.shrinkToFit()after parsing if you need to keep the document around for a while
Filter Example (Saves 60–70% RAM on Large Responses)
// Only parse "main.temp" and "main.humidity" from OpenWeatherMap
JsonDocument filter;
filter["main"]["temp"] = true;
filter["main"]["humidity"] = true;

JsonDocument doc;
DeserializationError err = deserializeJson(doc, payload,
    DeserializationOption::Filter(filter));
// doc now only contains the 2 fields you need
Streaming Large JSON Documents
Some API responses in real-world IoT projects can be quite large — product catalogues, historical sensor batches, or firmware manifest files. The streaming API avoids loading the whole document into RAM:
#include <HTTPClient.h>
#include <ArduinoJson.h>

void parseStreamedResponse() {
    HTTPClient http;
    http.begin("https://api.example.com/large-data");
    int code = http.GET();

    if (code == HTTP_CODE_OK) {
        // Parse directly from the stream — no intermediate String buffer
        WiFiClient* stream = http.getStreamPtr();

        JsonDocument doc;
        DeserializationError err = deserializeJson(doc, *stream);

        if (!err) {
            // Process doc fields here
        }
    }
    http.end();
}
This technique is particularly valuable when integrating ESP32 with Indian government APIs (GST, ONDC, IndiaStack) that return verbose JSON payloads.
Recommended ESP32 Boards from Zbotic

Ai Thinker NodeMCU-32S ESP32 Development Board
The classic dual-core ESP32 with breadboard-friendly pinout — perfect for JSON parsing projects where you need USB-Serial debugging and plenty of GPIO for sensors.
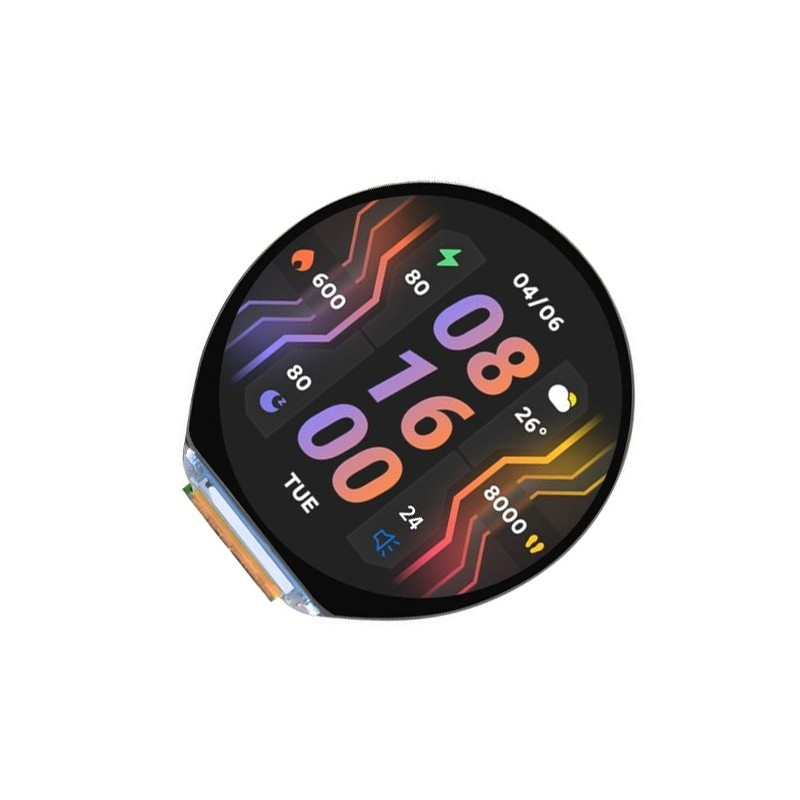
Waveshare ESP32-S3 1.46inch Round Display Board
An all-in-one ESP32-S3 board with round display, accelerometer, speaker, and microphone — parse weather API JSON and display results on a beautiful round screen.

DHT20 SIP Packaged Temperature and Humidity Sensor
Read temperature and humidity with this I2C sensor, serialize the data to JSON using ArduinoJson, and POST it to your cloud API — a classic ESP32 IoT pipeline.
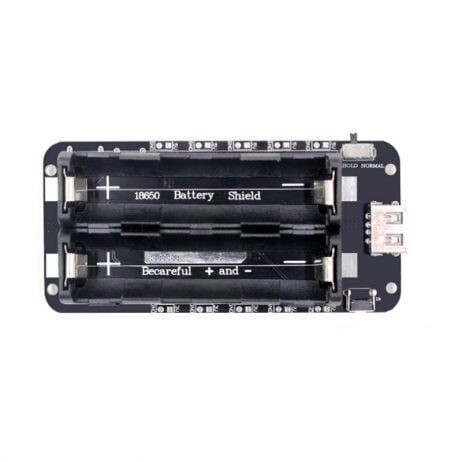
2 x 18650 Battery Shield V8 for ESP32
Power your ESP32 API data logger off-grid with this 18650 shield — perfect for remote sensor nodes that periodically wake, fetch JSON data, and sleep again.
Frequently Asked Questions
What is the maximum JSON document size ArduinoJson can handle on ESP32?
ArduinoJson v7 dynamically allocates from the heap, so the limit is your available free heap (typically 200–280 KB on ESP32 after Wi-Fi stack). For very large documents (>50 KB), use the streaming API to avoid buffer overflow.
Why does my parsed string become garbage after the function returns?
ArduinoJson uses zero-copy parsing — string values point into your input buffer. If the buffer is a local String that goes out of scope, the pointers become dangling. Either copy strings with String or strdup(), or keep the buffer alive as long as you need the parsed values.
How do I parse nested JSON objects and arrays?
Use chained subscript operators: doc["weather"][0]["description"] for arrays and doc["main"]["temp"] for nested objects. If a key doesn’t exist, you get a default value (0, false, null) rather than a crash.
Does ArduinoJson work with HTTPS on ESP32?
Yes. Use HTTPClient with http.begin(client, url) where client is a WiFiClientSecure. Set the server certificate or use setInsecure() for development. ArduinoJson is agnostic to the transport — it just parses strings and streams.
Can I use ArduinoJson with MQTT on ESP32?
Yes — serialize your JSON to a char[] buffer and publish it as an MQTT message payload. On the receive side, deserialize the incoming payload. This is the most common pattern for IoT sensor networks using ESP32 + MQTT + Node-RED or Home Assistant.
Build Your ESP32 API Project Today
Get ESP32 development boards, sensors, and accessories from Zbotic.in — fast delivery across India and expert community support for your IoT projects.


Add comment