
An ESP32 captive portal for Wi-Fi credentials setup is an essential feature for any IoT product you plan to distribute to end users in India. Instead of hardcoding your Wi-Fi SSID and password into the firmware, a captive portal lets users connect their own network credentials through a smartphone browser — no Arduino IDE, no computer, no technical knowledge required. This tutorial explains what a captive portal is, how it works on the ESP32, and provides a complete working implementation using the popular WiFiManager library.
What is a Captive Portal and Why It Matters
A captive portal is a web page that intercepts all HTTP traffic from a connected device and redirects it to a configuration page — the same technique used by hotels, airports, and public Wi-Fi hotspots to show a login or terms-of-service page. On the ESP32, you implement a captive portal by temporarily turning the device into a Wi-Fi access point (AP). When a user connects to this AP from their phone, all DNS queries are answered with the ESP32’s own IP address, and all HTTP requests are redirected to the configuration form.
The user experience is:
- Press a button (or power on for the first time)
- A new Wi-Fi network appears, e.g., ESP32-Setup
- User connects their phone to it
- A page automatically opens (captive portal detection by iOS/Android)
- User selects their home Wi-Fi and enters the password
- ESP32 saves credentials to flash and reboots in station mode
This approach is used by virtually every consumer IoT product — from smart bulbs to air purifiers to industrial monitors. For Indian product developers building on ESP32, implementing a proper captive portal is the difference between a prototype and a shippable product.
Hardware You Need
- ESP32 development board
- Push button (for factory reset, optional but recommended)
- LED (to indicate AP mode)
- Resistors: 10kΩ pull-down for button, 330Ω for LED

30Pin ESP32 Expansion Board with Type-C USB and Micro USB Dual Interface
This expansion board breaks out all GPIO pins cleanly, making it very easy to add reset buttons and LED indicators for your captive portal project.
Setting Up WiFiManager Library
The easiest way to implement a captive portal on ESP32 is using the WiFiManager library by tzapu/tablatronix. Install it via Arduino IDE Library Manager:
- Open Arduino IDE → Sketch → Include Library → Manage Libraries
- Search for WiFiManager by tzapu
- Install version 2.0.x or later (ensure it supports ESP32)
- Also install the dependency: AsyncTCP (for non-blocking operation)
WiFiManager stores credentials in the ESP32’s NVS (Non-Volatile Storage) partition using the Preferences library under the hood. Credentials persist across power cycles and firmware updates as long as you do not erase the NVS partition.
Basic Captive Portal Implementation
Here is the minimal working captive portal sketch:
#include <WiFi.h>
#include <WiFiManager.h> // https://github.com/tzapu/WiFiManager

void setup() {
  Serial.begin(115200);
  WiFiManager wm;

  // Uncomment next line to erase stored credentials (for testing)
  // wm.resetSettings();

  // AP name and optional password (leave blank for open AP)
  bool res = wm.autoConnect("ESP32-Setup", "12345678");

  if (!res) {
    Serial.println("Failed to connect. Restarting...");
    ESP.restart();
  } else {
    Serial.println("Connected to Wi-Fi!");
    Serial.println(WiFi.localIP());
  }
}

void loop() {
  // Your main application code here
}
How autoConnect() works:
- If saved credentials exist and the network is reachable, it connects directly — the portal never opens.
- If no credentials are saved (first boot) or the saved network is unreachable, the ESP32 launches its own AP named ESP32-Setup.
- The portal times out after a configurable duration (default: no timeout) and can restart the device.
When connected to the ESP32-Setup AP:
- iOS shows a pop-up immediately (captive portal detection via NCSI/CNA)
- Android shows a notification about a sign-in page
- Windows shows a notification about additional sign-in info needed
- Manually navigate to
http://192.168.4.1if the automatic redirect doesn’t appear
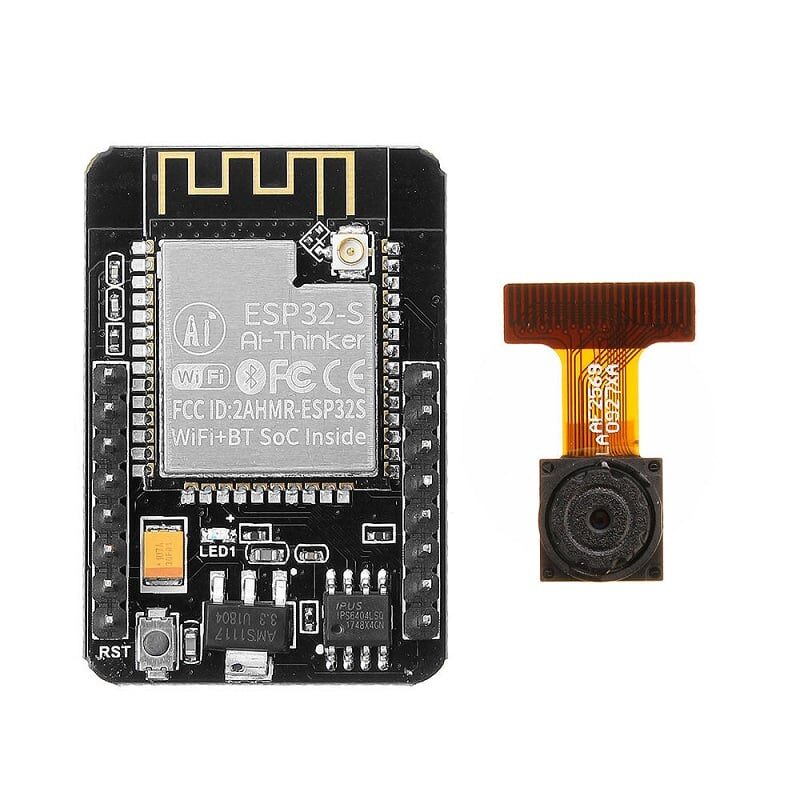
Ai Thinker ESP32 CAM Development Board WiFi+Bluetooth with AF2569 Camera Module
Use a captive portal on the ESP32-CAM to allow users to configure Wi-Fi without hardcoding credentials — essential for deployable security camera products.
Adding Custom Parameters to the Portal
WiFiManager lets you add extra input fields to the portal for things like MQTT broker addresses, device names, or API keys. This is essential for products that need more than just Wi-Fi credentials:
#include <WiFiManager.h>
#include <Preferences.h>
Preferences prefs;
char mqtt_server[40] = "broker.hivemq.com";
char device_name[20] = "MySensor";
void setup() {
Serial.begin(115200);
// Load saved custom params
prefs.begin("config", false);
String saved_mqtt = prefs.getString("mqtt", mqtt_server);
String saved_device = prefs.getString("dname", device_name);
saved_mqtt.toCharArray(mqtt_server, 40);
saved_device.toCharArray(device_name, 20);
prefs.end();
WiFiManager wm;
WiFiManagerParameter param_mqtt("mqtt", "MQTT Server", mqtt_server, 40);
WiFiManagerParameter param_name("dname", "Device Name", device_name, 20);
wm.addParameter(¶m_mqtt);
wm.addParameter(¶m_name);
wm.setSaveParamsCallback([&]() {
prefs.begin("config", false);
prefs.putString("mqtt", param_mqtt.getValue());
prefs.putString("dname", param_name.getValue());
prefs.end();
});
wm.autoConnect("ESP32-Setup");
}
This pattern is used in production IoT products. When the user opens the captive portal, they see fields for Wi-Fi credentials AND MQTT server and device name in the same form. All values are saved to flash and persist across reboots.
Reset Button and Fallback Logic
A physical reset button is critical for end users who change their router or move to a new location. Wire a button between GPIO 0 and GND (GPIO 0 has a built-in pull-up on most ESP32 boards). Hold it for 3 seconds on boot to erase Wi-Fi credentials and re-open the portal.
#define RESET_PIN 0

void setup() {
  pinMode(RESET_PIN, INPUT_PULLUP);
  delay(100);

  // Hold button for 3 seconds to reset
  if (digitalRead(RESET_PIN) == LOW) {
    unsigned long start = millis();
    while (digitalRead(RESET_PIN) == LOW) {
      if (millis() - start > 3000) {
        WiFiManager wm;
        wm.resetSettings();
        Serial.println("Settings erased. Restarting...");
        ESP.restart();
      }
    }
  }
  // Continue with normal WiFiManager setup...
}
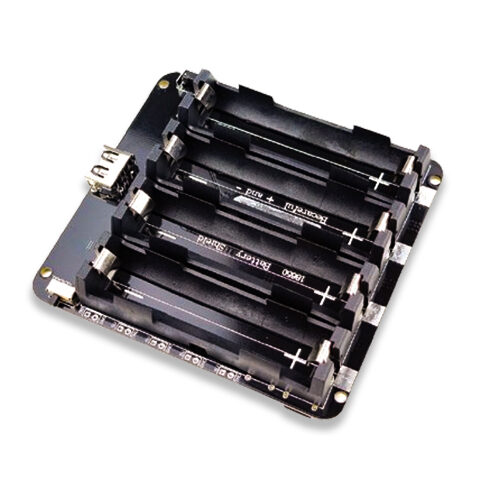
4 x 18650 Lithium Battery Shield V8 V9 for Arduino ESP32 ESP8266 with On-Off Button
Power your captive portal ESP32 project from rechargeable 18650 cells — perfect for portable or off-grid IoT deployments across India.
Frequently Asked Questions
How do I prevent the captive portal from opening every time if Wi-Fi is temporarily unavailable?
Use wm.setConnectTimeout(10) and wm.setConfigPortalTimeout(120). The device will try to connect for 10 seconds. If it fails, it opens the portal for only 120 seconds before restarting and trying again. This prevents the portal from opening due to temporary Wi-Fi outages.
Can the captive portal work on ESP32-CAM which has no extra GPIO?
Yes. On ESP32-CAM, GPIO 0 is used for programming mode but is available at runtime. You can use it as a reset trigger or rely on a timeout-based portal activation (first boot or failed connection) instead of a physical button.
Is the Wi-Fi password stored securely on the ESP32?
WiFiManager stores credentials in NVS (flash). NVS is not encrypted by default on ESP32, meaning someone with physical access and a flash programmer could read the password. For security-sensitive applications, enable the ESP32 flash encryption feature in the ESP-IDF or use a custom storage mechanism.
Can I add multiple Wi-Fi networks (SSID fallback) through the captive portal?
The standard WiFiManager library supports a single SSID. For multi-network fallback, use the WiFiMulti library alongside WiFiManager — save multiple SSIDs via custom parameters and manage connection priority in your firmware logic.
Build Your Own ESP32 IoT Product
Shop for ESP32 boards, sensors, battery shields, and accessories at Zbotic.in — fast delivery across India, quality components guaranteed.


Add comment