
Manual bed leveling on the Ender 3 is one of the most common frustrations in 3D printing. Paper-under-nozzle leveling works, but it is tedious, inconsistent, and becomes a ritual you must repeat every few prints. Installing a BLTouch — or its CR Touch clone — solves this problem permanently. Once installed and configured, your Ender 3 will automatically probe the bed surface before every print and compensate for any variation across the mesh.
This guide covers the complete BLTouch installation process for the Ender 3, Ender 3 Pro, and Ender 3 V2, including wiring, firmware flashing with Marlin, and the critical first-use setup that many guides skip.
What is BLTouch and How Does It Work?
The BLTouch is a precision auto bed leveling sensor developed by Antclabs. It uses a small push-pin probe that physically touches the bed surface at multiple points to measure height variations across the entire print area. The printer uses this data to create a mesh map of the bed surface, then applies real-time Z-axis compensation during printing to maintain a consistent first-layer height everywhere on the bed.
The probe has two main signals: a servo signal that deploys and retracts the pin, and a sensor signal that triggers when the pin is pushed up by the bed surface (signalling a touch event). The combination of physical contact sensing (unlike inductive or capacitive probes) makes BLTouch compatible with glass, PEI, BuildTak, magnetic flex plates, and virtually any bed surface.
The CR Touch is Creality’s own version of BLTouch and is fully compatible with the same wiring and firmware configuration. It is often cheaper and available on Amazon India. Either option works equally well.
What You Need Before Starting
Hardware
- BLTouch v3.1 or CR Touch (the latest version — check the gold colour on the sensor housing)
- BLTouch mount bracket for your Ender 3 model (many free designs on Thingiverse — print in PLA or PETG)
- M3 screws and nuts for mounting (usually included with BLTouch kit)
- 5-pin wiring harness (included with BLTouch kit, but buy an extended harness if yours is too short)
Software Tools
- Marlin Firmware source code (download from marlinfw.org — use the latest bugfix-2.1.x branch)
- VS Code with PlatformIO extension (free, for compiling Marlin)
- MicroSD card (8GB max — Ender 3 mainboards have SD card compatibility issues above 8GB)
- SD card reader for your PC
Identify Your Mainboard Version
This is critical. The Ender 3 has had several mainboard versions over its lifetime:
- V1.1.2 / V1.1.4: Original board (loud steppers, no bootloader pre-installed). Needs programmer or bootloader flash first.
- V4.2.2: Most common upgrade board. Quiet TMC2208 or TMC2209 drivers. Boot from SD without programmer.
- V4.2.7: Same as 4.2.2 but with TMC2225 drivers. Boot from SD without programmer.
- Ender 3 V2 / S1 boards: Different firmware configs needed.
Check your board by opening the electronics enclosure and reading the version number printed on the PCB.
Step 1: Mount the BLTouch Probe
The BLTouch mounts to the left side of the print head, alongside the hotend. You have two options:
Option A: Use a Printed Mount (Recommended)
Download a BLTouch bracket for your specific Ender 3 model from Thingiverse or Printables. The most popular designs for Ender 3 use two M3 screws to attach to the existing fan shroud mounting holes on the carriage. Print the bracket in PETG (not PLA — the hotend area gets warm).
Option B: Use the Official Creality Mount Kit
Creality sells a BLTouch kit that includes a metal mount bracket. This is more rigid than a printed mount and recommended if you want the most reliable long-term setup.
Probe Position and Offsets
After mounting, measure the exact X and Y offset of the probe tip relative to the nozzle tip. These values (in mm, can be negative) must be entered in the firmware configuration. Typical values for a standard left-side mount are around X: -42mm, Y: -6mm — but measure your actual installation. The Z offset is set during calibration, not in firmware (see Step 4).

220×220mm Frosted Heated Bed Sticker Build Plate
Upgrade your Ender 3 bed surface at the same time as installing BLTouch. This frosted PEI-style sticker provides excellent first-layer adhesion for PLA, PETG, and ABS — perfectly compatible with BLTouch probing.
Step 2: Wiring the BLTouch to the Ender 3 Board
The BLTouch has 5 wires, typically split into two groups: a 2-pin connector (sensor signal and ground) and a 3-pin connector (servo PWM, +5V, and ground).
For V4.2.2 / V4.2.7 Boards (Most Common)
These boards have a dedicated BLTouch header (usually labelled BLTouch or Probe) near the Z-stop connector. The pinout from left to right on the 5-pin header is:
- GND (black wire from servo group)
- +5V (red wire from servo group)
- PWM/Signal (yellow/orange wire from servo group)
- GND (black wire from sensor group)
- Signal/Z-min (white wire from sensor group)
Important: Remove the existing Z endstop switch connector from the board. The BLTouch replaces the Z endstop — running both simultaneously causes conflicts. Leave the Z endstop switch physically in place (it can act as a max endstop or be left unused), but disconnect it from the board.
For V1.1.x Original Boards
The original Ender 3 board does not have a dedicated BLTouch header. You need to install a bootloader first (using an Arduino programmer or another Arduino as ISP), then use a community-patched Marlin build. Many Indian makers simply upgrade to the V4.2.7 board (around ₹1,500–₹2,000) and bypass the complexity entirely — this upgrade is recommended.

Aluminium Heat Sink for MK7/MK8 Extruder
While upgrading your Ender 3 with BLTouch, it is the perfect time to also refresh the extruder heat sink. This aluminium heatsink keeps the cold zone cool, preventing heat creep and improving reliability.
Step 3: Flash Updated Marlin Firmware
Creality ships the Ender 3 with firmware that does not include BLTouch or mesh bed leveling support. You must compile and flash a new firmware. The recommended source is Marlin bugfix-2.1.x branch from GitHub (marlinfw.org).
Key Configuration Settings in Marlin
In Configuration.h, make these changes:
Enable BLTouch:
#define BLTOUCH
Set probe offsets (replace with your measured values):
#define NOZZLE_TO_PROBE_OFFSET { -42, -6, 0 }
Enable bilinear bed leveling:
#define AUTO_BED_LEVELING_BILINEAR
Set mesh grid size (5×5 recommended for Ender 3):
#define GRID_MAX_POINTS_X 5
Enable restore mesh after G28:
#define RESTORE_LEVELING_AFTER_G28
Enable Z Safe Homing (homes Z at centre of bed where probe can reach):
#define Z_SAFE_HOMING
Compile and Flash
- Open the Marlin folder in VS Code with PlatformIO
- In
platformio.ini, verify the default_envs matches your board (e.g.,STM32F103RE_crealityfor V4.2.2/V4.2.7) - Build (PlatformIO sidebar → Build). This takes 5–10 minutes.
- Find the compiled
firmware.binin.pio/build/[env-name]/ - Copy to the root of a FAT32-formatted MicroSD card (8GB or less)
- Power off the Ender 3, insert SD card, power on. The orange LED will flash during flashing (~30 seconds). The screen will show the Marlin boot logo when done.
Step 4: Configure the Z-Offset
The Z-offset is the distance between the probe trigger point and the nozzle tip. This value must be calibrated precisely — too close and the nozzle gouges the bed; too far and the first layer won’t stick.
- Home all axes with
G28 - Send
G1 Z0to move to the reported Z=0 position - Place a piece of standard A4 paper under the nozzle
- Use the printer menu (Motion → Z Offset or Probe Z Offset) to adjust the Z offset value until the nozzle gently grips the paper with slight friction
- A typical Z offset for BLTouch is between -1.5mm and -3mm depending on mount height
- Save the value to EEPROM with
M500
Take your time on this step. A 0.1mm difference in Z offset noticeably changes first-layer quality. It is worth doing 2–3 small test prints (a 40×40mm single-layer square) to confirm the offset before running a full bed mesh.
Step 5: Run Bed Mesh Leveling
Now the BLTouch earns its place:
- Home all axes:
G28 - Start bed leveling:
G29— the printer will probe 25 points in a 5×5 grid across the bed - The process takes about 5–8 minutes
- After probing, save the mesh:
M500 - Enable leveling:
M420 S1
View the mesh data with M420 V — this shows the height variation at each probe point. On a new Ender 3, typical variation is 0.3–1.2mm across the 220×220mm bed. With BLTouch compensation active, the printer corrects for this in real time during the first 5mm or so of print height.
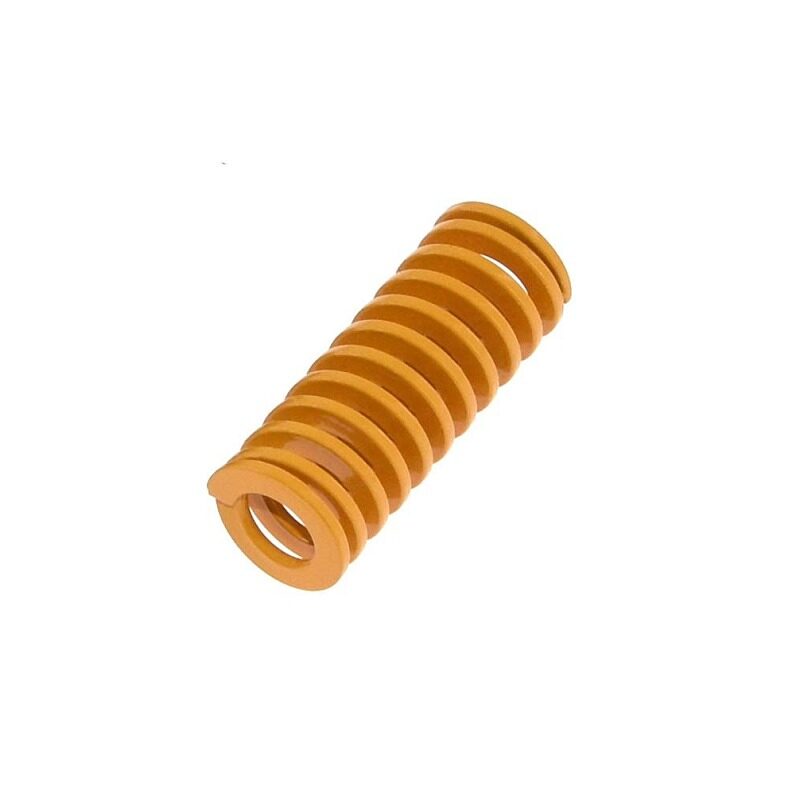
Heated Bed Springs for MK3 / CR-10 / Hotbed
Pair your BLTouch install with stiffer bed springs — they reduce manual leveling drift and give the ABL mesh a better baseline. These heavy-duty springs are a popular Ender 3 upgrade among Indian makers.
Step 6: Update Your Start G-Code
For ABL to work automatically on every print, your slicer’s start G-code must include the leveling commands. Use this start G-code in Cura, PrusaSlicer, or Orca Slicer:
G28 ; Home all axes
G29 ; Run auto bed leveling
M420 S1 ; Enable mesh compensation
G92 E0 ; Reset extruder
G1 Z2.0 F3000 ; Move Z up
G1 X0.1 Y20 Z0.3 F5000 ; Move to start position
G1 X0.1 Y200 Z0.3 F1500 E15 ; Draw first line
G1 X0.4 Y200 Z0.3 F5000 ; Move right
G1 X0.4 Y20 Z0.3 F1500 E30 ; Draw second line
G92 E0 ; Reset extruder
G1 Z2 F3000 ; Move Z up
Alternatively, if you saved the mesh with M500, you can load it at startup and skip re-probing every print (faster startup but mesh may drift over many prints):
G28 ; Home all axes
M420 S1 ; Load saved mesh and enable
G1 Z2 F3000
Troubleshooting Common Issues
BLTouch LED flashes red repeatedly
This indicates a probe deployment or retraction failure. Power cycle the printer. If it persists, the probe pin may be bent or stuck — gently push the pin fully in by hand and retry. Check that the servo signal wire is connected correctly and the firmware has BLTouch properly enabled.
Z-offset drifts between prints
Usually caused by either not saving EEPROM (M500) after calibration, or the BLTouch mount flexing. Print a more rigid mount with higher infill (50%+) in PETG or ABS.
Printer homes Z and immediately descends too far
The Z-offset is set incorrectly or the probe was not triggered during homing. Re-check your probe wiring (Z-min connector) and that the Z endstop switch is disconnected from the board.
Bed mesh does not improve first layer consistency
First, verify leveling is enabled (M420 V shows the mesh — confirm it is not flat). Second, check that your start G-code includes G29 or M420 S1. Third, re-calibrate Z offset — if it is slightly off, all the mesh compensation in the world won’t help the first layer.
Probe deploys but does not retract after Z homing
A firmware issue — make sure #define BLTOUCH_DELAY 500 is set in Marlin’s Configuration_adv.h. Some BLTouch clones need a longer delay between deploy and probe commands.
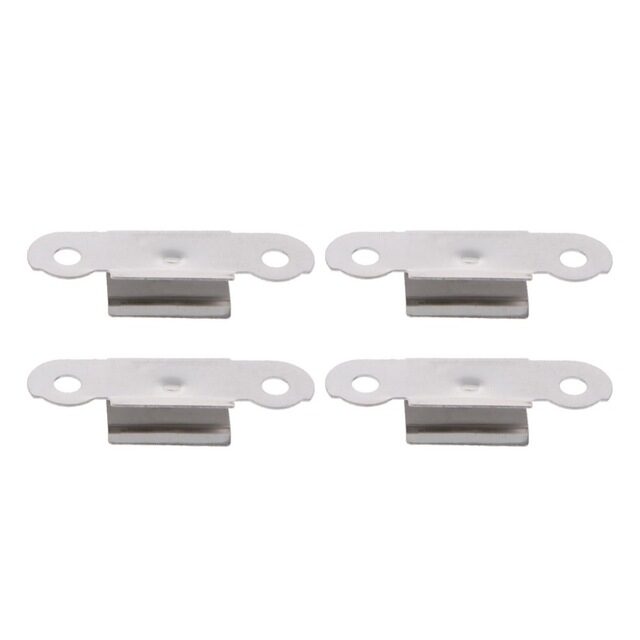
Heated Bed Glass Retainer Clips – Pack of 4
If you are upgrading to a glass bed alongside your BLTouch install, these stainless steel retainer clips keep the glass firmly positioned. Consistent glass position is essential for repeatable BLTouch probe results.
Frequently Asked Questions
Does BLTouch work with all Ender 3 variants?
Yes — BLTouch works with Ender 3, Ender 3 Pro, Ender 3 V2, and Ender 3 S1. Each variant needs different firmware configuration and sometimes a different mount. Creality’s official BLTouch kits are specific to printer models — do not mix them up.
Should I use BLTouch or CR Touch?
For Ender 3 owners in India, CR Touch is often easier to source and costs slightly less. It uses an optical switch internally (vs BLTouch’s hall effect) which makes it more consistent in some environments. Both work equally well with Marlin. If you see a big price difference, go with CR Touch.
Do I need to re-run G29 before every print?
Not necessarily. Running G29 before every print gives the most accurate compensation but adds 5–8 minutes to startup. Alternatively, save the mesh with M500 and load it with M420 S1 in your start G-code. Re-run G29 whenever you change the bed surface, move the printer, or every 20–30 prints as maintenance.
Will BLTouch fix bad prints caused by a warped bed?
BLTouch compensates for gradual bed warping across the print area — typically the slightly concave or convex beds that most Ender 3 units have. It cannot compensate for bed warp that exceeds approximately 3–4mm (where compensation correction would require very thick first layers at one end). For severe warping, replace the bed or add a borosilicate glass plate.
Can I install BLTouch without compiling Marlin myself?
Yes — Creality and third-party sources publish pre-compiled firmware binaries for common Ender 3 + BLTouch configurations. Search for your specific board version (V4.2.2, V4.2.7) and download the matching binary. This is simpler but gives less control over settings. Compiling your own Marlin is recommended for anyone who wants to customise settings.
Upgrade Your Ender 3 with Quality Parts
From bed springs and build plates to hotend components and nozzles — find all the upgrade parts you need for your Ender 3 at Zbotic.


Add comment